The macOS operating systems have an essential and complete tool to manage disks and volumes and it is the Disk Utility, this utility, present in all macOS systems, allows us to have a centralized and complete control over the hard disk and other storage devices Let's connect to the team..
Controlling and managing our disks is essential to safeguard the proper functioning of our systems and, in particular, of macOS systems. The disks are the storage units par excellence of our equipment while participating fully in the startup and operation of the systems. Therefore, it is important to verify that their status is correct and to know what management possibilities we have at hand to be able to carry out their control.
Disk Utility Features
Some of the tasks we can perform from Disk Utility are:
- Check the storage units to check for errors.
- Comprehensively manage external storage devices.
- Merge multiple hard drives into a RAID.
- Check and repair errors on both the local disk and external drives.
- Properly manage the space between several available volumes and more.
Uses Disk Utility
However, there are some situations in which Disk Utility becomes a fundamental support tool, some of these situations are:
- Unexpected closure of system applications.
- Mount, disassemble or eject a disc.
- Delete, format or partition a disk or drive.
Next, we will see various methods to access Disk Utility in macOS Catalina but the process applies equally to the other versions of macOS..
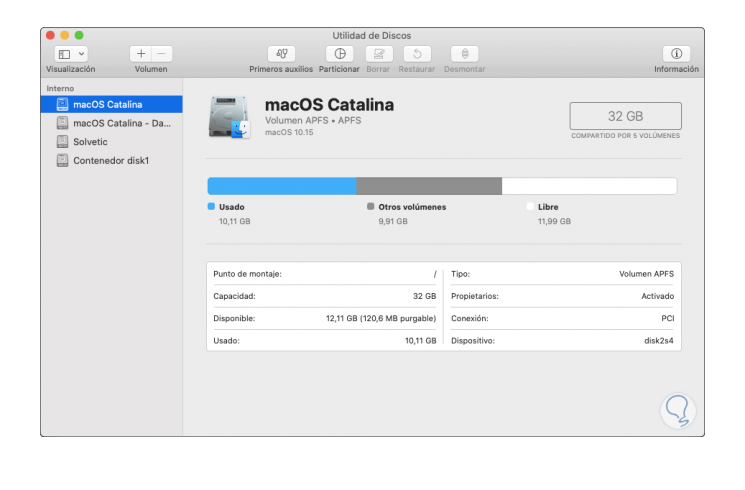
We also leave you the video tutorial with the necessary steps to open the Disk Utility in different ways in mACos:
To keep up, remember to subscribe to our YouTube channel! SUBSCRIBE
1. Open Disk Utility from the Finder in macOS
Step 1
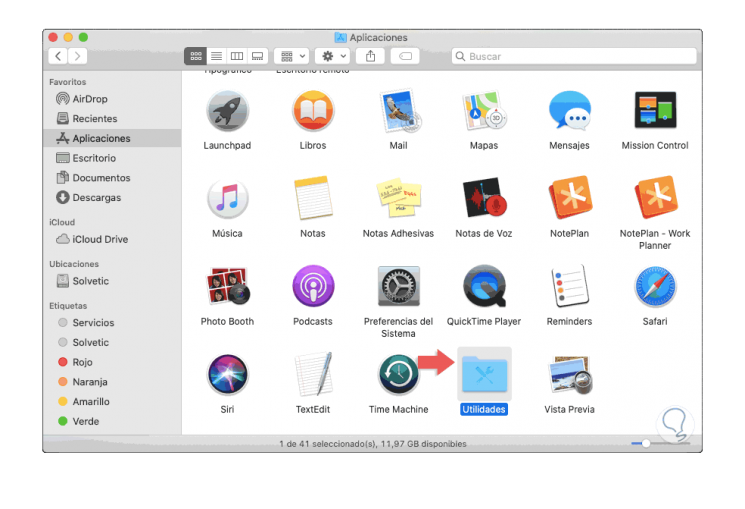
The first step that we will see will be directly from the macOS integrated search engine which we know as Finder, for this, we access it from the icon located in the Dock and in the window that will open we will go to the “Applications†section:
Step 2
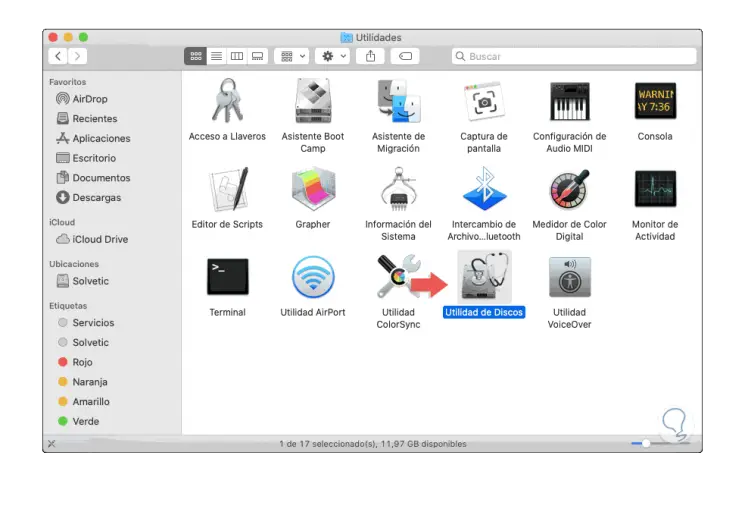
There we double click on the "Utilities" folder and in the new window we open we double click on "Disk Utility":
2. Open Disk Utility using Spotlight on macOS
Spotlight is a smart search engine integrated into macOS which searches based on the criteria that we indicate displayed in the results all the associated values
Step 1
To start Spotlight you have two options:
- Click on the magnifying glass icon located in the upper right corner of the desktop.
- Use the key combination Command + Spacebar
+ Barra espaciadora ⌘ + Spacebar
Step 2
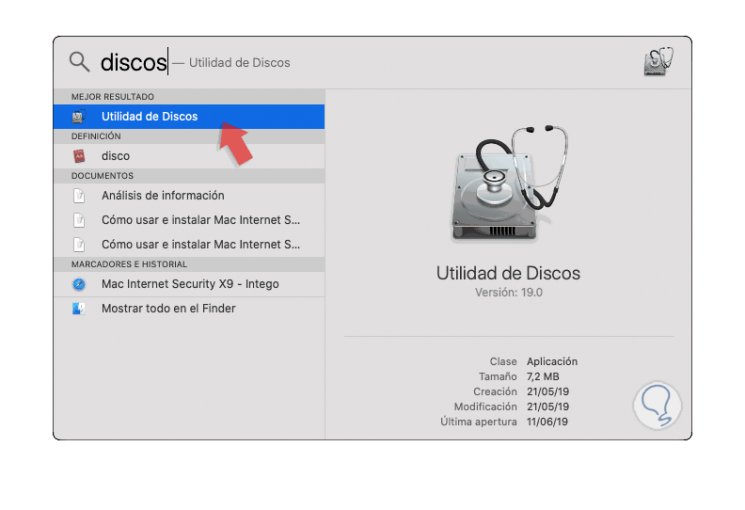
In the pop-up window we enter the text “disks†and there we will select the Disk Utility in the results offered:
3. Open Disk Utility using the Finder menu in macOS
This is another option available in macOS and is using the Finder menu, for this method we have two options that are:
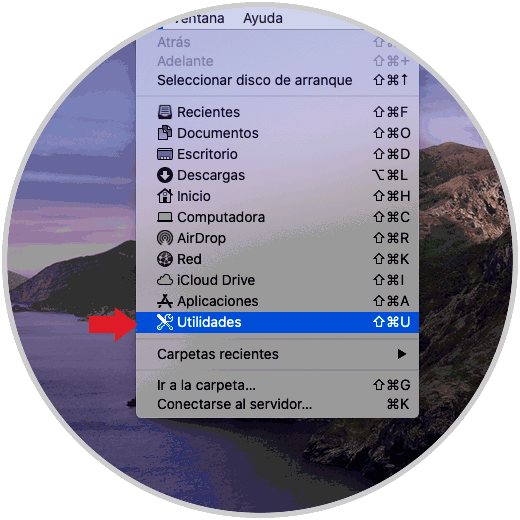
- Access the Go menu and then select Utilities and then double click on Disk Utility.
- Use the following key combination and then select Utility
+ ⌘ + U ⇧ + ⌘ + U
4. Open Disk Utility using the terminal in macOS
Finally, we have another option that is to open Disk Utility from the terminal
Step 1
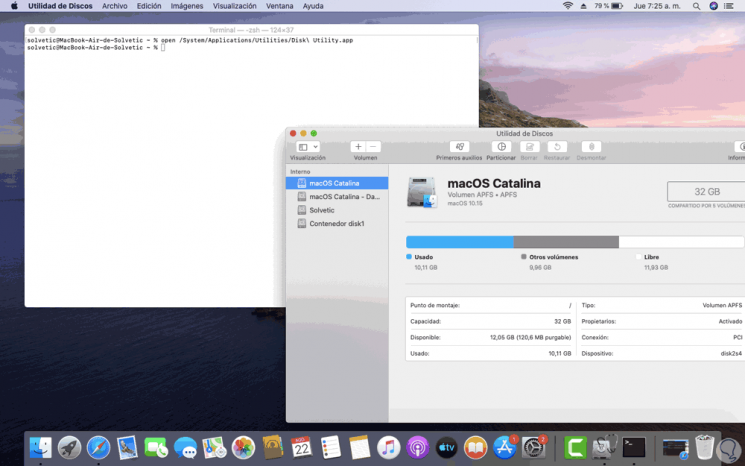
For this we access the console and execute the following:
open / System / Applications / Utilities / Disk \ Utility.app
Step 2
Press Enter and we will access the Disk utility:
5. How to view all devices in Disk Utility in macOS
Finally, we will explain the way to visualize all the disks and drives that are currently connected to the equipment for better administration.
Step 1
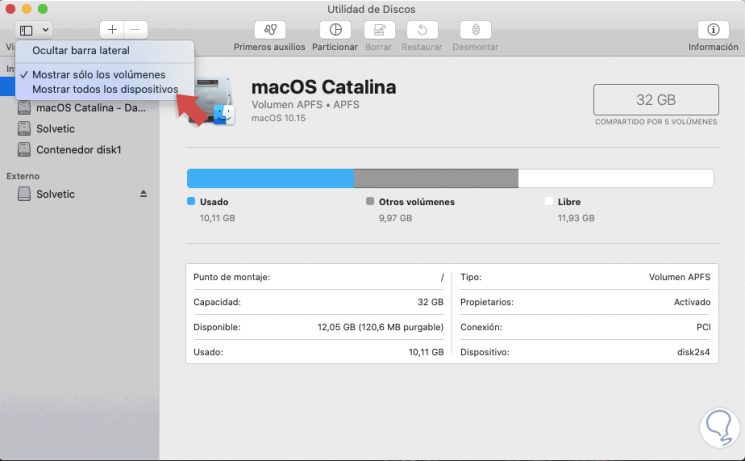
The process is really simple, first of all, we access the Disk Utility and once there we click on the “Display†icon located in the upper left corner and in the displayed options select “Show all devicesâ€:
Step 2
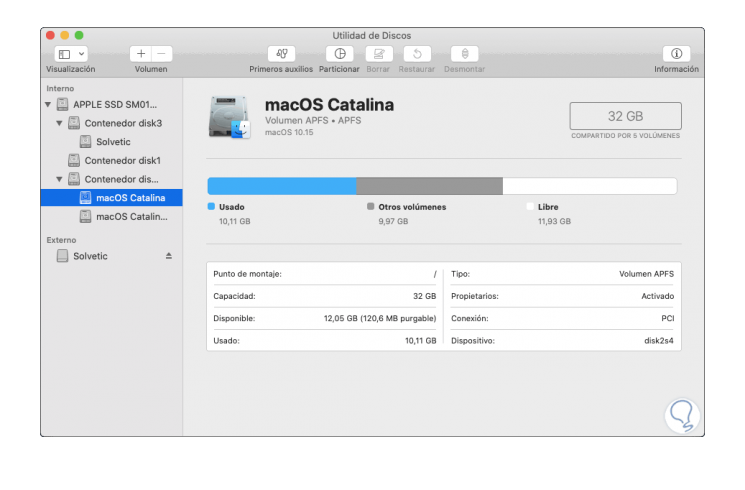
By selecting this option, we can see all current devices connected to macOS:
You have learned not only to open Disk Utility but to see all available devices there thanks to TechnoWikis.