Windows 10 integrates different functions that have been developed to allow the system to retain the best security, performance and stability features. One of these is automatic blocking due to inactivity, that is, Windows 10 detects when we do not carry out any activity on the computer and proceeds to lock the computer and request access credentials again, and it is for security reasons since many times we must exit and we forgot to lock the Windows 10 computer ..
This gives other people access to the computer and see what we have there, so this function is enabled by default, but if only we use the computer we can disable it and we will see how to eliminate automatic blocking in Windows 10.
We also leave you the video tutorial so you know how to remove automatic blocking due to inactivity Windows 10..
To stay up to date, remember to subscribe to our YouTube channel! SUBSCRIBE
How to disable automatic inactivity lock in Windows 10
Step 1
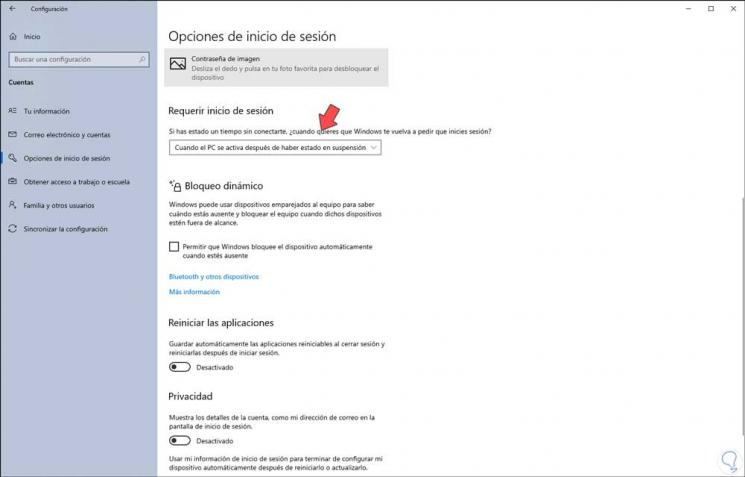
In this case we must go to the Start - Configuration menu and in the displayed window we will go to the "Accounts" category, there we will go to the "Login options" section where we will see the following:

Step 2
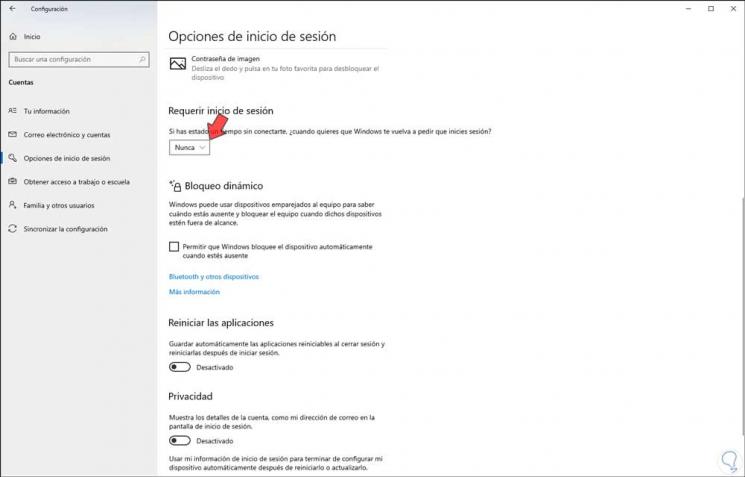
There we go to the section "Require Login" and we see that the default value is "When the PC is activated after having been suspended", there we must display the available field and select "Never":

Note
For this option of "Require Login" to be available, we must access the system with a password, if we access with a PIN or image we will not see this option available there in Windows 10 Configuration.
With this we have been able to deactivate the automatic blocking due to inactivity Windows 10.