Windows 10 has a lock screen which automatically synchronizes with Bing to offer featured content and also Cortana is incorporated to offer certain types of elements such as news, featured applications and more. For many users this is no problem, but for others it is certainly a cause of discomfort.
The screen lock helps us protect our equipment when we have it in a shared place like an office and we have personal information or work that is dangerous to be damaged. However, if only we use the computer it can bother us to have to constantly unlock the screen , so it is important to know how to put or remove this option..
This is why TechnoWikis will explain how we can enable or disable this lock screen in Windows 10.
To keep up, remember to subscribe to our YouTube channel! SUBSCRIBE
1. Disable the lock screen using the Windows 10 Registry Editor
To make use of this option it is necessary that a system restore point or a backup be made as a mishandling of the records can result in system failures.
Step 1
To access the registry editor, we will use the following key combination and execute the “regedit†command, press Enter or Accept.
+ R
gpedit.msc
Step 2
In the displayed window we will go to the following route:
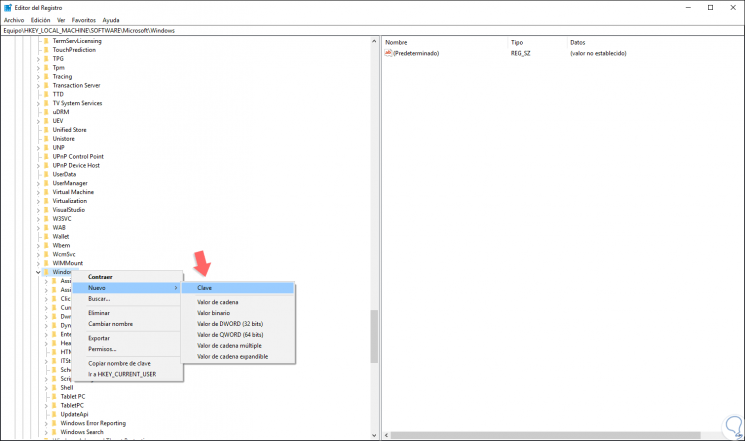
HKEY_LOCAL_MACHINE \ SOFTWARE \ Microsoft \ Windows
Step 3
There we will right click on the Windows key and select the “New / Password†option:
Step 4
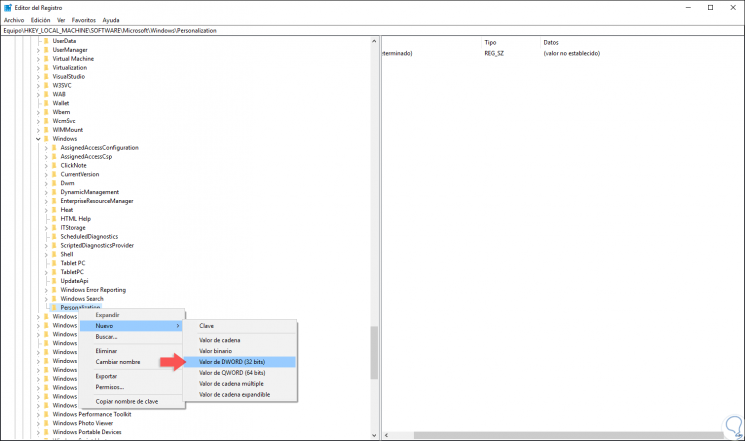
This new key will be called “Personalization†and now we will right click on it and select the option “New / DWORD Value (32 bits)â€:
Step 5
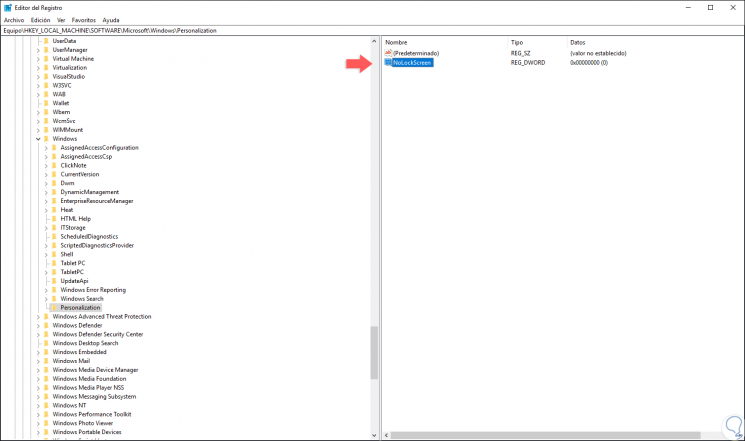
This DWORD value will be called "NoLockScreen":
Step 6
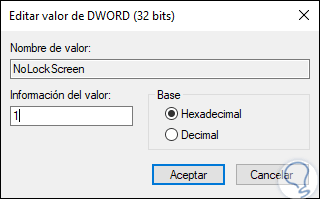
We will double-click on this DWORD value and in the “Value information†field we assign the number 1. Click OK and we can exit the Windows 10 registry editor.
2. Disable the lock screen using the Windows 10 Group Policy Editor
This option applies to the Pro, Enterprise and Education editions of Windows 10.
Step 1
To access these policies we will use the following key combination and execute the gpedit.msc command, press Enter or Accept.
+ R
gpedit.msc
Step 2
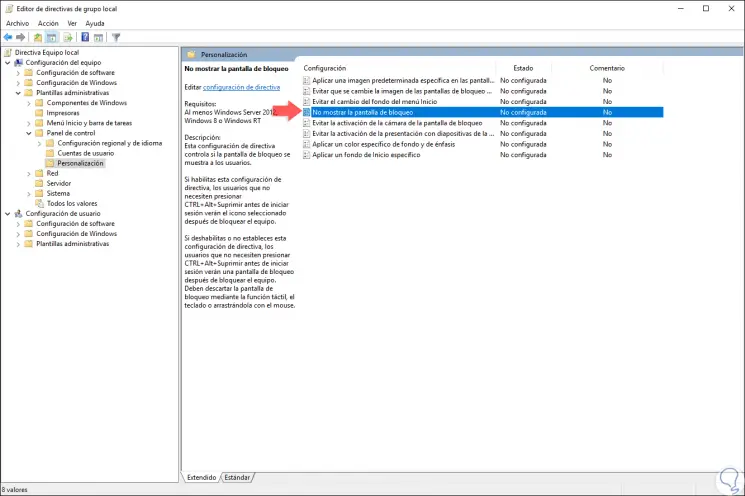
In the deployed editor we will go to the following route:
Step 3
On the central side we select the policy called “Do not show the lock screenâ€:
Step 4
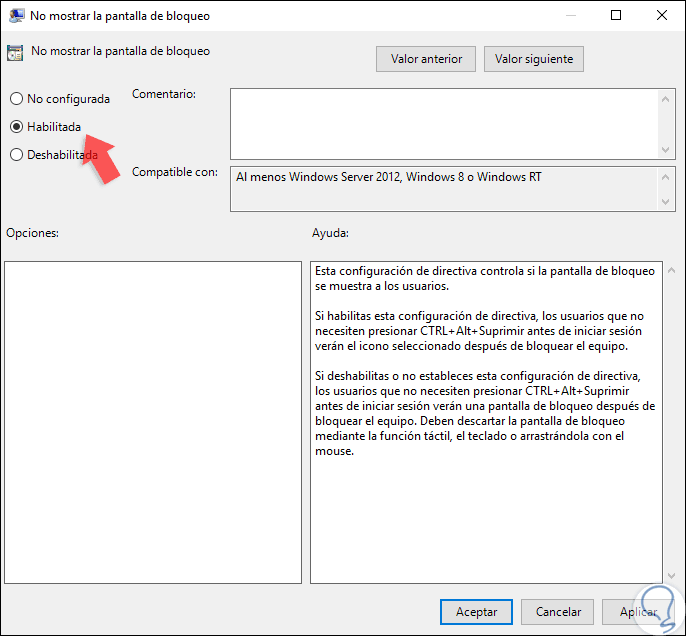
We double-click on it and in the displayed window we activate the “Enabled†box. Click on Apply and Accept to save the changes.
Thus, we have two options to disable the lock screen in Windows 10..