Google Chrome is one of the most popular browsers that exists today since it has been renewing itself in terms of function, features, integrity and compatibility, but it is also true that there are many other browsers that have great security and performance advantages. But it is possible that after its use we are not convinced by its offer, so it is normal that we want to uninstall Chrome Windows 10 completely and leave no trace inside our computer..
That is why many users prefer to use something new and in this case we can resort to new browsers and uninstall Chrome, but it is not enough to go to the Control Panel and uninstall it, it is necessary to carry out a series of additional steps which TechnoWikis will explain to you in order to Uninstall Chrome completely in Windows 10.
We also leave you the video tutorial to know how to uninstall Chrome in Windows 10 completely..
To stay up to date, remember to subscribe to our YouTube channel! SUBSCRIBE
1. Export bookmarks in Chrome
The first step to take is to export Google Chrome bookmarks as a backup method in case we ever go back to using Chrome.
Step 1
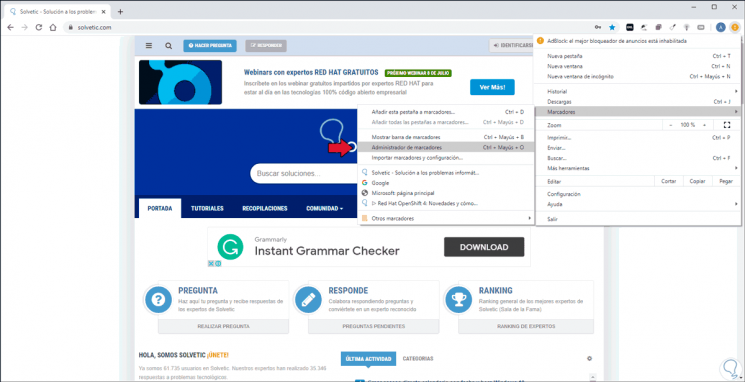
To do this, we click on the menu "Customize and control Google Chrome - Bookmarks - Bookmark Manager" or we can use the Ctrl + Shift + O keys:
Ctrl + Shift + O
Step 2
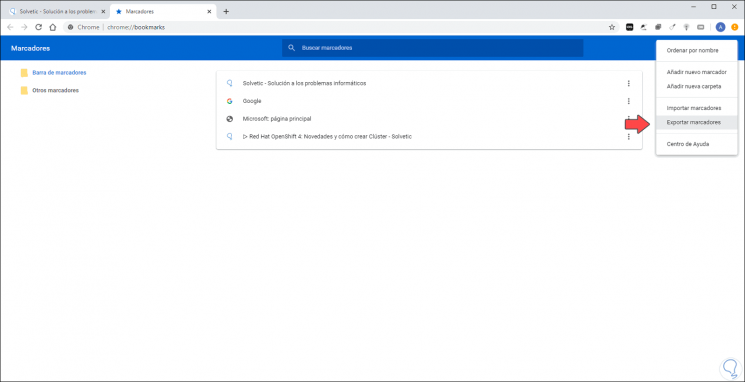
In the window that will be displayed, we click on the three vertical points and in the displayed options select "Export markers":
Step 3
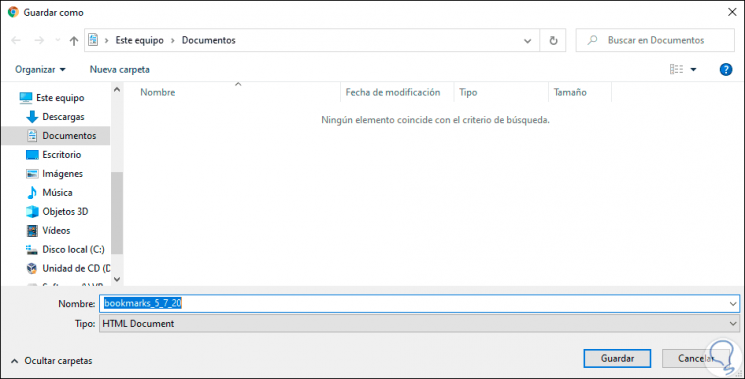
Now we define name and location where the backup of the Chrome bookmarks in Windows 10 will be saved. We click "Save" to complete the process.
2. Uninstall Chrome completely
Step 1
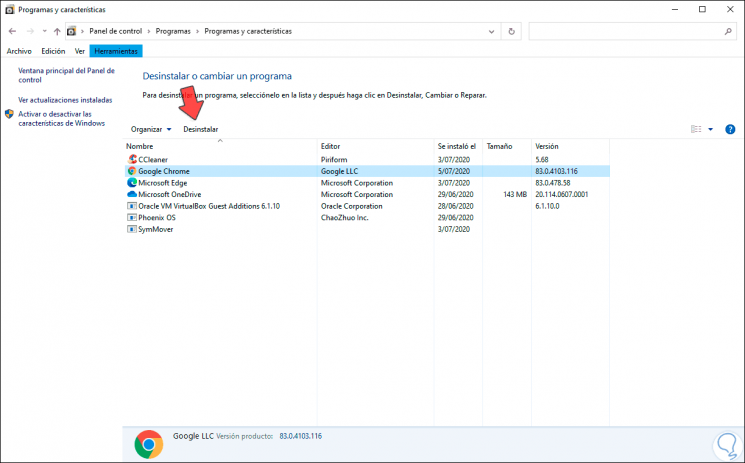
Now we will go to the following route:
- Programs and characteristics
Step 2
There we select Google Chrome:
Step 3
Once selected we click on “Uninstall” and the following message will be displayed:
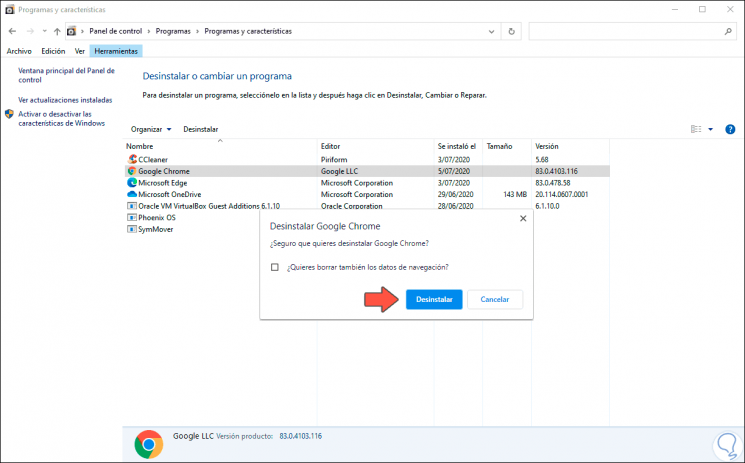
Step 4
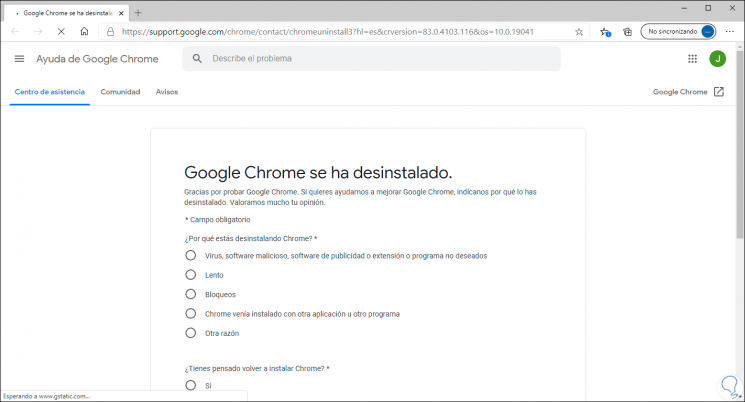
There we can delete the browsing history in passing if we wish, we click "Uninstall" to complete the process, this will open a website where the reason for the uninstallation will be asked:
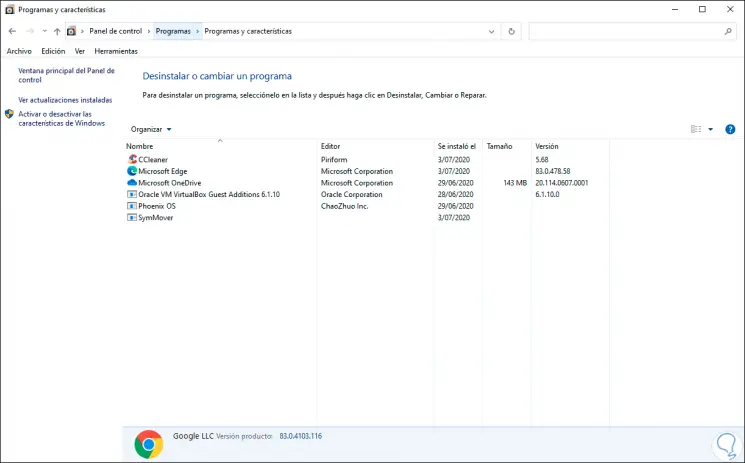
Step 5
We check from the Control Panel that Google Chrome has been uninstalled:
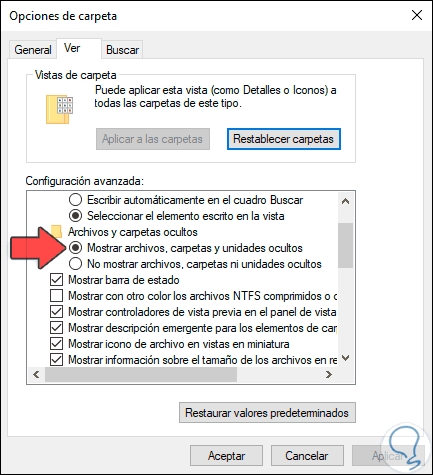
Step 6
After this we access the File Explorer and go to "View - Options - Change folder and search options":

Step 7
In the displayed window we will go to the "View" tab and activate the "Show hidden files, folders and drives" box. We click Apply and OK to save the changes.
Step 8
Now we will go to the following route:
C: \ Program Files (x86)
Step 9
There we right-click on the "Google" folder and select "Delete":
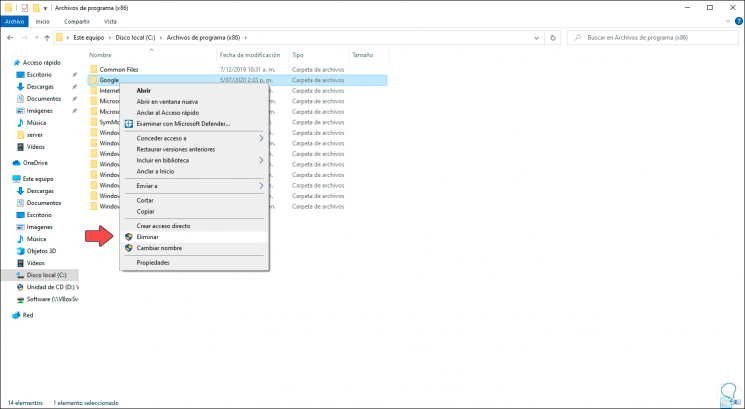
Step 10
We hope that all objects are removed:
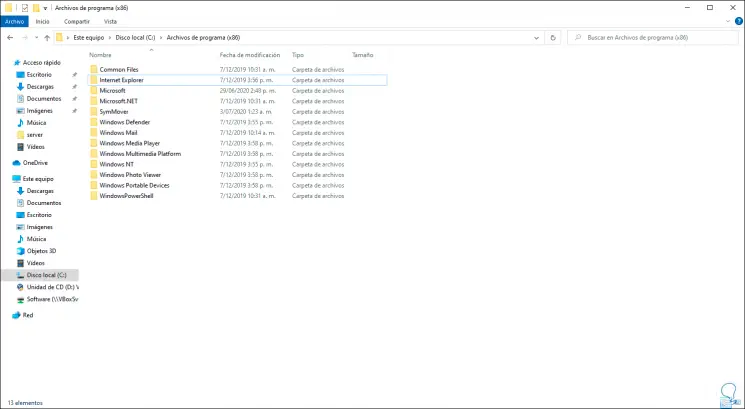
Step 11
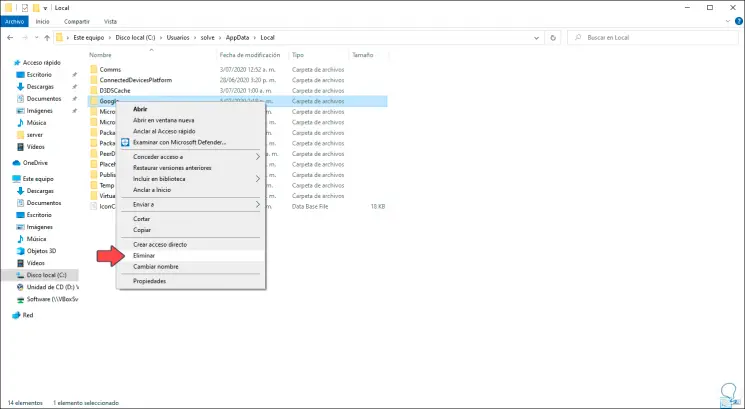
Then we must go to the following route:
C: \ Users \ user \ AppData \ Local
Step 12
There we locate the “Google” folder and delete the existing folder there:
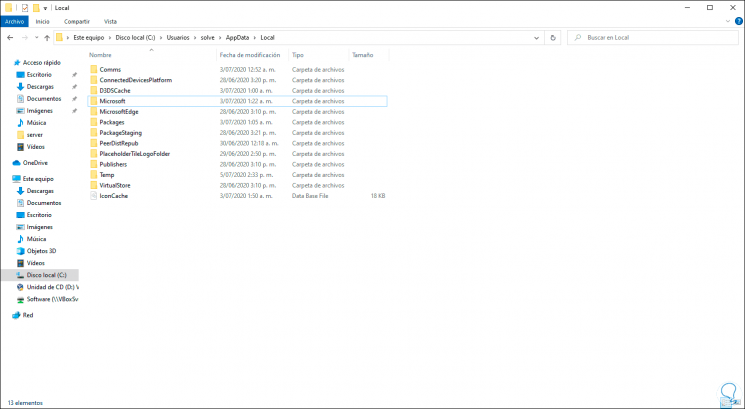
Step 13
We confirm that the folder has been deleted:
Step 14
We can validate on the following routes that there are no Google folders:
C: \ Users \ user \ AppData \ LocalLow C: \ Users \ user \ AppData \ Roaming
Step 15
Once these folders are deleted, we access the registry editor using one of the following ways:
Step 16
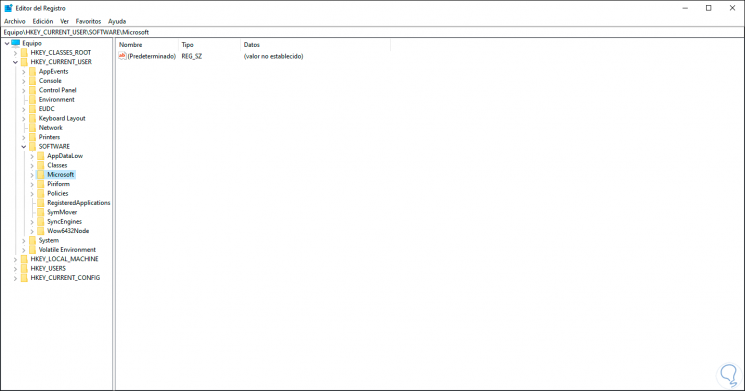
TechnoWikis recommends that you run the registry editor as administrator. In the Editor we will go to the following route:
HKEY_CURRENT_USER \ SOFTWARE
Step 17
There we locate the “Google” folder, right-click on it and select “Delete”:

Step 18
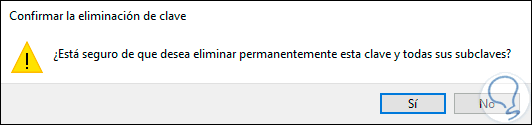
We will see the following warning. We confirm by clicking "Yes".
Step 19
After this we go to the following route:
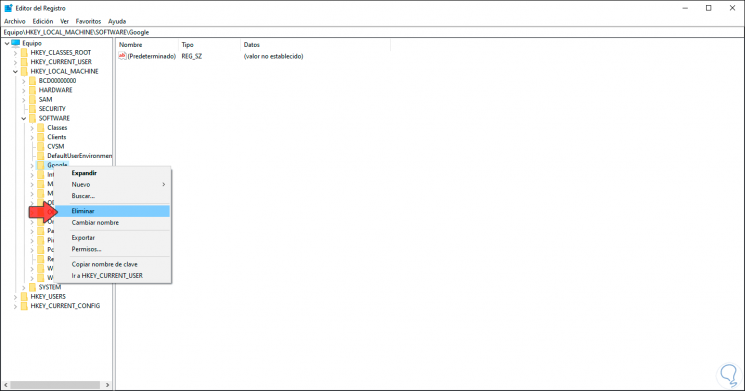
HKEY_LOCAL_MACHINE \ SOFTWARE
Step 20
There we delete the Google key again:
Step 21
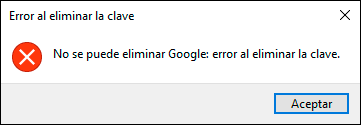
We may see the following error:
Step 22
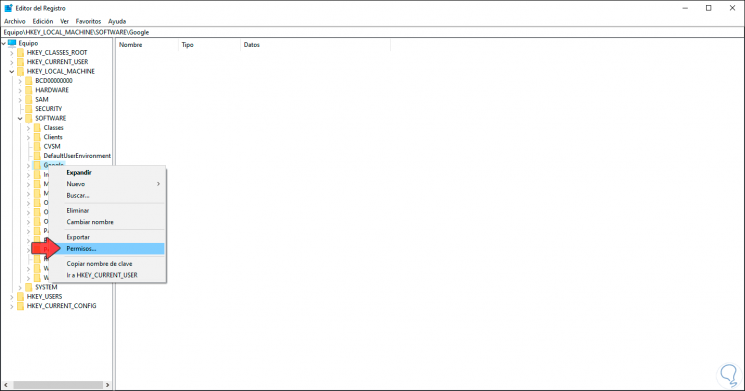
If this is the case, we must right-click on the key and select "Permissions":
Step 23
We will see the following:
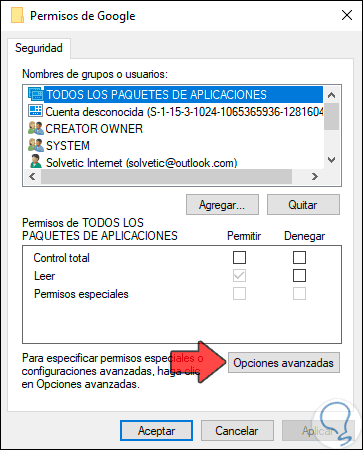
Step 24
We click on "Advanced Options" and the following will be displayed:
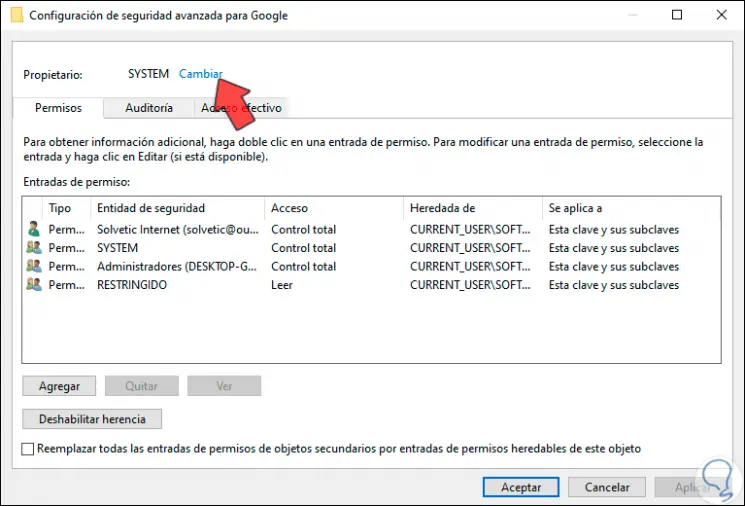
Step 25
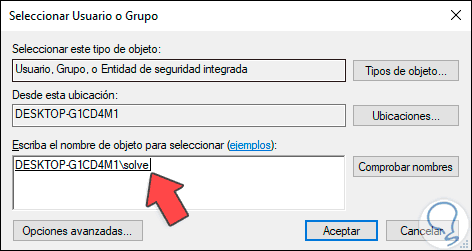
There we click on "Change" at the top of "Owner" and in the pop-up window enter the name of the administrator user:
Step 26
We click OK and now we check the box "Replace owner in subcontainers and objects" and in the box "Replace all child object permission entries with inheritable permission entries for this object" at the bottom:
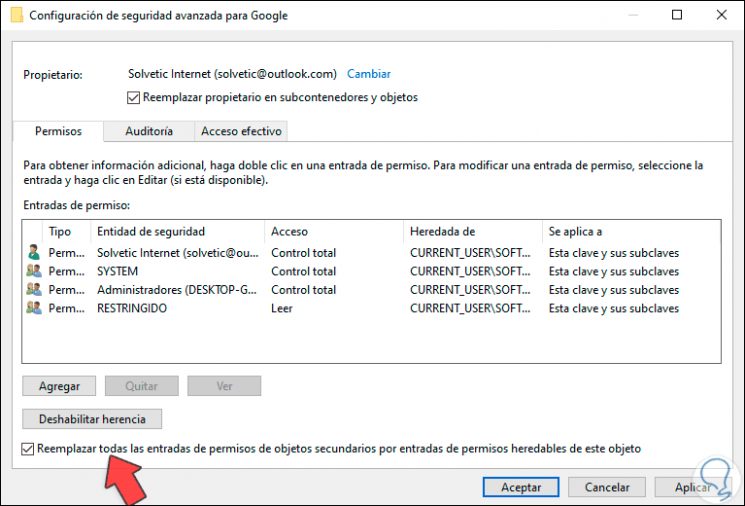
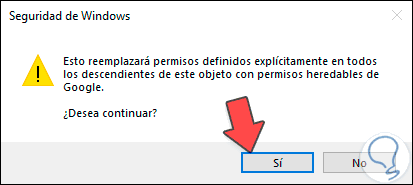
Step 27
We click Apply and OK and we will see the following warning. We click Yes to confirm. After this it will be possible to delete the Google key in the path of the registry editor.
Step 28
After performing all these steps, it only remains to restart the operating system so that all the changes are applied correctly.
With TechnoWikis you have learned how to completely uninstall Google Chrome in Windows 10..