Java JDK (Java Development Kit) allows us to write Java applications and applets, it includes Java Runtime Environment with which we have at hand the necessary tools for an effective and complete development work. Java JDK has incorporated in its latest versions interesting features such as support for Unicode 13.0, new options jstatd or jcmd, improvements in jhsdb or compatibility with MSSFU at the realm level..
Java JDK is complete for all developers in their different stages of work, which is an essential part of working on Java applications and applets, but if we have left this segment aside or have other tools, we can uninstall Java JDK completely on Windows. 10 and TechnoWikis will explain how to do it.
To stay up to date, remember to subscribe to our YouTube channel! SUBSCRIBE
How to uninstall Java JDK in Windows 10
Step 1
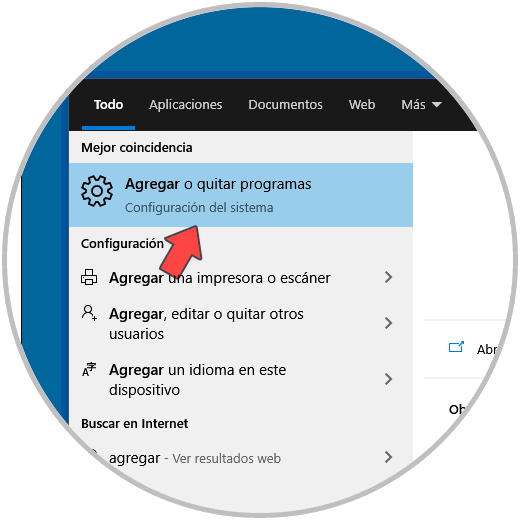
In the Start search engine we enter "add" and in the displayed results we select "Add or remove programs":
Step 2
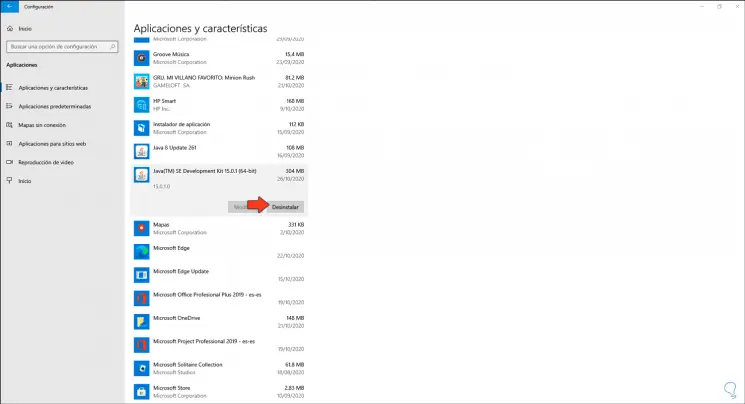
This will redirect us to Configuration, there we locate the option "Java SE Development Kit", we click on it and then we click "Uninstall":
Step 3
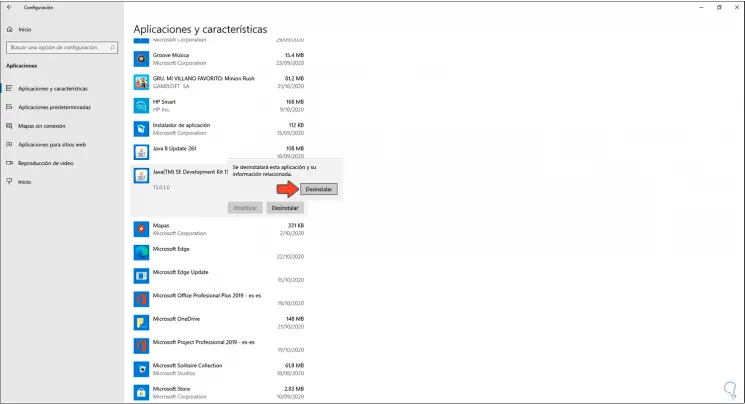
Clicking here will open another window to confirm the uninstallation of java JDK:
Step 4
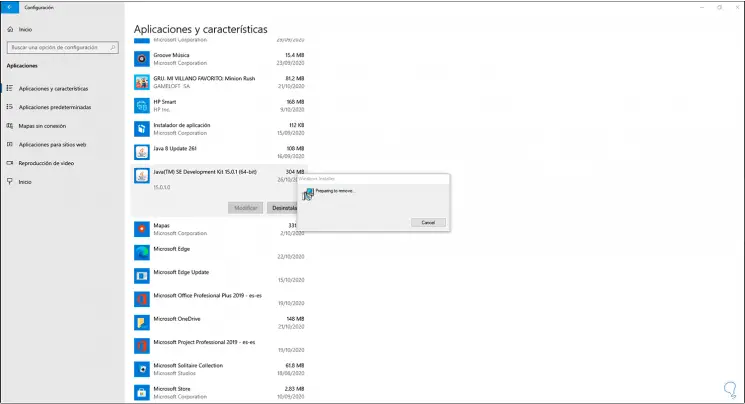
Again we click on "Uninstall" and the Java JDK uninstallation process starts in Windows 10:
Step 5
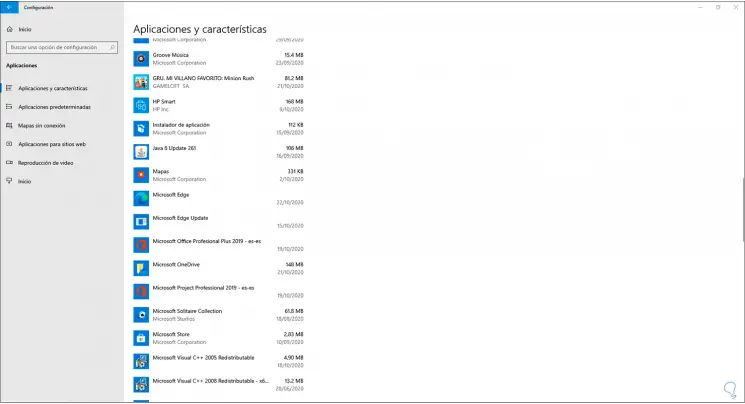
Once this process is finished we will see that Java JDK is no longer available in programs:
Step 6
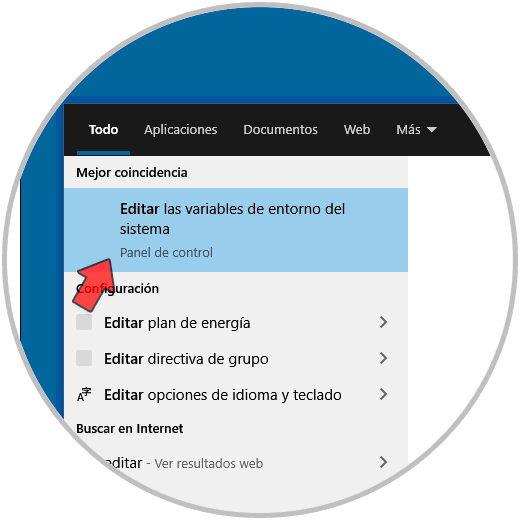
The next step is to delete the variable that is integrated into the system, for this we enter "Edit" in the search box and select "Edit the system environment variables":
Step 7
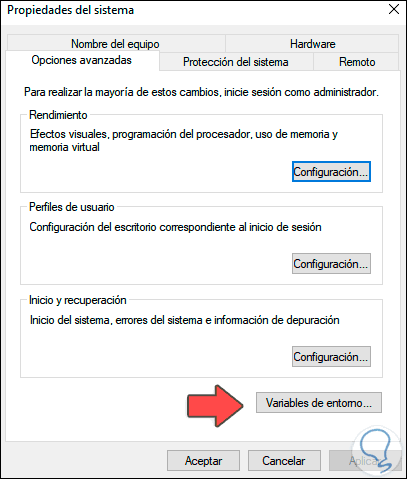
The following window will be displayed:
Step 8
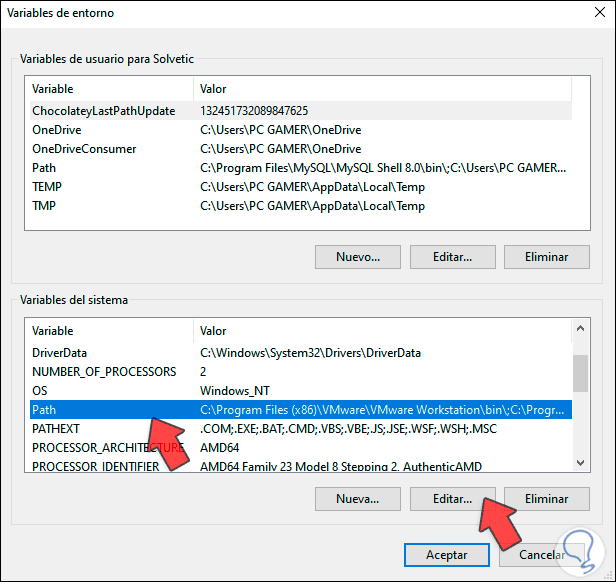
We click on the button "Environment variables" and in the next window we go to "System variables" and select "Path":
Step 9
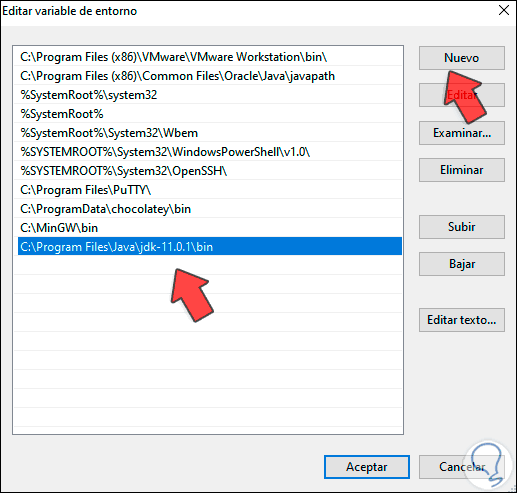
We click on "Edit" and in the next window we locate the Java JDK variable. We click on "Delete" to remove it from the Windows 10 variables, we apply the changes.
With this process we have completely uninstalled Java JDK in Windows 10 to use other development methods if it is the case..