Today we have numerous platforms to emulate and simulate other operating systems or to be able to run applications (especially games) of mobile systems on PC, for example, run Android games on Windows 10 . For this we have BlueStacks which is an application with which it is possible to run Android applications on Windows 10 our team using an intuitive interface. In this way we can combine both the Android system and Windows 10 through a single application, being able to play our favorite games from PC..
BlueStacks focuses on games, one of its main functionalities is the ability to open several games simultaneously and has a wide configuration of controls. For various reasons, you may want to completely uninstall BlueStacks from Windows 10, and TechnoWikis will explain how to achieve this so that its uninstallation is comprehensive.
To stay up to date, remember to subscribe to our YouTube channel! SUBSCRIBE
Uninstall BlueStacks from Windows 10 completely
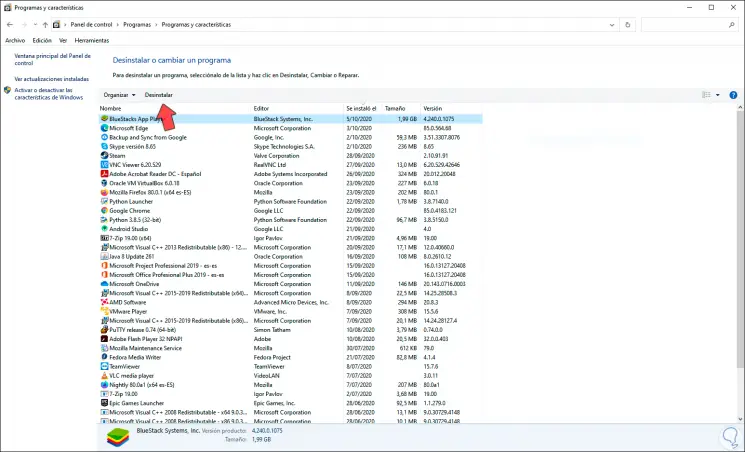
Step 1
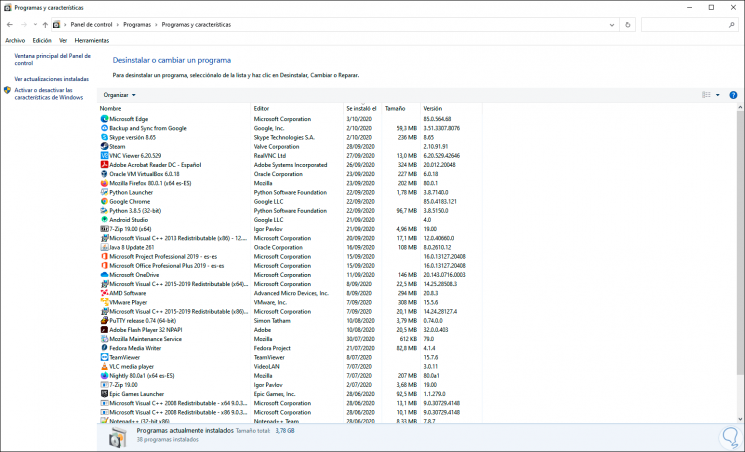
To uninstall BlueStacks completely in Windows 10 we will go to the following route:
- Programs and characteristics
Step 2
There we select "BlueStacks App Player":
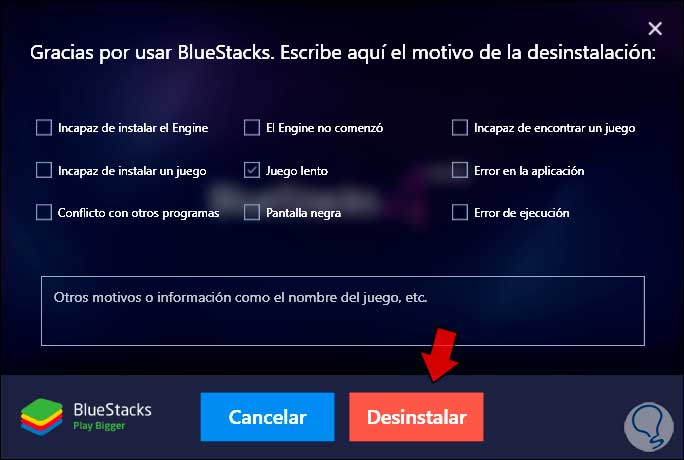
Step 3
Once selected we click on the "Uninstall" button at the top, a pop-up window will be displayed where we define the reason why we are uninstalling BlueStacks:
Step 4
Once we define the reason, click on "Uninstall" to complete the process and we will see a new pop-up window:
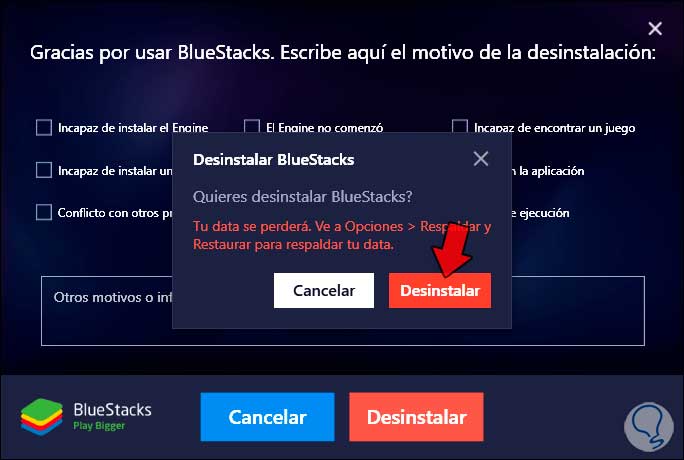
Step 5
We confirm the action by clicking on "Uninstall".
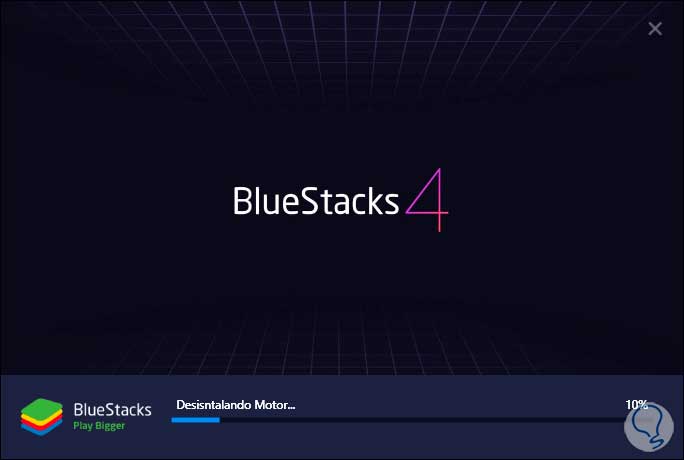
Step 6
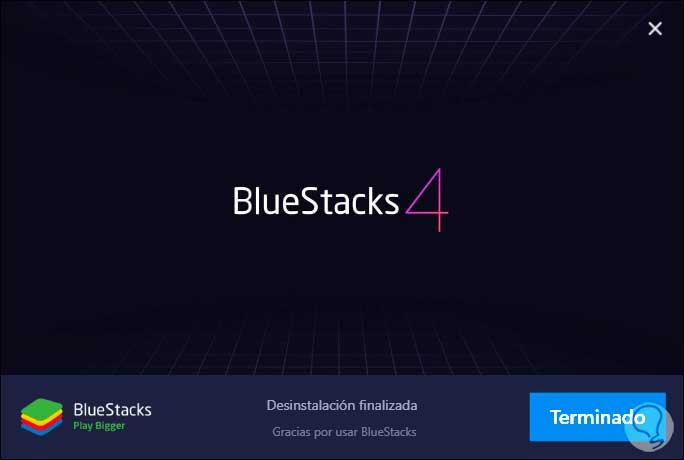
When the process comes to an end we will see the following:
Step 7
We click on "Done" to exit the wizard and we will see that BlueStacks is no longer available in the Control Panel:
Step 8
In some versions of BlueStacks, the MSI App Player will also be installed, which we must remove from the Control Panel.
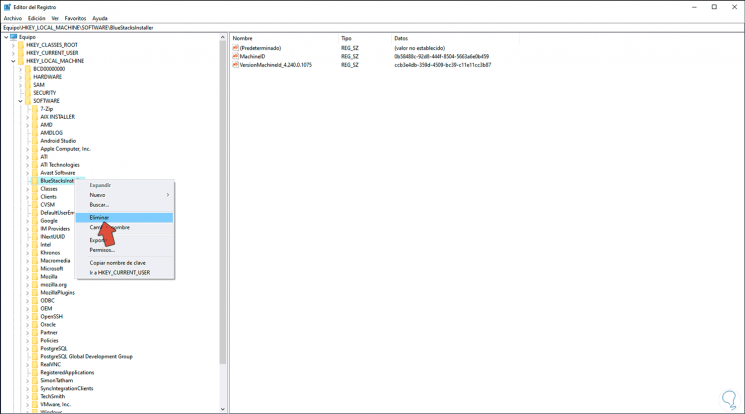
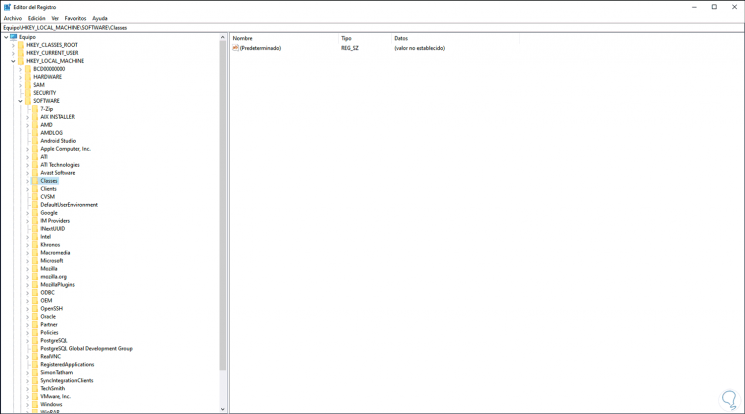
After this we access the registry editor using one of the following options:
Step 9
We create a backup of the logs before any changes, then we go to the following path:
HKEY_LOCAL_MACHINE \ SOFTWARE \ BlueStacksInstaller
Step 10
We right click on the key "BlueStacksInstaller" and select "Delete":
Step 11
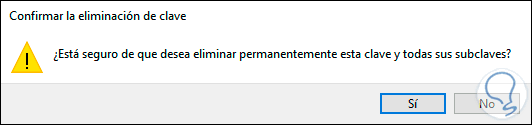
We will see the following message. We confirm by clicking Yes.
Step 12
We can see that this key has been removed from the Windows 10 registries:
Then we delete the shortcuts if they exist and thus BlueStacks has been completely removed in Windows 10..