All the elements that make up our PC are important for its correct operation, so it is interesting that we know the options offered by each one of them and thus make the most of all of them..
The mouse in Windows 10 (and in all operating systems) is key to multitasking whether inside the system, in your applications or in content. The internal mouse has many options to be edited, such as setting colors, shadows, effects and much more. This with the idea that the user always has a personal touch when working there.
One of the values that we can set on the mouse is the addition of the mouse pointer shadow . This will leave a leftover, as its name implies, when we drag the mouse over the computer. We can define the shadow level based on the selected scheme and TechnoWikis will explain how to activate or not the shadow in the mouse pointer in Windows 10..
To stay up to date, remember to subscribe to our YouTube channel! SUBSCRIBE
1. Enable or disable Windows 10 mouse pointer shadow
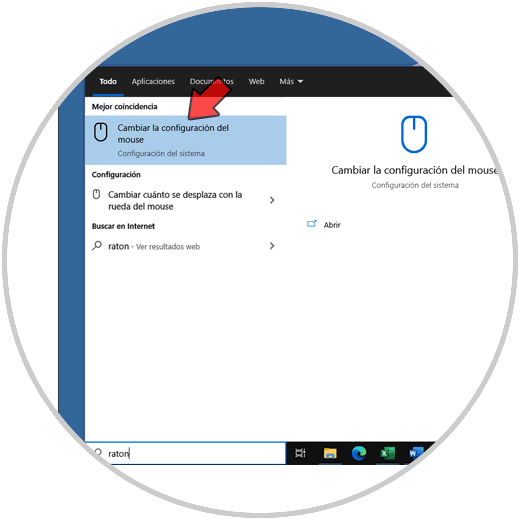
Step 1
For this process we enter the word "mouse" in the Start search box and select "Change adapter settings":
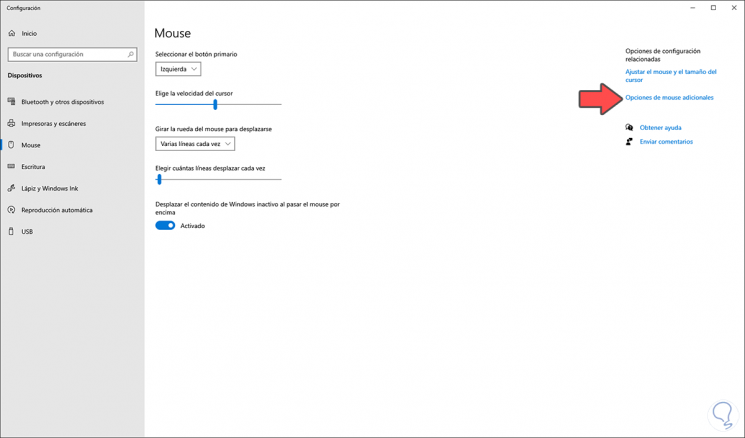
Step 2
In the next window we click on the line "Additional mouse options":
Step 3
In the pop-up window we go to the "Pointers" tab and at the bottom we can activate the "Enable pointer shadow" box:
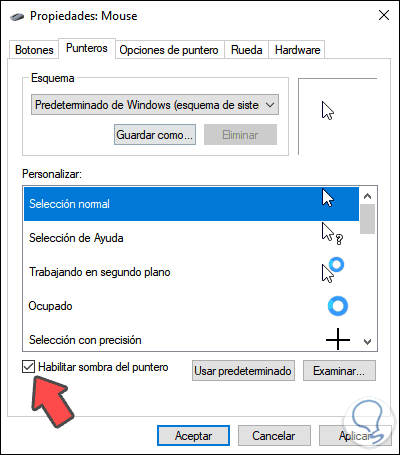
We can make use of the default configuration (based on the Windows 10 scheme) or click on Browse and search for cursors that we have downloaded from the internet.
We click Apply and OK to save the changes..
To deactivate the pointer shadow we simply deactivate the “Enable pointer shadow” box and apply the changes.
2. Enable or disable Windows 10 mouse pointer shadow
Step 1
To access the system properties we can use two options:
- Go to the path Control panel \ System and security \ System
- Use the Windows + Pause key combination
We will see the following:
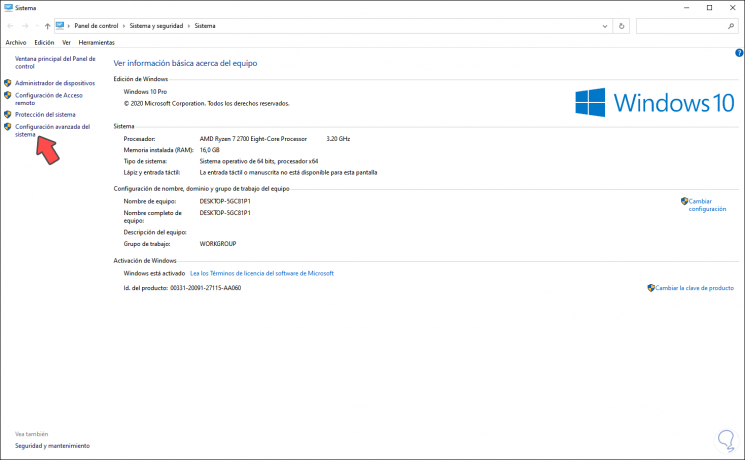
Step 2
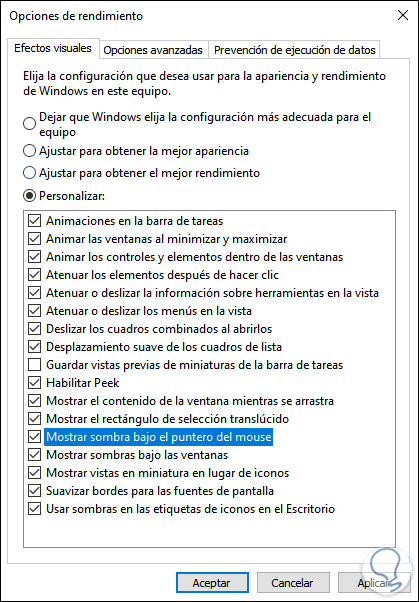
We click on "Advanced system settings" and then we will see the following:
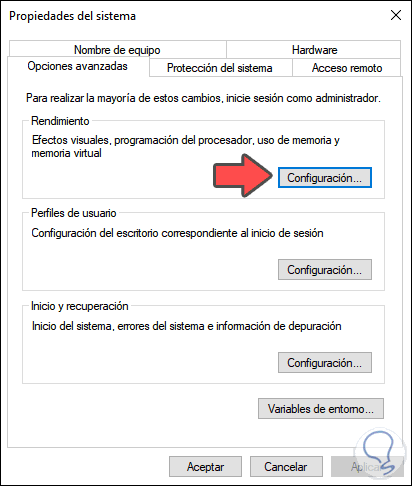
Step 3
We click on the "Settings" button located in the "Performance" section and in the "Visual Effects" tab we activate or deactivate the "Show shadow under the mouse pointer" box. We apply the changes and accept.
With any of these two methods we can activate or not the shadow of the mouse pointer in Windows 10.