In the computer we store a lot of information, both personal and professional, in many cases, so it is interesting and recommended to keep an order of all this so that we can easily access all of it whenever we need it. One way to sort all this data is by sorting it by folders on the computer..
As Windows 10 users it is normal for us to share a folder so that other users can access it from different locations in order to access its content in a functional way without having to use different methods such as USBs, emails , etc, .
When this folder is no longer necessary, we can stop sharing it for security reasons and there are different options to do so and TechnoWikis will explain each of them in detail..
To stay up to date, remember to subscribe to our YouTube channel! SUBSCRIBE
1. Stop sharing a Windows 10 folder from File Explorer
From Explorer we have control and access to the system libraries and storage units.
Step 1
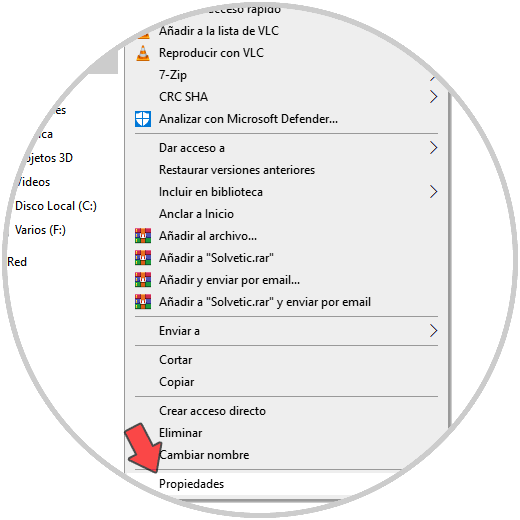
To stop sharing a folder from there we must go to the path where the shared folder is, right-click on it and select "Properties":
Step 2
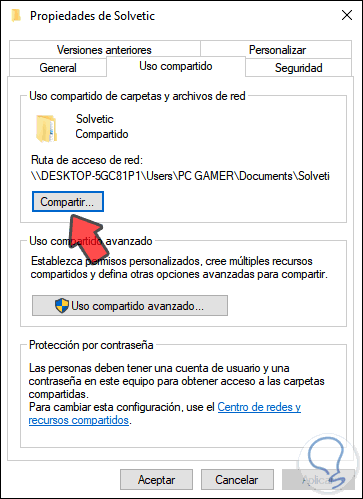
In the window that will be displayed we go to the "Share" tab and we will see the following:
Step 3
We click on "Advanced sharing" and in the following window we deactivate the "Share this folder" box:
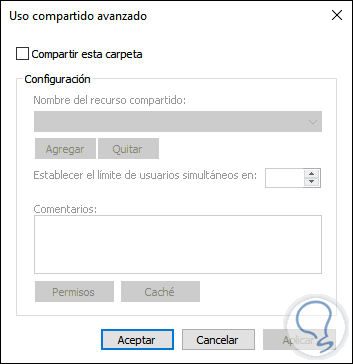
We apply the changes to complete the process.
2. Stop sharing a Windows 10 folder from the command prompt console
The command prompt console is another method we have to stop sharing a folder in Windows 10.
Step 1
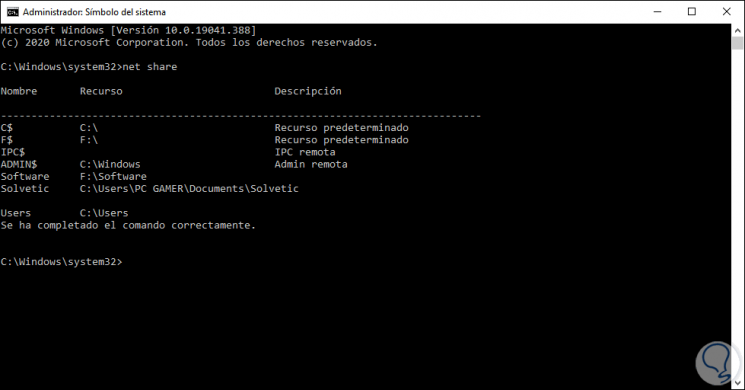
Apart from many other tasks, for this we access the command prompt as administrators and in the console we detect which are the shared resources with the following command:
net share
Step 2
To stop sharing the folder we execute the following syntax:
net share “shared folder” / delete
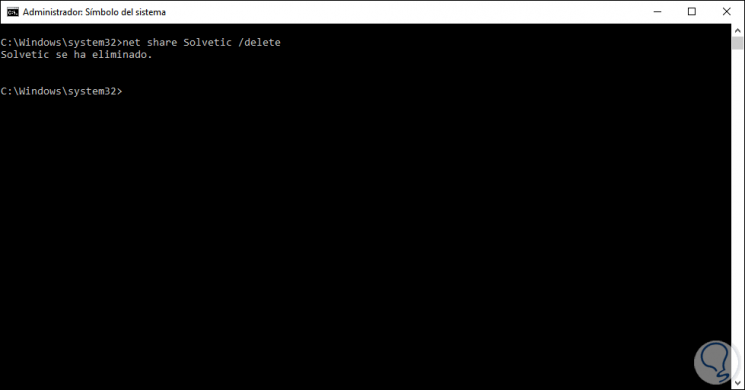
We can see that this resource has been removed and as such is no longer being shared..
3. Stop sharing a Windows 10 folder from Run
Step 1
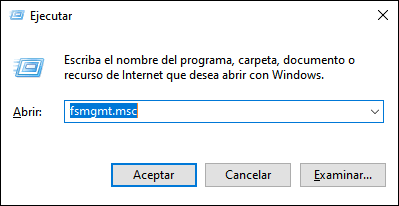
The Run command is ideal to carry out different actions in Windows 10, one of them is to stop sharing a folder on the system, for this we access Run and run the following command:
fsmgmt.msc
Step 2
We click OK or press the Enter key and in the window that opens we must go to "Shared resources", right-click on the shared folder and select "Stop sharing":
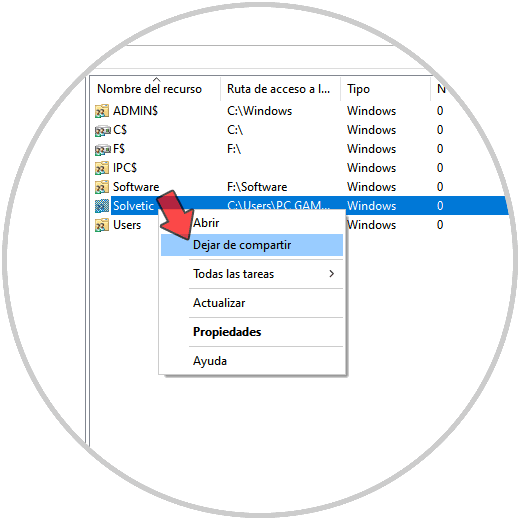
This will make that resource no longer accessible. With any of these methods we can stop sharing a folder in Windows 10.