Office tasks are increasingly necessary in our daily lives, regardless of the type of work done since they facilitate the use of multimedia elements such as audio or video as well as text management which is essential for many tasks, and if You are a user of Windows environments without a doubt that at some point in your existence you will have used the Notepad or the Office Office suite with its Microsoft Word word processor but did you know that there is an integrated option to use in Windows 10 with many functions and text tools ?, If your answer is no, then TechnoWikis introduces you to WordPad..
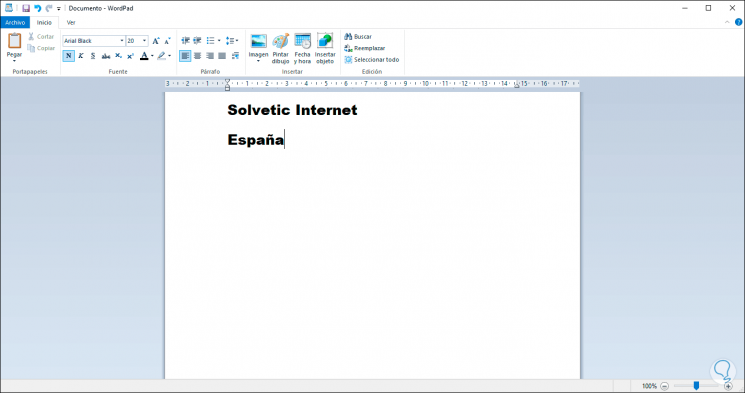
WordPad does not intend to replace Microsoft Word , but as you can see, it provides us with a large set of special functions for handling text such as editing options, drawing, table settings and others all in a simple, yet complete environment. .
Although WordPad is more advanced than notepad it is less than Microsoft Word for very logical reasons and since it is very little used by most of us a good option to free up space or not to run it is to uninstall it from Windows 10 and Today you will learn how to carry out this process..
To keep up, remember to subscribe to our YouTube channel! SUBSCRIBE
1. How to uninstall WordPad in Windows 10
Step 1
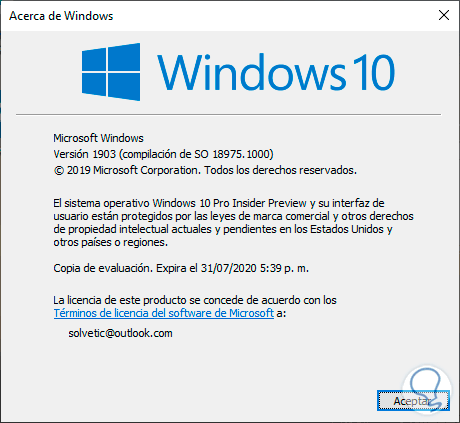
The first thing you should know is that for this process you must run version 18963 of at least Windows 10 and this can be validated using the following keys and by running the winver command:
+ R
Step 2
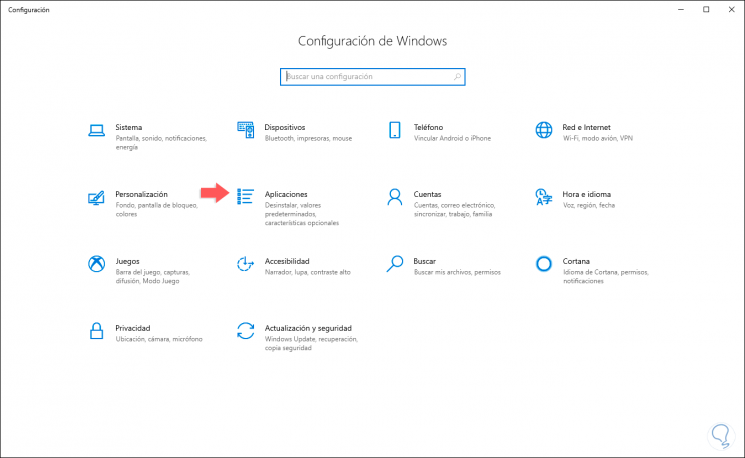
If you have this version of Windows 10 you must go to the Start menu and there select the Configuration utility where you will see the following. There we go to the "Applications" section and in the new window we go to Applications and features where we will see the following:
Step 3
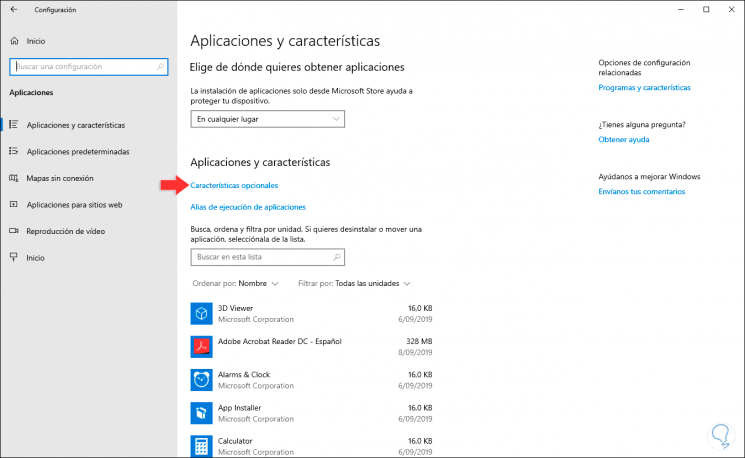
We click on the line "Optional features":
Step 4
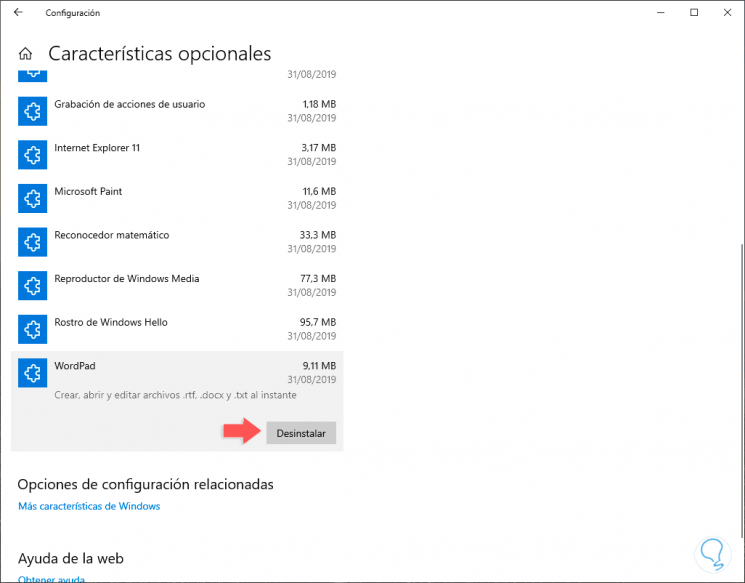
In the displayed list we must locate the WordPad line, clicking on it will activate the Uninstall button:
Step 5
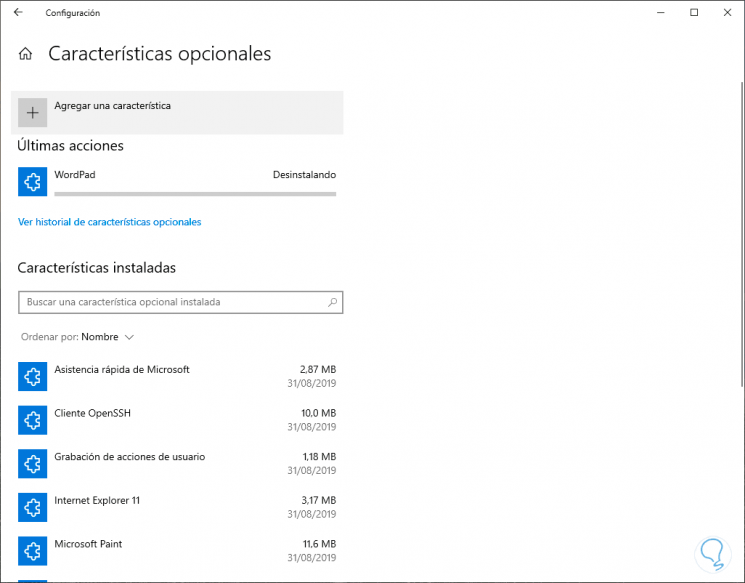
We click on this button and at the top we will see that the process begins. WordPad will automatically be uninstalled from Windows 10.
2. How to reinstall WordPad on Windows 10
Step 1
Now if you want to have WordPad again, you must go back to Start / Settings / Applications / Applications and features and click on “Optional featuresâ€:

Step 2
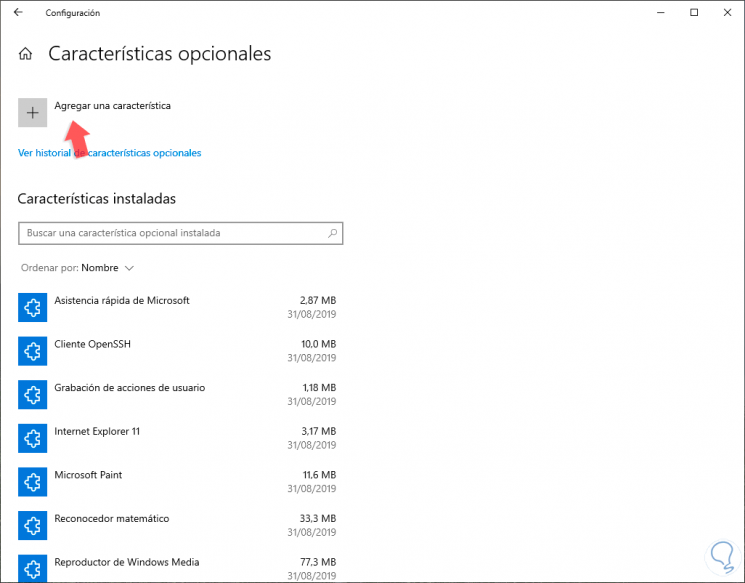
Now we click on the "Add a feature" button located at the top:
Step 3
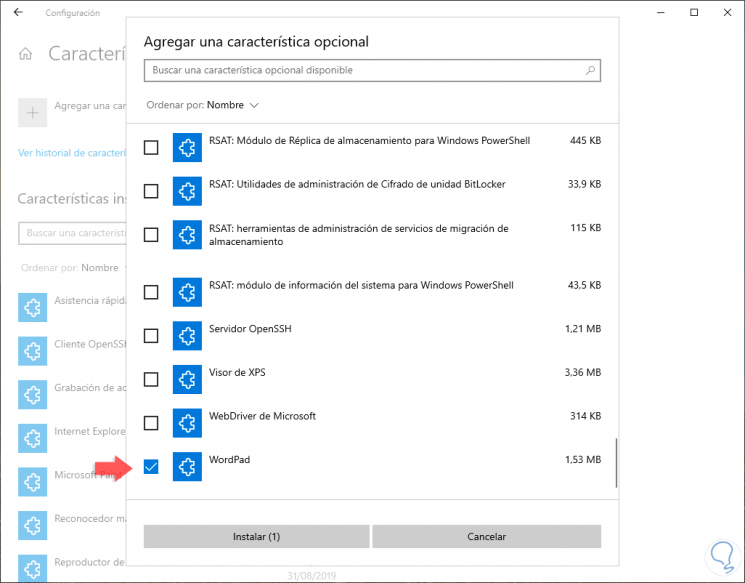
In the displayed window we select the WordPad box:
Step 4
We click on the Install button to proceed with the installation of WordPad again in Windows 10:
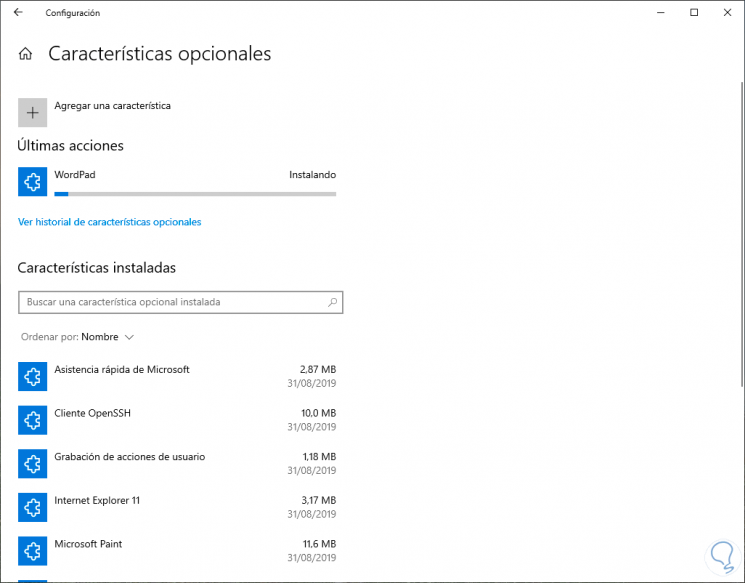
You can see the simple process to uninstall or reinstall WordPad in Windows 10 and make use of this handy text utility.