Many times when we are working with Windows 10 we can see that it suddenly suffers crashes that affect its operation. The reasons are varied, problems in the hardware, in the software, etc., but the important thing is that this type of situation undoubtedly affects our work there. Memory is important, for example having space in Windows 10 RAM is essential to avoid crashes..
The memory dump has a high impact on the behavior of the operating system, this memory dump (core dump or memory dump), we have seen it many times and it is the not pleasant blue screen , this one, although it seems somewhat critical is a registry not structured memory content that occurs when debugging a program that terminated incorrectly.
With the memory dump we have the possibility of carrying out a global diagnosis of Windows 10 and of debugging errors in the programs, this memory dump occurs for reasons such as:
Memory dump reasons
- Software that is not compatible with the operating system
Memory dump types
In Windows 10 we have the following types of memory dump:
- Complete memory dump: This type of dump records the entire contents of the operating system memory upon crashing without warning. If we use this type of dump, it is required to have a paging file on the boot volume which must have the capacity to store physical RAM plus 1 megabyte.
- Core memory dump or kernel: with this type of dump only the kernel memory is recorded, this allows the recording of information in the registry to be much faster.
- Small memory dump: this dump records the information necessary for the administration tasks that are necessary, we must have a paging file of at least 2 MB and all the information collected there allows us total control to determine the root of the failure.
- Automatic memory dump: in this case, it is the Windows operating system that defines the size of the system paging file.
- Active memory dump - This is a type of dump that filters unimportant objects in order to determine the cause of the system crash.
TechnoWikis will now explain how to enable this memory dump in Windows 10 to be able to perform analysis in the event of a blue screen..
To stay up to date, remember to subscribe to our YouTube channel! SUBSCRIBE
How to enable memory dump in Windows 10
Step 1
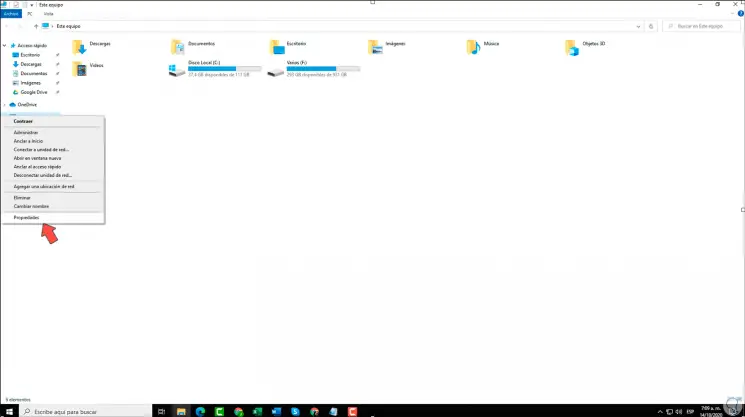
For this we open the Windows 10 File Explorer and right click on "This computer", select "Properties":
Step 2
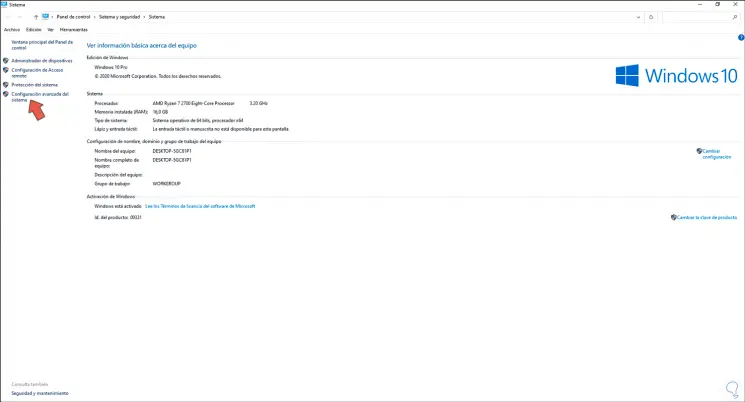
In the window that will be displayed we go to "Advanced system configuration":
Step 3
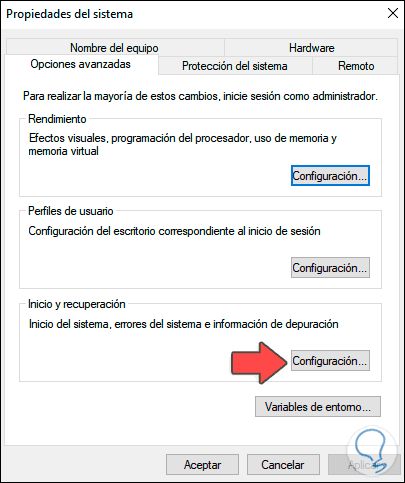
Clicking there will open the following pop-up window:
Step 4
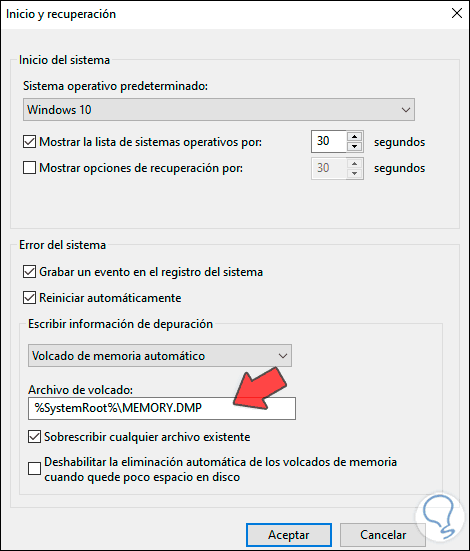
We click on the "Settings" button in the "Startup and recovery" section, in the next window we select "Automatic memory dump" in the "Write debugging information" field.
In "Dump file" we can see the path where the records will be copied in case of crashes. We apply the changes.
With this method we can enable memory dump in Windows 10 for better system management.