OpenOffice is a suite that integrates applications for word processing, spreadsheets, presentations, graphics and everything else that we expect to find in a set of office automation utilities, only with the difference that OpenOffice is open source, in other words, it is gratuitous..
OpenOffice is compatible with all current operating systems and can be found in different languages. One of its advantages is that OpenOffice stores data in an international standard format and is capable of reading and writing files from other office automation programs.
OpenOffice features
OpenOffice is composed of:
- Writer which is a word processor with multiple features
- Impress for creating professional presentations
- Calc which is the spreadsheet manager
- Draw to do everything related to art and drawing
- Base with which it is possible to administer databases
- Math with which we can work on mathematical equations
TechnoWikis will explain the process to install OpenOffice on Chromebook and have more options to work from there..
To stay up to date, remember to subscribe to our YouTube channel! SUBSCRIBE
How to install OpenOffice on Chromebook
Step 1
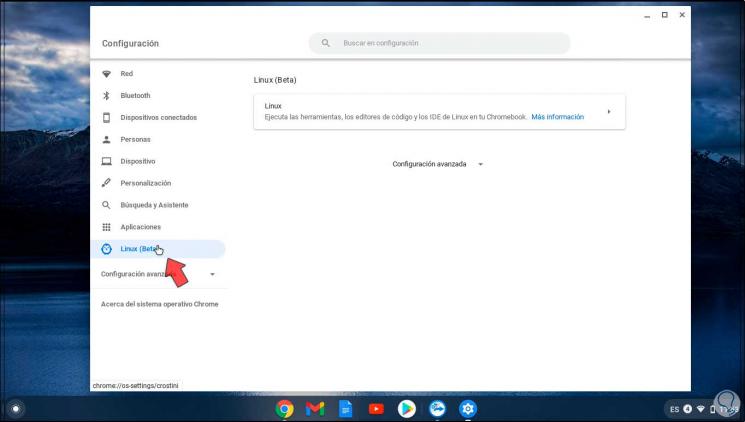
The first thing we must do is go to Settings:
Step 2
Then we go to the "Linux (Beta)" section and check that it is enabled:
Step 3
In case it is not active, in the following tutorial we explain the process to do it:
Linux Chromebook
Note
Linux (Beta) is available for teams from 2019 onwards and only on select models before 2019.
Step 4
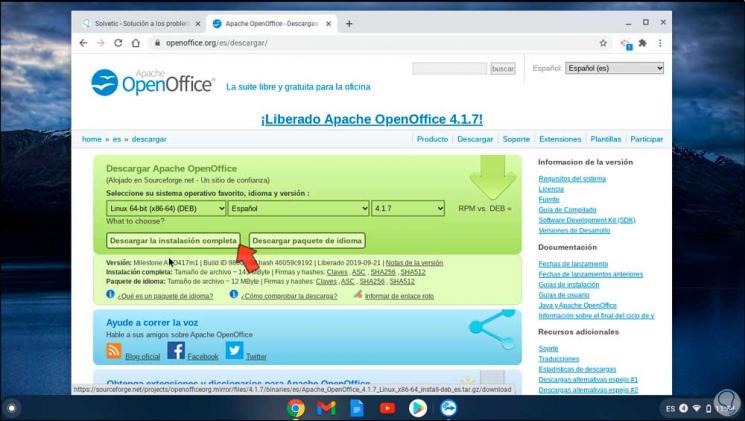
Once we validate that Linux (Beta) is enabled we can continue. Let's go to the official OpenOffice link:
OpenOffice
Step 5
There in the version we must select the Linux 64-bit (x86-64) (DEB) option or, failing that, the 32-bit option, but it must always be the DEB option, we choose the language and the version which by default will always be the last.
We click on "Download the complete installation" to be redirected to the download link:
Step 6
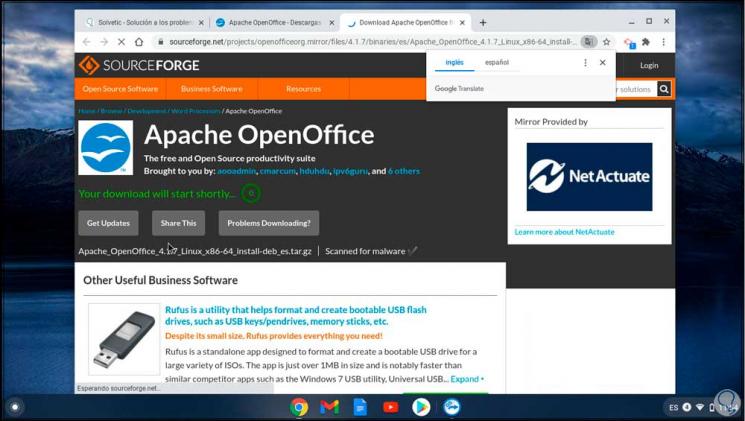
Then we must save the file locally:
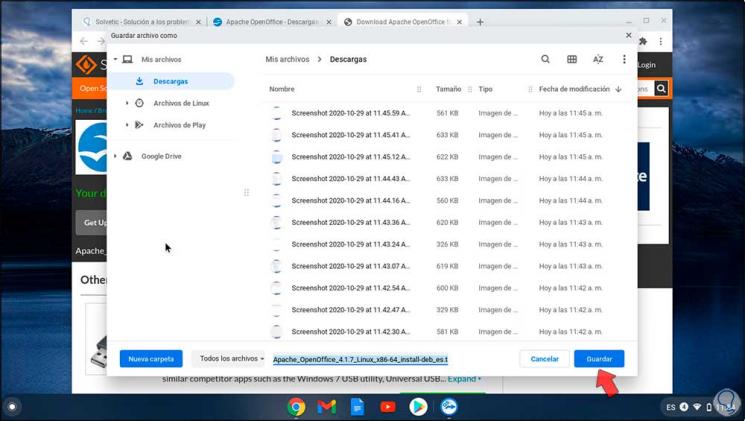
Step 7
We click on Save and we hope that the download has finished:
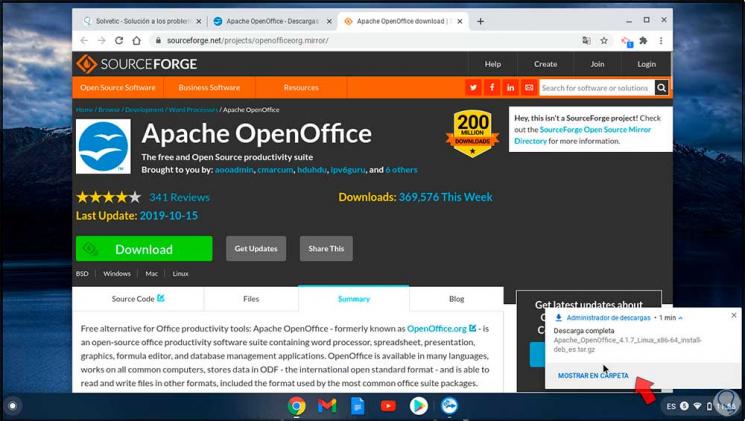
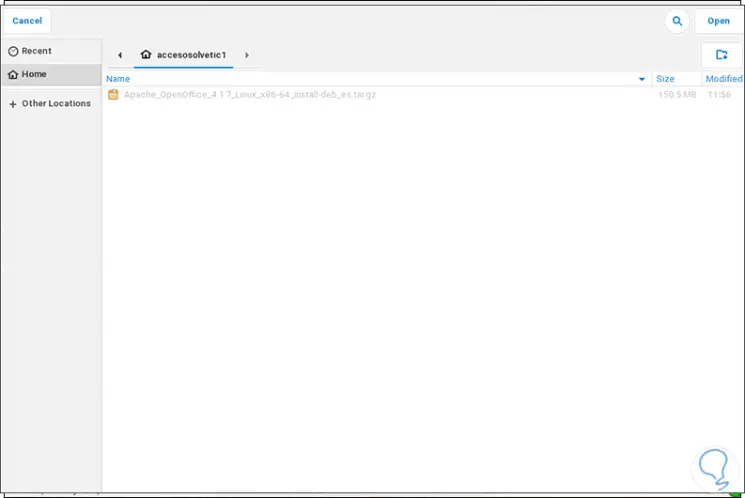
Step 8
We click on "Show in folder" to access that location:
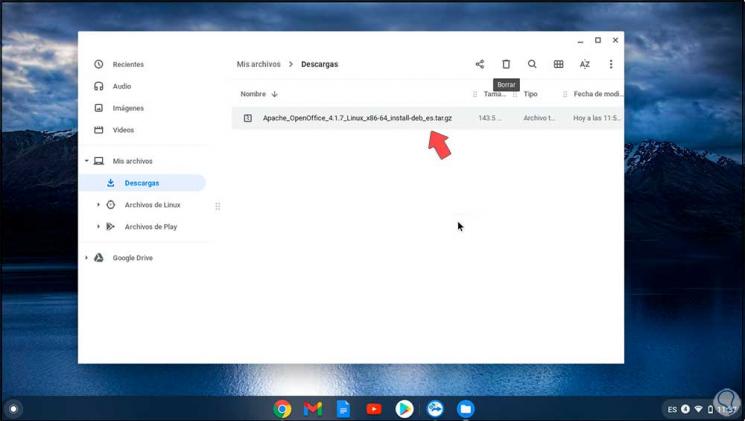
Step 9
This file must be moved to the Linux Files section:

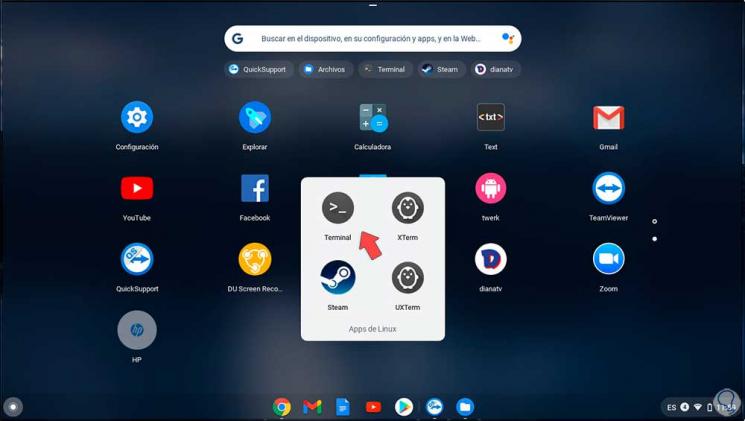
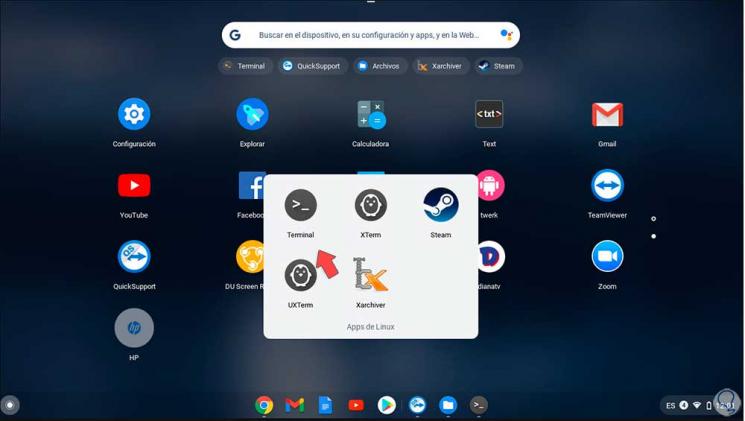
Step 10
Now we go to Linux Apps and there we select "Terminal":
Step 11
In the terminal we are going to execute the following:
sudo apt install xarchiver
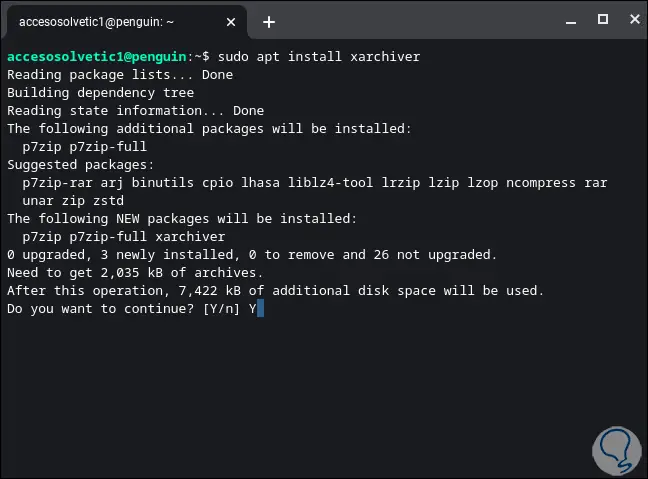
Step 12
We enter the letter Y to confirm the download and installation.
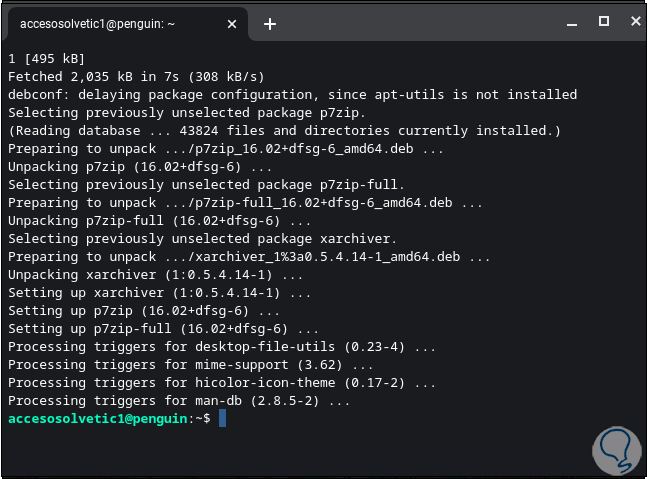
Step 13
Once the process is complete, we go to Linux Apps and open Xarchiver:
Step 14
We will see this:
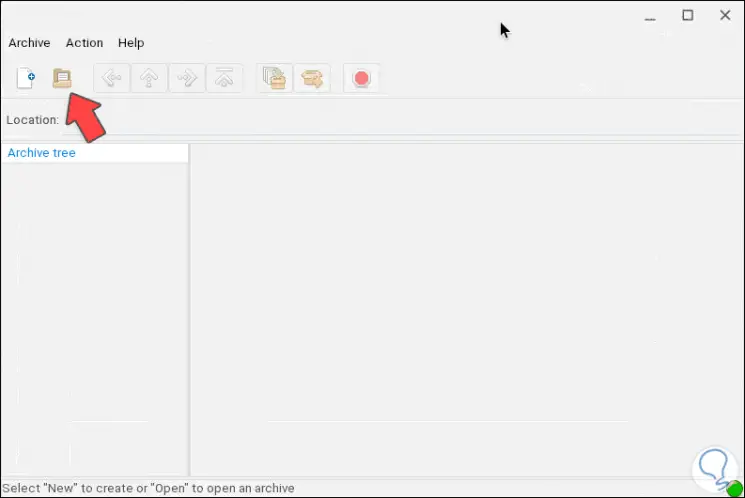
Step 15
We click on the "Open an archive" button and we will be redirected to this window:
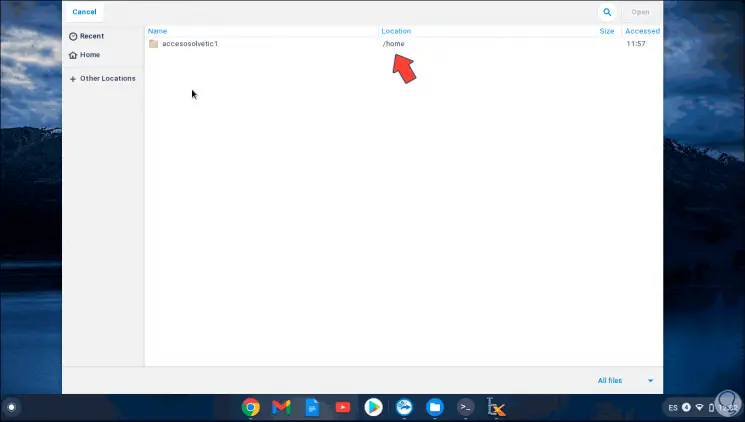
Step 16
There we go to Home and select the DEB file:
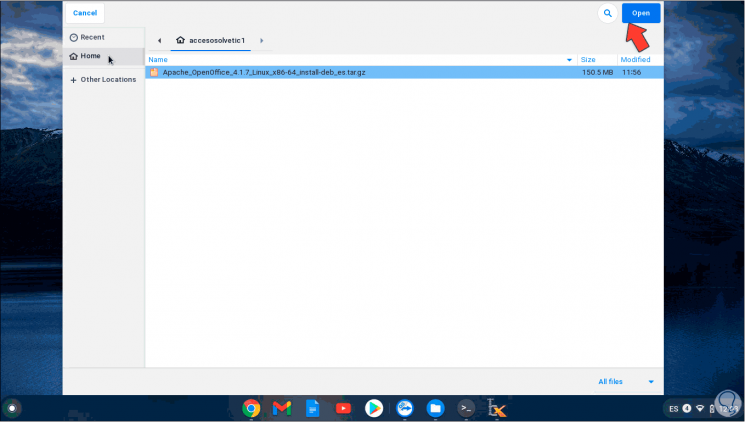
Step 17
We click on Open and its content will be added:
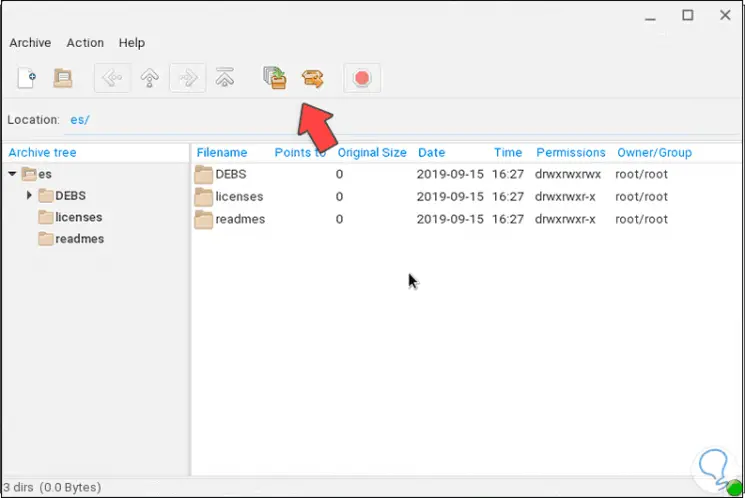
Step 18
Now we click on the Extract to button and we will see the following:
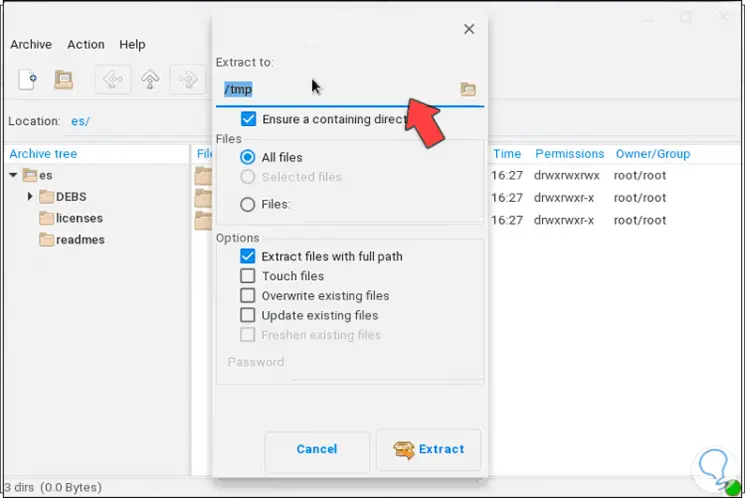
Step 19
At the top we change the route by clicking on the icon and choose Home:
Step 20
Click on Open and we will see the new established path:
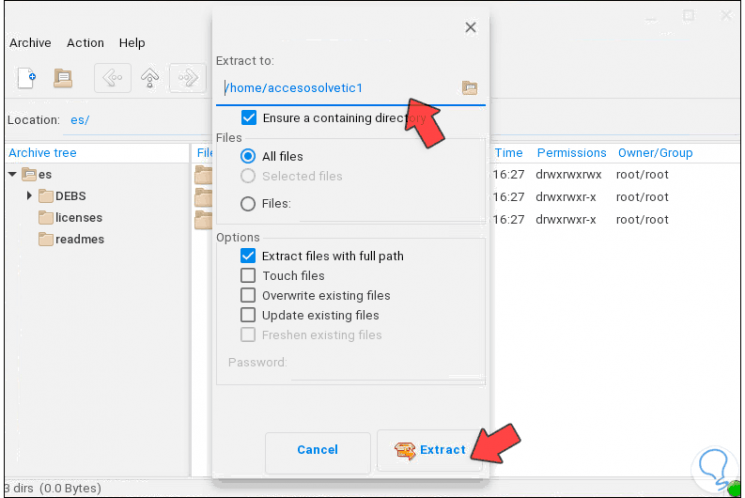
Step 21
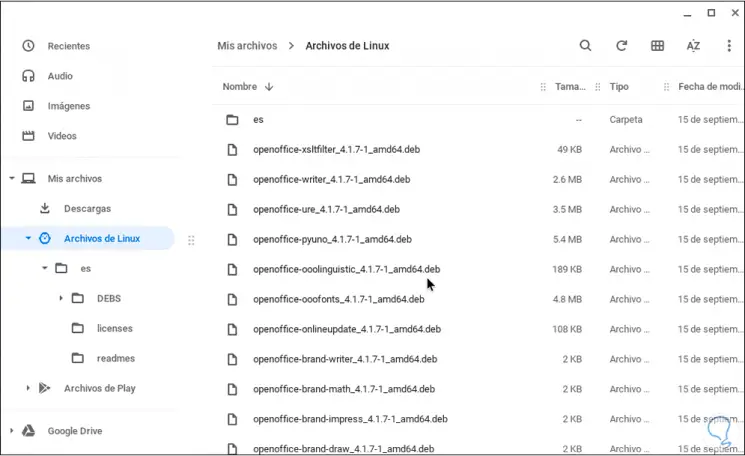
We click on "Extract" to complete the process, we will see there the extracted folder with the selected language, in this case "es":
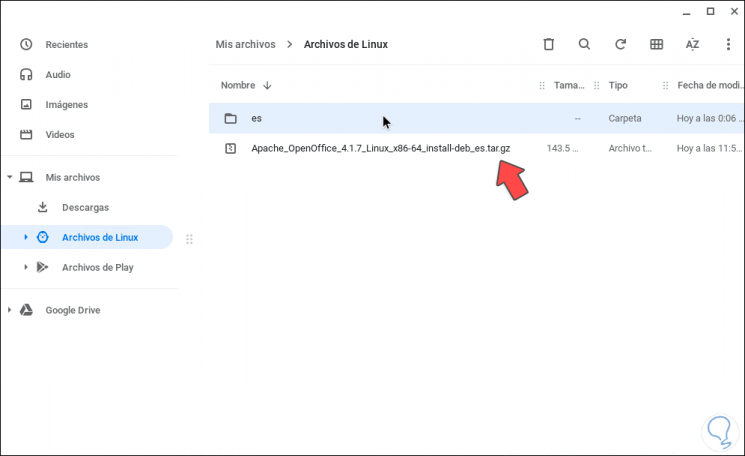
Step 22
We access it and open DEBS:
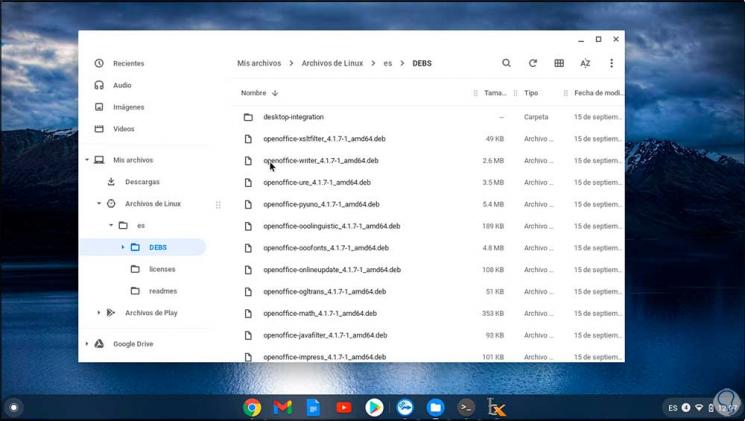
Step 23
We select all the content except "desktop-integration":
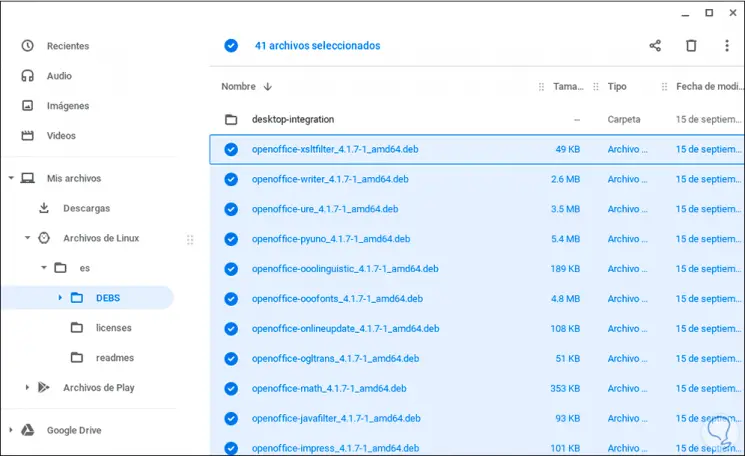
Step 24
We are going to move these elements to the Linux Files section:
Step 25
Now we go back to "es" and open "desktop-integration", there we see the .deb file:
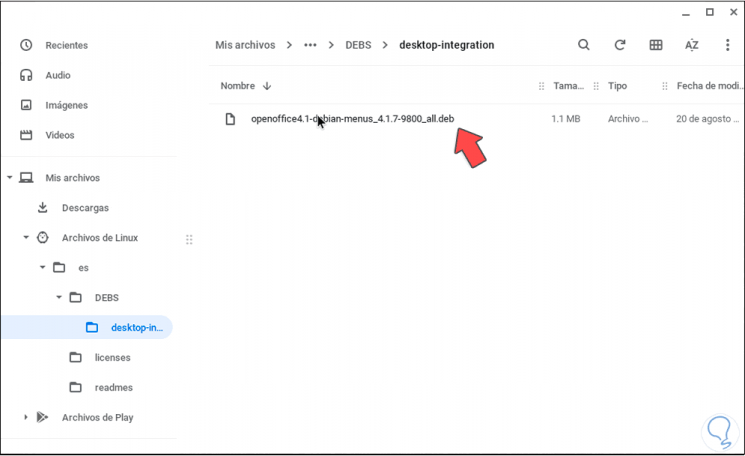
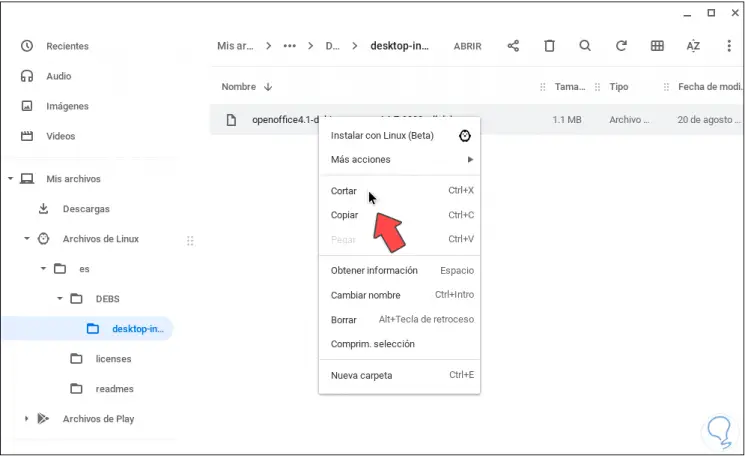
Step 26
We move this file to Linux Files by cutting and pasting it there:
Step 27
Once we do this, we open the terminal and execute the following. It will start the OpenOffice installation process on Chromebook.
sudo dpkg -i * .deb
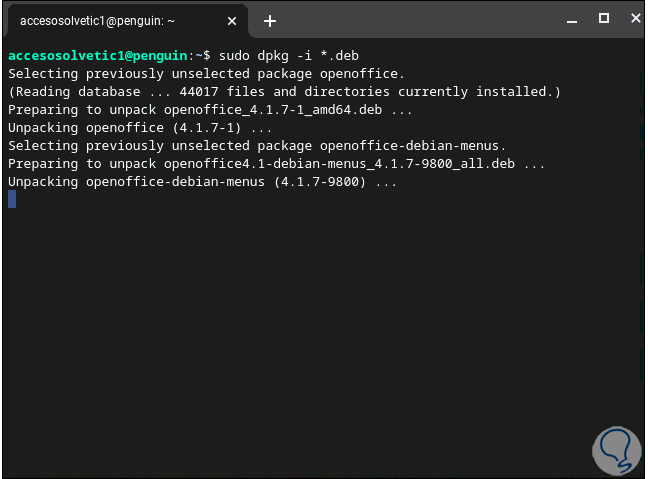
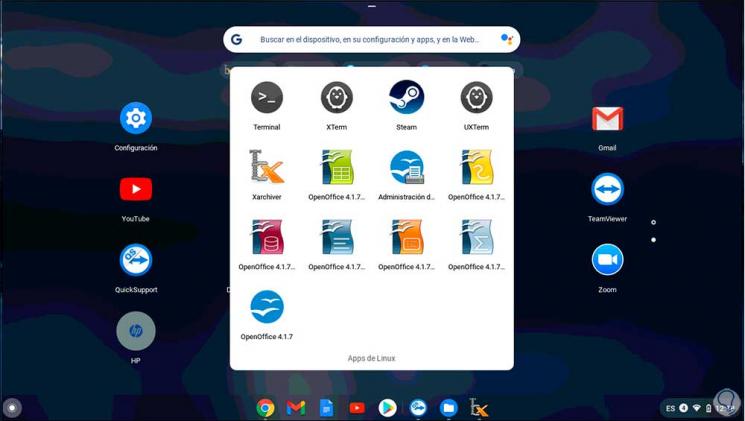
Step 28
At the end, we go to Linux Apps and there we find the OpenOffice content:
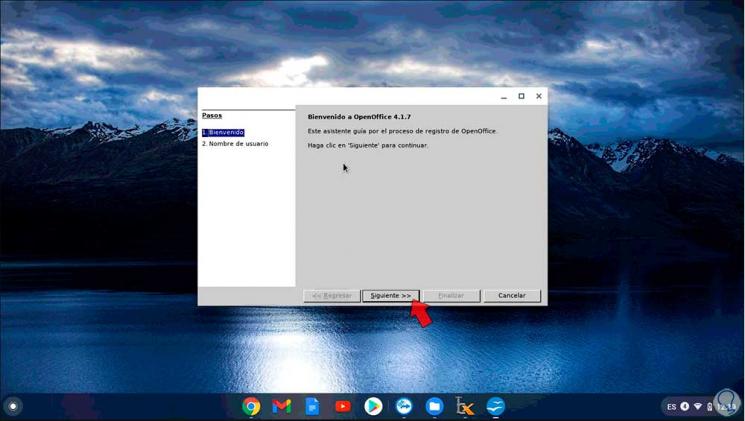
Step 29
We open any of these and we must complete some additional fields:
Step 30
We enter the desired name:
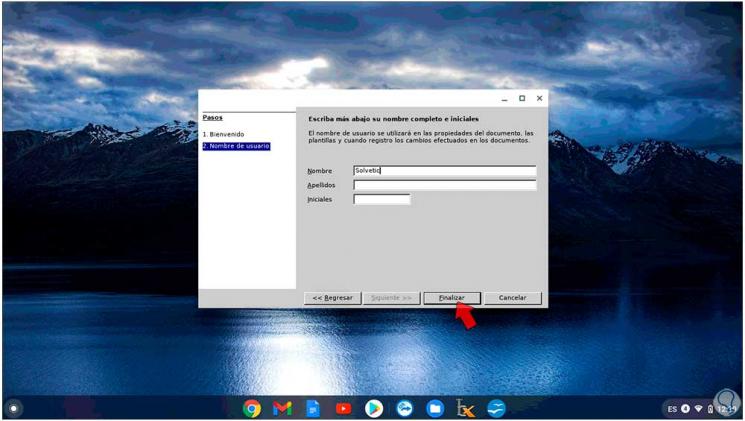
Step 31
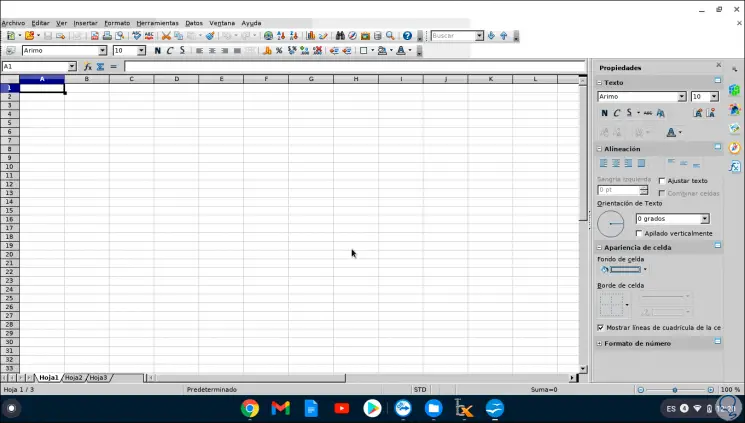
Click on Finish and with this we access OpenOffice:
It is a simple process thanks to TechnoWikis if you wish to install OpenOffice on Chromebook.