Microsoft Excel 2019 is one of the applications integrated in the Office 2019 suite which presents new features that have and will have a positive impact on all data management and administration tasks of various types which can be worked with extensive tools (such as functions , formulas , tables, etc.) in the Microsoft Excel 2019 spreadsheets..
Among all the options that we have in Excel 2019 , one stands out for its ease of interaction between the user and the data and they are the drop-down cells, that is, a cell where at the moment of clicking on it a series of options based are displayed in a range of source data.
This may seem like a complex thing to do , but it is actually something simple and thanks to Excel 2019 and its new features it will be even easier to do. TechnoWikis will explain in detail how to make a drop-down list in Excel 2019 in a simple and practical way..
To keep up, remember to subscribe to our YouTube channel! SUBSCRIBE
1. How to create a drop-down cell in Microsoft Excel 2019
Step 1
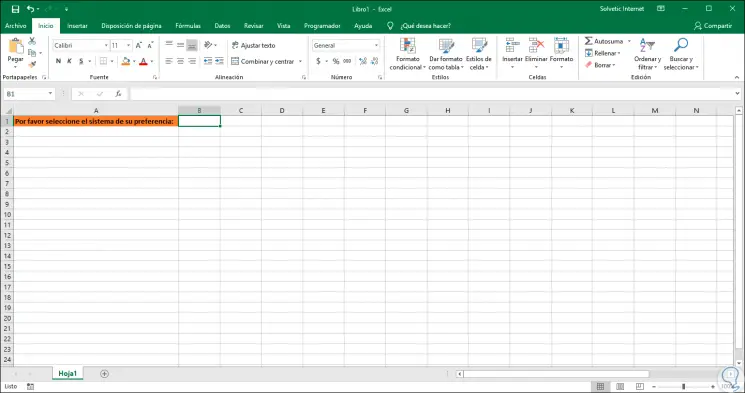
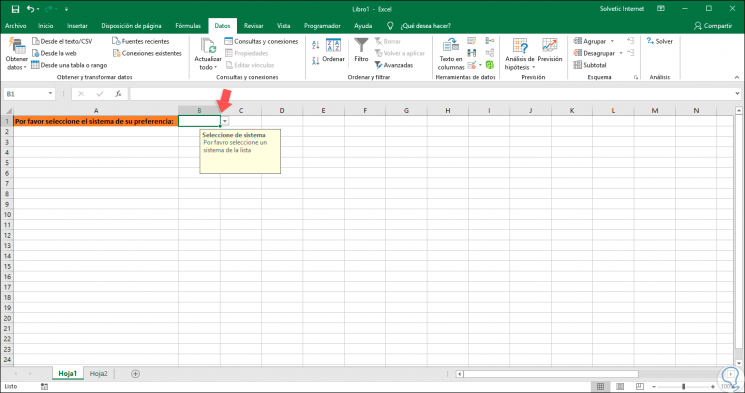
For this case we have a question in cell A1 associated with the type of operating system used:
Step 2
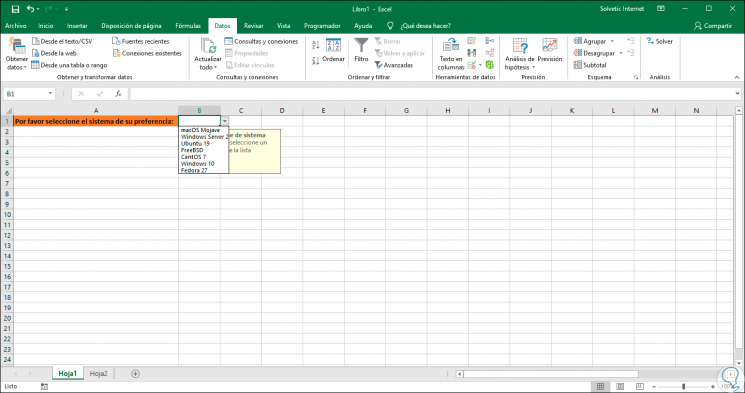
In cell B1, the drop-down cell will be created, which allows the user to only have the opportunity to choose one of the values ​​described there and not add or remove any of the options provided by the creator of the cell.
When a drop-down cell is created in Excel 2019, a button will be displayed to the right of that cell, which refers to the fact that there is a list with options to select.
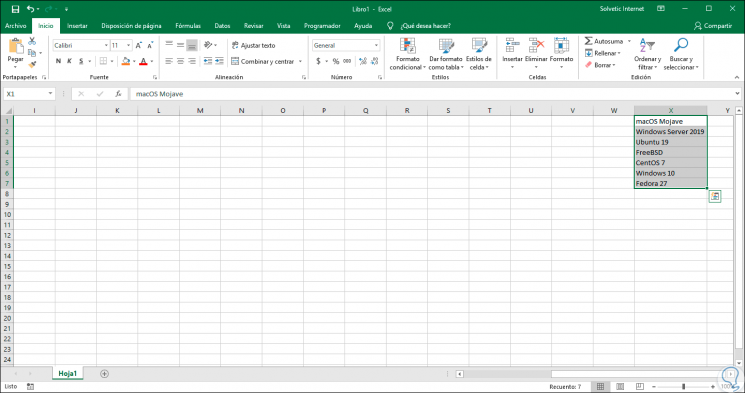
Now, in another column, or on another sheet of the book, we have the values ​​that the user can select in the drop-down cell:
Step 3
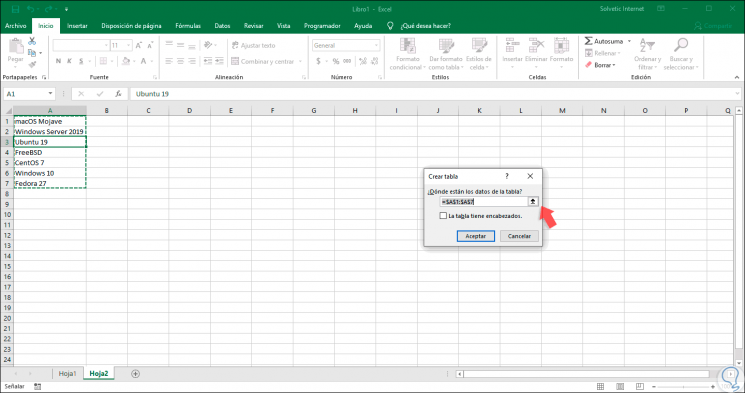
One tip to optimize the results, although not mandatory, is to display the elements in a table format, this is achieved by selecting any cell in the range where the values ​​are and pressing the following keys:
+ T Ctrl + T
Step 4
There we click on the Accept button to confirm the changes and we will see the range in table list format:
Step 5
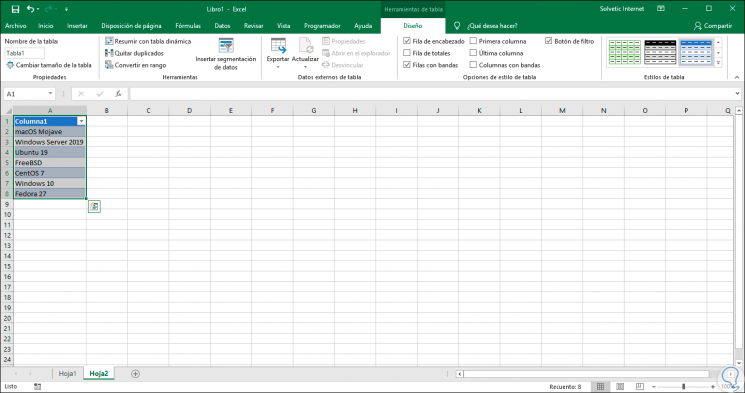
As we mentioned, this is an option to simplify the process, but it is not mandatory, the advantage of using the data as a table, is that, if at any time we add or remove items from the list of that range, they are automatically updated in Drop-down lists based on that table, this helps save time for the selection process.
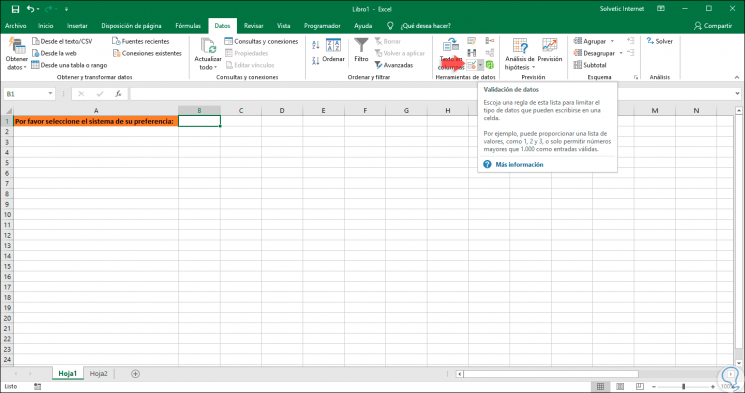
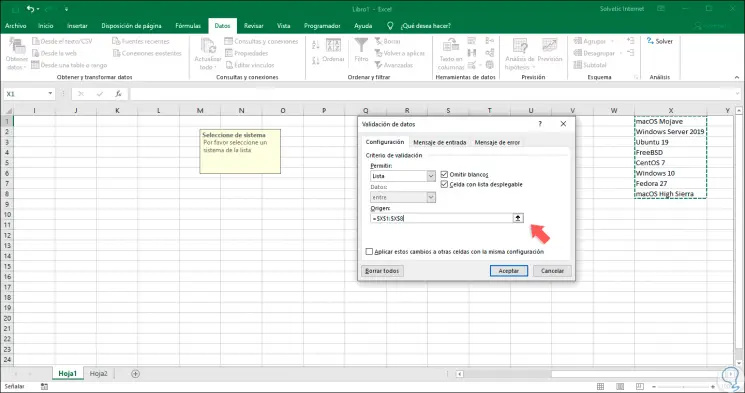
Once this is configured, we select the cell where the drop-down cell is to be created, in this case we mention that it will be cell B1 and there we go to the “Data” menu and in the “Data Tools” group we click on the “Validation of data":
Step 6
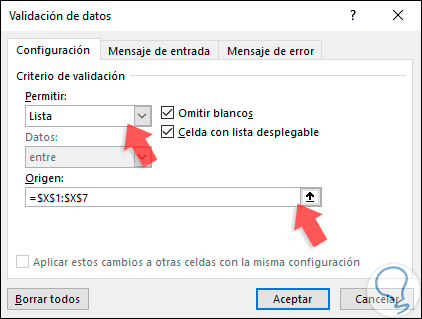
Clicking there will display the following wizard where we initially configure the following:
- In the "Allow" field we select the List option.
- In the “Origin” field we select the table or the range of cells where the values ​​to be displayed are.
Step 7
We can activate the “Skip targets” box so that users should choose whether or not to select an option from the list and it is vital to select the “Cell with drop-down list” box so that Excel 2019 assumes the role of that cell with this format .
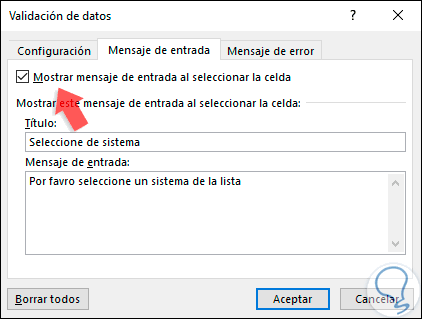
Now we go to the "Incoming message" tab and there we assign a title and a message which will be displayed to the user when the mouse passes over the drop-down cell.
To display the message, the “Show input message when selecting cell” box must be active.
Note
In the "Incoming message" field we can enter up to 225 characters.
Step 8
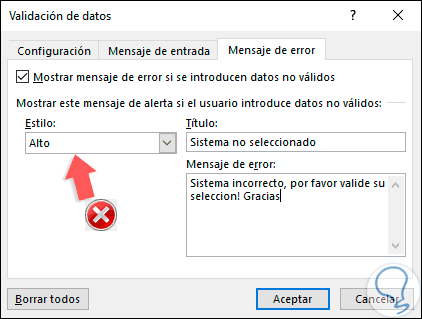
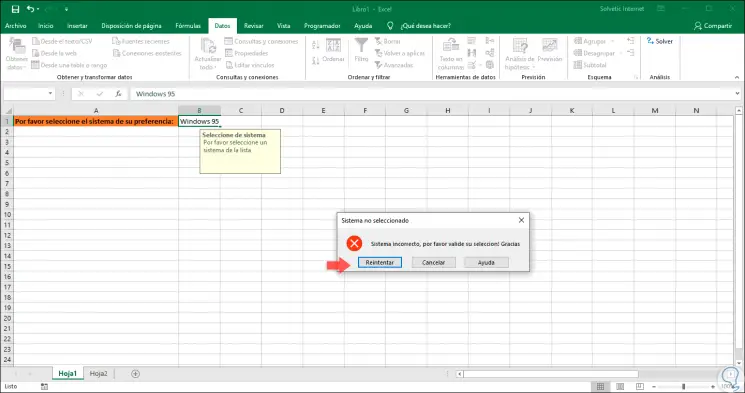
Now we go to the “Error message” tab and there we assign the message title and enter the message that will be displayed if the user makes a mistake in his / her selection, on the left side we can select the type of icon to be displayed:
Note
To display the message, we must check the box “Show error message if invalid data is entered”.
Step 9
Click on OK to save the changes. In the cell where the drop-down cell was created we will see the input message that we have defined:
Step 10
When clicking on the cell, the available values ​​will be displayed in the range selected for your choice:
Step 11
If the user enters a wrong value, the following will be displayed. In this way, users can only select options from the selected range.
2. Options on the drop-down cell in Microsoft Excel 2019
There are some options we can make about working with the drop-down cell, some of these options are:
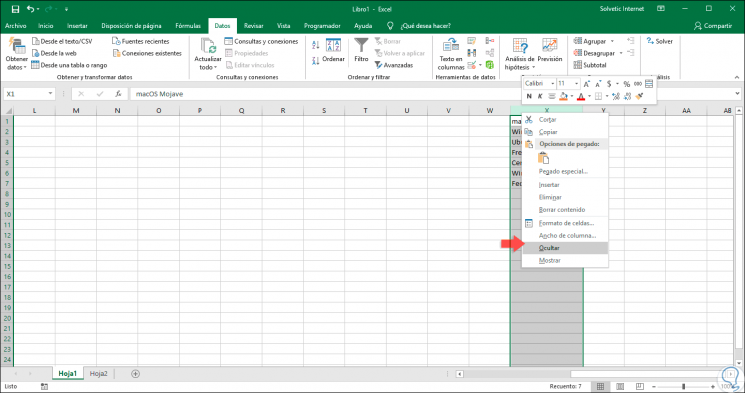
Hide the data range
For security we can hide the values ​​that are displayed in the drop-down cell, for this, we select the range of data, right click on them and select the “Hide” option:
Add more options to the drop-down list
For organizational reasons it is normal for the data in the drop-down list to be modified, either by adding or removing data, in this case we have added a new system:

Now, to allow the drop-down cell to assume that new value, we select the drop-down cell and in the “Data” menu we click again on the “Data validation” option and in the “Origin” field we specify the new range to use:
3. Delete a drop-down list in Excel 2019
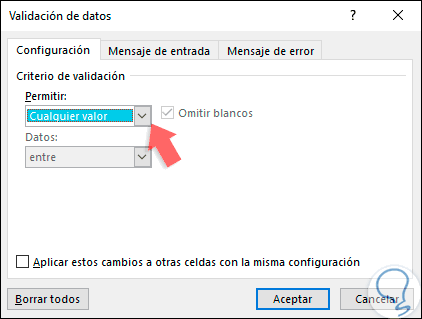
At the moment we consider that the drop-down list is no longer needed, we must delete it, for this it will be necessary to eliminate the data validation rule, this is achieved from the option “Data validation” in the “Data” menu and in the field "Allow" select the option "Any value". Click on OK to apply the changes..
As we have observed, the options to create and edit our drop-down cell in Excel 2019 is wide and useful for this type of information to use.