One of the best allies offered by Windows for data management is undoubtedly Excel, since it allows us to execute various functions. This is possible thanks to the large number of formulas with which you can manage all types of data in a worksheet. These functions programs help us save time when applying some kind of calculation since they are configured by default..
Excel facilitates the validation of data, with which we can perform diverse tasks, regardless of the degree of complexity they offer. Thanks to a data editor such as Excel we can count on a variety of already integrated functions that streamline data editing, the drop-down lists help make this possible in Excel.
The use of Excel is so varied that, for example, you can request that you decide between several options that are offered in a list, or you can even perform more complex activities such as restricting cells to a certain type of data. These lists allow the end user to be offered a series of possibilities that must be selected from the dropdown that we have previously configured in a personalized way..
We want to teach you in the simplest way possible, how to create drop-down lists with data validation in Excel 2019, for this a procedure is offered through a tutorial that you must perform sequentially.
1. How to create a table with list of options in Excel 2019
To start this procedure, the first thing that must be done is the configuration of the Excel table with basic data. You have the option of writing them manually or copying and pasting them directly from another source. Next, it will be necessary to enter a list of alternatives so that a drop-down directory can be executed, occurring at the moment when the data validation is defined. It is also possible to define a list in any other location of the same spreadsheet, you can even set a new list on another sheet.
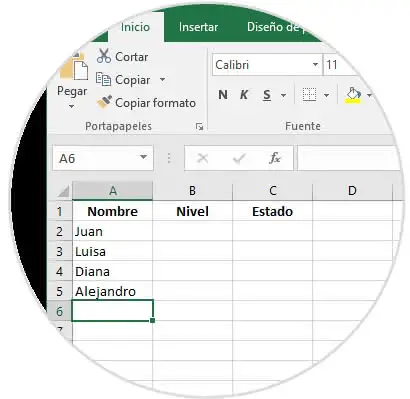
Step 1
In the image shown below you can see the following basic data.
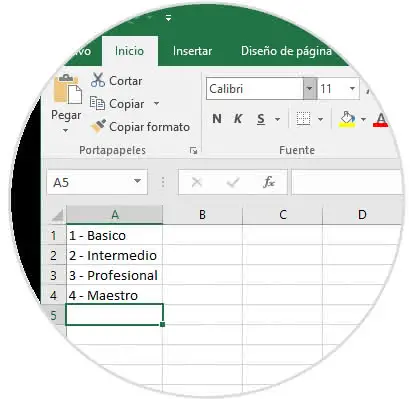
Step 2
Then on sheet two of the book, we will proceed to create a list of sections.
2. How to enable data validation for selected cells in Excel 2019
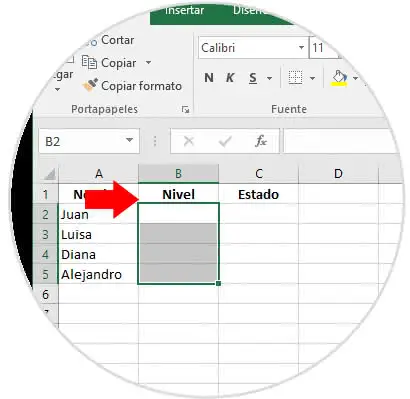
With this TechnoWikis example, you can see how to design a drop-down list in column B, which is called Level.
Step 1
For this it is necessary to choose the cells where the drop-down lists will be located as shown in the next image.
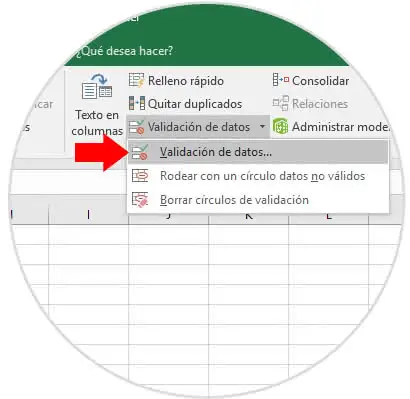
Step 2
Subsequently, we must go to the data menu, then enter "Data Tools", and finally click on the "Data Validation" alternative.
3. How to add drop-down lists to selected cells in Excel 2019
We suggest that if you want to see how to create drop-down cells directly, take a look at this Excel 2019 video tutorial:
To stay up to date, remember to subscribe to our YouTube channel! SUBSCRIBE
Step 1
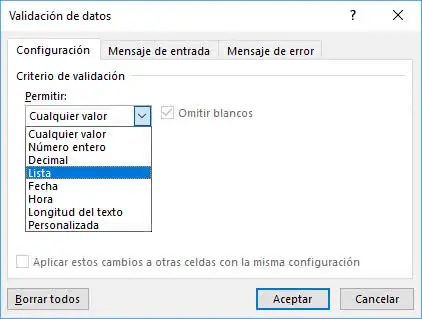
Pressing on Data validation, automatically opens a tab where we can choose all those elements that you want to include in the Allow section, for this we only need to display the options by choosing "List".
Step 2
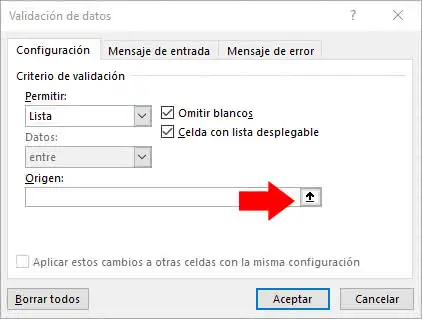
After having selected the Lists section, it is necessary to choose where the data comes from, to do this there are two alternatives.
- The first one is that you must manually type the cells followed by commas in the source field.
- To execute the second alternative, it is required to click on the icon that is located in the Origin part and with the help of the assistant you must select the origin of the data.
Step 3
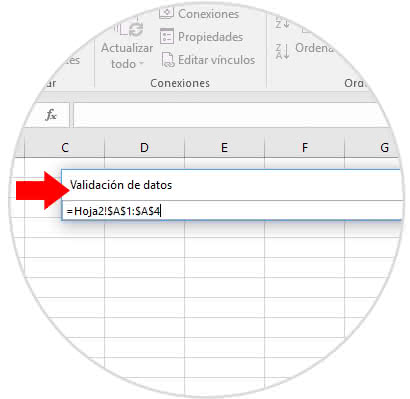
By pressing on the previous icon, the source field will be reduced.
Now we proceed to go directly to the sheet where the data for the drop-down list is, you can see both the selected cells and the name of the sheet..
Step 4
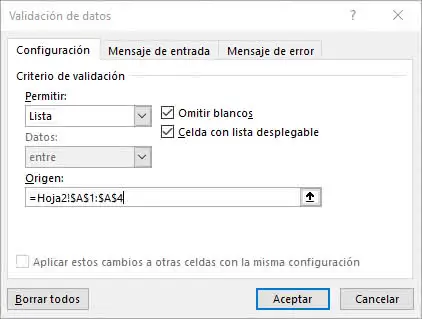
Subsequently, you must click on the arrow pointing down and that is on the right side of the source box, this way the input is accepted and the expansion of the dialog box is achieved.
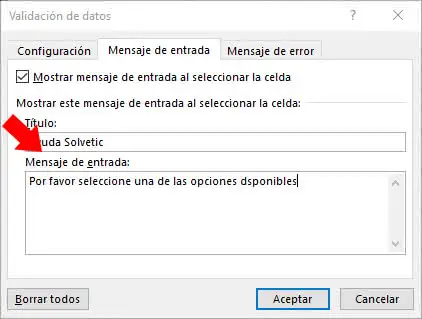
4. How to add an input message in Excel 2019
The Excel 2019 tool, among its many functions, offers us the option of adding an optional message to the drop-down list, all with the purpose of making the user aware of the existence of a special issue.
To execute this action, we go to the Input message section and when the tab is activated, the Show input message box is enabled. When choosing the cell we select the title of the message in the "Title" section and the general message in the "Input message" section, just press "Accept" so that all the changes made can be retained.
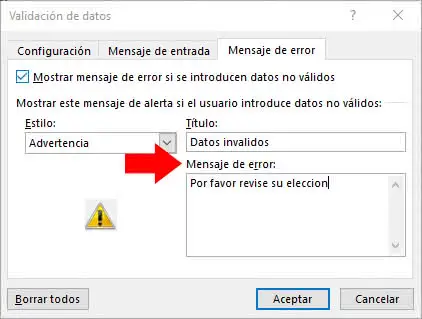
5. How to add an error message in Excel 2019
One of the alternatives that is also counted in Excel, is to incorporate an error message at the moment in which the user enters some type of wrong or wrong data, likewise it can happen when a correct alternative is not selected.
Step 1
In order to activate the error message, we must enter the Error Message window, selecting the "Show error message if invalid data is entered" option to later choose on the "Style" field where some of the available options are displayed ( High, Warning or information), in the same way you can complete the fields with the messages.
At the moment when everything is configured we must press the "Accept" option which is located in a rectangle that is at the bottom of the screen
Step 2
In this way we can observe the following:
This is the way you can create drop-down Lists using data validation with the help of the Excel 2019 tool.