Sharing is a mandatory feature for any device. In addition, over time, the ways in which we share have evolved and are now much optimal and the range of possibilities is much wider. This is what happens with iPhone and its new iOS update that introduces new ways to share photos through Shared Albums.
Related: How to hide the Hidden Album from the Photos app | iPhone or iPad
We have all shared some iPhone photo or video. For this there are many possibilities such as the possibility of sending these images through apps such as WhatsApp or Messenger. However, the most efficient way between Apple devices is to use the Airdrop function which offers unmatched speed without losing any quality in your shared photos or videos..
Well, now Apple gives a twist to the way we share and now introduces the possibility of creating Shared Albums that, as the name suggests, can be shared with other users who own Apple devices. This means that when we share an Album, all the photos and videos inside it will be shared with it and therefore will be available in the shared Album on other users' devices.
This feature is highly recommended for users who are constantly sharing a specific type of photo or video. For example, we just had a baby and we love that all of our relatives have such photos. In this case we can create a Shared Album on our iPhone that we share with all the members of our family that we want. From this moment on, all the photos that we include in said Album will be shared automatically with the rest of the family..
That said, below we show you step by step how to create Shared Albums on iPhone and iPad to automatically share all the photos and videos that we include inside:
How to create shared photo albums on iPhone and iPad.
1. Open the Photos app on your iPhone or iPad.
2. Go to the section: Albums
3. Now click on the + icon located in the upper left corner of the screen..
4. At this point a small menu will be displayed where you will have to select the option: New Shared album .
5. This opens a small window in which we will have to assign a name to the album and click on Next .
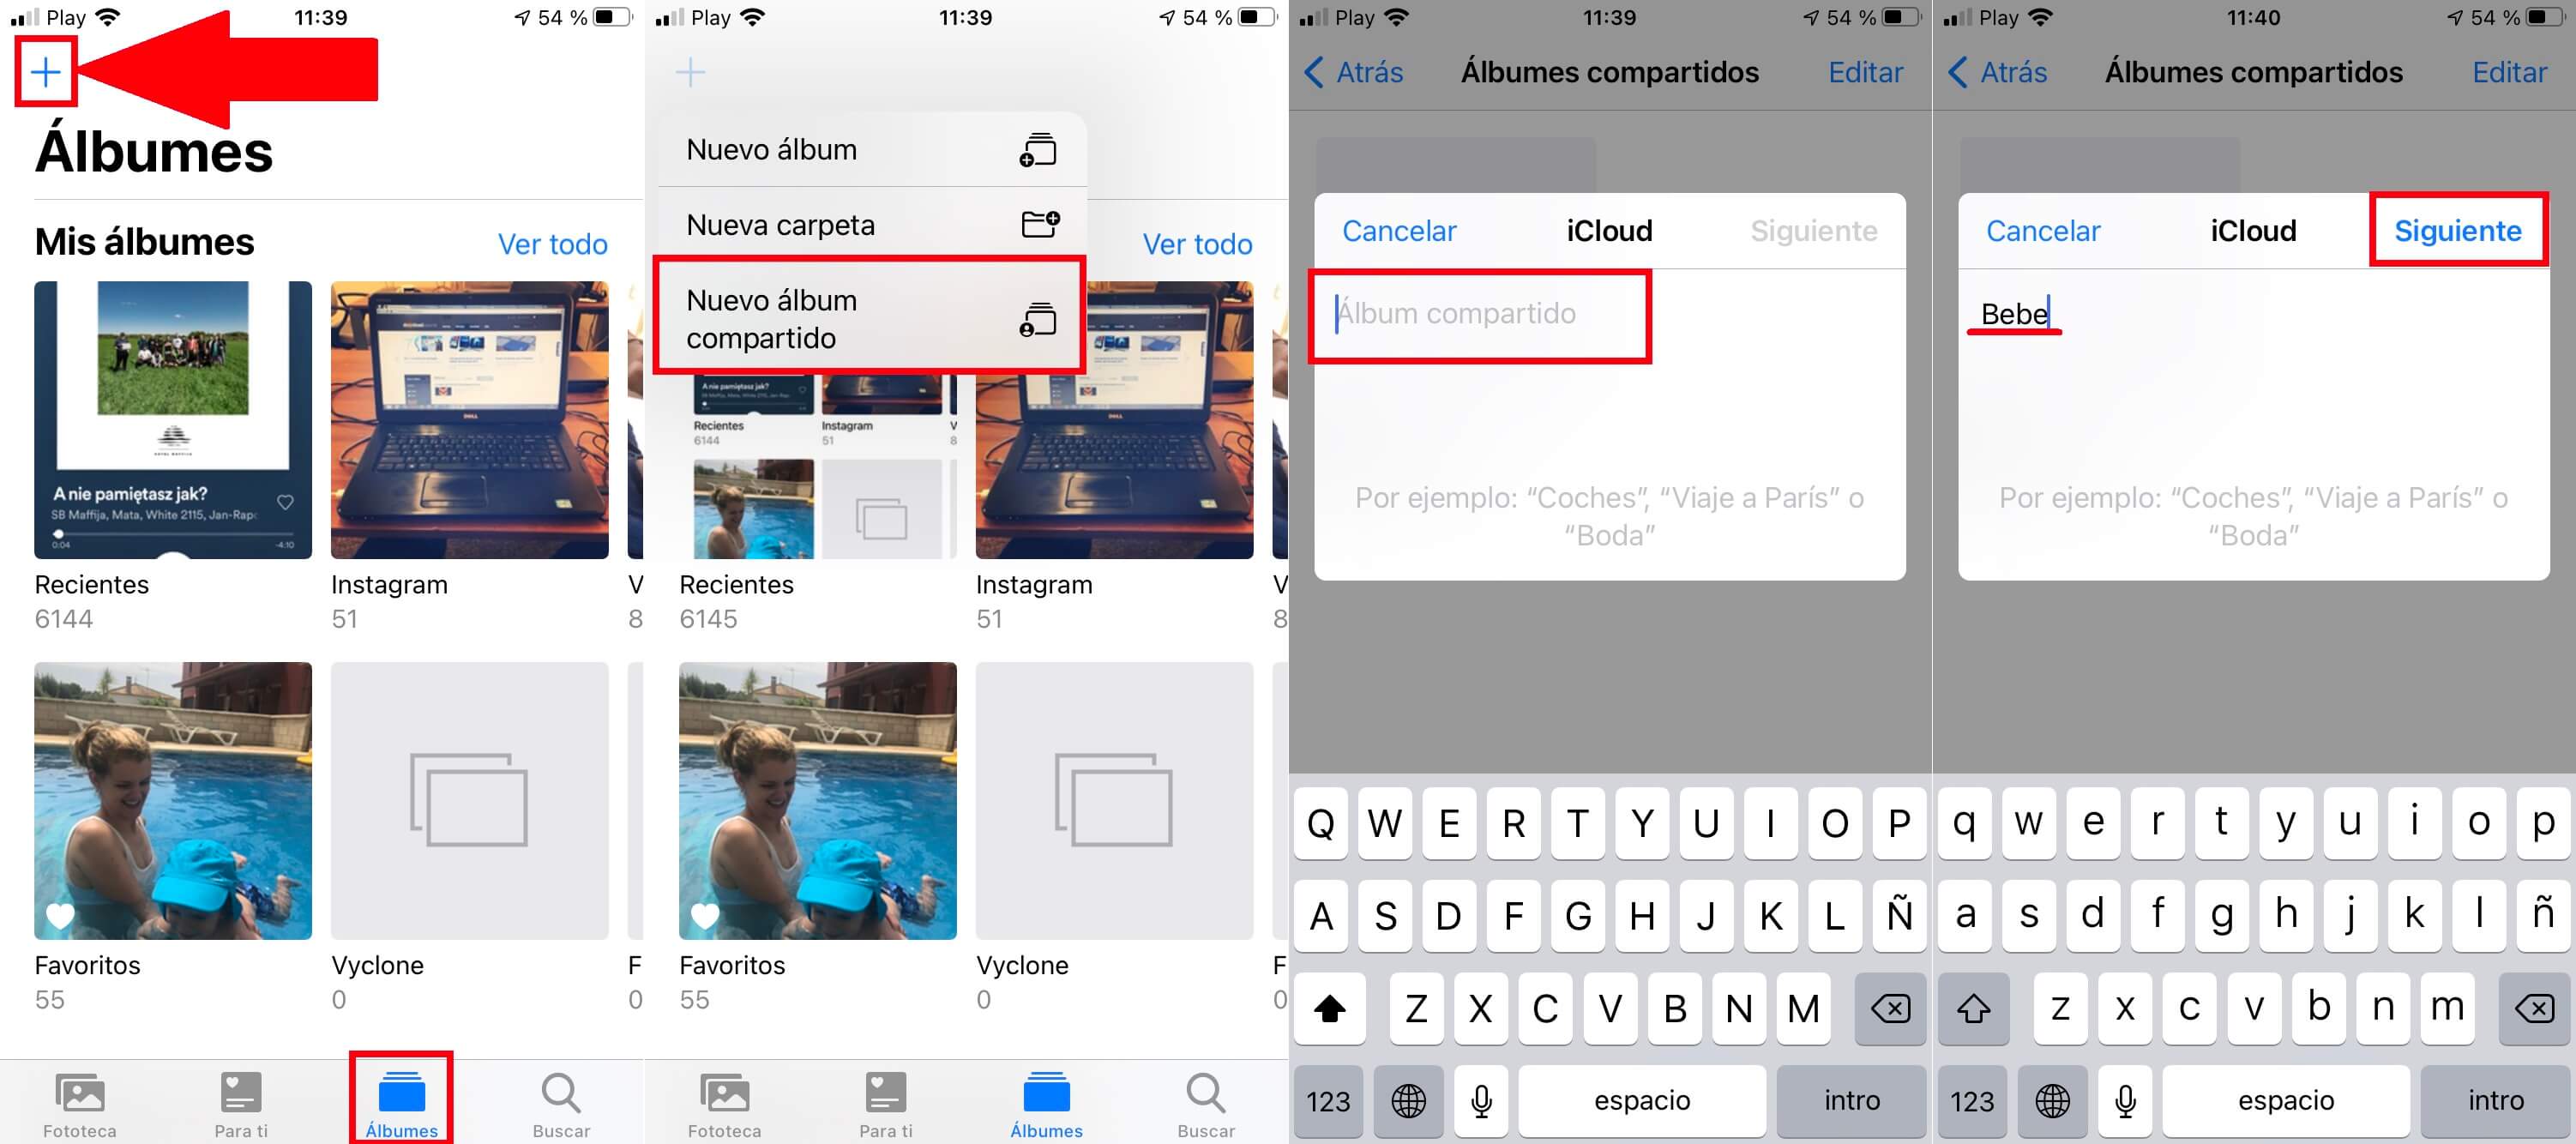
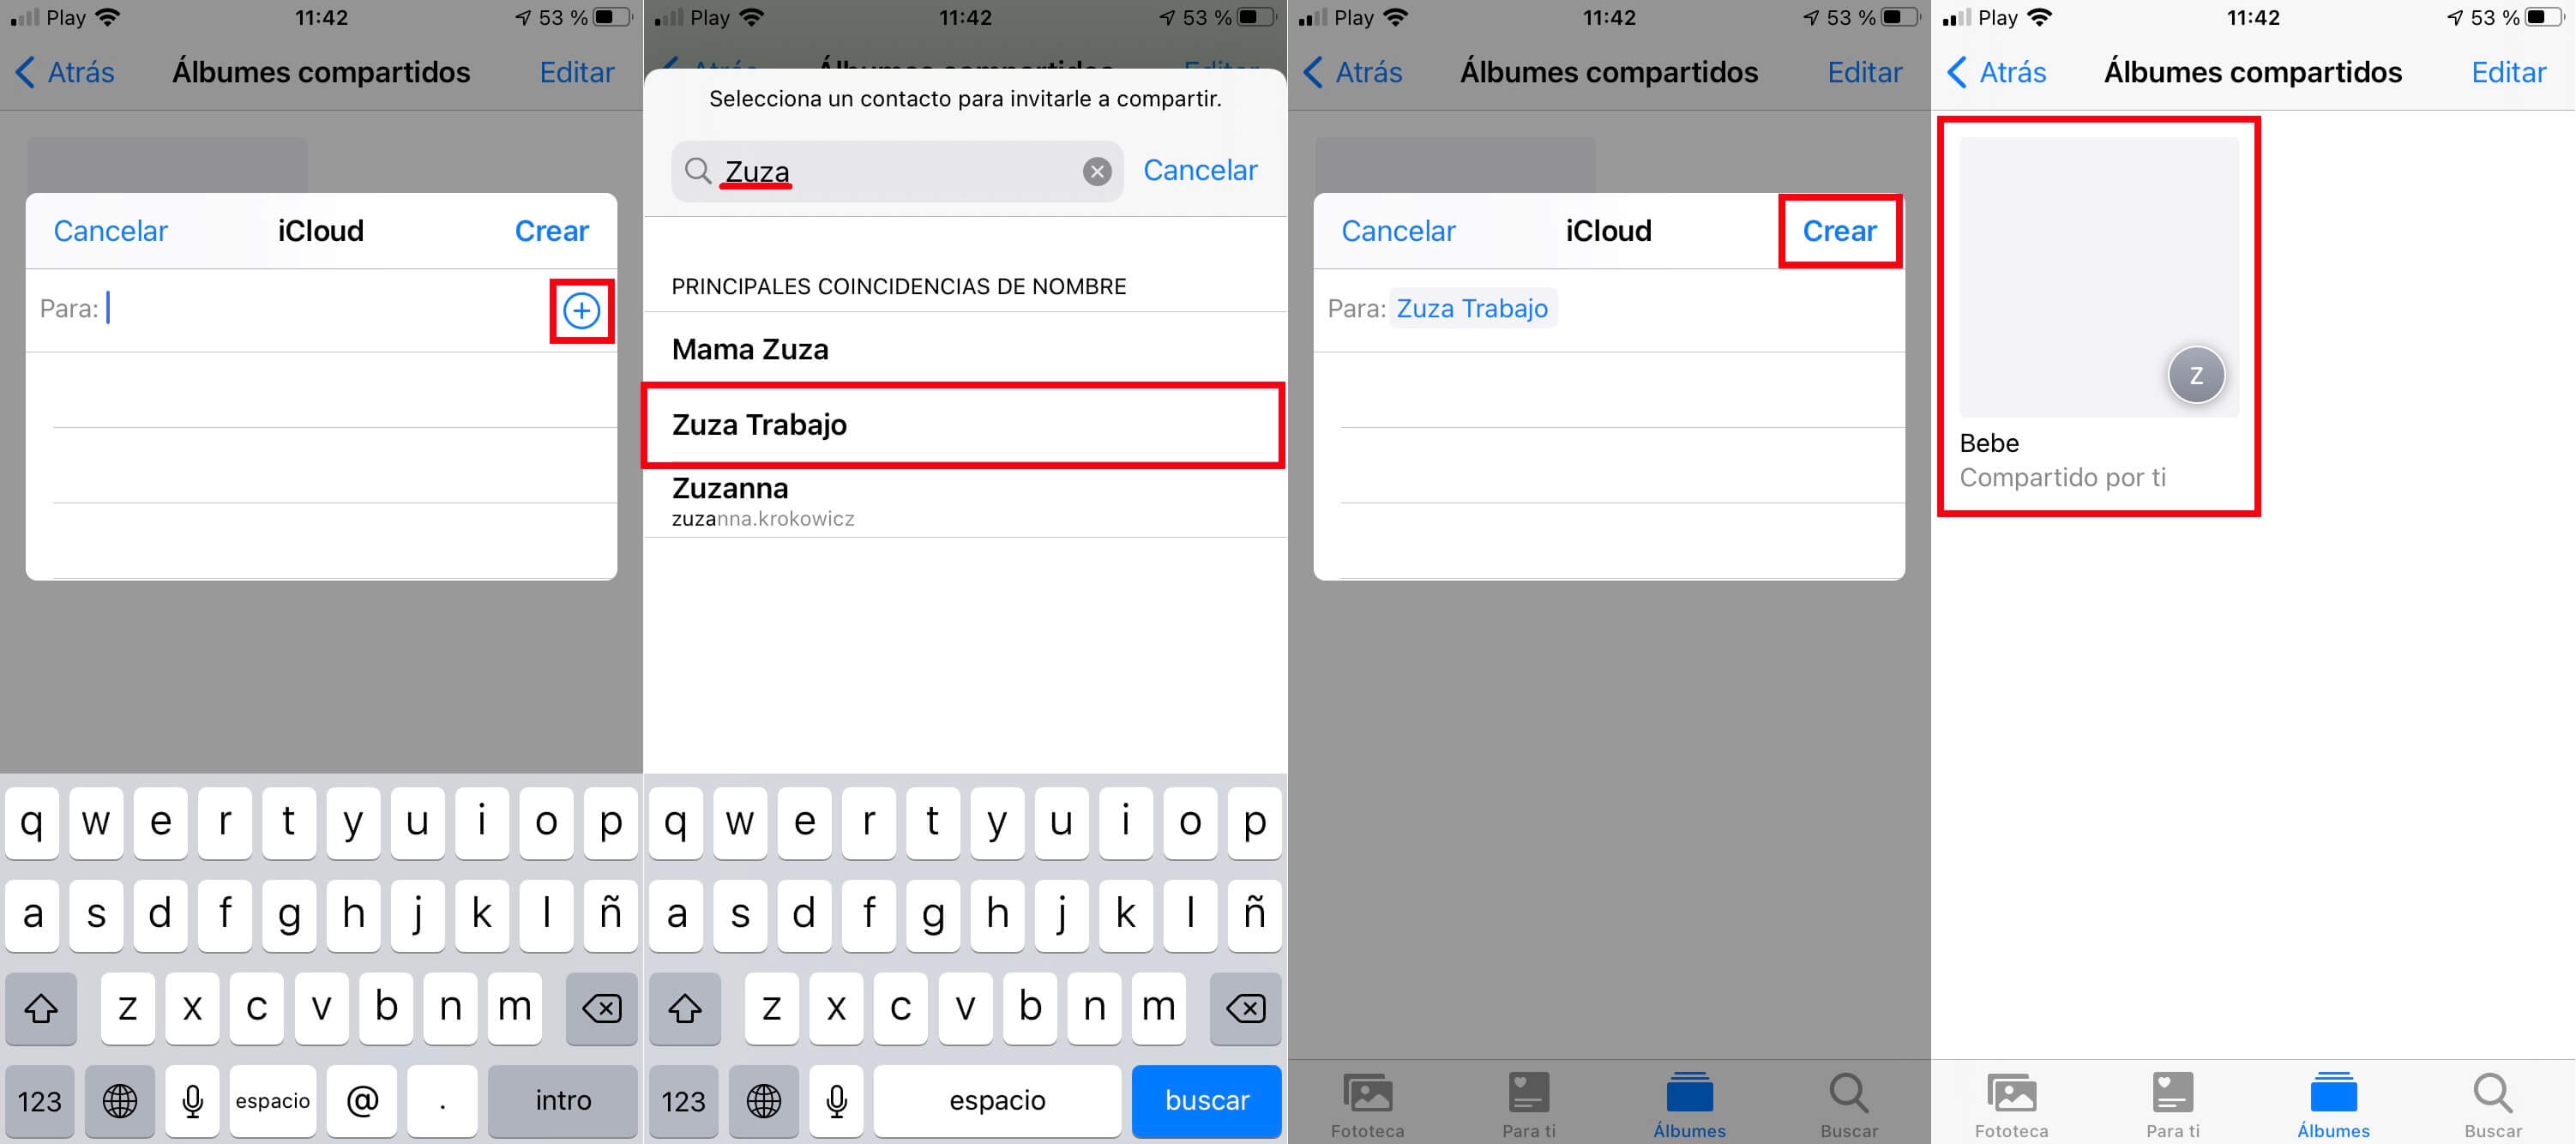
6. On the next screen you will have to start typing the name of the contact with whom you want to share the Album. You can also click on the + icon and select it from the contact list.
7. Finally click on Create and voila, the shared album will have been created.
How to add photos and videos to Shared Album on iPhone or iPad.
1. Open the Photos app and go to the Albums section.
2. Select the Shared Album just created.
3. Click on the + icon
4. Select the photos and videos that you want to be added to said Shared Album and that you will therefore share with other people who have access to them.
5. Once you have selected all the photos, tap: OK
6. In the small window when you are sure that you want to share the selected photos and videos you will have to click on: Publish.
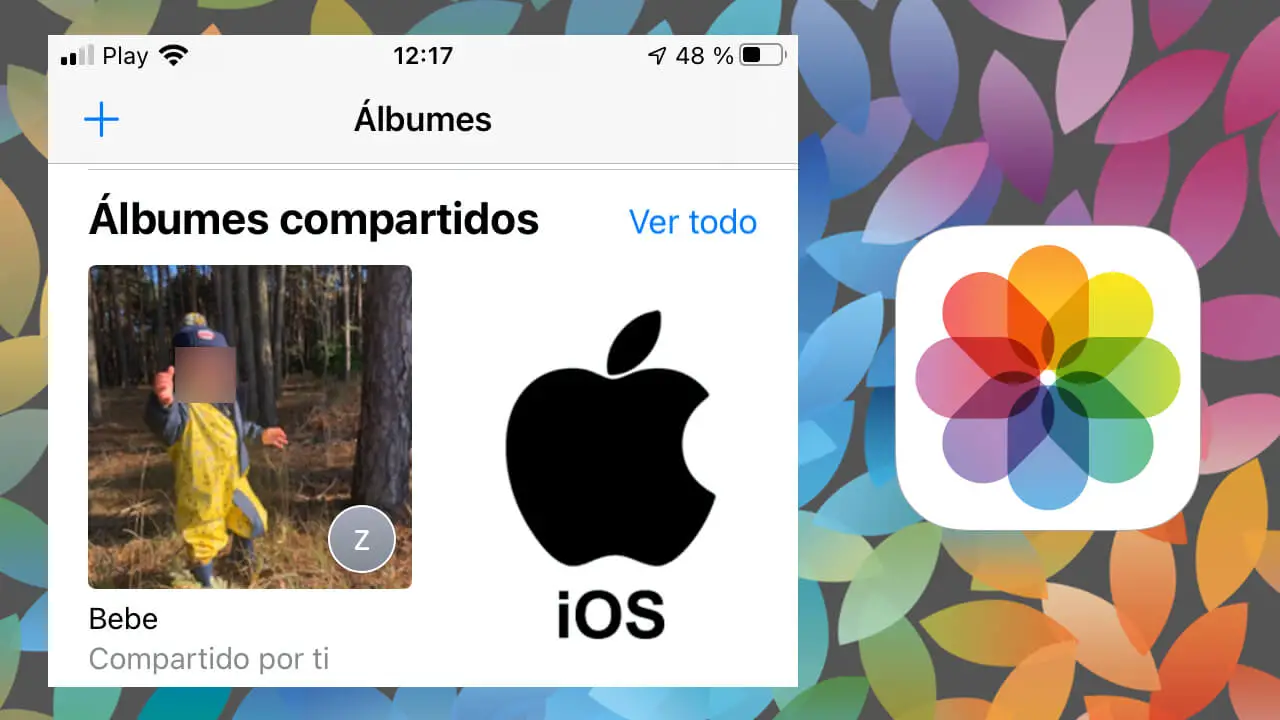
7. Now all the selected photos and videos will be available from the Shared Album, which means that all the users with whom you shared them also have access to these photos and videos.

How to delete photos and videos from a Shared Album.
1. From the same shared album, click on the option: Select
2. Now select the photos and videos from said album that you want to delete.
3. Click on the trash icon and confirm this action.
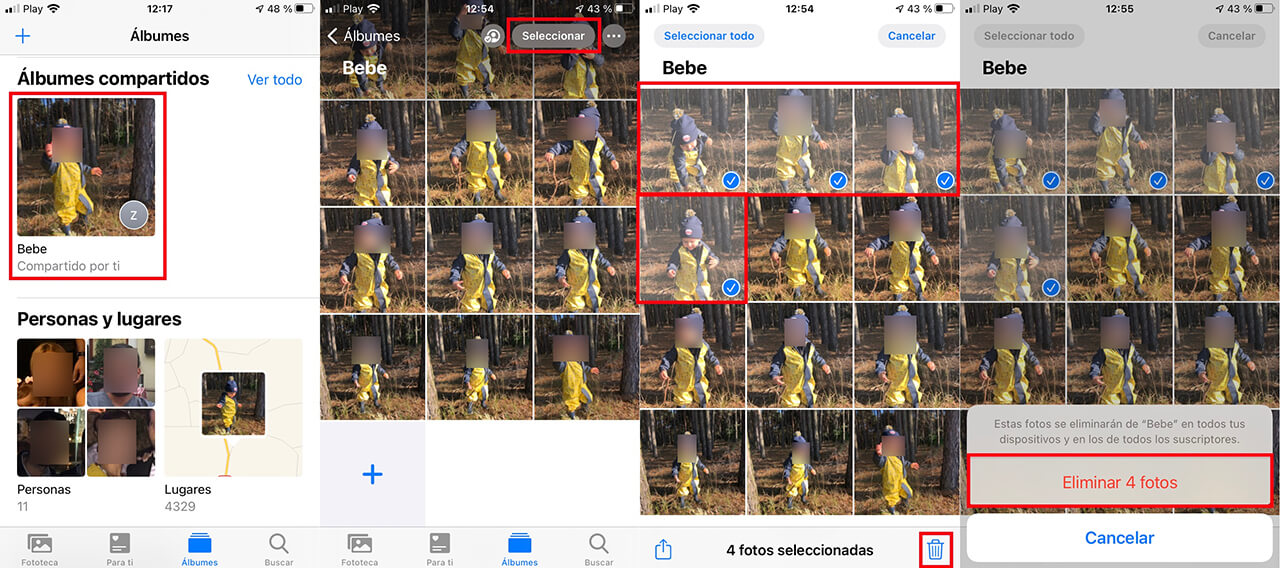
Note: when you delete photos from the share album, they are only deleted from that album. These photos and videos will still be available in your iPhone and iPad's photo library and can be added again later if you wish.
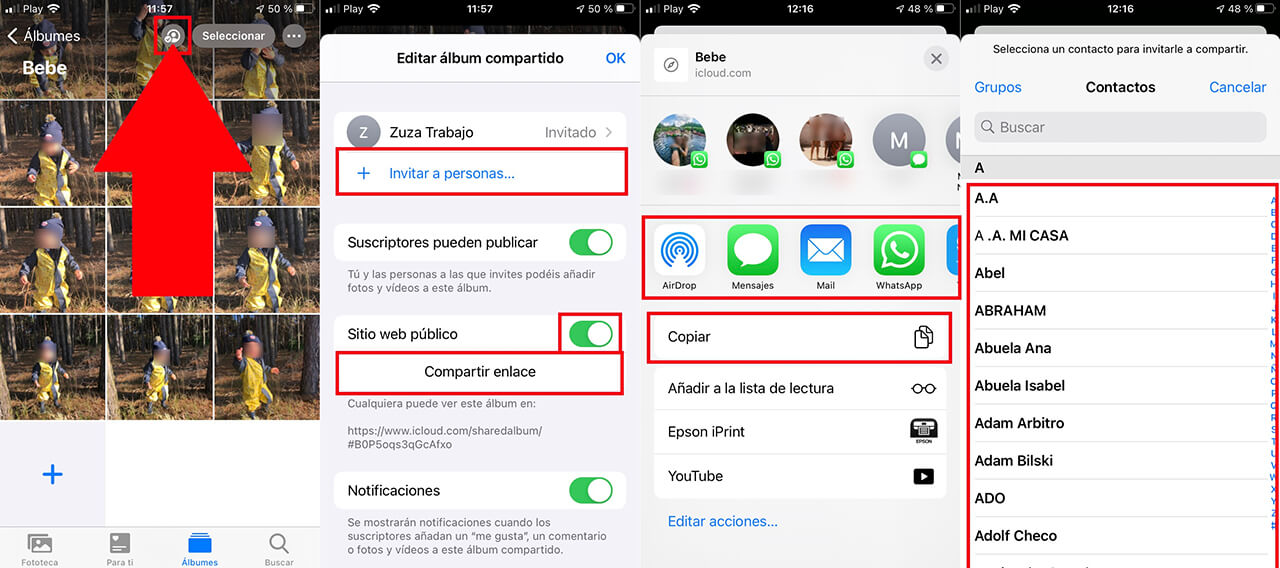
How to add more people to the Shared Album or share the Album via link.
1. Go to the shared album and from inside you will have to click on the icon in the form of a “bust”.
2. This will reveal a series of options from which you will have to activate the option switch: Public Website.
3. After several seconds a link will be displayed that we can copy and share with any other user so that in their Web browser they can access the photos in the Shared Album.
4. On the other hand, if you want to invite more people to your shared album, you can do so by clicking on the option: Invite people ...
5. From the next screen you will be able to select all the users that you want to be added to the shared album and therefore have access to the photos and videos inside.
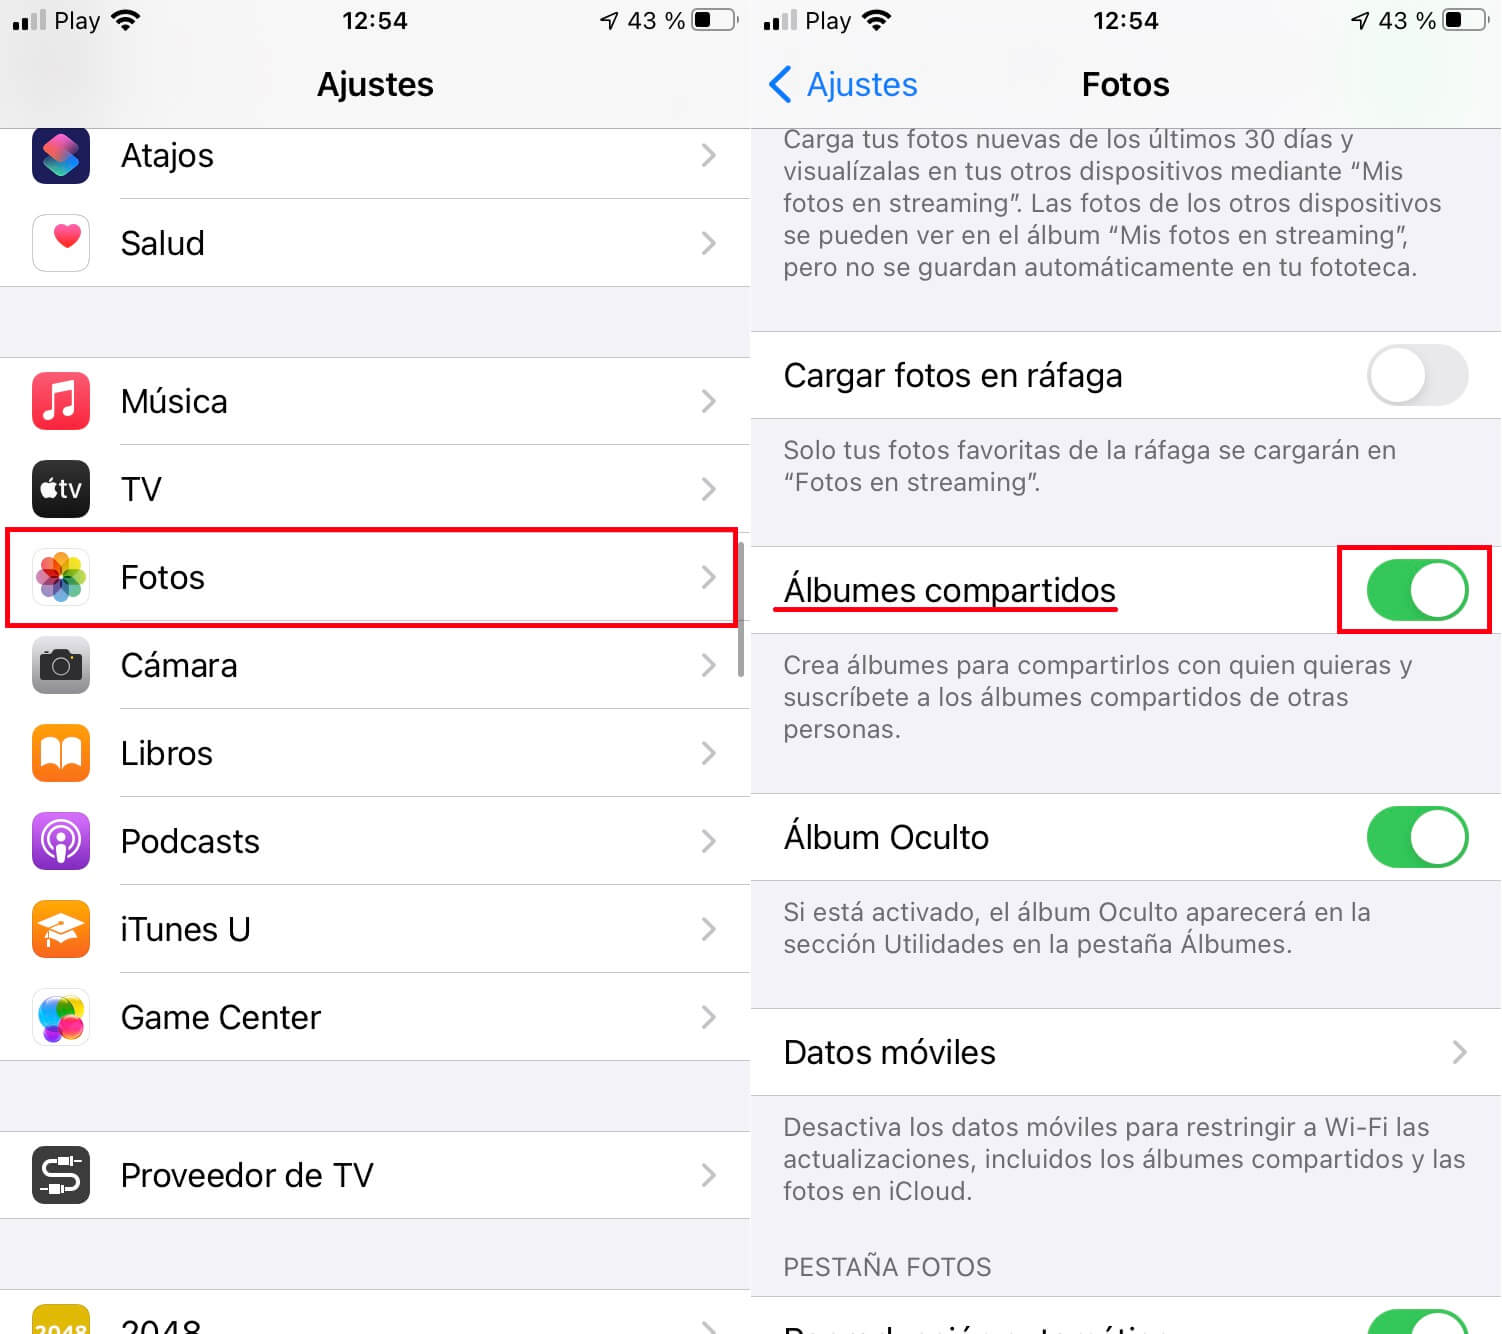
Shared Album option does not appear in Photos on iPhone or iPad
Important Note: All shared albums work with or without iCloud Photos and My Photos Stream. However, you will have to make sure that Shared Albums are activated, which you can do from: Settings> Photos> Shared Albums. Make sure that the option switch is activated otherwise, you will not have the option to create a shared album on your device.