Windows 10 has a default antivirus called Windows Defender. The truth is that this antivirus is really good and the best thing is that it consumes very few hardware resources on your PC. Windows Defender has a Protection History in which all the threats detected and the actions taken are shown. In addition, as of the Windows 10 update 18305, controlled access to folders blocks are included, In this Post we will show you how to manually delete the protection history in Windows Defender of Windows 10.
Related: How to Prevent Windows Defender From Deleting Files | Windows 10
If you use Windows 10's Windows Defender antivirus, this tool frequently scans your operating system for malicious software. In the event that these are detected, Windows Defender will take action on the matter and make a record of said threat, showing it in the Threat History. But in addition, Windows Defender will take actions to neutralize said threat and in the threat history you will also be able to see pending recommendations (marked by red or yellow colors depending on their severity)..
By default, Windows Defender typically deletes the threat history automatically every 30 days. However, users can delete the protection history manually or even prevent Windows Defender from deleting the threat history every 30 days.
Having said that, below we show you step by step 3 ways to delete Windows Defender threat history in Windows 10 operating system:
Delete Windows Defender Threat History using PowerShell.
1. Use the keyboard shortcut: Windows keyboard + X
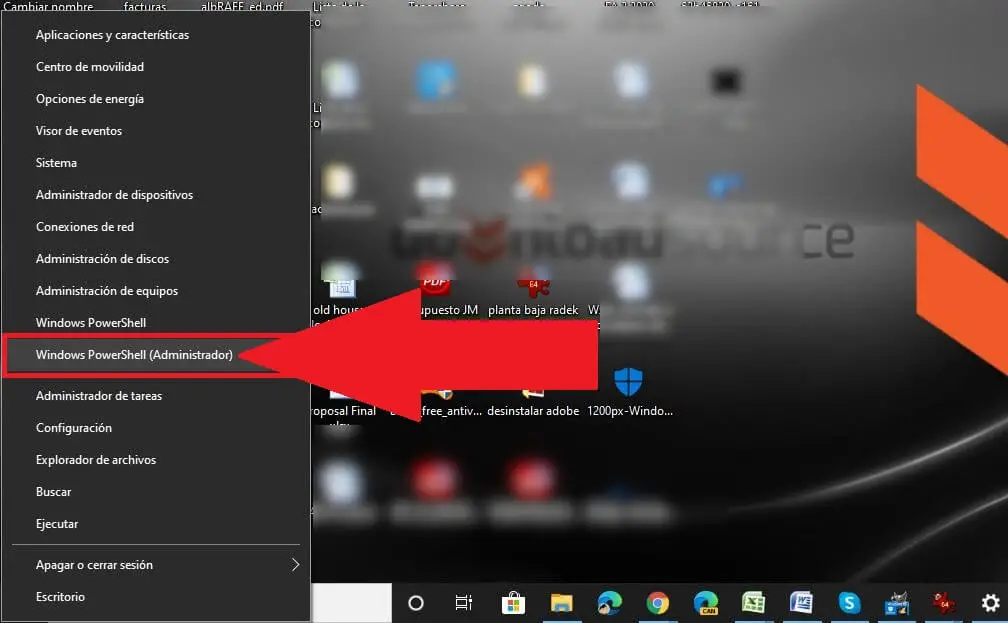
2. In the displayed menu you will have to select the option: PowerShell (Administrator)
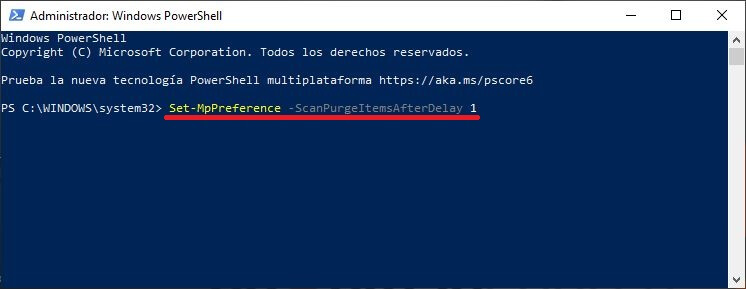
3. When the PowerShell interface is displayed , you must enter the following command and execute it by pressing the Enter key:
Set-MpPreference -ScanPurgeItemsAfterDelay 1
4. The number 1 specified at the end of the command, corresponds to the number of days that will pass until the Windows Defender protection history record is cleared as well as the items in the registry folder..
5. If you want the threat history to be deleted at a different frequency, you just have to replace the number 1 with the number of days after which you want the threat history to be deleted.
Delete Windows Defender Threat History using deleting Windows Defender Service folder from hard drive.
To manually clear the Windows Defender protection history, this method requires deleting the Services folder in the Windows Defender folder located on your local hard drive..
1. Use the keyboard shortcut: Windows key + R
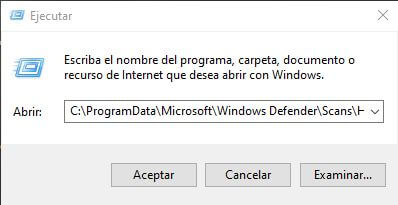
2. In the Run box, you must enter the following Path:
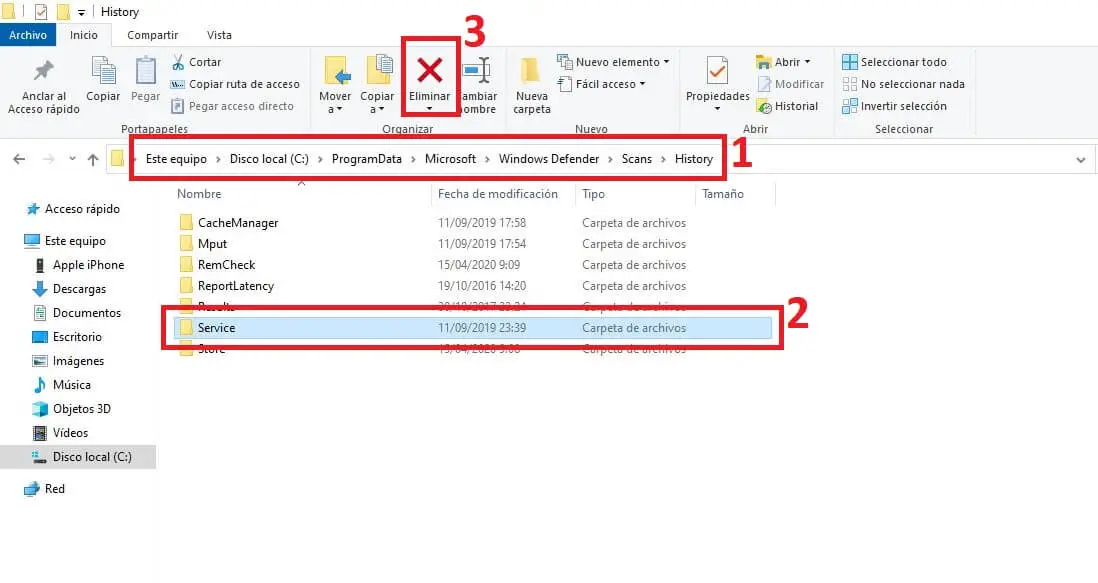
C: \ ProgramData \ Microsoft \ Windows Defender \ Scans \ History
3. Now, click with the right mouse button on the folder: Service
4. In the context menu you will have to select the option: Delete .
5. Close File Explorer.
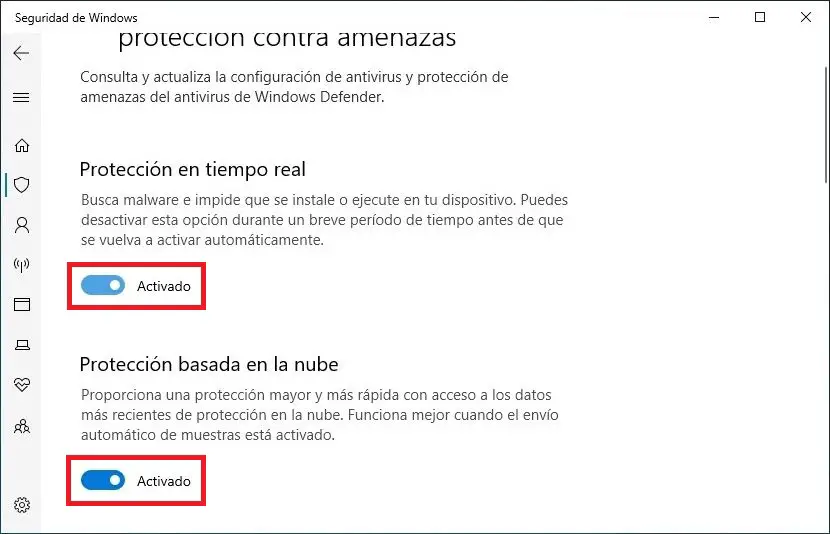
6. Next, go to: Windows Security> Virus and Threat Protection> Manage settings.
7. Here you will have to deactivate and reactivate the settings: Real-time protection and Cloud-based protection.
Delete Windows Defender Threat History Using Event Viewer
To manually clear the Windows Defender threat history using the Event Viewer (eventvwr), you will have to carry out the following steps:
1. Make use of the keyboard shortcut: Windows key + R
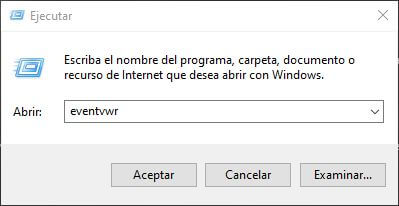
2. In the Run window you will have to enter the following command and then press Enter:
3. When the Event Viewer window opens, look in the left part of the window you will have to select: Applications and services logs.
4. Then expand the option: Microsoft .
5. Click on the “folder”: Windows .
6. In the central part of the window, scroll down until you find Windows Defender.
7. Click with the right mouse button on the Windows Defender option and in the context menu select the option: Open
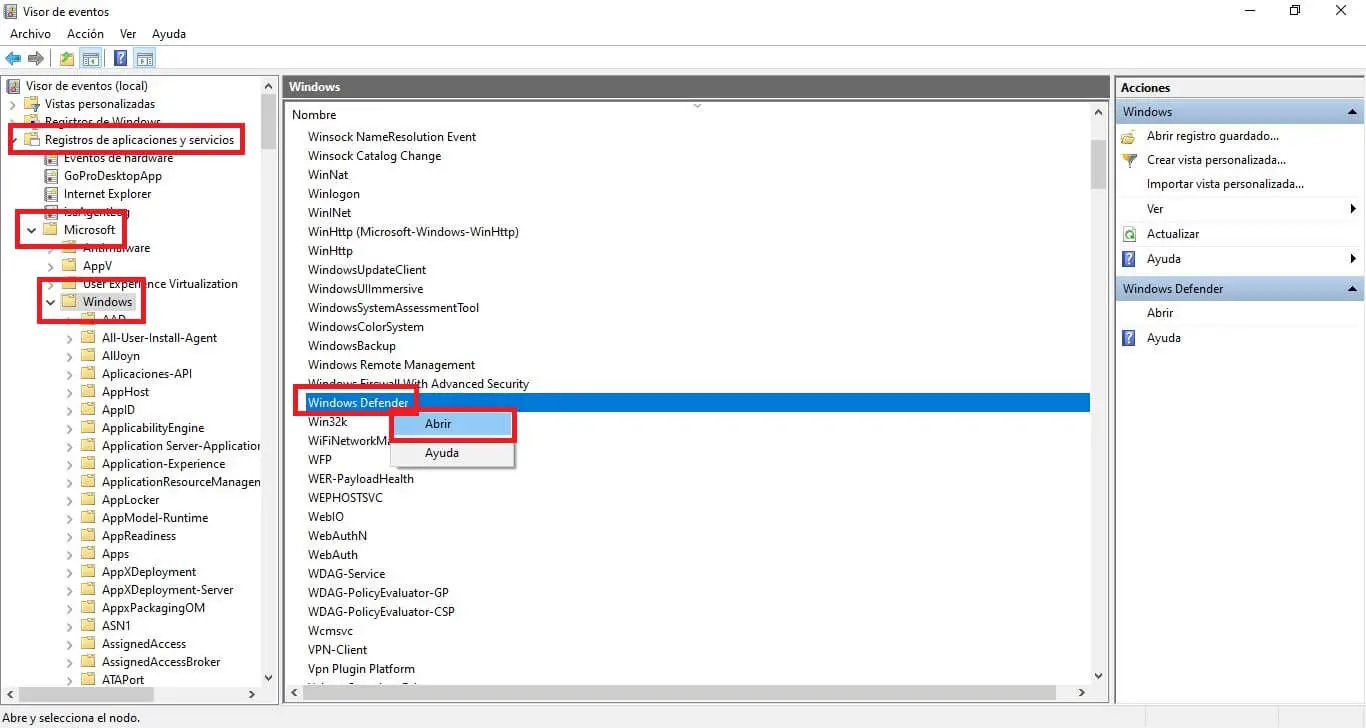
8. Right click on the file: Operational
9. In the menu you will have to select Open. This will show all the logs
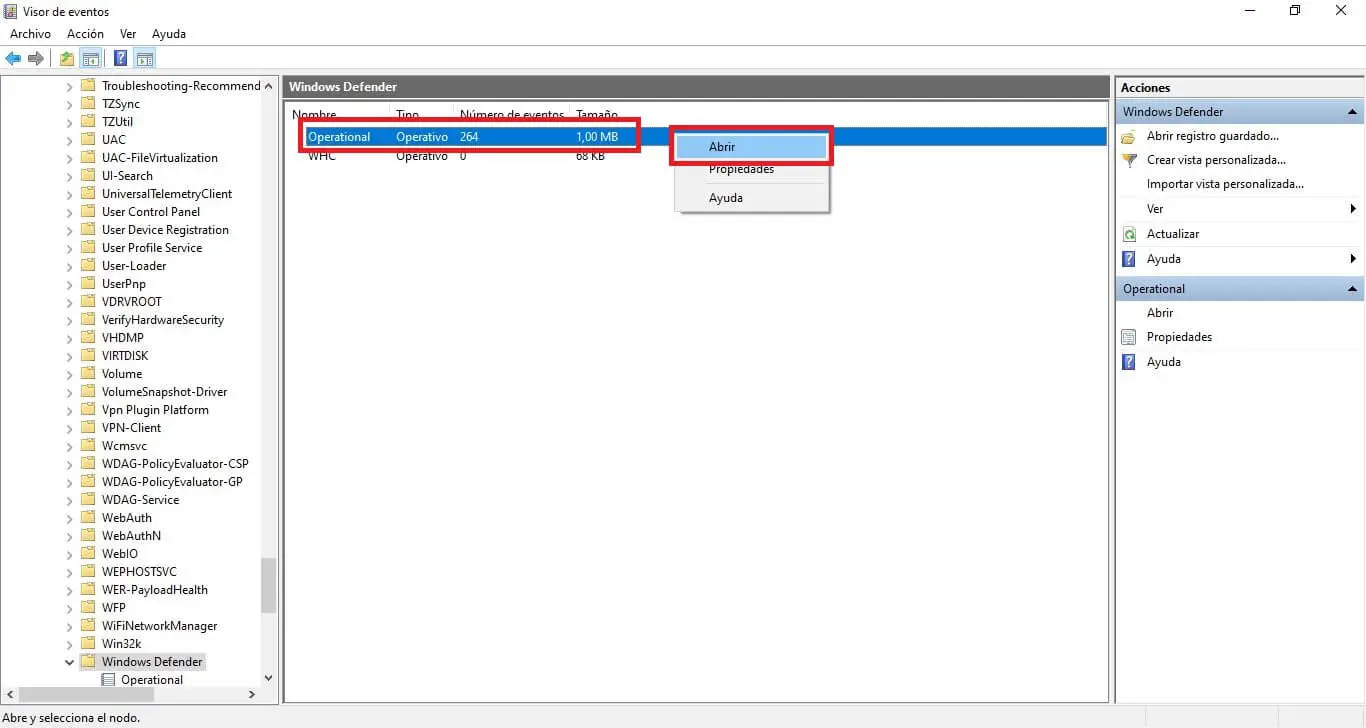
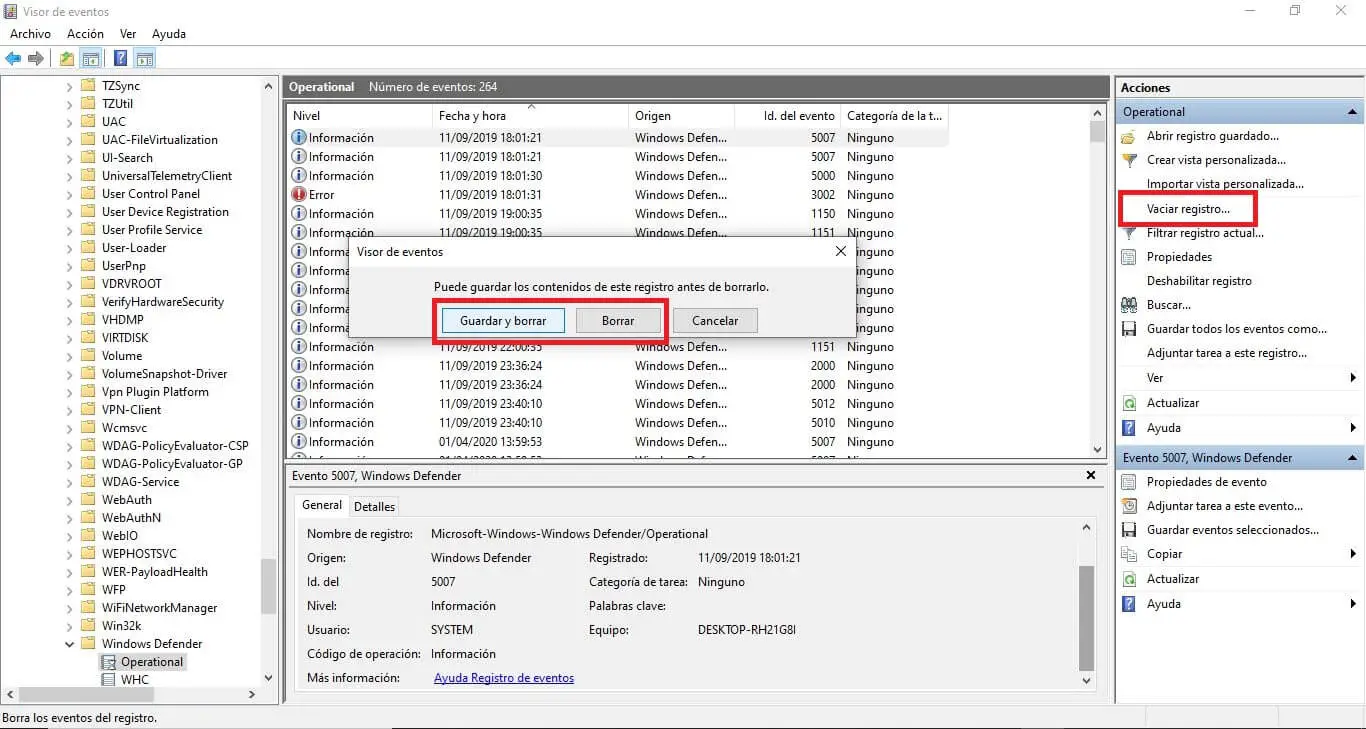
10. Now in the right menu of the screen we will have to select the option: Empty Registry ...
11. In the displayed window, you will have to select the option Delete or Save and Delete depending on your preference.
