One of the multimedia elements that has a superior impact on any presentation or file that we want to create or edit are the videos which we can configure in multiple formats such as .avi, .mp4, .wmv, etc., this based on the need and Project resources , regardless of this a video directly expresses an idea and is very clear to highlight concepts, approaches or techniques..
It is normal that when we are working on a project with videos , the insertion of not only a video but of two or more is required due to the quality or extension of the topic to be treated. In this case it can be annoying to insert each video separately not only for the space or errors that this may entail, but if we forget any of the videos this will result in an incomplete presentation. So the most feasible and useful solution is to unify these videos into one, this results in:
- The certainty that all the desired videos will be available
- A single video instead of multiple loose videos
- The whole presentation at a glance
- Better management of topics to show
Through this tutorial, TechnoWikis will explain how we can join two videos in Windows 10 thanks to its integrated tools without using any third-party program.
To keep up, remember to subscribe to our YouTube channel! SUBSCRIBE
1. What is Photos and how to install it on Windows 10
The updated Photos application in Windows 10 gives us the opportunity not only to view and edit our photos and videos, it also gives us the tools to create movies and albums using techniques and tools to remix these videos and thus automatically create a video from of the selected photos and videos.
At the video level, the topic that interests us today, we have a video editor that allows you to apply complete settings to the selected videos such as filters, text, camera movement, music and many more. In addition, if we wish, we have the option of applying 3D effects, such as butterflies, lasers, explosions and many more to give a greater visual impact to the presentation. If you do not have the Photos application in Windows 10, we can download it for free at the following link:
Windows 10 photos
Photo Features
Some of the features of this renewed application are:
- We can trim video clips and upload them to YouTube or other social applications.
- Draw on a photo or video and then share it as an animated reproduction of the selected drawing.
- Add 3D effects to videos.
- Edit each video project in order to edit parameters such as music, camera movement, text, filters or more available actions.
- It will be possible to remix an album to watch it as a video.
- Crop or rotate photos, adjust lighting and color and many more editing options.
- Photos is compatible with PC, mobile device, Xbox, Surface Hub and Holographic.
- Photos corrects red eyes and imperfections in the photos we select and many more features.
Step 1
In order to use the Photos application in Windows 10 we must have the Windows 10 Fall Creators version or higher, for this we can use the following key combination and execute the “winver” command to know the version of Windows 10 installed. Defined this we will see how to carry out this task in Windows 10.
+ R
![image]()
Note
For this process of unification of videos with the Photos application we must have Windows 10 version 1709 or higher.
2. How to join two videos in Windows 10 using the Photos application
Step 1
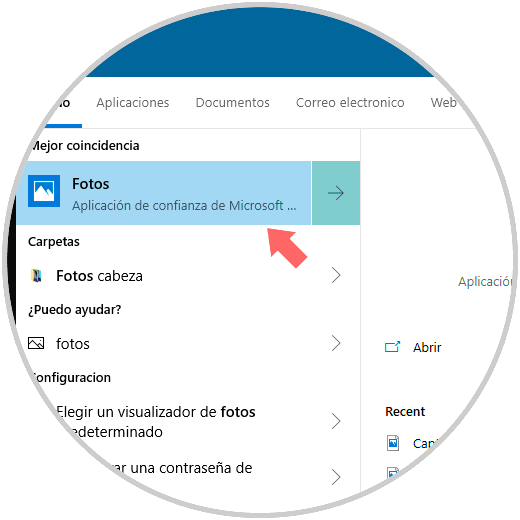
To access the Photos application we can go to the Windows 10 search box and enter the term "photos":
Step 2
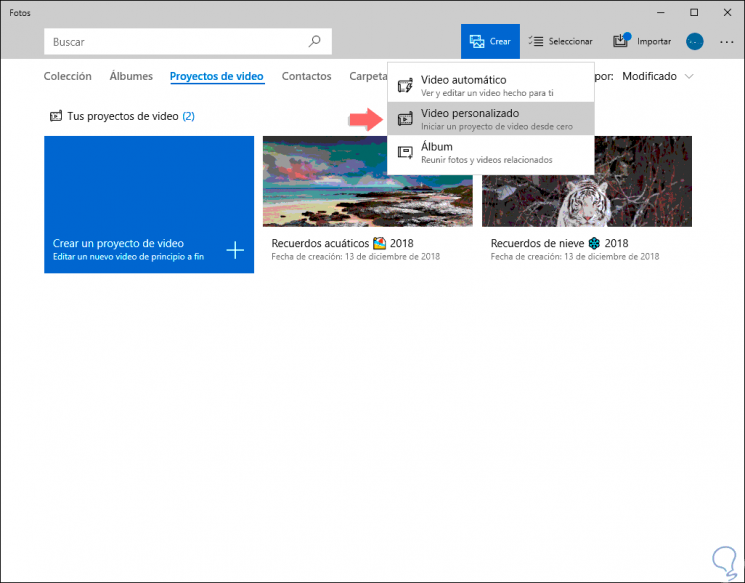
In the deployed application, click on the "Create" button located at the top and in the options displayed, select the "Custom Video" option:
Step 3
By selecting this option by default we will be redirected to the Windows 10 collection which offers us a series of videos already stored in the system:

Step 4
We can go to the "Folders" tab and there add a new folder where the videos to join:
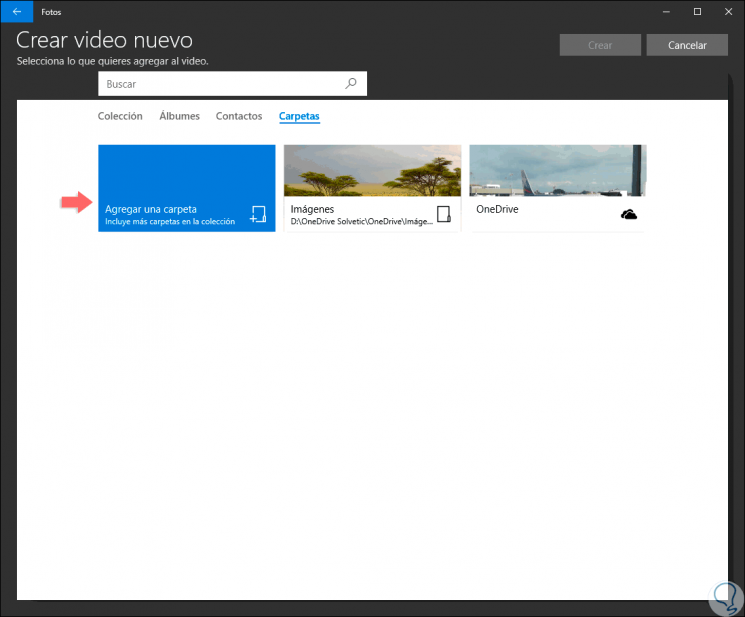
Step 5
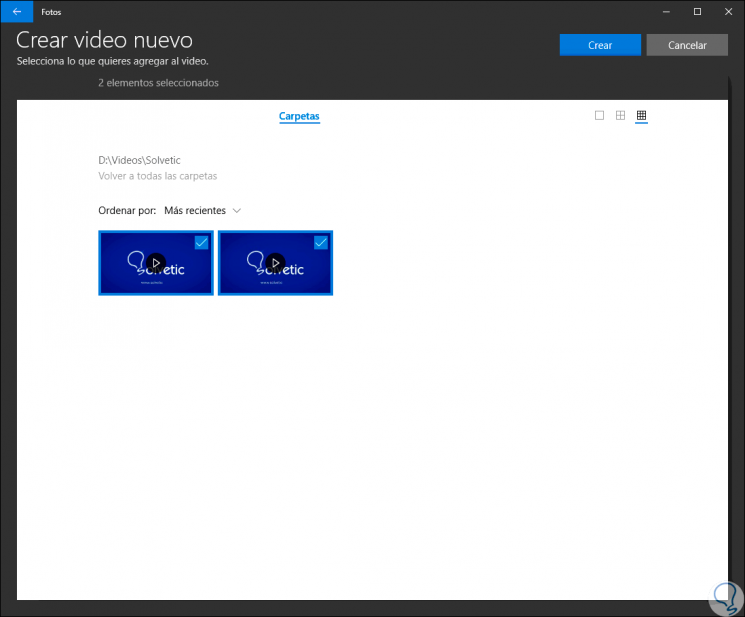
Click on “Add a folder” and in the pop-up window we will indicate the path of the folder to be added and then we click on the “Add folder” line and we will see the respective results of the videos hosted there and we must select the videos to join:
Step 6
Once these videos are selected, click on the “Create” button and the configuration process will begin:
![image]()
Step 7
Then we must name the video project:
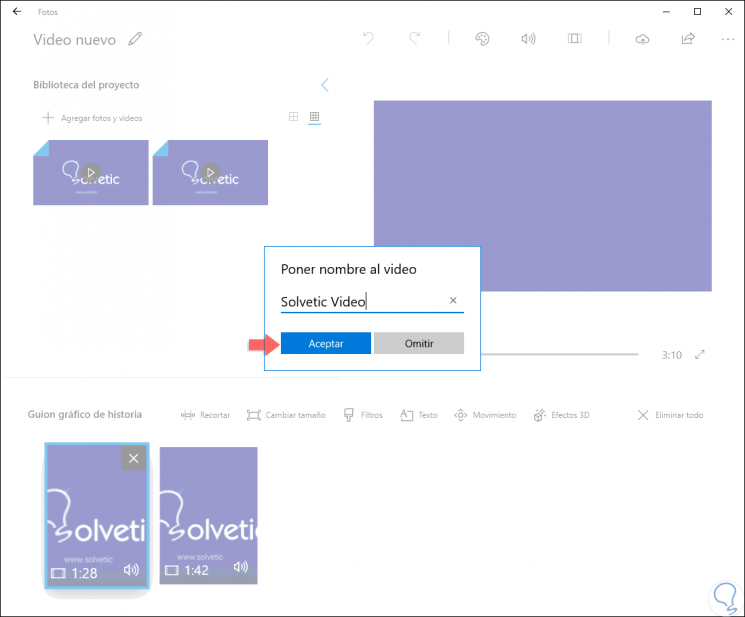
Step 8
Click OK once we assign the name and this will link us to the video editor integrated in the Windows 10 Photos application:

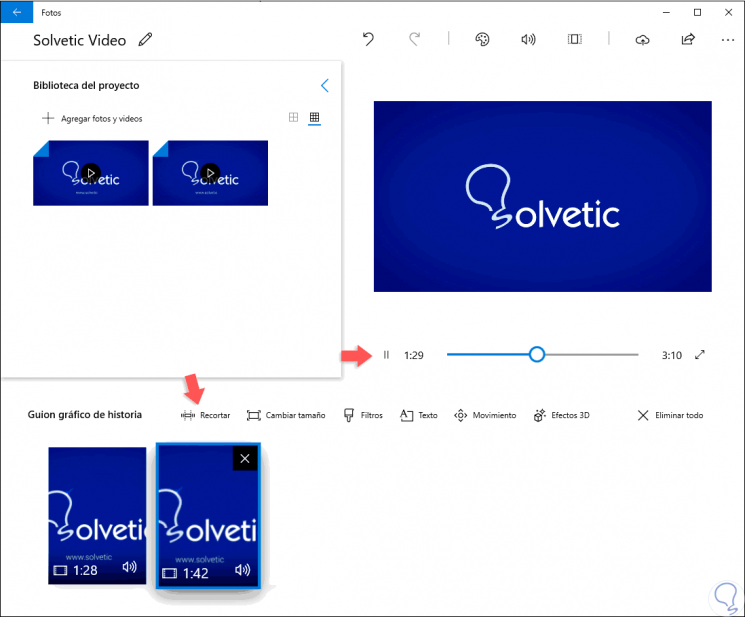
Step 9
As we can see the options for editing are varied and at the bottom we see the duration of each of the videos we have selected. In the upper right panel we observe that the time of both videos is (3:10) and we can click on the playback icon to verify that both videos are played in one:
Step 10
There we have some customization options such as:
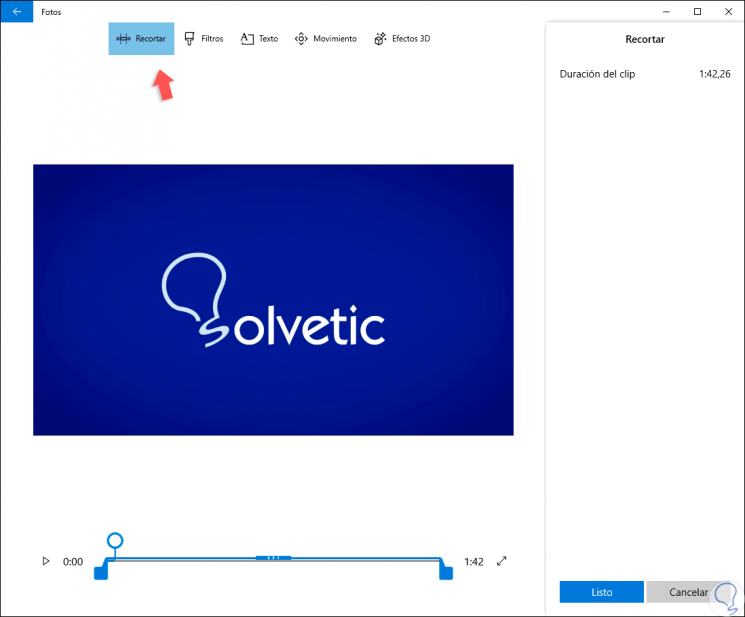
Trim
This option allows us to trim the video in case we want to reduce its length. For this we select the video and in the lower bar we set the start and end time of it:
Change the size
This option gives us the possibility to adjust the size of the videos or remove the black bars if they exist in the selected videos:

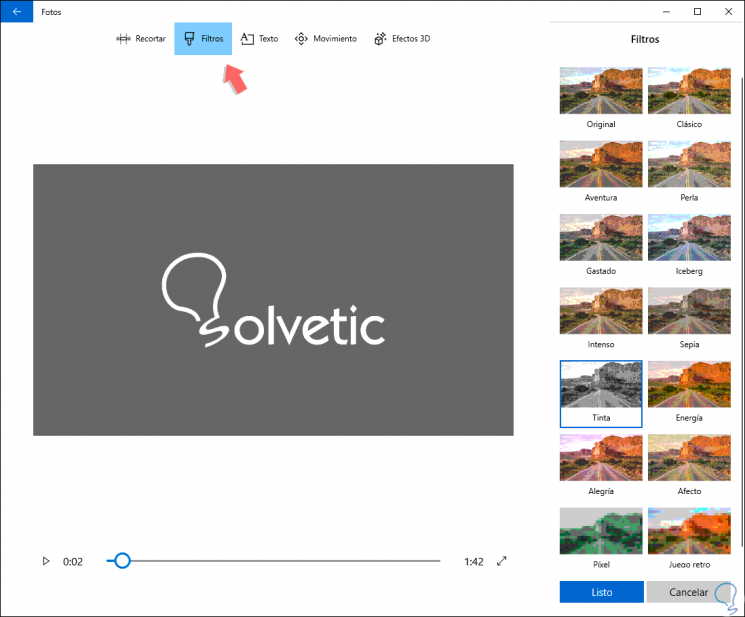
Filters
It is one of the most useful options since we have more than 12 alternatives to apply effects to our video. When we define some style, click on the "Done" button.
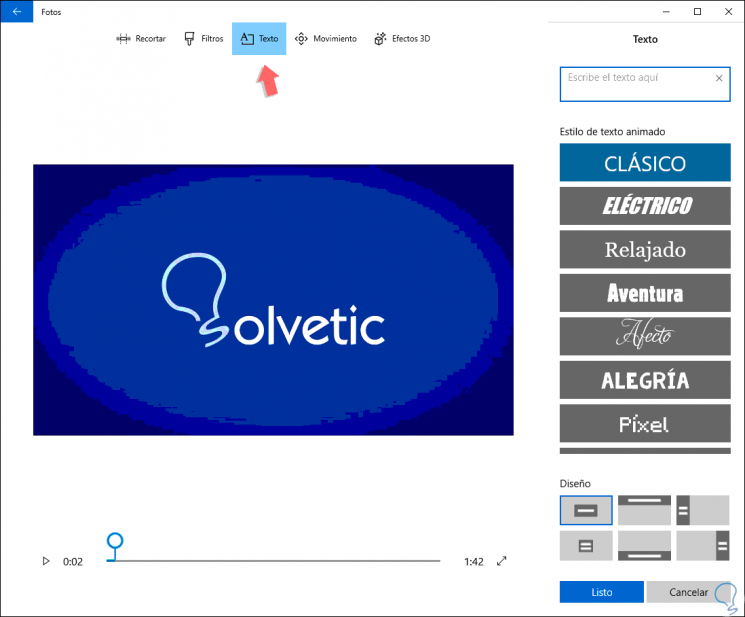
Text
Through this option we can make use of any of the available styles to add text to the selected video:
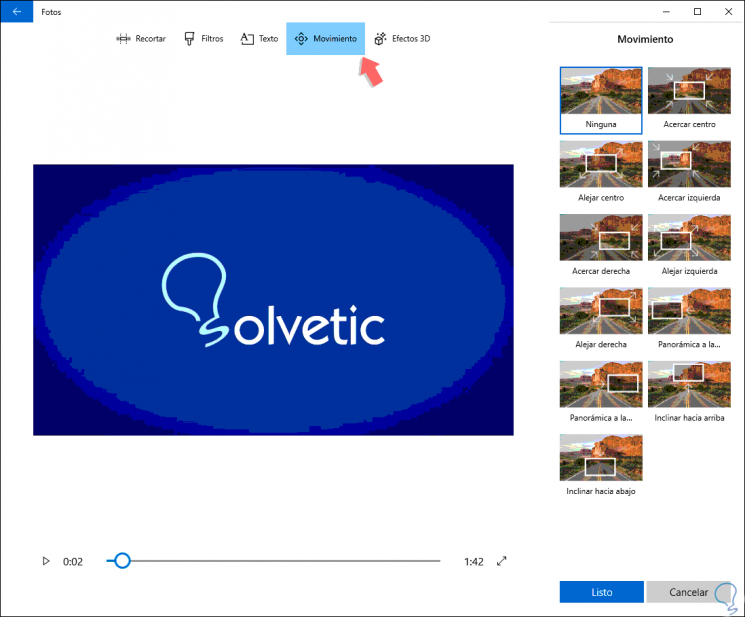
Movement
As the name implies, this option offers us a range of options to define how the video will move at the appearance level:
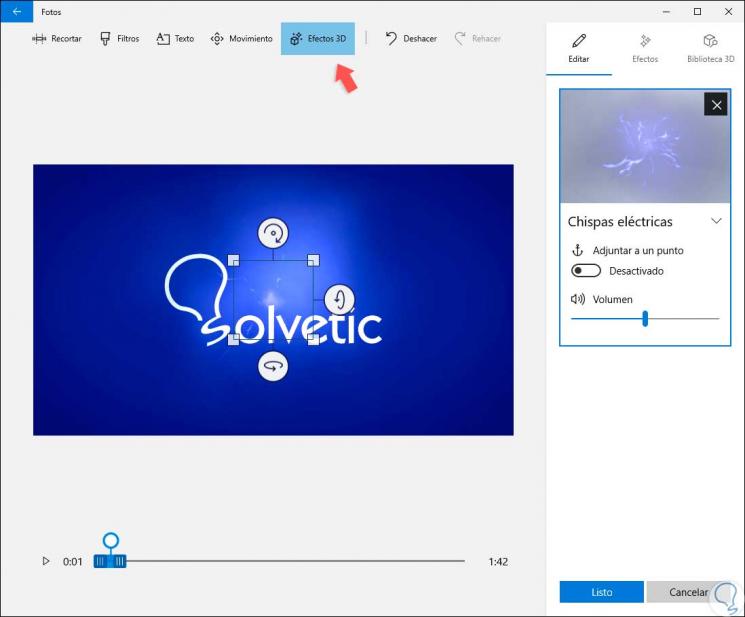
3D effect
It is one of the most striking options of Photos since here we have the opportunity to apply multiple effects on the video to cause a superior visual impact:
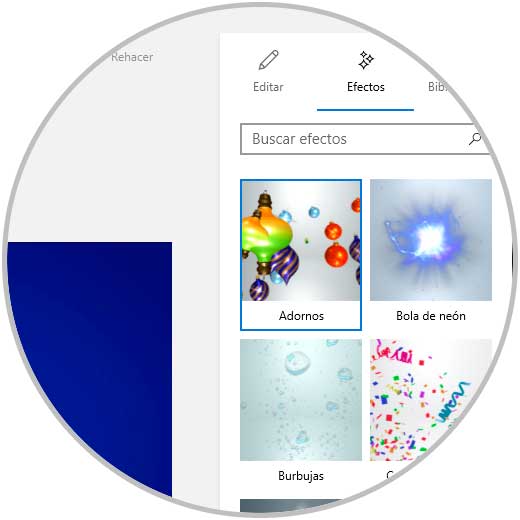
Step 11
We have more than 10 options to select:
Step 12
At the top we find options such as:
- Save the video to OneDrive
Step 13
In this case, click on the “Export” button and the following will be displayed:
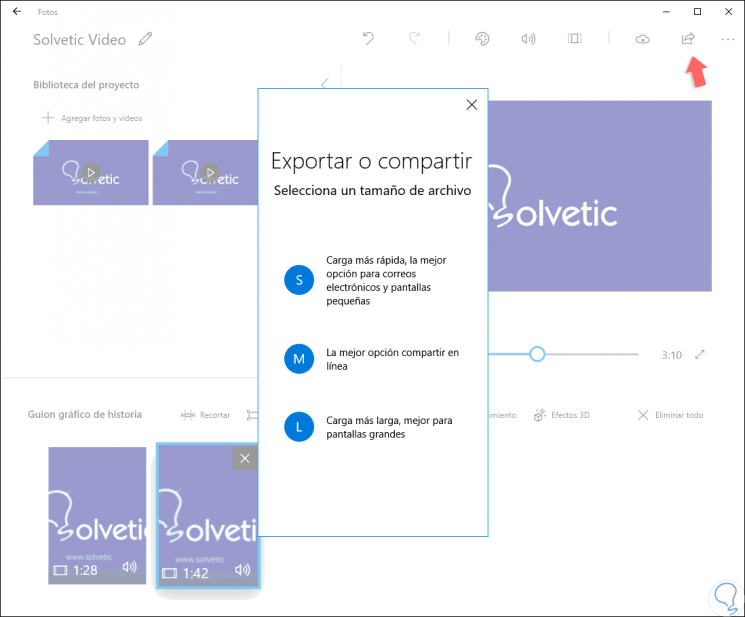
Step 14
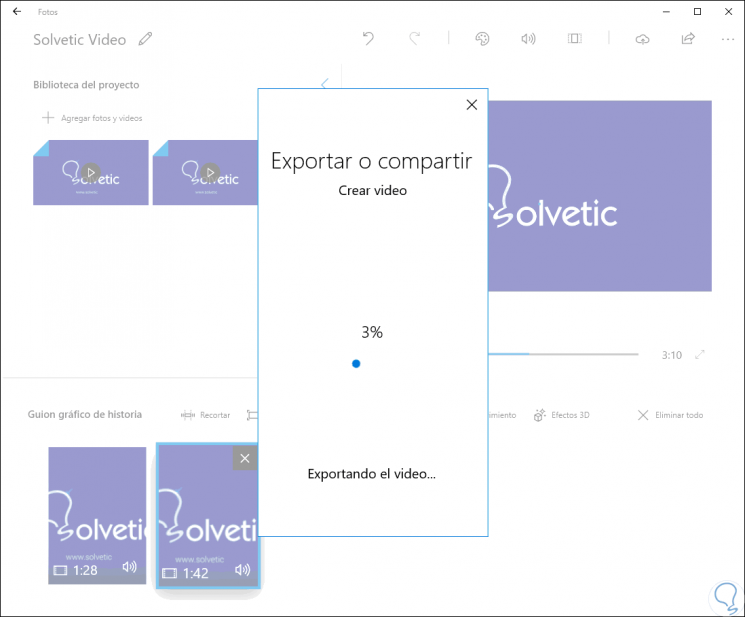
As we can see, we have the option to select the most appropriate way to save the video, these options are based on the current need for recording, in this case we will select “Longest load” to obtain the best technical aspects of the video and it will be given Start to the recording process:
Step 15
Once the process is finished we will see the following information:
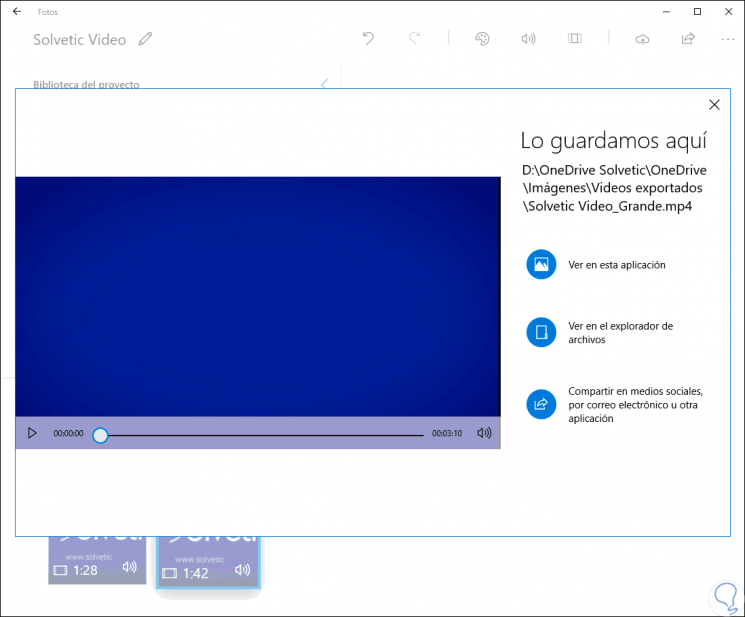
Step 16
There we can go directly to the folder where it has been saved, open it directly with the Photos application or share it on the network, we can use the option “View in this application” to verify that the video has a duration of 3:10 (both videos) and that plays continuously:

Thanks to the Photos application it will be possible to join our videos and have multiple configuration options to highlight the features of this..