Virtualization is one of the most useful technologies that we have today administrators, users of IT support and all those who want to explore everything new from an operating system or an application without jeopardizing your real information or the configuration of your team..
Thanks to virtualization we have the possibility of creating hundreds of virtual environments where it will be possible to perform tasks such as:
- Implement new operating systems in the testing phase.
- Understand the behavior of an application or program in a system.
- Perform tests of multiple configurations to know what impact they can have on a real environment.
- Run penetration tests at the security level and more.
One of the most useful and complete platforms since for more than two years it has been responsible for developing various solutions focused on providing its users with secure, reliable, dynamic platforms with great configuration options. VMware has created several products for all types of work areas, but the whole theme of virtualization is the basis.
Therefore we have features such as:
High performance 3D graphics
Since the VMware Workstation suite is compatible with DirectX 10 and OpenGL 3.3 which results in a much more realistic and better performance experience when running 3D applications.
Active snapshots
Which allow us to create a backup point which will be possible to access at any time (similar to the restore point in Windows systems), which gives us the confidence that, if something fails in the work on the virtual machine, it will be possible recover a normal operating state. In addition, with these snapshots, we can test various scenarios without requiring the installation of various operating systems.
Compatible with high resolution screens
Because VMware is optimized to support high resolution 4K UHD screens (3840x2160) and QHD + screens (3200x1800) available on x86 tablets and laptops.
Cross compatibility
Which is a function that allows us to create virtual machines of Linux or Windows systems which can be executed in other VMware products.
Integrated Security Options
How to create a restricted access to virtual machines which restricts access to the configuration of virtual machines to perform actions such as drag and drop, copy and paste or link connections to USB devices.
We will be able to create virtual machines in bulk whose configuration integrates up to 16 vCPU, 8 TB virtual disks and 64 GB of memory which will allow you to run demanding desktop applications or mount a server that works with hundreds of active roles.
Shared virtual machines
Which allows us to share and analyze applications in a simulated production environment.
Virtualization-based security (VBS) has been added
For virtual machines that use Windows 10 and Windows Server 2016 or Windows Server 2019
Compatible
With the support of Guest VBS and Virtual TPM.
VMware is compatible with Trusted Platform Module 2.0
Which can be used with advanced security or encryption technologies like the traditional BitLocker
VMware can be run on the following operating systems
- Ubuntu 16.04 / 17.04 / 18.04 / 18.10 / 19.04
- Red Hat Enterprise Linux 6.9 / 7.3 / 7.4 / 8.0
The free version of VMware can be downloaded at the following link:
VMware
TechnoWikis will explain how to install Ubuntu 19.04 , which is the version that will come out soon, in the month of April 2019, for server and desktop environments
In Ubuntu 19.04 we have some functions and features such as
- Perl has been updated to Perl 5.28.
- New usr directory configuration which is integrated by default in the new installations of Ubuntu 19.04.
- Native JavaScript implementation of the KDE Connect protocol.
- Steam available as Snap application
- OpenSSL will only be with version 1.1.1 LTS
The Ubuntu 19.04 ISO image can be downloaded from the following link:
Ubuntu 19.04
Once we have VMware installed on our computer and the image of Ubuntu 19.04 has been downloaded, we can begin the process of installing Ubuntu 19.04 on VMware..
VMware offers two installation methods which we will explain in detail through this tutorial since the goal of TechnoWikis is that we all have clear the various options available.
1. How to install Ubuntu 19.04 using the ISO image initially
This process involves selecting the ISO image that we downloaded during the installation process, we will explain what we mean by it.
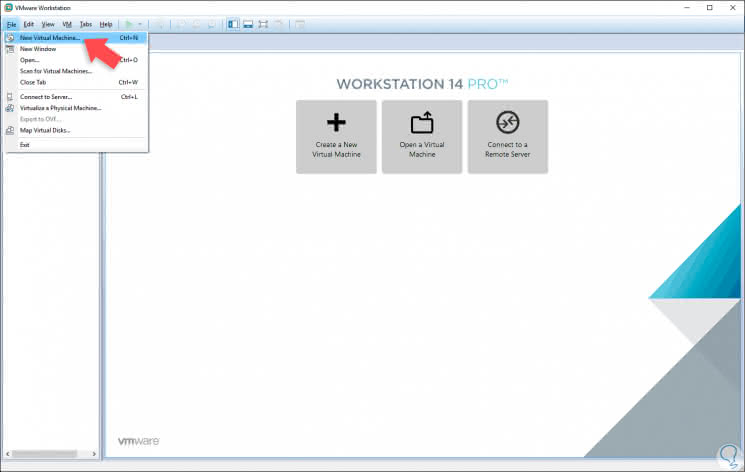
Step 1
To start we will create our virtual machine using one of the following options:
Option 1
From the File / New Virtual Machine menu
Option 2
Using the key combination:
+ N Ctrl + N
Option 3
By clicking on the Create a New Virtual Machine button in the central panel
Step 2
The following window will be displayed. There we have the opportunity to select the type of configuration to use, if we choose to use the Custom (advanced) option, it will be possible to define an aspect that can be vital in slightly older equipment such as hardware compatibility. In case this is not necessary to configure it, we can leave the option "Typical"
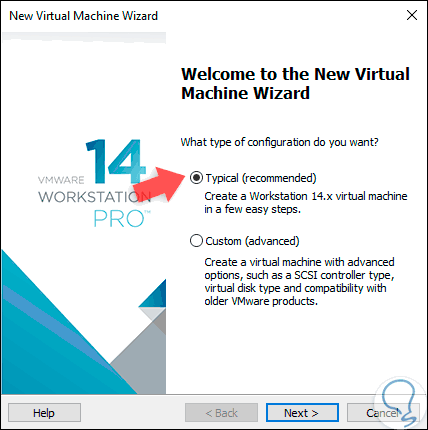
Click on "Next" to continue the process..
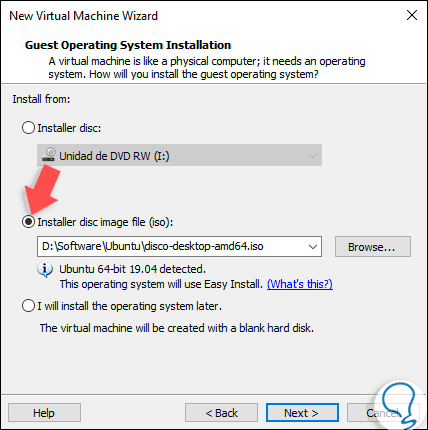
Step 3
In the next window we will use the method of this first point and it is to activate the "Installer disc image file (iso)" box to select the ISO image that we have downloaded from Ubuntu 19.04. Note that VMware automatically detects that the ISO image is from Ubuntu 19.04, it will also be possible to use a physical disk (Installer disc) or install the system later which will be the other analysis point of TechnoWikis. Once we select the ISO image, click on "Next".
Step 4
Now we find the difference in using the ISO selection method during creation, this is because VMware told us to enter the user data and system password directly. Click on "Next"
![image]()
Step 5
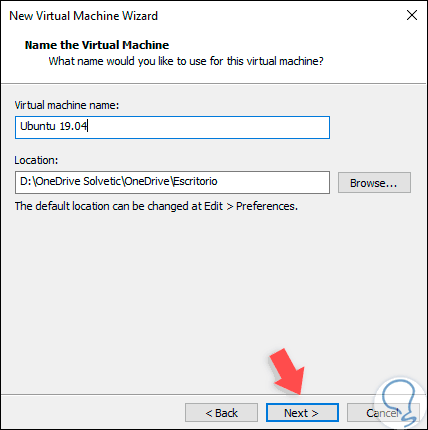
Now we define the name of the virtual machine and the route where it will be hosted locally. Click on "Next" again.
Step 6
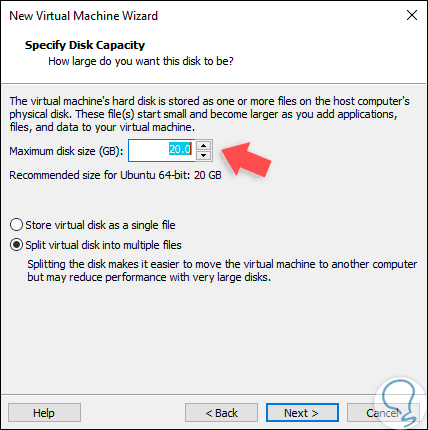
Now we define the size of the hard disk and its type of management:
Step 8
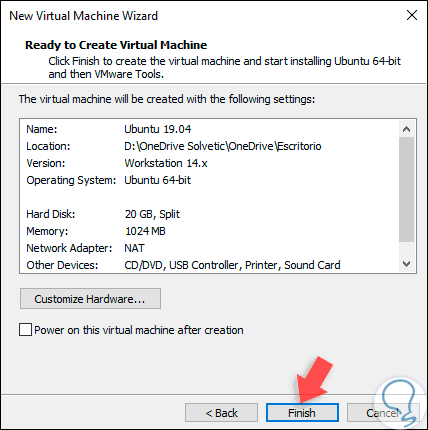
In the next window we find a summary of the virtual machine to create. There we can directly access the machine configuration, but we will see this globally later. There we click on "Finish" to complete the process.
Step 9
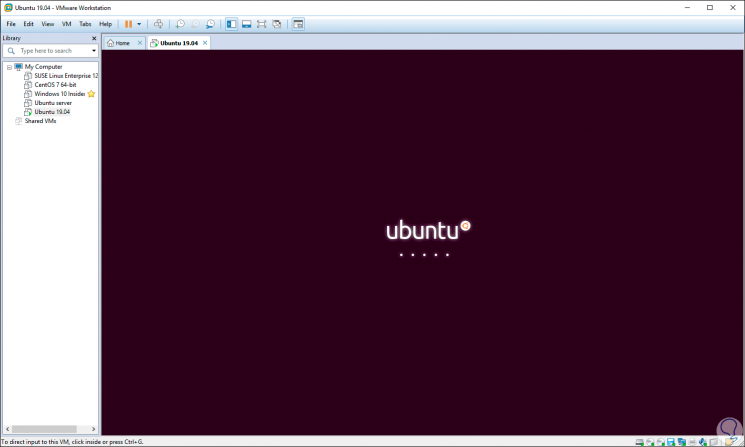
We will see our virtual machine created.

Step 10
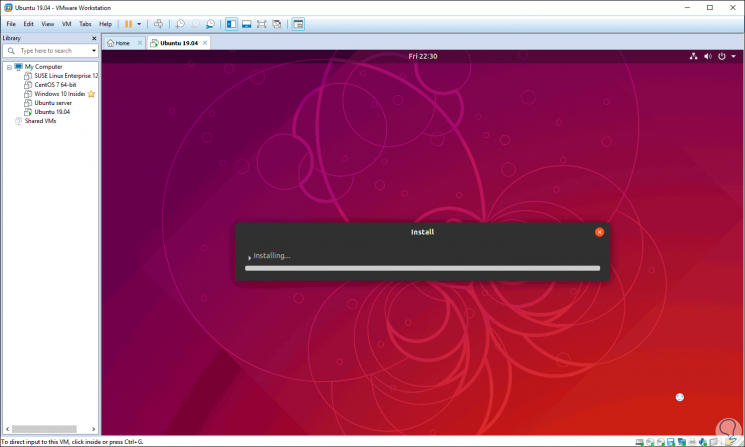
Run the machine by pressing the Power on this virtual machine button and we will see that the boot process starts:
Step 11
By using this ISO method directly we will immediately jump to the Ubuntu 19.04 installation process:

Login Join up!