Windows 10 is an operating system that has been developed with numerous services and processes so that each of its functions and features work properly, and many of these services are closely related to the time zone configured in the system . In addition to this, many applications and programs base their results, especially those that are of use in HR or in financial matters, in the time zone of the system so that if this is incorrect, erroneous results can be generated..
By default the operating system will detect the time zone based on our location , but if we travel to a different place, where the time zone changes dramatically, it will be necessary to know how to adjust the system time zone to that new region and thus know that We are performing the tasks correctly. It is for this reason that in this tutorial TechnoWikis will explain various ways to adjust the time zone in Windows 10 step by step.
To keep up, remember to subscribe to our YouTube channel! SUBSCRIBE
1. How to adjust time zone through Settings in Windows 10
The "Configuration" utility, integrated in Windows 10, is a central point from where it will be possible to manage various operating system parameters facilitating administration tasks, from there we can automatically adjust the time zone based on our new location.
Step 1
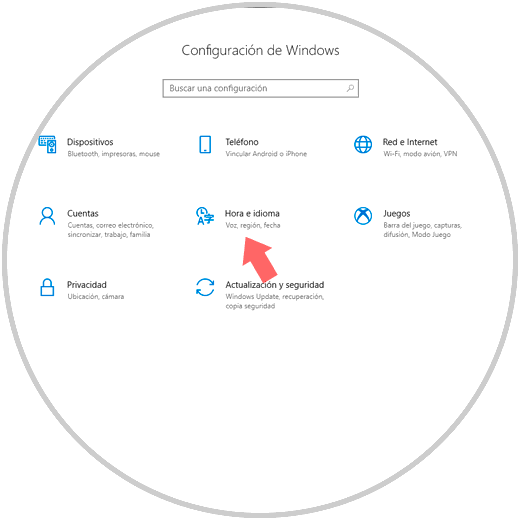
To achieve this, we go to the "Start" menu and there we click on the "Settings" utility and the following will be displayed. There we click on the "Time and language" category.
Step 2
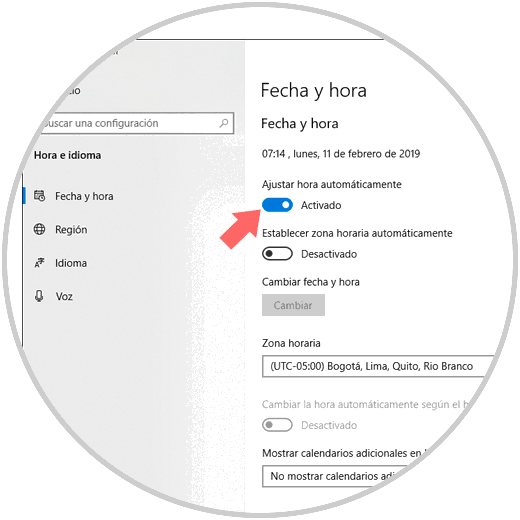
In the next window we go to the "Date and time" section and there we must activate the "Set time automatically" switch. This configuration will detect our geographic location and assign the time zone based on it.
2. How to adjust the time zone manually in Windows 10
This option allows us to manually select the time zone that we want to set in the system and applies when automatic detection does not work ideally.
Step 1
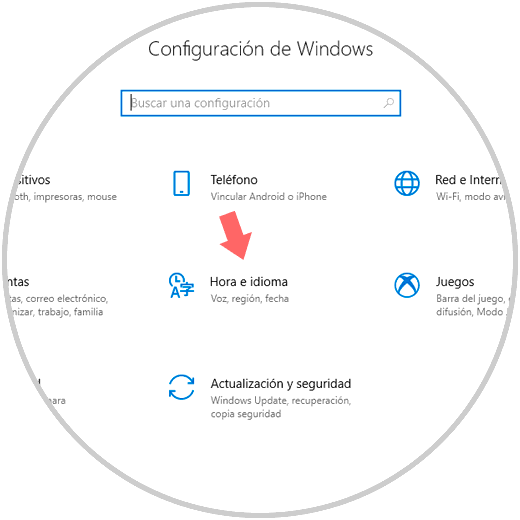
For this method, we will go back to the Start / Settings menu. There we go to the "Time and language" category.
Step 2
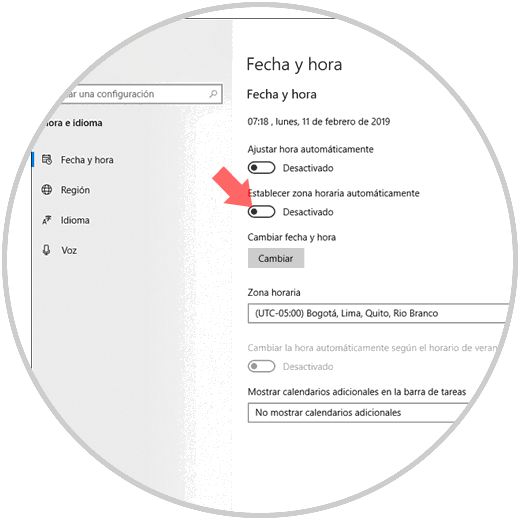
In the next window we will go to the "Date and time" section and it will be necessary to deactivate the option "Adjust zone automatically" by clicking on this switch:
Step 3
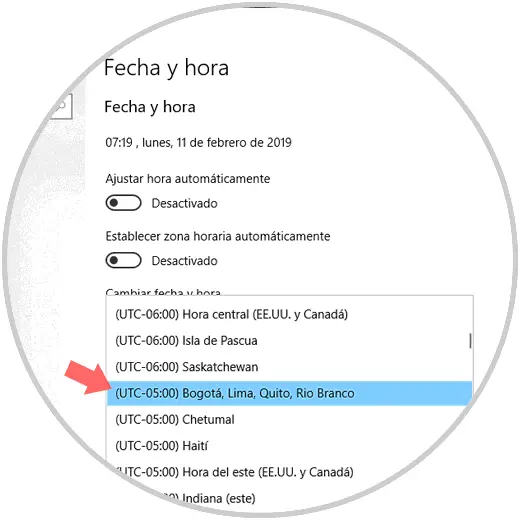
Now we go to the "Time zone" section and in the drop-down field we will select the desired time zone:
Step 4
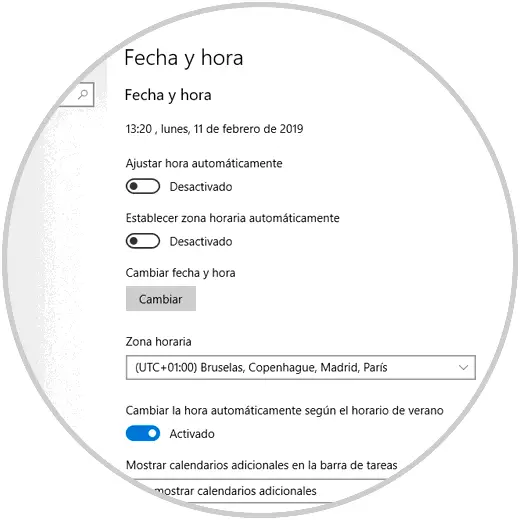
Once the desired zone is selected we will see that it is established and at the top we can see the new time change:
Note
If the selected region makes use of daylight saving time, we must activate the "Change the time automatically according to daylight saving time" switch.
3. How to adjust the time zone using the command prompt in Windows 10
Windows integrates the traditional CMD console (Command Prompt), thanks to which it will be possible to perform hundreds of administrative and support tasks in the system and its components, therefore, adjusting the time zone will be possible from there.
Step 1
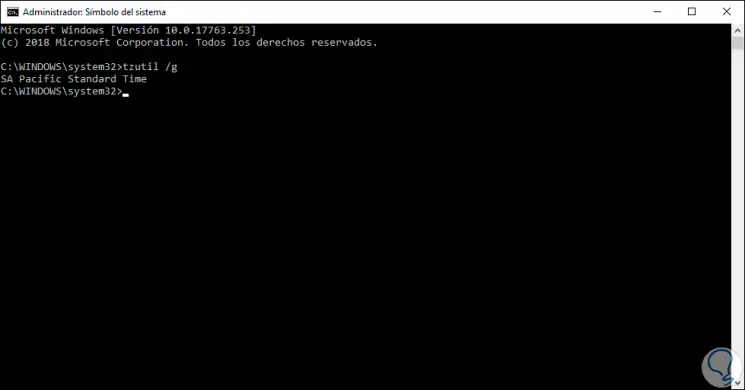
For this, we must access the command prompt console as administrators and first execute the following line:
tzutil / g
This command will display the time zone currently configured in Windows 10:
Step 2
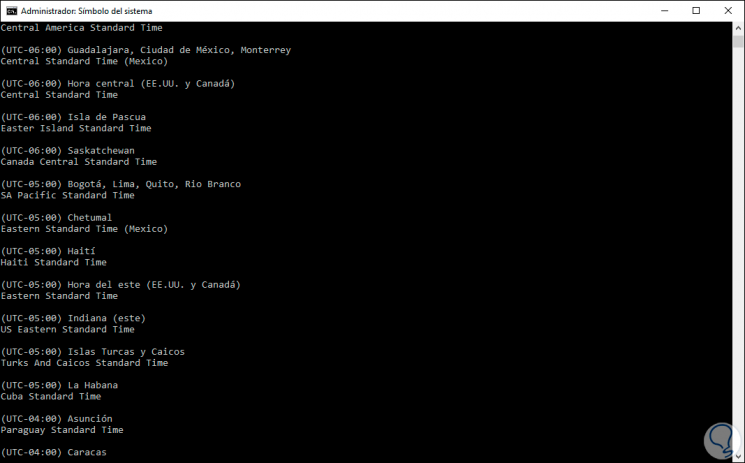
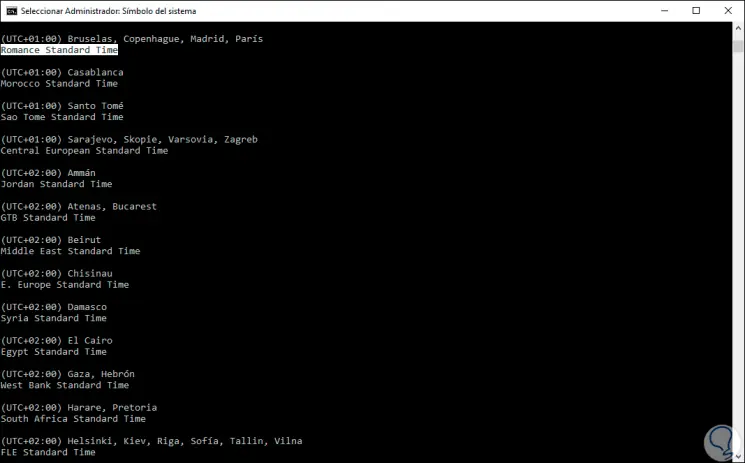
Now we will execute the following command to display all the time zones available in Windows 10:
tzutil / l
Step 3
To assign a new time zone, we must copy the line located under each city or group of cities, for example, in the case of selecting Madrid we must copy the Romance Standard Time line:
Step 4
Now we execute the following command to apply those changes:
tzutil / s "Romance Standard Time"
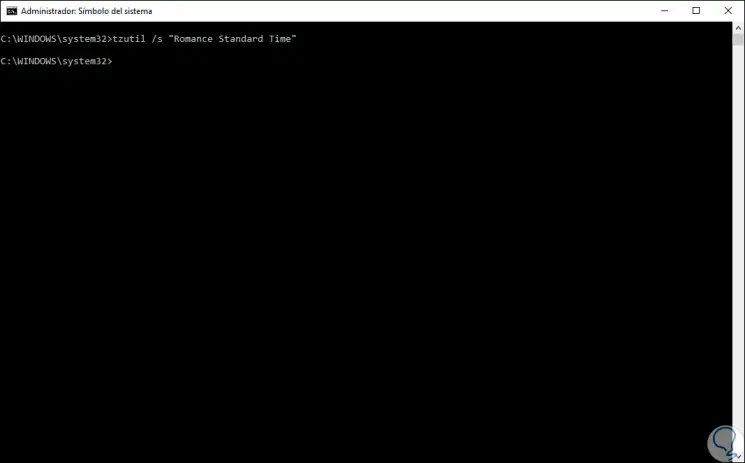
By pressing "Enter" automatically the time zone will be modified in Windows 10..
Note
We can run tzutil / g again to confirm the new time zone.
4. How to adjust the time zone in Windows 10 using Windows PowerShell
Windows PowerShell is another of the administration consoles integrated in Windows 10 thanks to which we have a series of cmdlets to control and manage numerous aspects of the system.
Step 1
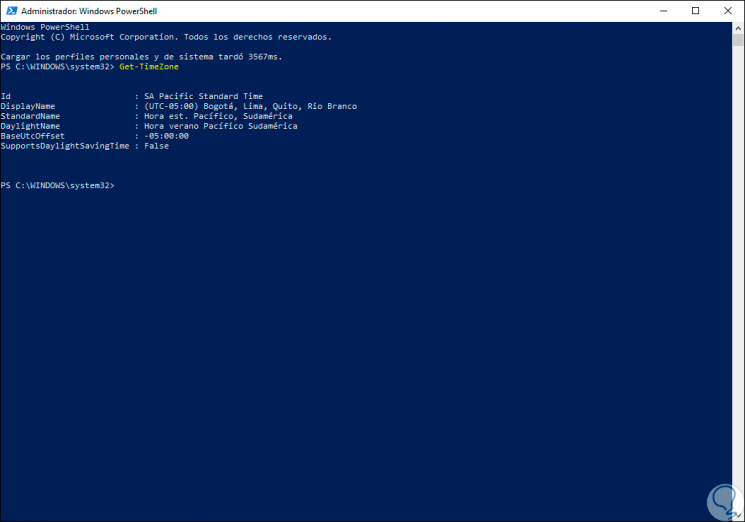
To use this method, we access Windows Powershell as administrators and in the console we execute the following to display the current time zone of the system:
Get-TimeZone
As we can see, there are specific details such as:
- ID of the current time zone of the system.
- Name of the area by city or cities.
- Validation of whether or not summer time applies.
Step 2
Now, we will execute the following line to acquire all the time zones available in Windows 10:
Get-TimeZone -ListAvailable
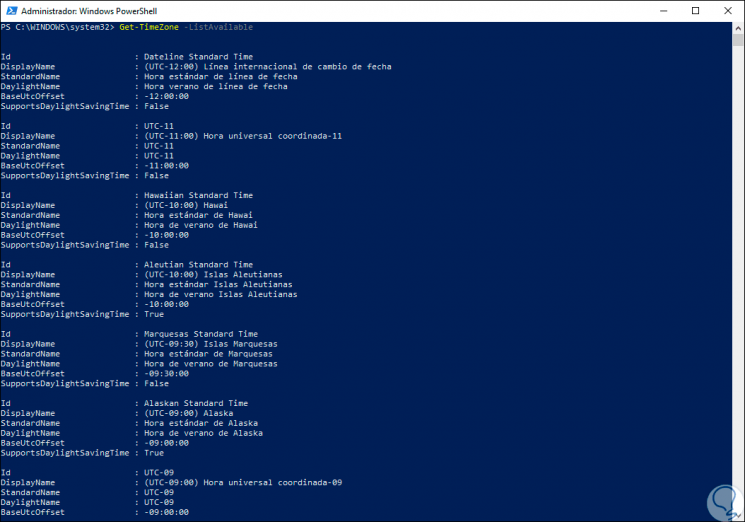
There we locate the area of ​​our preference and we must take into account the ID line to establish it, in this case we will assign the Madrid time zone so that we will execute the following:
Set-TimeZone -Name "Romance Standard Time"
After entering this line press Enter and the change will be applied to the system in general.
Thus, we have learned multiple ways to know and change the time zone in Windows 10 as needed.