One of the most delicate and important administration issues, although sometimes it does not seem that it is, at the server level, it is related to a correct configuration and time synchronization since any error in seconds, minutes or hours can trigger update errors. system, communication between applications such as databases, failures and errors in records and many other associated problems that may be imperceptible to us as administrators..
When we use Ubuntu 18.0, this system has an integrated and activated time synchronization by default, taking the systemd timesyncd service as a reference.
The timesyncd command replaces the ntpdate and chrony commands with much more optimal integrated functions for its performance since timesyncd regularly checks the time services to keep local time synchronized and stores time updates locally, so that after rebooting the system they are applied to allow everything associated with the date and time to be correct..
Next, we will see how to fully configure the time and date in Ubuntu 18.04.
Basic commands to use to configure and synchronize time, date and time zone in Ubuntu 18.04
The most basic command that we can use in Ubuntu 18.04 in order to detect the current time on the server is the date command, this can be used by any user to print the date and time:
date
The displayed result will be as follows. As we see there the current day, date and time is printed.

As a general rule, the server is configured by default in the UTC time zone, remember that UTC (Coordinated Universal Time) in which the time is set to zero degrees in length. The constant use of Universal Time is useful when we count or manage different time zones on a server.
1. How to modify the time zone in Ubuntu 18.04
Step 1
If for some reason you need to change the time zone, we achieve this with the timedatectl command, first of all, we must list the available time zones by executing the following command:
timedatectl list-timezones
All the areas that we can use will be displayed and to navigate between them we will use the arrow keys on our keyboard. There we must keep in mind the time zone line that we want to apply to Ubuntu 18.04.

Step 2
Now we can configure the time zone using the following command:
timedatectl set-timezone
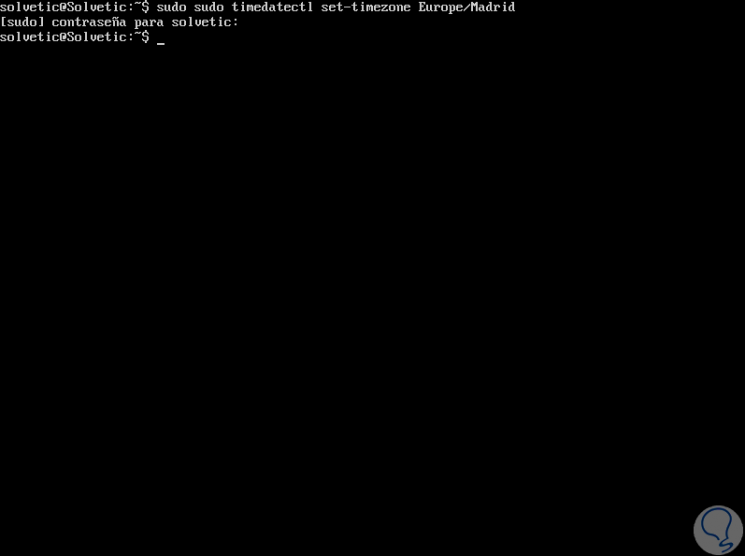
Adding the desired area, it will be necessary to use sudo with timedatectl to make the change like this, in this case we will use the Madrid area:
sudo timedatectl set-timezone Europe / Madrid
We enter the password of our user and the change will be applied correctly:
Step 3
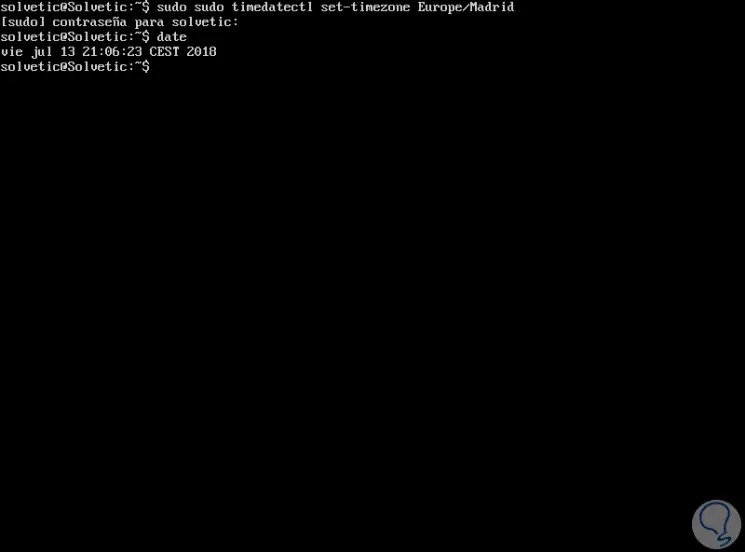
We can verify that the changes have been applied correctly by executing the date command again. We can tell the difference with the first date and time information we obtained and the abbreviation of the time zone will be reflected in the information.
2 . How to manage timesyncd with timedatectl in Ubuntu 18.04
In Linux environments, network time synchronization was naturally controlled by the Network Time Protocol or ntpd daemon, which is a service that connects to a set of multiple NTP servers to access constant and reliable time updates so that These apply to our system, but as we mentioned earlier, Ubuntu 18.04 now uses the timesyncd command instead of ntpd.
With timesyncd we have a service that connects to NTP time servers and works similarly to other distributions, but its main difference is that it is much lighter and is now integrated with the system which avoids the use of resources optimizing thus the overall performance of Ubuntu 18.04..
To check the status of timesyncd in Ubuntu, we must run timedatectl without arguments and the result will be the following where we find details such as:
- Systemd-timesyncd service status and more
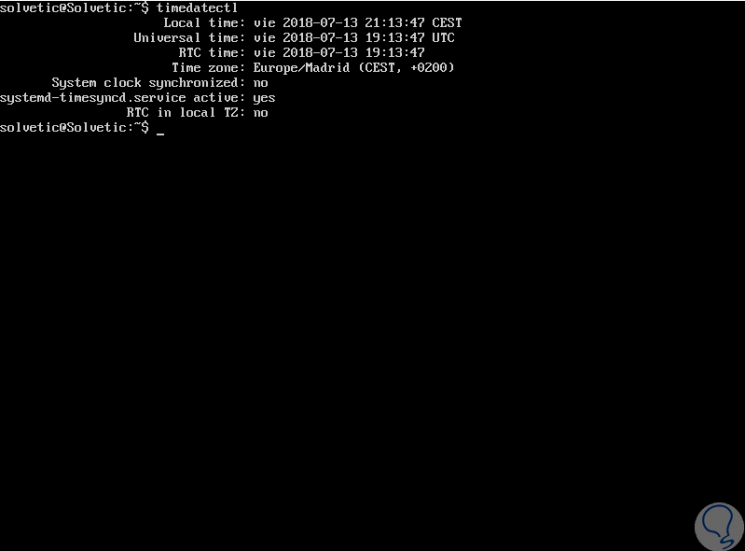
If the systemd-timesyncd.service line has a yes message, this means that timesyncd is enabled and running on Ubuntu 18.04. In case this service is deactivated, we can enable it by executing the following:
sudo timedatectl set-ntp on
Once this is done, we can run timedatectl again to confirm the service status.
3 . How to switch to NTP on Ubuntu 18.04 Linux
Step 1
This applies when it is strictly necessary for NTP to control everything related to the date and time of the system, this because its benefits are more effective than tumesyncd but does not mean that the latter is bad or presents errors.
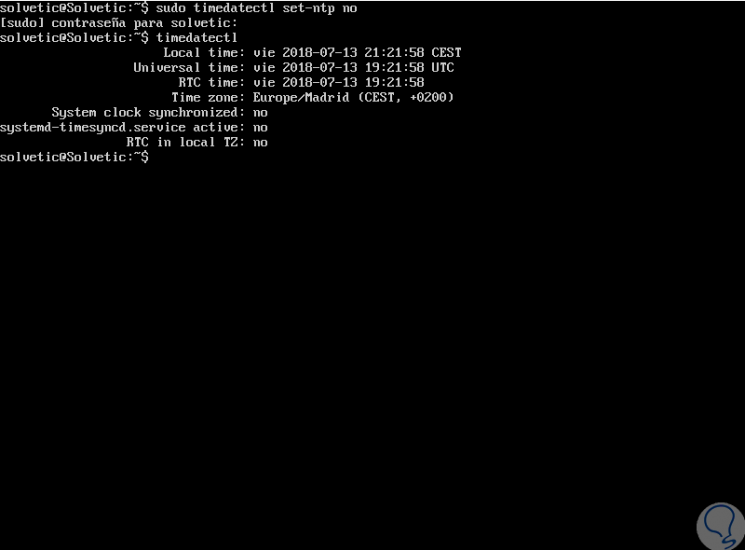
Before installing ntpd, we must disable timesyncd by running:
sudo timedatectl set-ntp no
We validate the deactivation by executing timedatectl which now has the answer no:
Step 2
Now let's update the system by running:
sudo apt update
It will now be possible to install the ntp package using apt if:
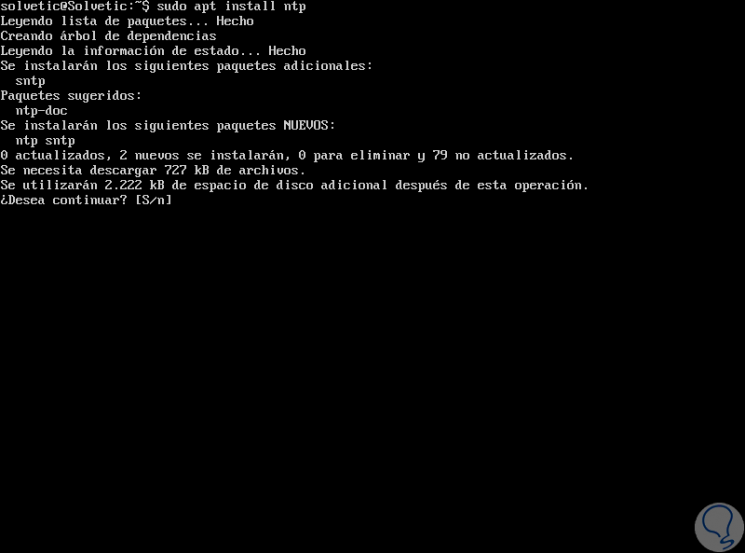
sudo apt install ntp
Enter the letter S to confirm the download and installation of NTP on Ubuntu 18.04.
Step 3
ntpd will start automatically after the installation process, we can consult ntpd in order to obtain information on the status to verify its operation using the following command:
ntpq -p
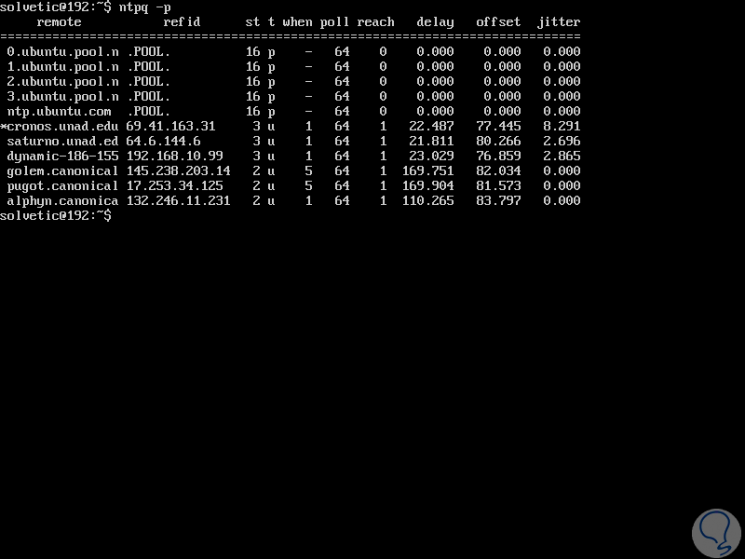
ntpq is a query tool for the ntpd command and the -p flag requests information about the NTP servers to which ntpd has been connected, we can see in the result the Ubuntu group servers on which it is based to synchronize the time and date .
With this process, we will always have our servers with the best synchronization features, which ensures optimal work in all the roles and services of Ubuntu 18.04.