Windows 10 has been designed and conceived as an operating system composed of numerous services, processes and internal functions that are responsible for improving both compatibility and speed of access to applications, programs and files. One of the services we have heard little, but which, according to Microsoft, has an essential role in the overall performance of the system, is Superfetch..
What is Superfetch?
Superfetch, as Microsoft has described it, is a service that “maintains and improves system performance over time.” But we must analyze this description further because there are many factors, both hardware and software that They play an important role in the overall performance of Windows 10 and not just a function.
Thinking about optimizing Windows performance, Microsoft developed Superfetch, a feature introduced from Windows Vista and whose execution is carried out in the background, that is, without affecting user actions . Superfetch routinely and constantly analyzes all the usage behavior of RAM, which is essential for Windows 10 performance. Based on that frequent use, an algorithm is created that determines which applications are run frequently, a Once all these are registered by Superfetch. This function is responsible for marking those applications with the legend of "frequent use" and then load them into RAM memory, thus facilitating the reading and execution of them as quickly as possible.
Superfetch has been developed in order to occupy only the remaining RAM for these preloaded applications. But Superfetch will only use the RAM that is not being used, since it is not consistent that a function designed to optimize the system uses the RAM available arbitrarily for more elementary applications or processes. Therefore, when Windows 10 requires the use of more RAM , the Superfetch function will step to the side and will not use the selected memory so as not to cause a negative effect on the system..
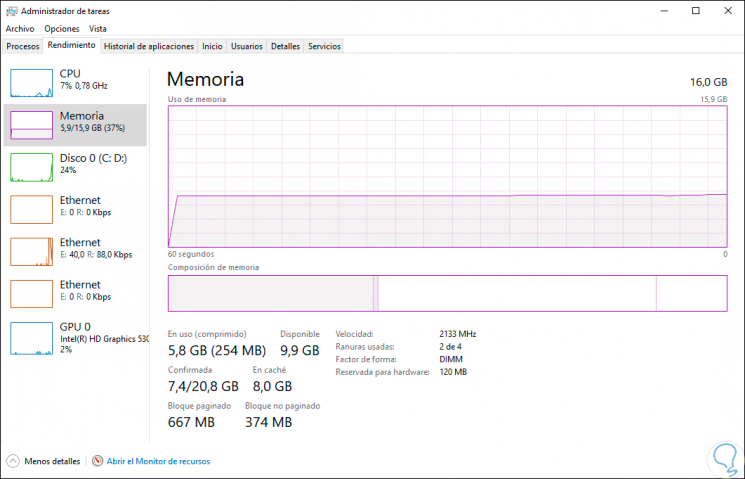
Seen from this point of view, we can see an improvement in the execution of traditional applications without the general performance of Windows 10 paying the price. When we access the System Administrator, in the "Performance" section we can see the amount of available RAM. This will be useful for Superfetch to help us run frequent applications faster:
Superfetch features
Some of the features of this Superfetch function are:
- When running in the background, Superfetch will make little use of CPU and RAM resources.
- Superfetch relocates the loading of applications to an earlier time, that is, when the application is loaded, the operating system internally will respond in the same way as if Superfetch was not used, which does not create a slowdown in the application. execution of this one.
- Superfetch works more conveniently on a mechanical hard disk (HDD) than on a solid state disk (SDD). This is because SSDs are designed to be much faster and safer.
Something important to keep in mind is that in operating systems where your RAM resource is between 4 GB or less, the Superfetch function can slow down the service.
To keep up, remember to subscribe to our YouTube channel! SUBSCRIBE
1. Enable or disable Superfetch from Windows 10 services
We enter a point where some users may wonder if it is worth it or not to use Superfetch. The answer is yes is important since its logic is to allow faster access to applications, but if we notice that this is not the case, we can deactivate it without any problem.
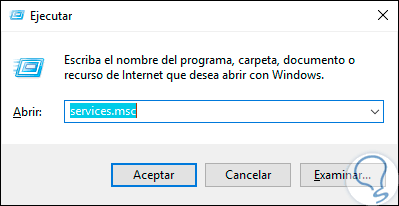
Step 1
To make use of this option, we will use the following key combination and execute the following command:
+ R
services.msc
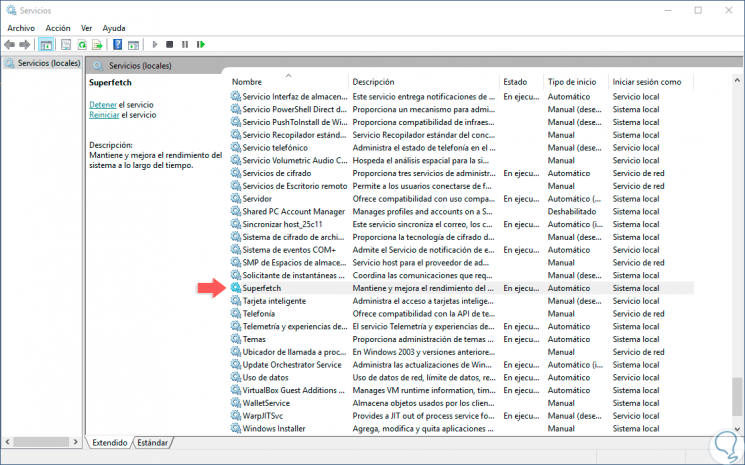
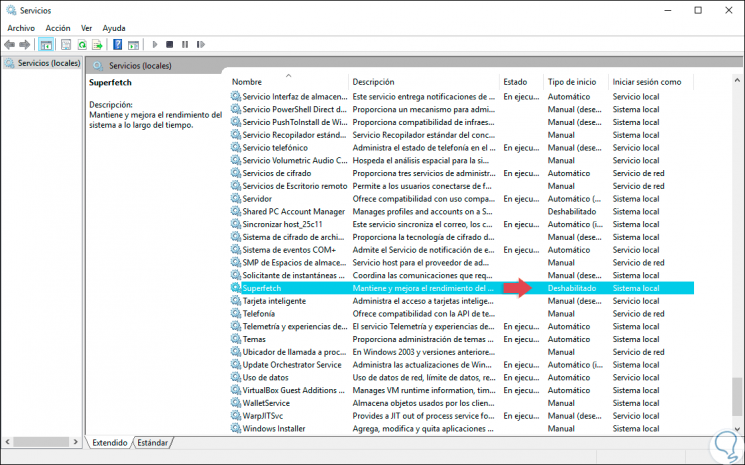
Step 2
Click on OK or use the Enter key and in the displayed window we will locate the “Superfetch” service:
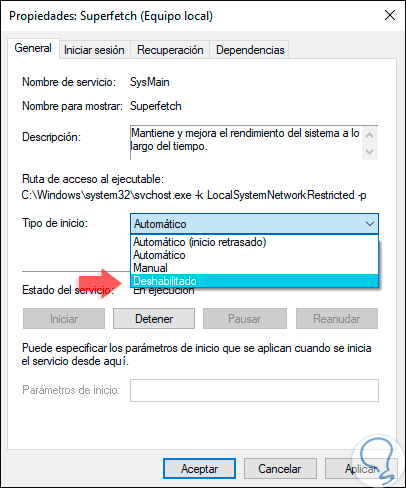
Step 3
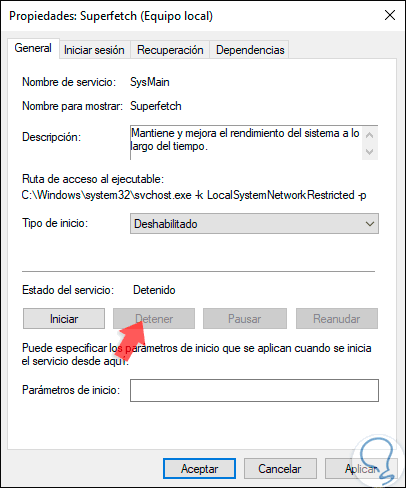
There we right click / Properties or double click on it, note that its default value is "Automatic", and in the next window we display the options of the "Startup type" field and select "Disabled":
Step 4
Then click on "Stop" and see the following:
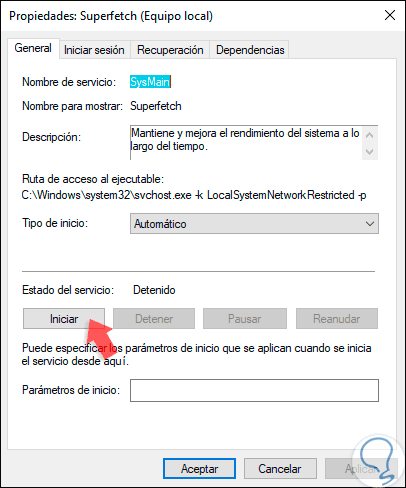
Step 5
There we click on the “Apply” button and then on “OK” to save the changes and we can verify that Superfetch has been deactivated in Windows 10:
Step 6
Now, to activate it again, we double-click on the Superfetch service and first select the "Automatic" option in the "Startup type" field so that it starts with Windows 10:
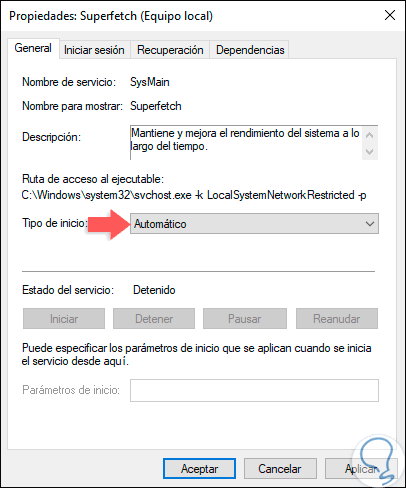
Step 7
Click on “Apply” and the “Start” button will be activated which we must press to start the service. Click on accept and in this way we have enabled the Superfetch service in Windows 10 again.
2. Enable or disable Superfetch using the Windows 10 Registry Editor
Before using this method, TechnoWikis recommends creating a backup in case of some type of error.
Step 1
After this, we will use the following keys and execute the regedit command:
+ R
regedit
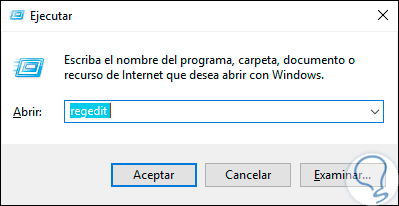
Step 2
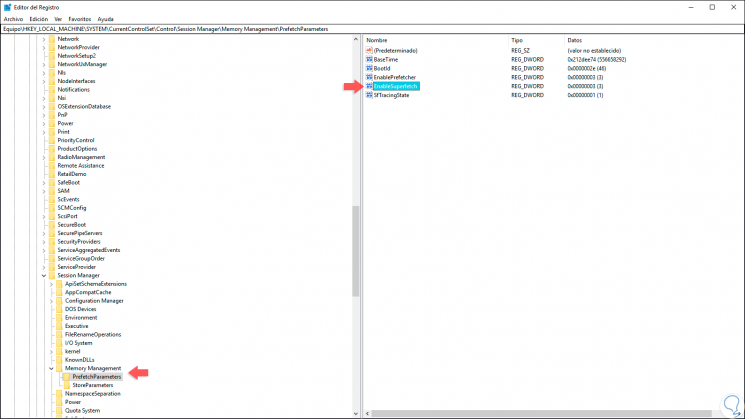
Press Enter or Accept and in the displayed window we will go to the following route:
HKEY_LOCAL_MACHINE / SYSTEM / CurrentControlSet / Control / Session Manager / MemoryManagement / PrefetchParameters
Step 3
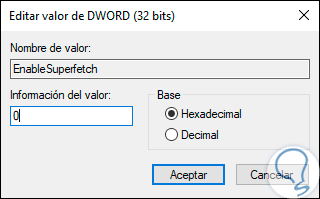
On the right side we locate the value called “EnableSuperfetch”, if it does not exist, we can create it by right clicking and selecting the option “New / DWORD Value (32 bits)”. We double click on this DWORD value and in the field "Type of information" we can enter one of the following options:
0
Disable the Superfetch function.
one
Enable the service during the start of the program.
two
Enable Superfetch with Windows startup.
3
Allows the activation of Superfetch throughout the system and for all users (it is the default)
Step 4
If we want to disable it, we enter the value 0, otherwise we do not make changes. Click on OK to apply the changes.
As we can see, the Superfetch service has been created with the intention of further optimizing the operating system's performance and thereby improving the experience of using Windows 10. It will depend on us if we deactivate it or not, but it is more prudent to leave its current state if We have good RAM capacity..