As we navigate the websites, these little by little occupy space on the disk with the DNS cache , this cache integrates data from the site such as its IP address, remote servers and other information necessary to access that site, since the cache is DNS present, the opening of the website will be much faster, but if the destination site changes IP, servers or name, the DNS cache Windows 10 will have a conflict when accessing that site and that is why in In this case it is best to clear the DNS cache, TechnoWikis will explain how to clear this DNS cache in two different ways..
With the DNS cache we are storing the IP addresses where we have been browsing and what is being saved. Sometimes we can have DNS resolution problems due to that stored information, throwing errors such as 404s and not finding a solution even with a CDN working correctly. Sometimes something as simple as clearing the DNS cache can solve temporary computer errors.
To stay up to date, remember to subscribe to our YouTube channel! SUBSCRIBE
1. Clear DNS Cache Windows 10 CMD
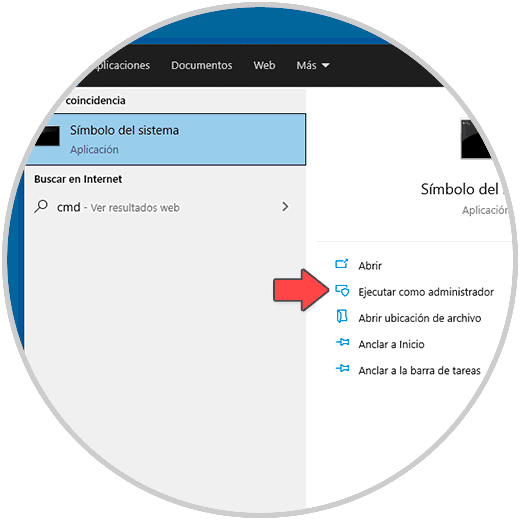
Step 1
We access the command prompt as administrators :
Step 2
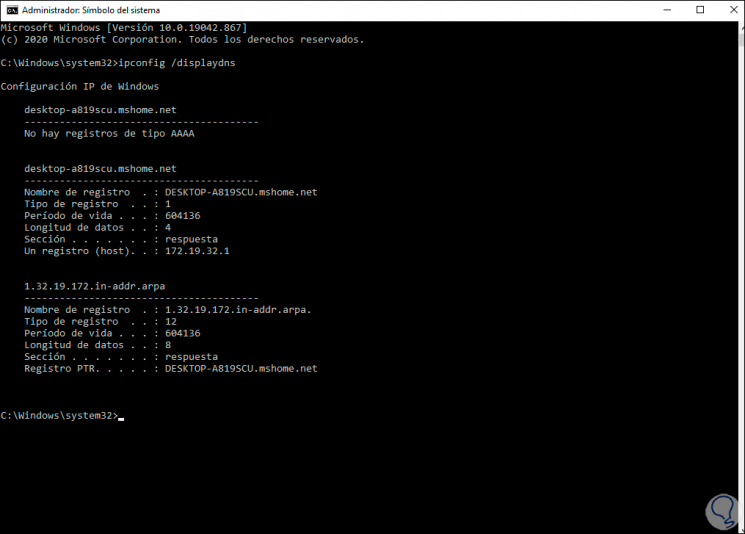
In the console we list the DNS with the command:
ipconfig / displaydns
Step 3
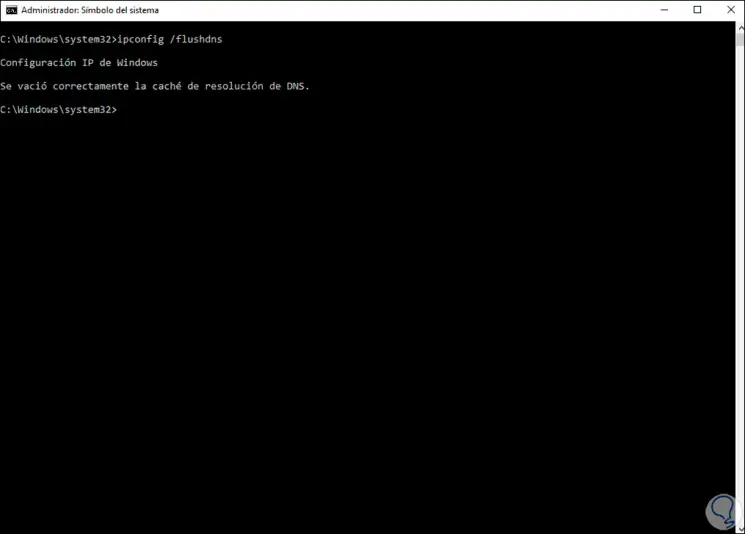
We delete the DNS:
ipconfig / flushdns
Step 4
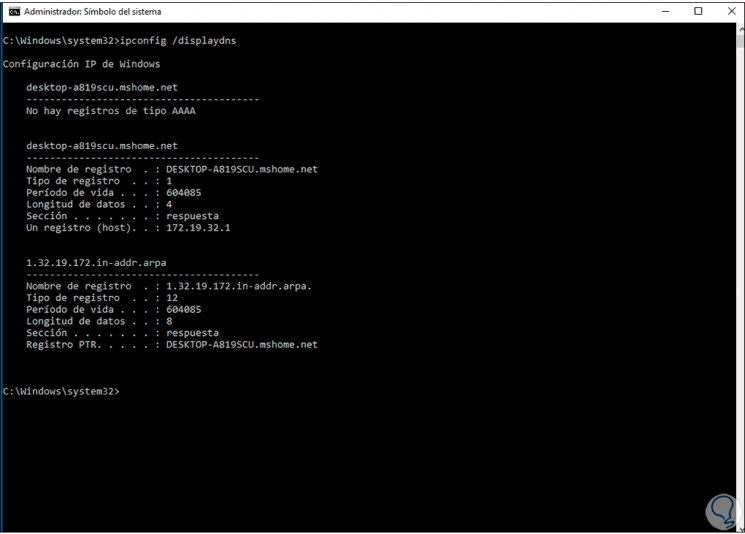
Again list the DNS:
ipconfig / displaydns
Note
some DNS records are required for system-specific tasks, so they will not be deleted.
2. Clear DNS Cache Windows 10 PowerShell
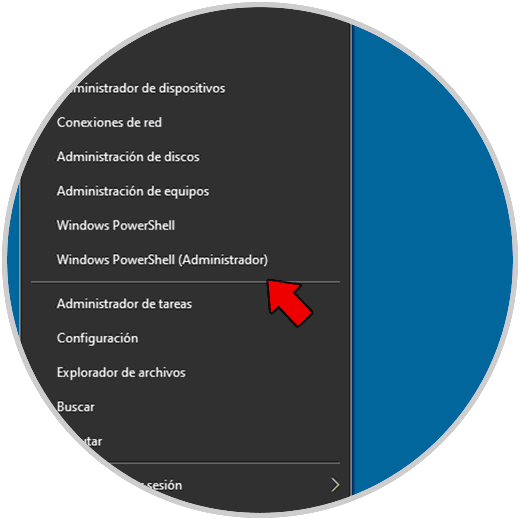
Step 1
Access PowerShell as administrator :
Step 2
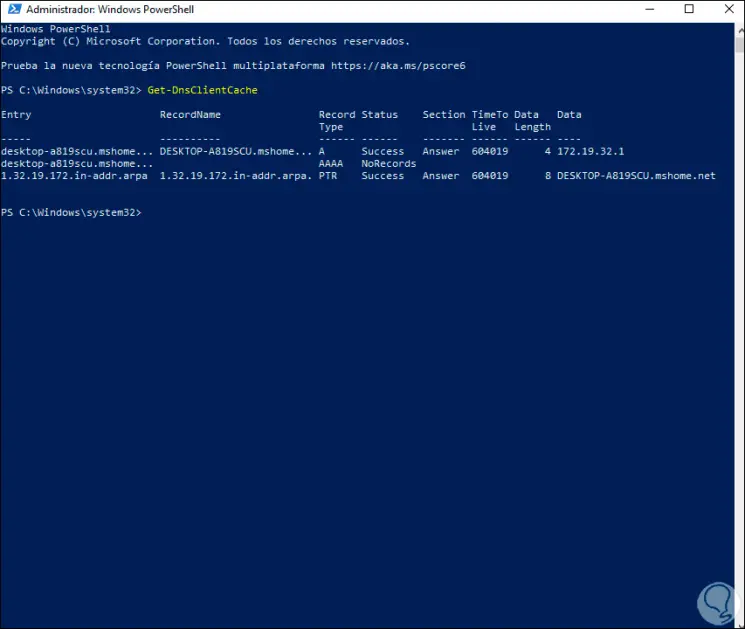
In the PowerShell console we list the DNS:
Get-DnsClientCache
Step 3
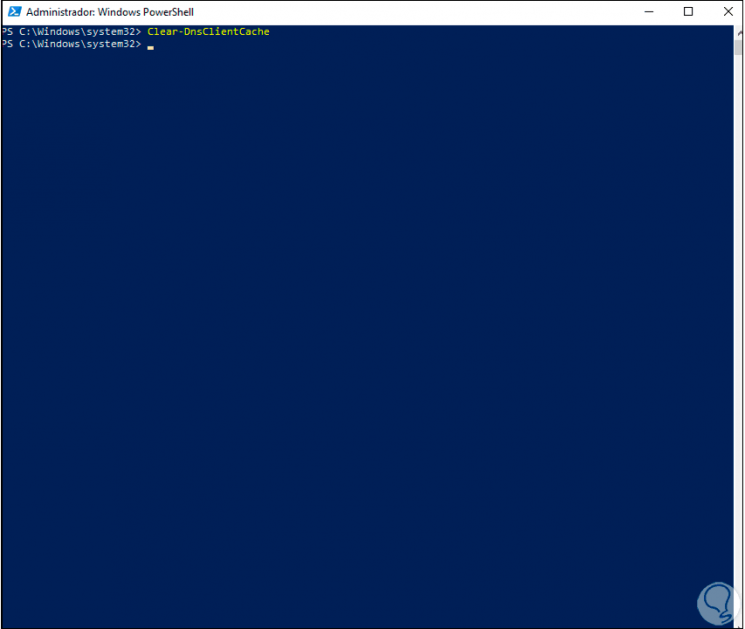
We delete the DNS cache:
Clear-DnsClientCache
Step 4
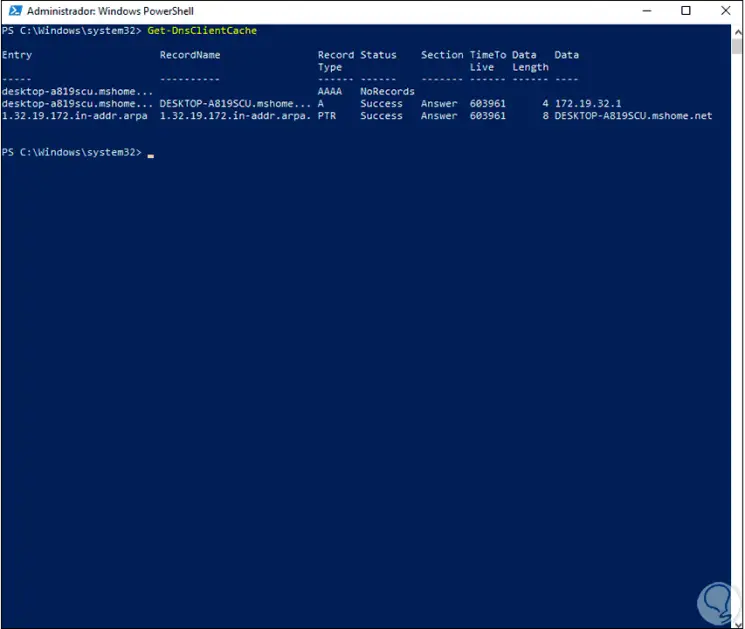
We list the DNS again:
Get-DnsClientCache
This has been the process to clear DNS cache in Windows 10 using CMD or PowerShell console..