If you want to share your calendar in Microsoft Outlook with other people, for example to make an appointment or to plan activities, Microsoft provides you with two methods. The calendar can then be used by everyone in the installed Outlook version via Office, but also via the Outlook.com website.
Share Outlook calendars via sharing
Follow our step-by-step instructions or take a look at the quick start guide ..
By the way: Shared calendars are usually updated automatically. In rare cases, however, it can happen that common appointments suddenly no longer appear. If your shared Outlook calendar has stopped updating, you can find help on how to do this here.
1st step:
 Start Microsoft Outlook and open the calendar view . Then click on the three-dot menu at the top right .
 2nd step:
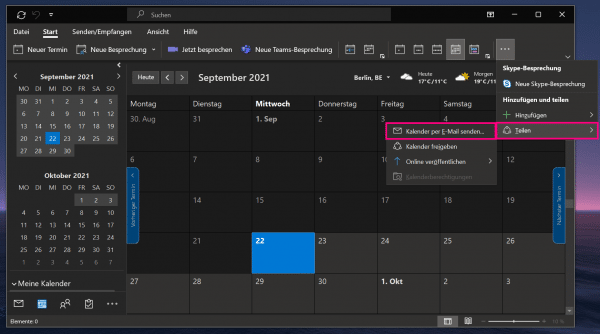 Select " Share " and then " Send calendar via email ". This is the easiest way to share your personal Outlook calendar with other people.
 3rd step:
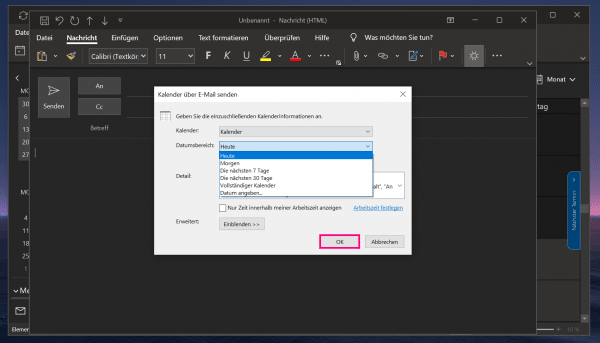 Select the to divide the calendar and you can specify whether you want to share the entire calendar or just a date range for sharing. Confirm with " OK ".
 4th step:
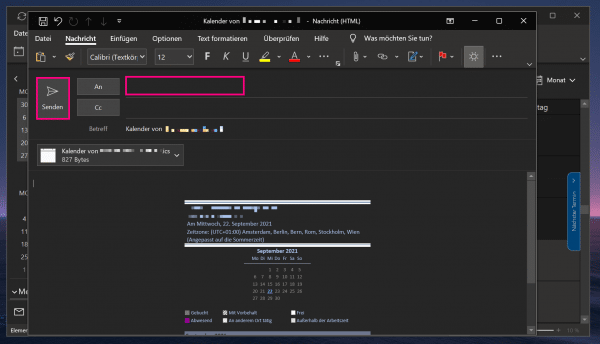 A new email will open containing the calendar to be shared . In the address field, enter the people who should receive the calendar. These people do not have to be in your contacts beforehand. You can optionally add a mail text. When everything is done, click " Submit " to share the calendar. The recipient (s) of the calendar receive an .ics file that can be opened with any calendar program. An installation of Microsoft Office is therefore not absolutely necessary. So your Outlook calendar can be used together.
 Set permissions for shared Outlook calendar
If you share a calendar, you can also set whether the other users should only be able to view the appointments or also edit them. In the case of weekly schedules for the job, for example, it is sufficient if only authorized persons can add or delete appointments. All other employees can only see them. For shared use, however, it can make sense to give everyone editing rights so that joint scheduling works. You can also adjust this in Outlook:
1st step:
 To do this, click on the three-point menu at the top of the calendar view and then select your calendar via " Share ".
 2nd step:
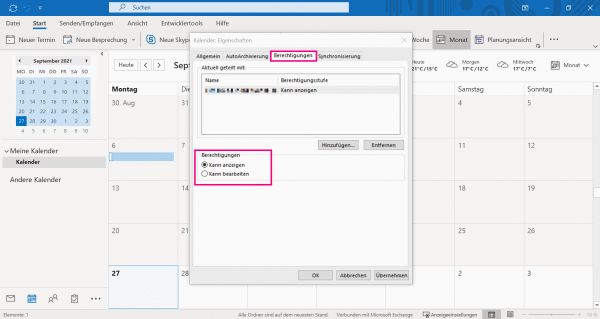 Now you can adjust the authorizations for individual persons. You can choose whether the calendar is only displayed to the shared contact (" Can display ") or whether they can also edit the calendar (" Can edit "). If the person has editing rights, they can, for example, delete appointments or add new appointments.
 Create Outlook group calendar
Follow our step-by-step instructions or take a look at the quick start guide .
1st step:
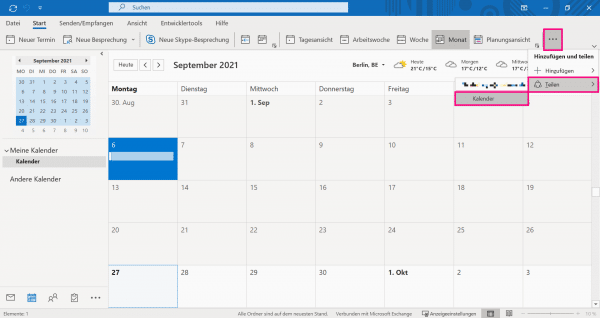
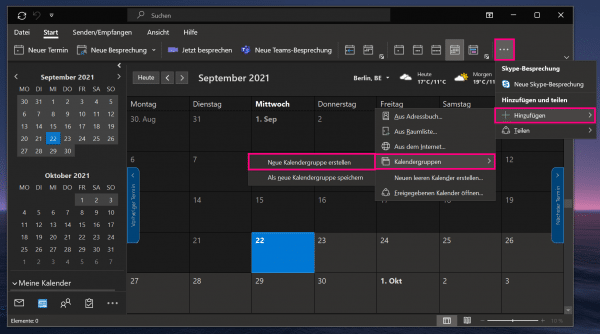 Open Microsoft Outlook. Then, in Calendar View, click the three-dot menu in the top right corner, then click Add > Calendar Groups> Create New Calendar Group . In this way you can create a shared calendar for your team.
 2nd step:
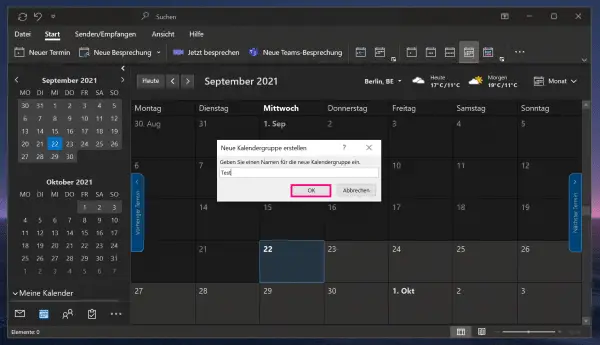 Enter a name for the calendar group in this window and confirm with " OK ".
 3rd step:
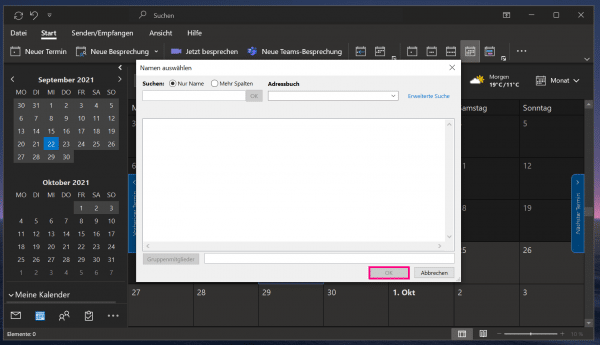 Now you need to add the people to the group calendar. You can enter the e-mail address or add contacts directly from your Outlook address book. Once you have selected all persons, click on the " Group members " button and then on " OK " to activate the shared calendar. All selected people can then work together on this calendar.
 Quick guide: Create a calendar share
- Open Microsoft Outlook and navigate to the calendar view.
- Click on the three-dot menu in the top right corner then select " Share " and " Email Calendar "
- Then select the calendar you want to share and choose whether you want to share the entire calendar or just a range of dates. Confirm with " OK ".
- Now enter the email addresses of the recipients with whom you would like to share the calendar. This does not have to be in your contacts. Then click " Send " to share the calendar. As soon as the other people confirm the approval, they can access your calendar and see your appointments. This enables sharing.
Quick guide: Create a group calendar
- Open Microsoft Outlook and navigate to the calendar view .
- Click the three-dot menu in the upper right corner, then choose Add > Calendar Groups> Create New Calendar Group .
- Enter a name for the calendar group and confirm with " OK ".
- Now you have to add the people to the group calendar. These people can be in your contacts. Alternatively, you can simply enter the relevant e-mail addresses. Once you have selected all persons, click the " Group Members " and then click " OK to activate" to the shared calendar. You can now edit the group calendar as a team.