Microsoft Word and Excel , in its new edition 2019, provides us with a series of functions and practical features to execute numerous tasks both for creating and editing documents and managing large amounts of data in a safe and practical way. To many of us it has happened to us, that while working in a normal way, suddenly there is a power outage, the team restarts, the application closes or any event happens that can make us lose the work done and with it a lot of time and productivity ..
For this reason, today we will learn how to enable the autosave feature in both Word and Excel 2019 and in this way preserve the integrity of the data .
To keep up, remember to subscribe to our YouTube channel! SUBSCRIBE
1. How to enable autosave in Microsoft Word 2019
Step 1
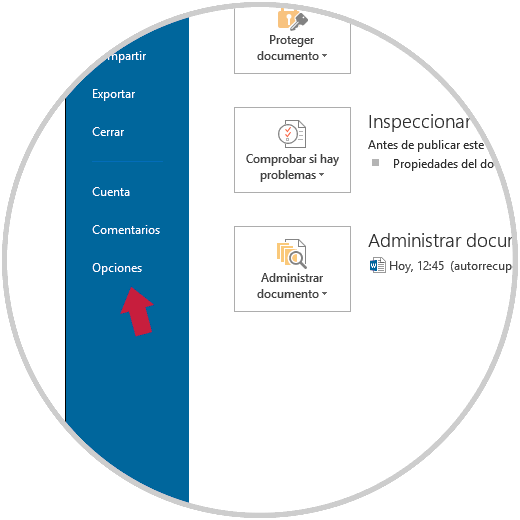
To perform this process in Word 2019 we must go to the “File†menu and in the options displayed select “Optionsâ€:

Step 1
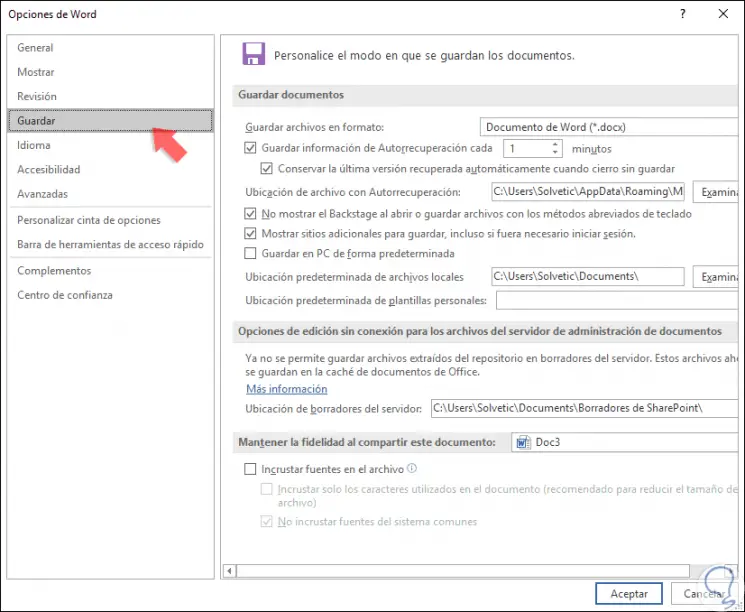
In the window displayed, we will go to the “Save†category and we will see the following configuration:

Step 1
There we go to the “Save documents†section where we configure the following. Once this is defined, click on “Accept†and thus our information will be backed up based on the defined time.
- We must activate, if it is not, the “Save AutoRecover information every†box and in the available field enter how often Word 2019 will execute this process automatically
- In the “Save files in format†field we can define the type of format in which the file will be automatically saved, in the case of Word it is recommended to leave the default option * .docx
- Check the box “Keep the last version automatically recovered when I close without saving†so that Word automatically recovers the data.
- We can define the path where the recovered files will be hosted.
2. How to enable autosave in Microsoft Excel 2019
The information recorded in Excel 2019 can be one of the most critical for its levels of functions and formulas which if they get lost can be a real headache.
Step 1
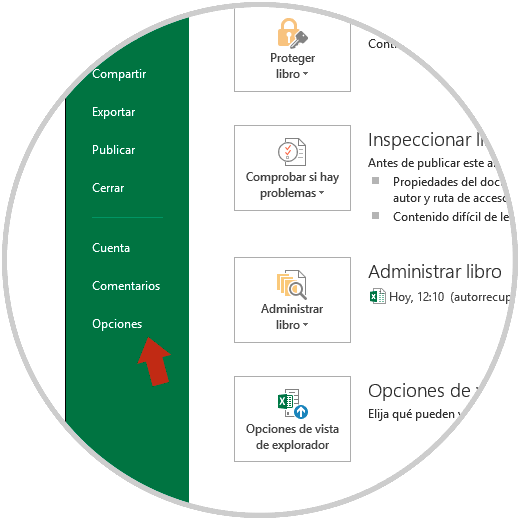
In the case of Excel 2019, we go to the “File†menu and at the bottom click on “Optionsâ€:

Step 2
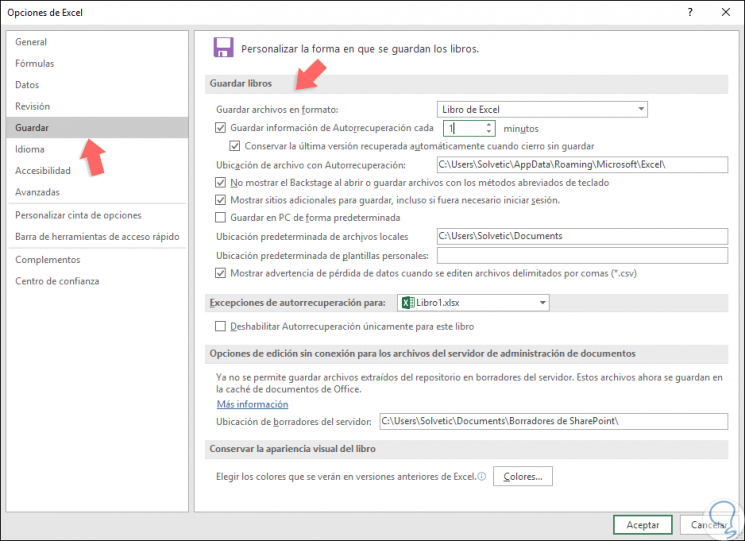
In the window that will be displayed we go to the Save line and, as in Word 2019, we define the following. Once this is defined, click on OK to save the changes.
- We validate if this cativa, or if we must not activate, the “Save AutoRecover information every†box and in the available field enter the time in which Excel 2019 will execute the process automatically.
- In the “Save files in format†field it will be necessary to define the type of format in which the file will be automatically saved, in the case of Excel 2019 it is recommended to leave the default option Excel Workbook.
- Check the box “Keep the last version automatically recovered when I close without saving†so that Excel automatically recovers the data.
- We can define the path where the recovered files will be hosted if necessary

That simple we will prevent our work from being lost in Word or Excel 201 thanks to the autosave function..