Most critical errors in Windows 10 are the result of software errors or malfunctioning drivers. However, the blue screen "Page Fault in Nonpaged Area" is usually the result of problems in the hardware, especially in the main memory (RAM). The error can also be traced back to the incorrect management of the virtual memory by Windows. So, in order to fix the error message, you need to diagnose both hardware and software errors.
How to fix the Windows 10 error "Page Fault in Nonpaged Area"
Check the RAM
If you've made any hardware changes to your computer recently, it is worth checking that everything has been installed correctly. Sometimes new RAM sticks can be faulty, or old sticks no longer work. Here are some things you can do to check your memory. Be sure to turn off your computer and unplug all cables from electrical outlets before proceeding.
- If you're using two RAM sticks, try swapping the slots.
- However, if you only use a single RAM chip, you will remove any dust that may have accumulated.
- If you have some spare RAM modules lying around, try replacing the RAM and restarting the PC. If the error no longer occurs, then the RAM is defective.
- Try to use only one RAM slot.
Update Your Drivers
Faulty drivers can wreak havoc on your computer. For example, this can also lead to the blue screen "Page Fault in Nonpaged Area". This is why it is best to always update your drivers to the latest version. You can read here how to update your drivers in Windows..

Disable your antivirus applications
Anti-virus software can also cause the error message in Windows 10. If you recently installed any antivirus software, you should turn it off. If you are not using any extra software, you should deactivate the Windows Defender anti-virus protection system so that the blue screen error can possibly be resolved. Instructions for deactivating Windows Defender can be found in another post.
Disable the automatic management of the paging file size.
This method has a high success rate in fixing the "Page Fault in Nonpaged Area" crash because it deals directly with virtual memory. Usually Windows manages the size of the paging file, but if this causes your system to crash, it is best to disable this feature.
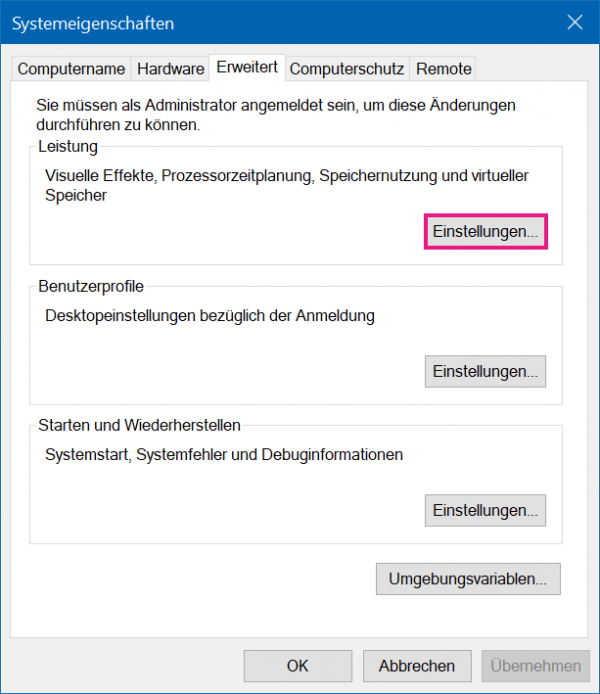
To do this, right-click on " This PC " in Windows Explorer and then select " Properties " from the menu . After you have then selected " Advanced system settings " below , click in the new window under " Performance " on the button " Settings ".
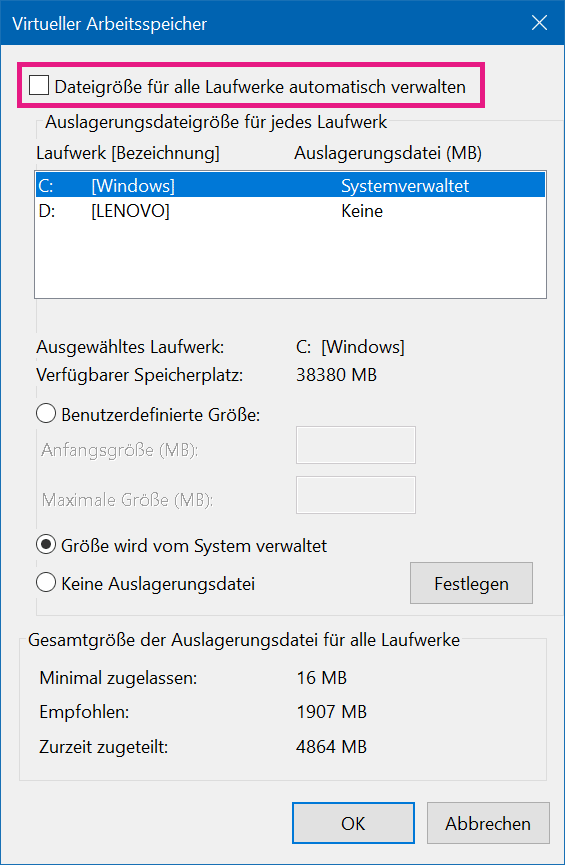
Then switch to the " Advanced " tab in the new window and click on " Change ". In the new window, deactivate the option " Manage file size for all drives automatically ". To save the changes, simply click " OK ". If the error persists after deactivating the setting, it is advisable to reactivate it in the same way.
Use DISM and SFC to Repair
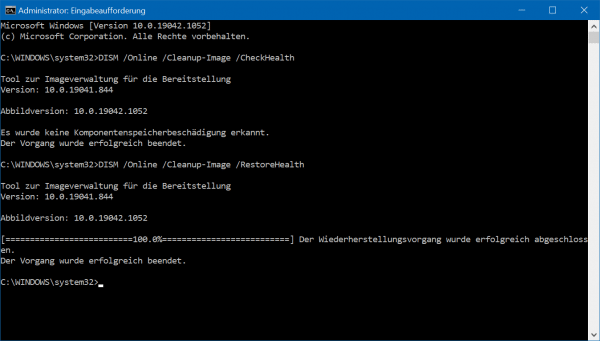
Corrupted System Files DISM and SFC are the two most effective utilities for repairing system files in Windows 10. Since there are endless possibilities of what could be causing the blue screen failure, it is recommended that you run both utilities. To
do this, enter cmd in the Windows search bar and then click on " Command Prompt " to open it. You need administrator rights for this. Then enter the command DISM / Online / Cleanup-Image / CheckHealth in the console and press [ Enter ]. Then enter DISM / Online / Cleanup-Image / RestoreHealth and press [ Enter ] again. Then wait for the process to complete and close the command prompt.
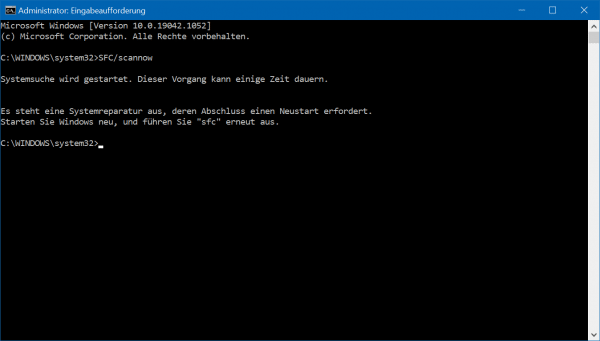
In order to run SFC after DISM, open the command prompt again. Then enter SFC / scannow and press [ Enter ]. Then wait for the analysis to run and any possible Windows errors to be resolved. Then restart your computer.
Run the Windows Memory Diagnostic Tool
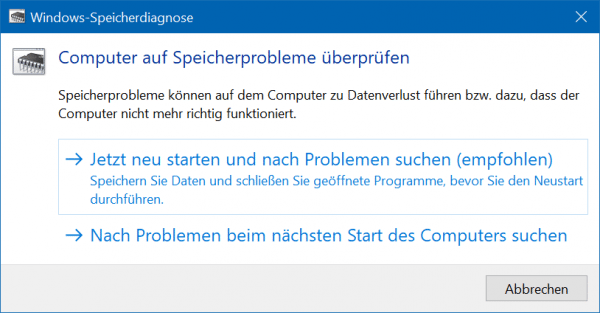
Windows Memory Diagnostics is a built-in Windows utility that checks and repairs problems in memory. It's easy to use and very effective. Especially in the case of the blue screen error, it is advisable to run the tool and thus possibly locate errors. To do this, enter the term " Windows memory diagnosis " in the Windows search bar and then click on the result of the same name.
Then select the option "Restart now and check for problems "to start the diagnostic tool. The test can then take up to half an hour, since the existing memory is checked intensively. If problems are found, you should replace your RAM. It can also help if you can set the timing for Adapt the memory modules How exactly you do this can be found in the manual for your mainboard.
Establish a restore point
If you have used all methods without success, all that remains is to restore a previous restore point. It is possible that your system is faulty and that is why you are getting the blue screen. You can read here how to restore a restore point in Windows 10.