SpeedFan is a free tool that allows you to control the fans of the CPU and other components and monitor their speed. In some cases, however, it may happen that the software does not correctly recognize your installed fans and no characteristic values for the speed can be output. You can find out what can help in such a case in this article.
SpeedFan doesn't recognize fans - you can do that
Check BIOS settings
First, you should restart your PC and enter the BIOS settings. To do this, you must hold down the F2 key immediately during the boot process. With some mainboard manufacturers, other buttons may have to be pressed. With ASUS laptops, for example, access to the BIOS is only possible via the F10 key. If in doubt, please refer to your instruction manual or the website of the computer or mainboard manufacturer.
In the BIOS of your computer you should check the advanced settings for the built-in components that have a fan. The CPU fan, the fan of the graphics card and the fan on the PC case must be connected to the mainboard in order to be recognized in Speedfan. If necessary, check which connection options your mainboard offers.
Activate label in SpeedFan
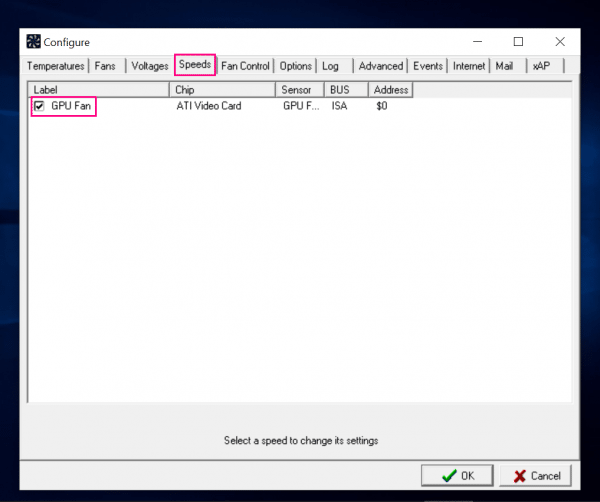
Open the configuration settings in SpeedFan by clicking on " configure ". Now activate all checkboxes in the " Speeds " tab . The fan speed should now be displayed..
 In the "Speeds" tab you should activate all available checkboxes to display the fan speeds.
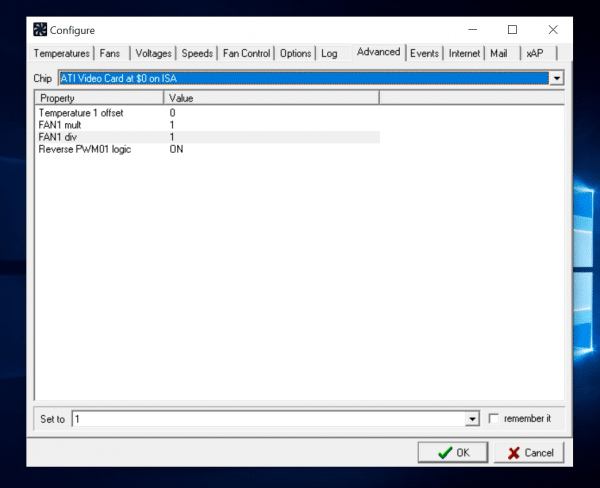
Open advanced settings in SpeedFan Open the configuration settings in SpeedFan by clicking on " configure ". Under " Advanced " you will find setting options for the respective component. For example, select your graphics card to activate all relevant parameters there.
 In the advanced configuration settings of Speedfan you can control individual components of your computer.