The use of hard drives in PC (Windows 10/11) is an essential task with the base disk in which the operating system, applications are installed and where the user's data and files are stored. There is no doubt that it is an essential element when using our computer, so we must always be able to use it correctly..
But based on the capacities of the motherboard, it will be possible to add more hard drives to increase the storage capacity of the PC and thus have more data options. A problem that usually happens in Windows is that after connecting the hard drive (and checking its connection), it is not recognized and therefore there is no access to it. Correcting this error is very simple and we will see it in this tutorial.
Next we will see all the steps that you must follow in detail to solve that Windows does not recognize the hard disk..
To stay up to date, remember to subscribe to our YouTube channel!
SUBSCRIBE ON YOUTUBE
How to make Windows recognize the hard drive
Step 1
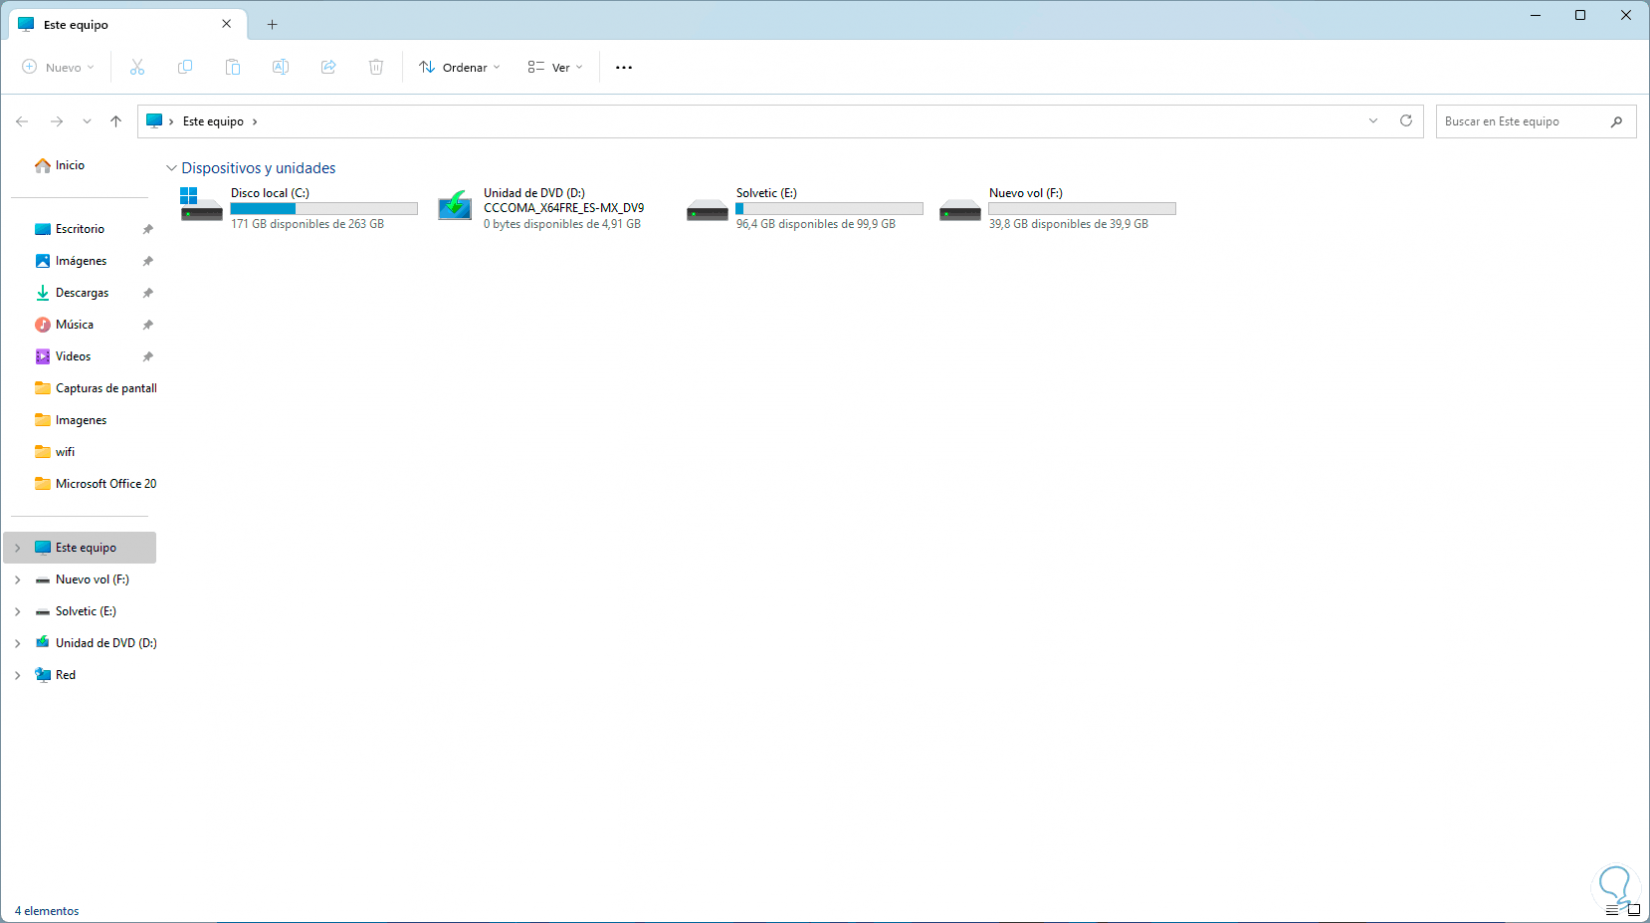
We open the File Explorer to validate the current hard drives:
Step 2
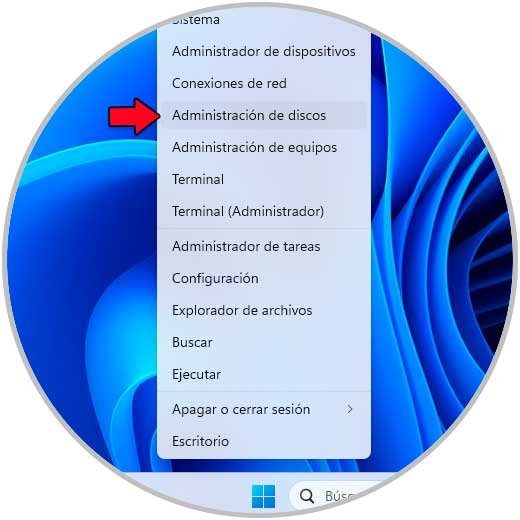
We will see the currently active disks, now open Disk Management from the Start context menu:
Step 3
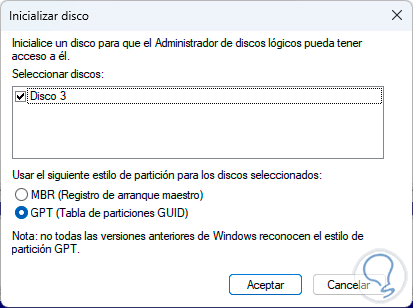
When the new disk is connected we will see a small pop-up window where we select the type of disk to establish:
Step 4
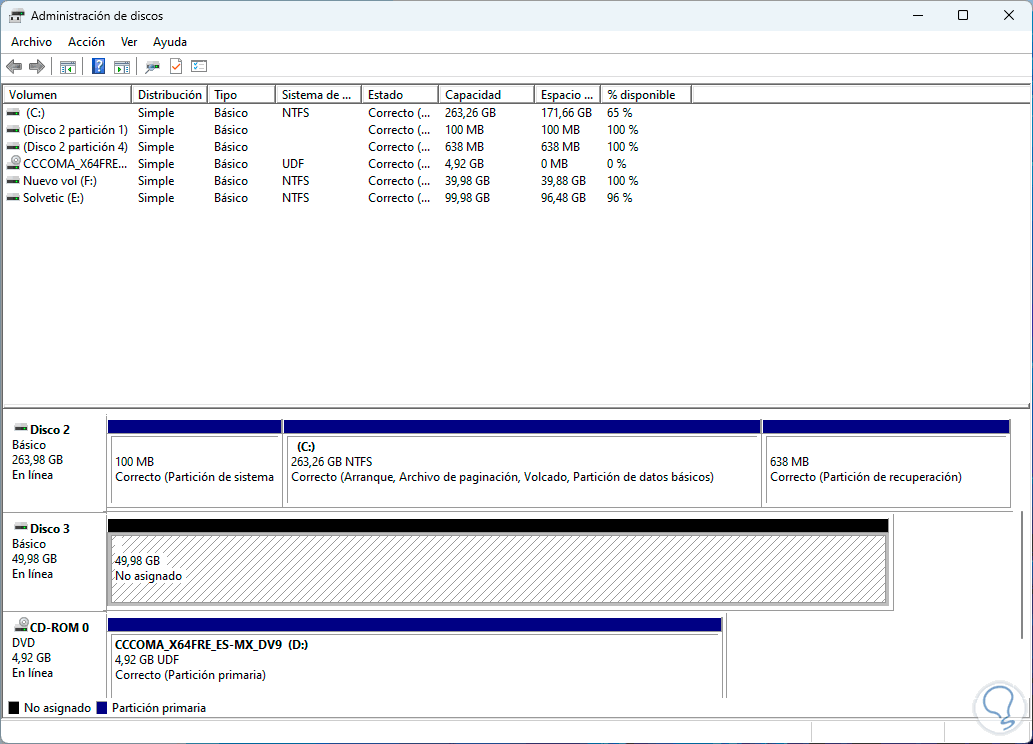
We activate the disk box and click "OK", the new disk will be available in the console:
step 5
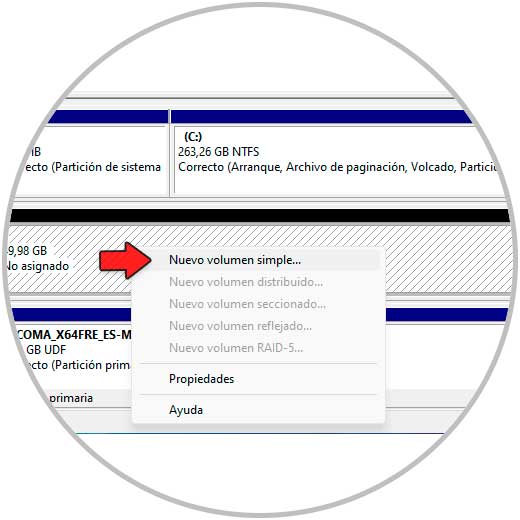
We can see that unlike the other disks, this one has a black stripe indicating that it is not active, we right-click on the new disk and select "New simple volume":
step 6
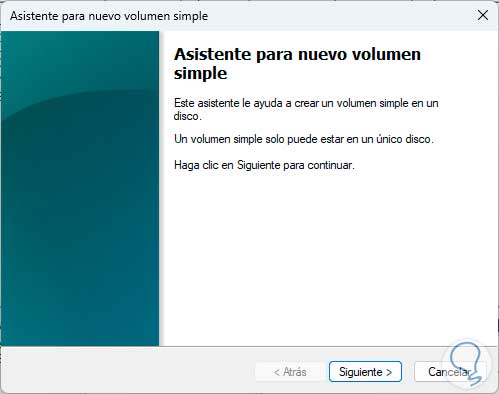
The following wizard will open:
step 7
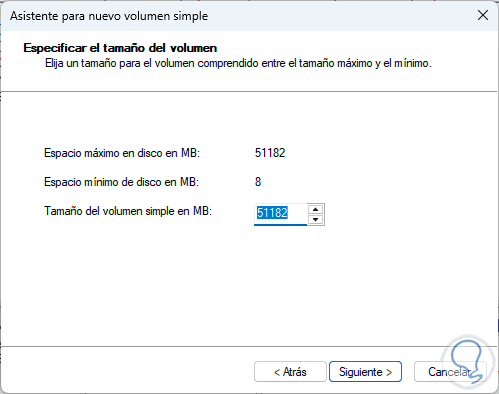
Select the disk space to use:
step 8
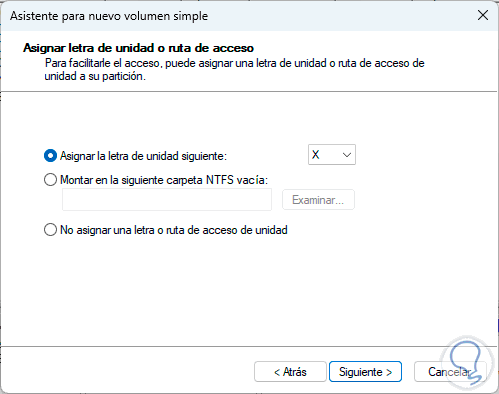
Assign a letter to the disk so that it is recognized by the system:
step 9
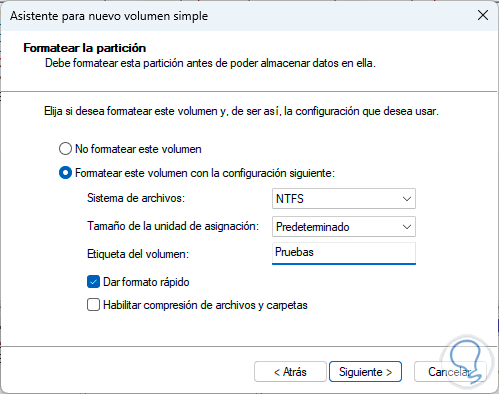
Now set the format and name of the drive:
step 10
step 11
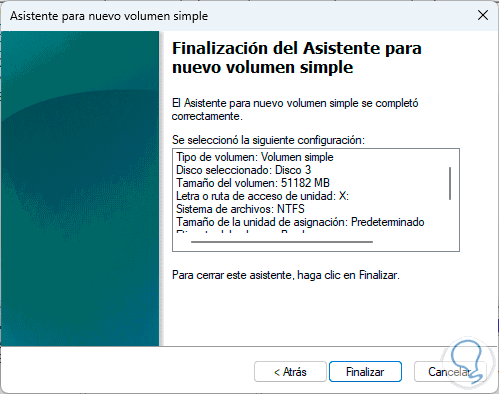
We click Next and now we will see a summary of the process:
step 12
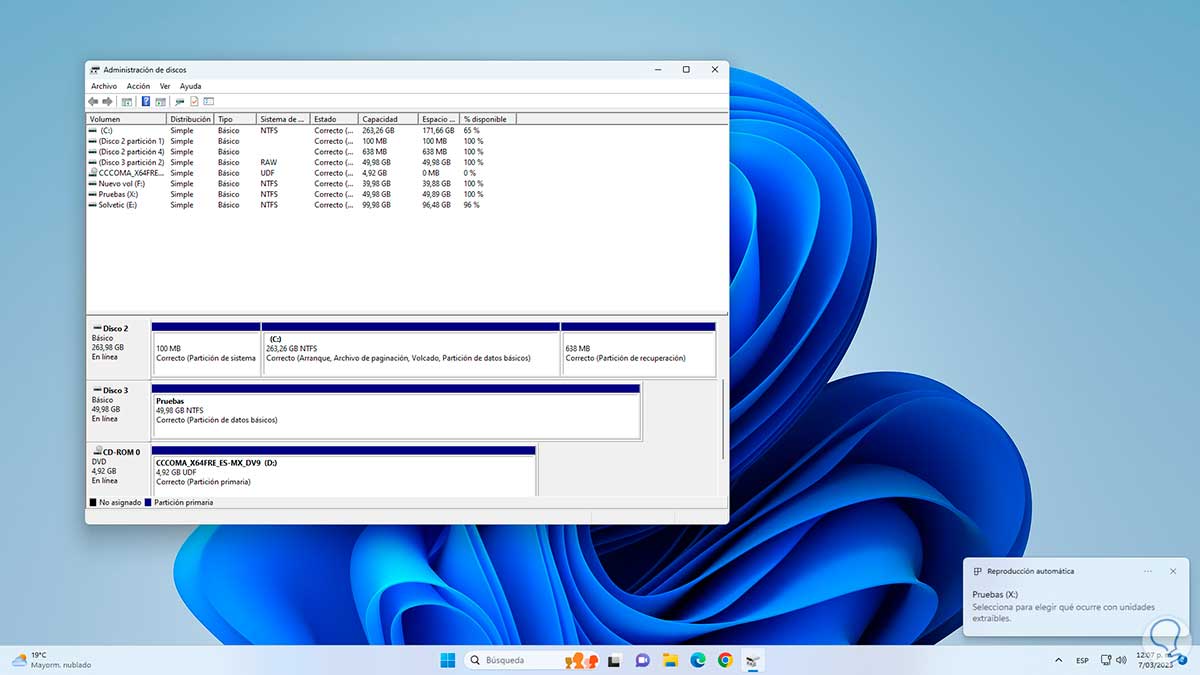
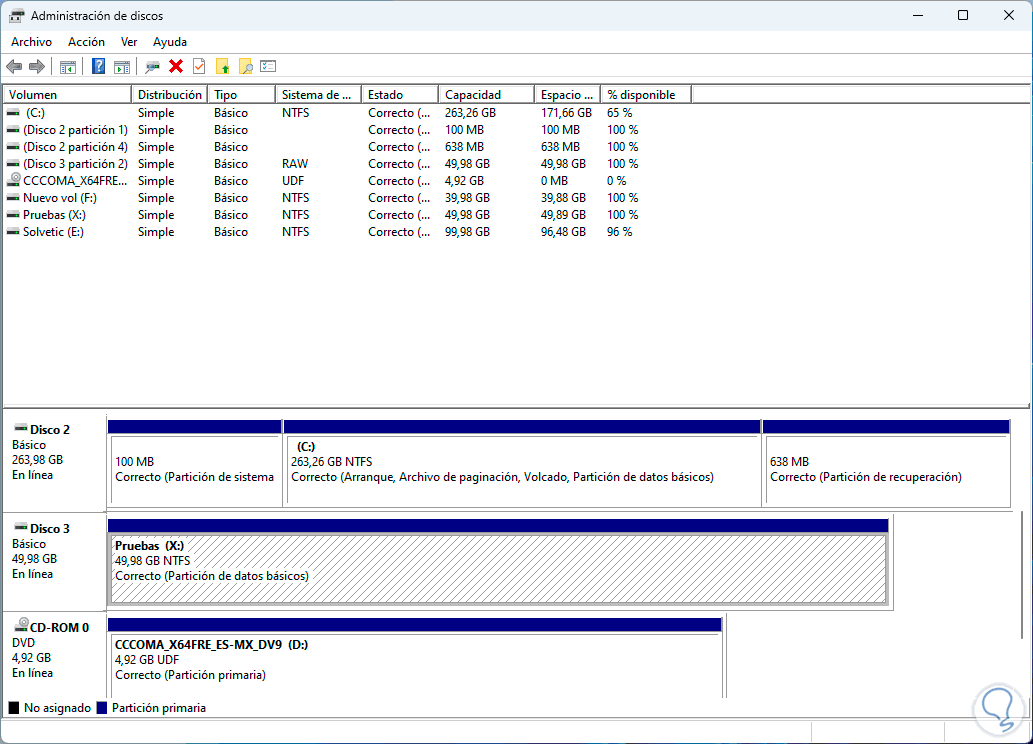
We apply the changes and the unit will automatically be loaded:
step 13
We can access the File Explorer to validate:
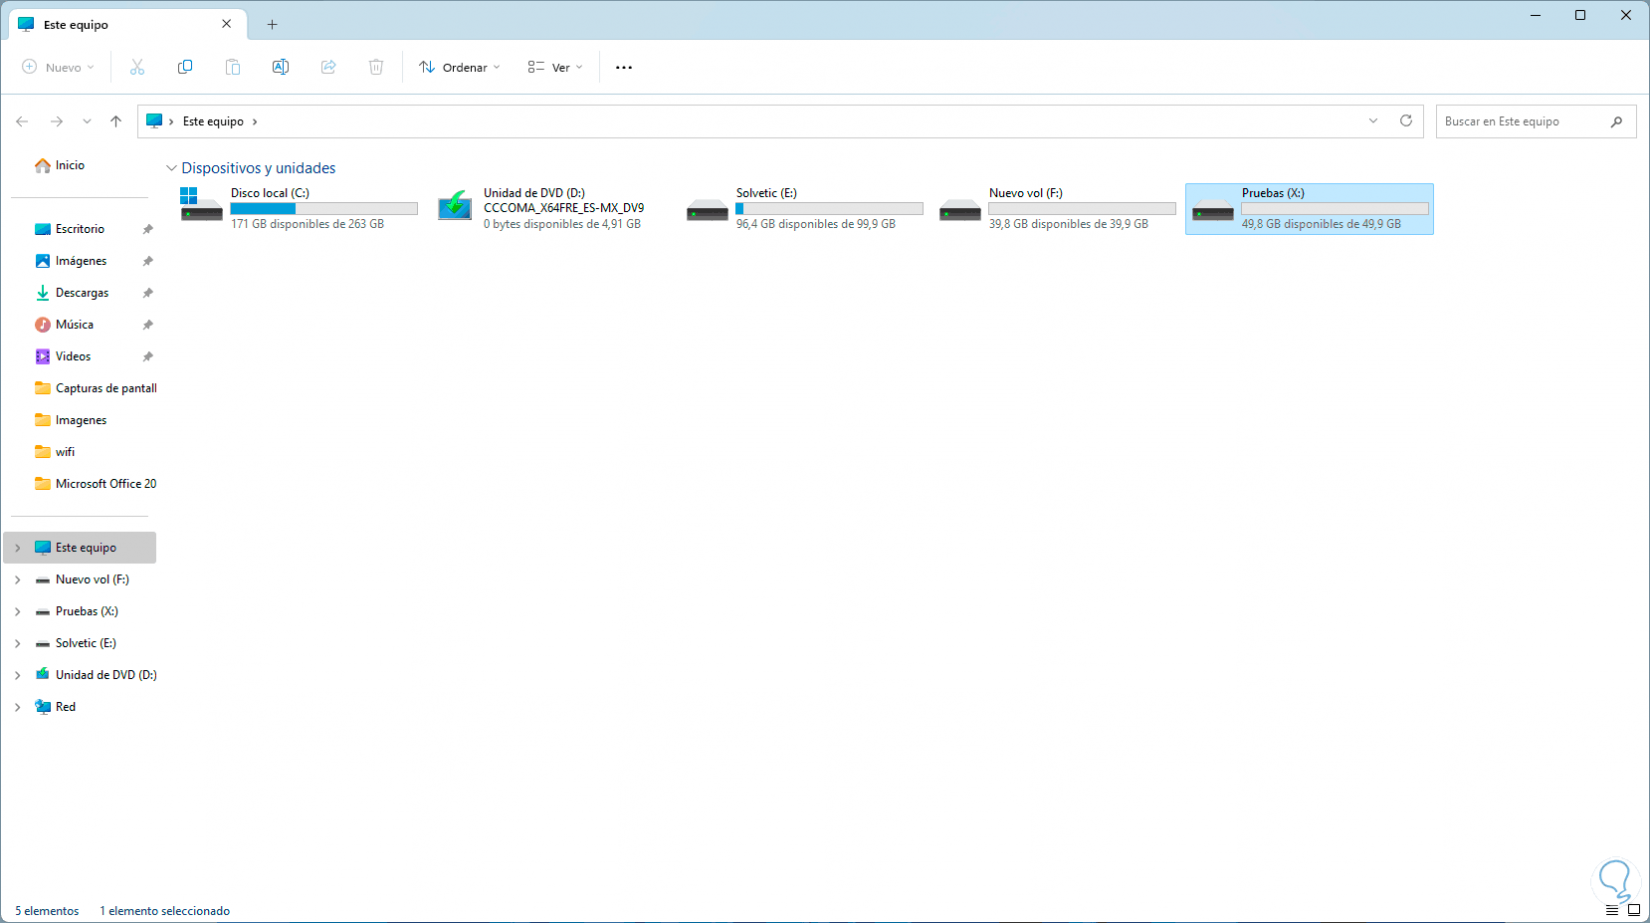
It is that simple to recover the new hard drive that we have connected to the PC.