VirtualBox is one of the most comprehensive solutions when virtualizing various types of operating systems in order to carry out actions such as:
- Know the new versions of operating systems released.
- Try new programs and applications.
- Know the reaction of applying new structures at the system level.
- Validate resource compatibility in different environments and more.
When using a virtualized environment, we will protect the productive environment without being affected by any negative reaction which is normal when a new operating system or application is launched. VirtualBox has been developed as a virtualization platform for the x86 (32-bit) and AMD64 / Intel64 (64-bit9) architectures both at the corporate and home level.
VirtualBox is a free open source software under the terms of the GNU General Public License (GPL) version 2.
VirtualBox can now be run on Windows , Linux, Macintosh and Solaris hosts and supports a large number of guest operating systems , which means that the management and administration possibilities will be greater..
Basic characteristics
Some of the basic features of VirtualBox are:
- It is portable since VirtualBox can be run on both 32 and 64 bit operating systems
- Virtual machines created in VirtualBox can be imported and exported simply by using the Open Virtualization Format (OVF).
- Integrates Guest Additions which are software packages that are installed within compatible guest systems in order to improve performance and offer additional integration and communication with the host system at aspects such as shared folders, integrated windows, 3D virtualization.
- Hardware virtualization is not required.
- VirtualBox offers great hardware support in aspects such as the multi-processing guest (SMP) which can support up to 32 CPUs in each virtual machine, support for USB devices, ACPI support, supports various resolutions on several screens, supports PXE network boot and plus.
- It has a multigeneration of branched snapshots with which VirtualBox will save the snapshots of the virtual machine state, then it will be possible to go back in time and revert the virtual machine to any of the available snapshots in order to start an alternative configuration of the machine selected
- VirtualBox has a group function which allows the user to organize and control virtual machines collectively and individually.
News
Currently VirtualBox has launched version 6.0 which offers news such as:
- The user interface has been improved which has added improvements with HiDPI compatibility and scaling, including better detection and configuration by virtual machine.
- Support implemented with the objective of exporting a virtual machine to Oracle Cloud Infrastructure
- A new file manager has been integrated which will allow you to control the guest's file system and copy files between the host and the guest.
- Aspects for 3D graphics support for Windows guests, and VMSVGA 3D graphics device emulation on Linux and Solaris guests have been improved.
- Support for surround sound speaker configurations has been added.
- Integration of the vboximg-mount utility on Apple computers which allows access to the content of guest disks on the host.
- Support has been added to use Hyper-V as the alternate execution kernel on the Windows host.
Improvements
At the level of improvements of the features and functions existing in this version 6.0 we find:
- Video and audio recording can now be enabled individually.
- Added better support for connecting and disconnecting remote desktop connections.
- Audio and video corrections.
- iSCSI is determined automatically.
- The VBoxManage now has support for DHCP options.
- It is now possible to resize disk images transparently.
- New interfaces and features in Guest Control.
- Linux 4.20 is now supported.
- Performance improvements in shared folders.
- Initial support of shared folder.
- With this new version it will be possible to configure up to four customized ACPI tables for a virtual machine.
Knowing this we will see how to install and create a virtual machine using VirtualBox in macOS Mojave. VirtualBox can be installed on Linux, Windows and macOS systems , as we will talk about macOS, it can be installed on the following systems:
1. How to download and install VirtualBox on macOS Mojave
Step 1
To download VirtualBox we must go to the following link:
Virtualbox
There we will see the following: We click on the "OS X hosts" line to download the VirtualBox .dmg image to be used in macOS Mojave.

Step 2
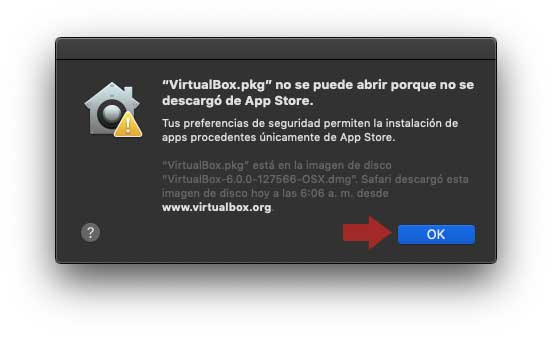
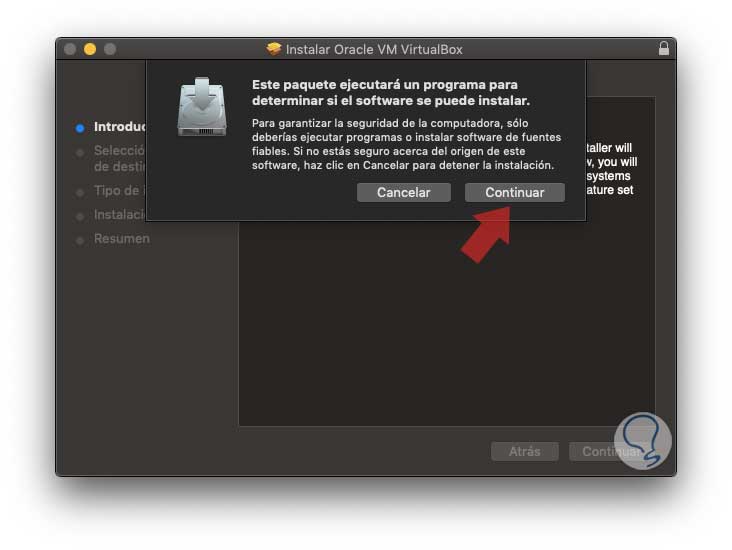
Once the VirtualBox image has been downloaded we proceed with its worst execution due to security issues, macOS Mojave prevents third-party applications or unreliable developers from being downloaded, so when you try to run the VirtualBox image, we will see the following. There we click on "Ok"
Step 3
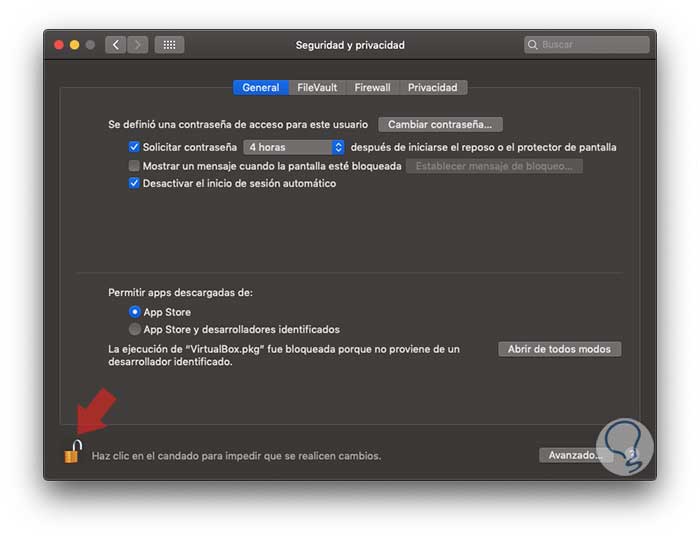
We must go to "System Preferences" and in the "Privacy and security" section we find the following. There we must click on the lock icon located at the bottom to make changes and it will be necessary to click on the "Open anyway" button to allow the installation of VirtualBox on macOS Mojave.
Step 4
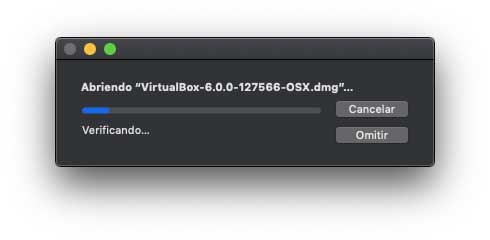
Once this process is authorized, we can see that the validation and opening of the VirtualBox image is initiated:
Step 5
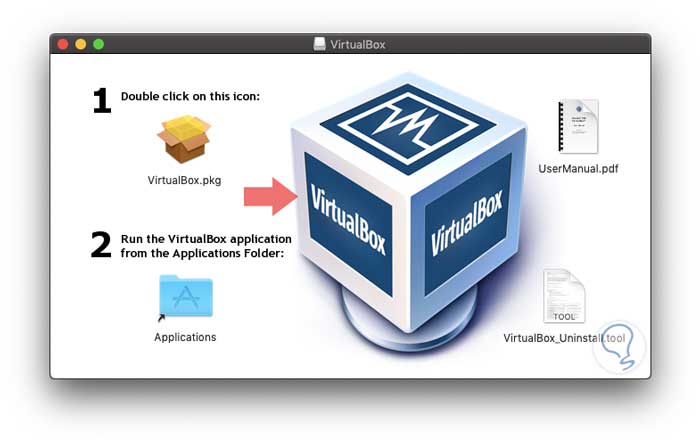
As soon as the image is verified, the following window will be launched:
Step 6
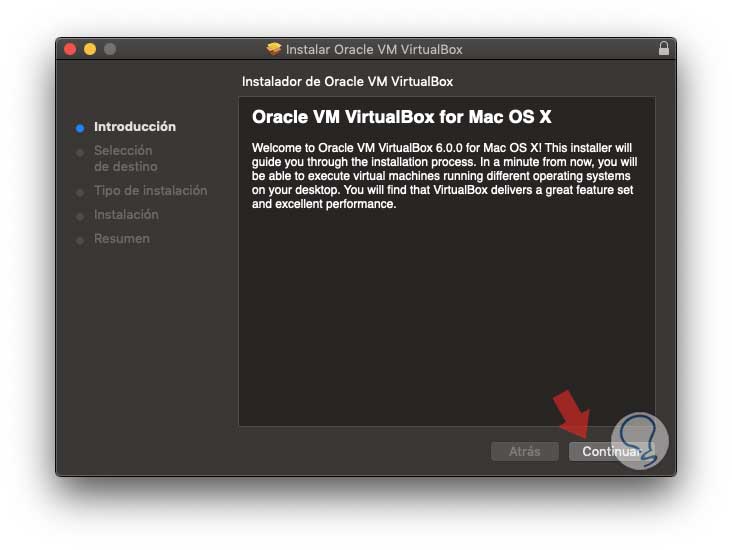
There we double click on the "VirtualBox.pkg" option to start the installation, the following wizard will be displayed:
Step 7
There we click on "Continue" and we will see the following:
Step 8
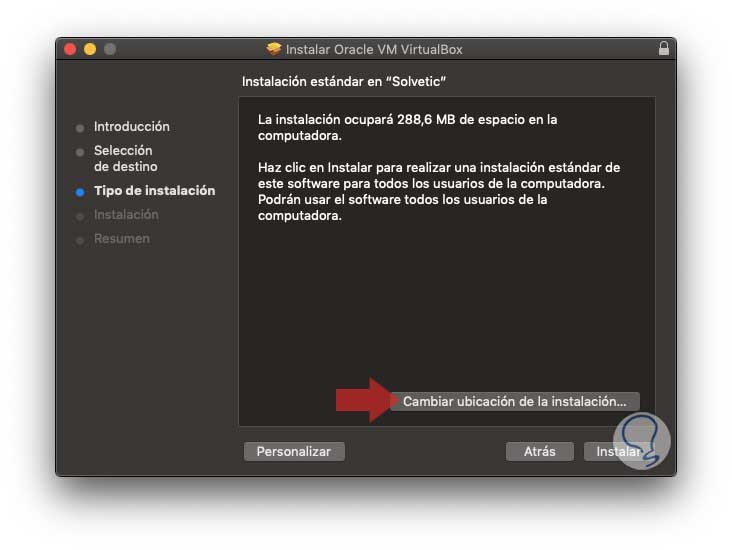
Click on "Continue" and in the following window we can define a different location for the VirtualBox installation:
Step 9
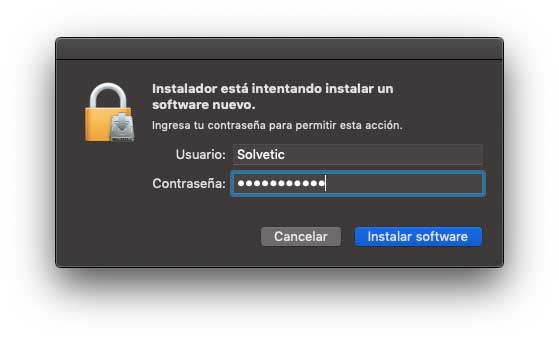
Once this is defined, click on the "Install" button and we will need to enter the administrator password to validate the process:
Step 10
We click on Install software and the installation of VirtualBox on macOS Mojave will begin. Once this process is finished we will see the following:
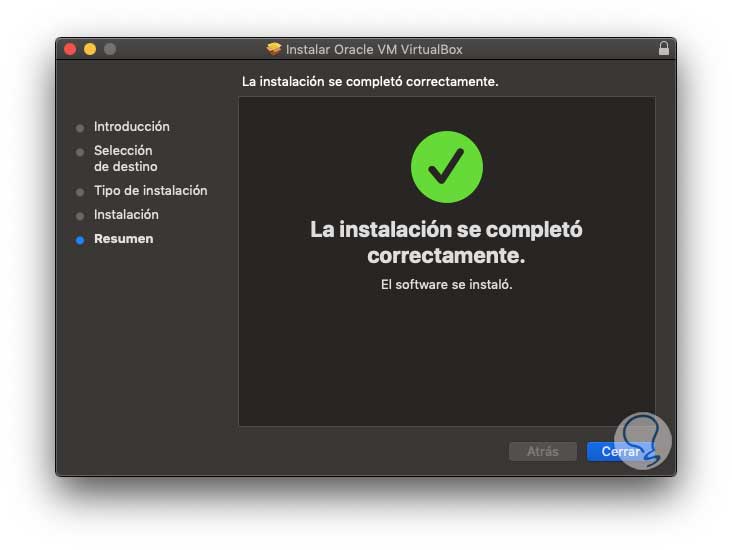
Click on Close to exit the assistant. Thus, we are ready to create our virtual machines in VirtualBox in Mojave..
2. How to create a virtual machine in macOS Mojave
Step 1
To create a virtual machine we access VirtualBox 6.0 in macOS Mojave and we will see the following:

There we can create the virtual machine in various ways such as:
- Clicking on the New button
- From the Machine / New menu
- Using the Command + N keys
Step 2
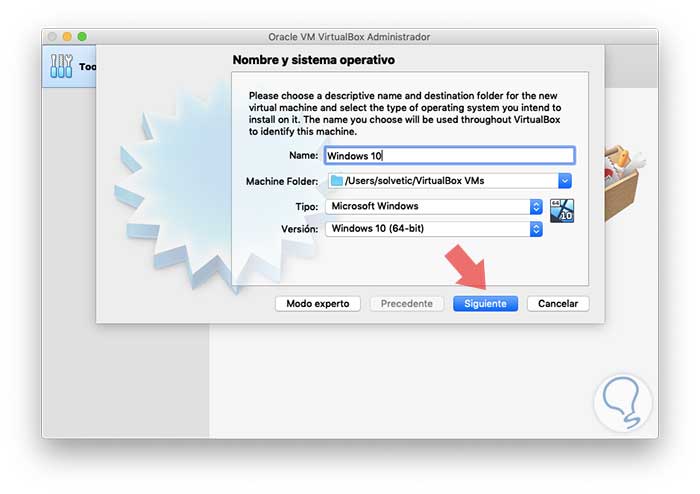
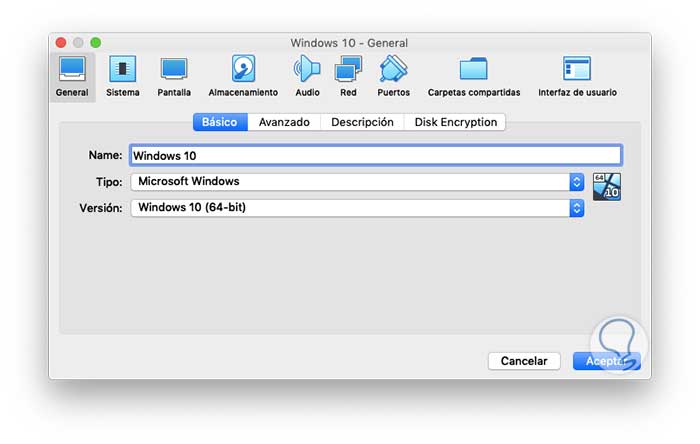
The following wizard will be displayed where we will enter:
- Type of system to install
Step 3
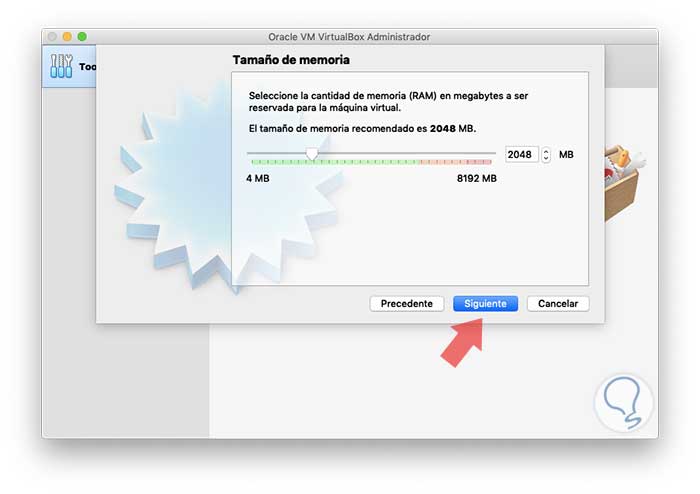
Now we define the amount of RAM to use and press next
Step 4
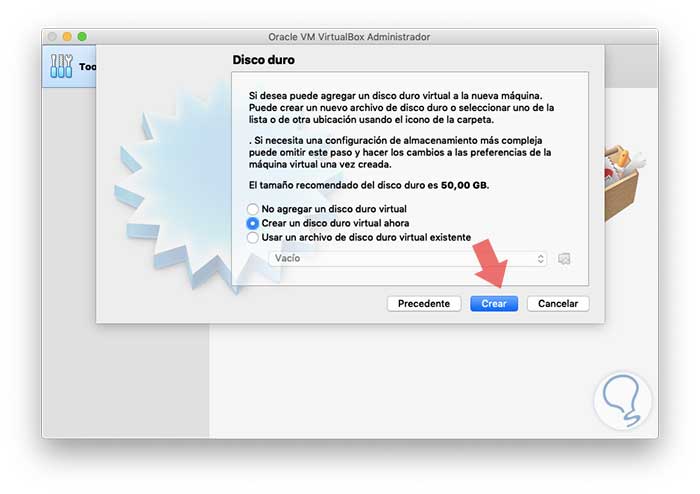
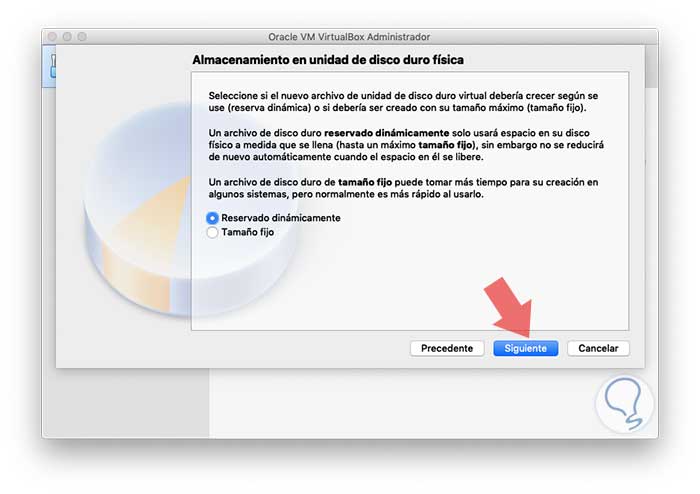
Now we can create a new virtual hard disk or use an existing one. Click on "Create" to define the type of hard disk to use:
Step 5
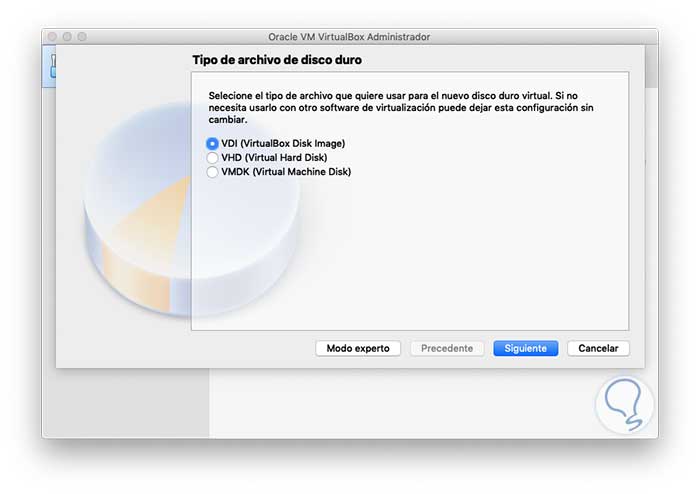
In the following window we define the type of storage to use:
Step 6
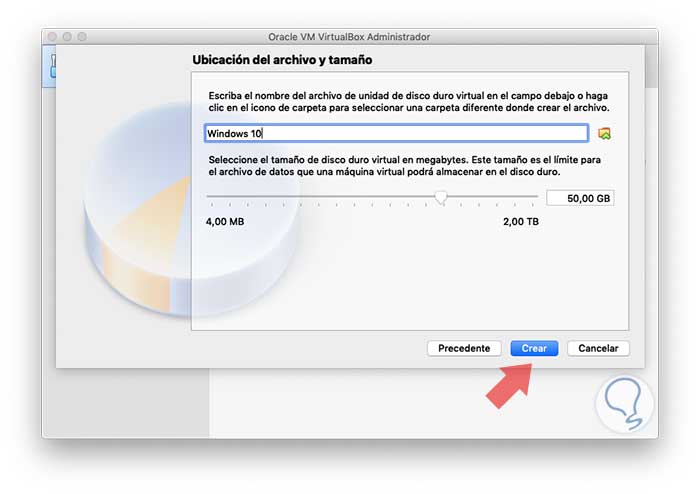
Finally we assign the name for the virtual hard disk and define its size:
Step 7
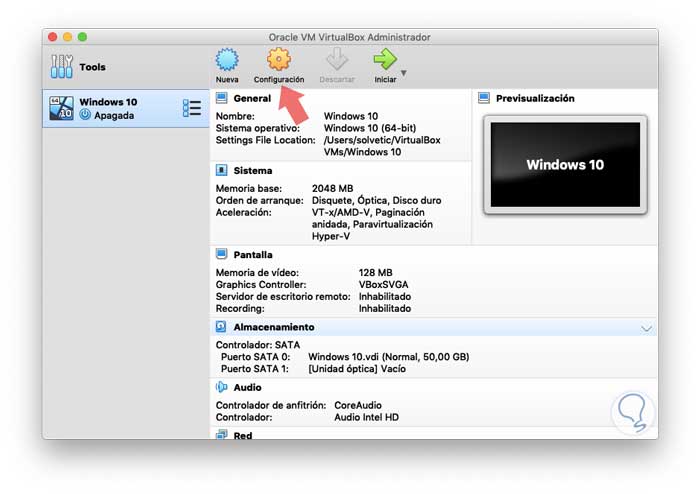
Click on "Create" to complete this process and once this is done we will see a summary of the configuration of the machine to create:
Step 8
There we can click on the "Settings" button to access all the settings options such as network, system, shared folders and more:
Step 9
To start the process of creating the virtual machine in VirtualBox in Mojave, click on the "Start" button and the following will be displayed:
Step 10
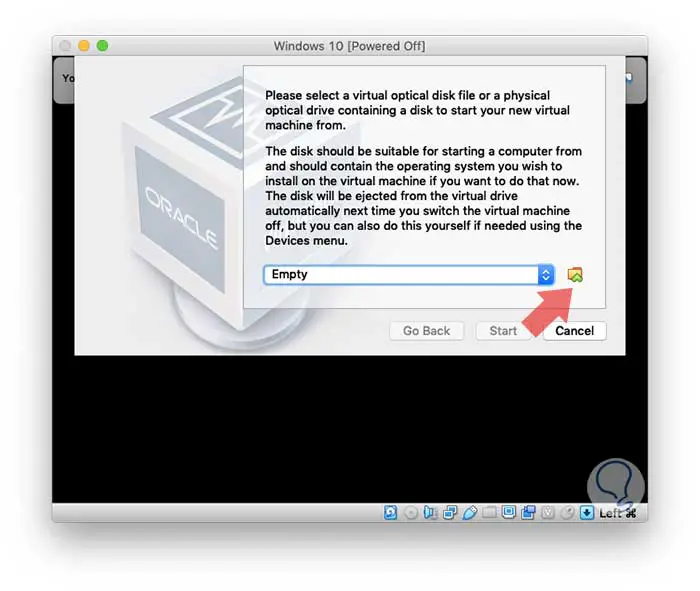
There we click on the folder icon located just next to access the path where the ISO image of the system to be installed is located:
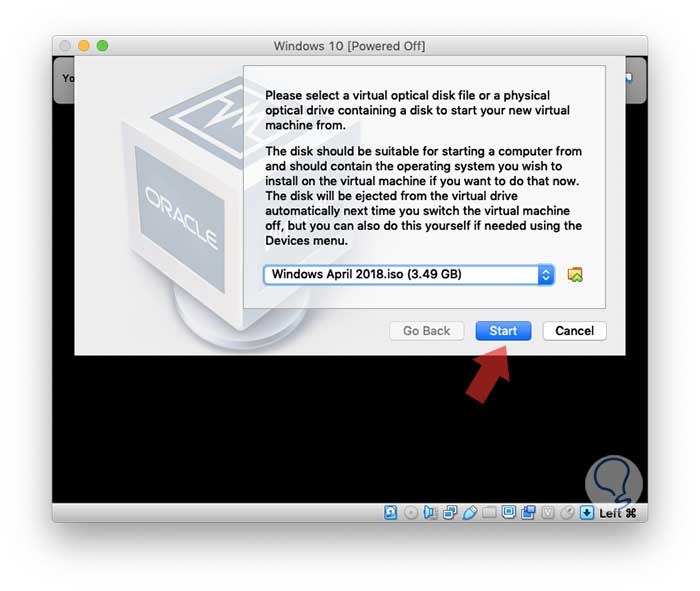
Step 11
Click on "Start" to access the installation process of the operating system:
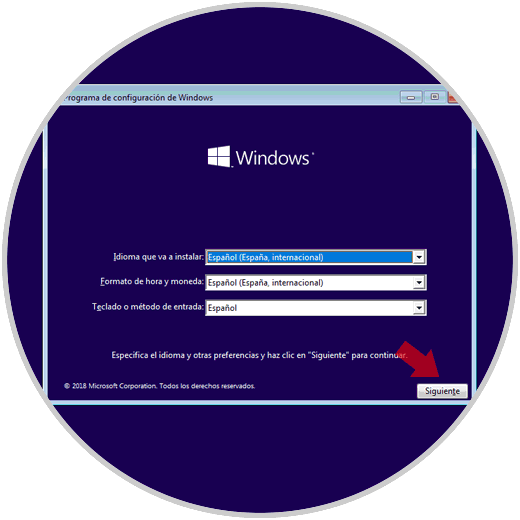
Step 12
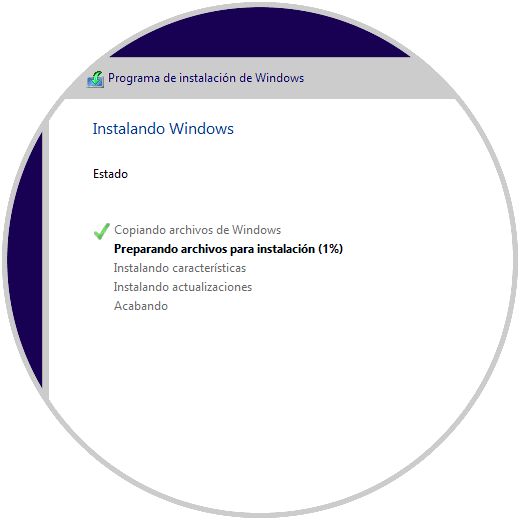
Once this process is carried out we expect the operating system to be installed in the traditional way:
Step 13
Once the installation process is finished, we can access the different menus offered by VirtualBox to manage virtual machines, for example:
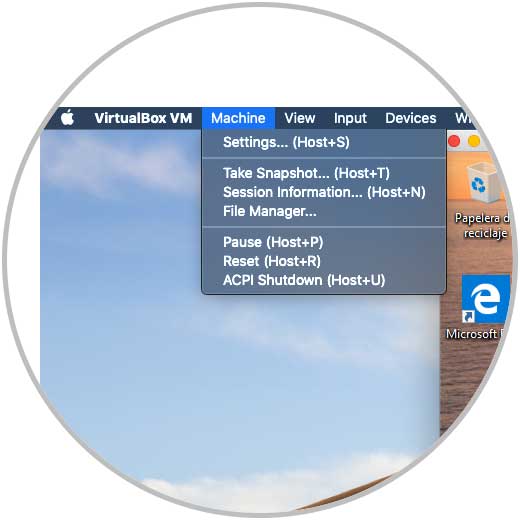
Step 14
In the Machine menu, it will be possible to take snapshots, access the file manager, view active session information and more:
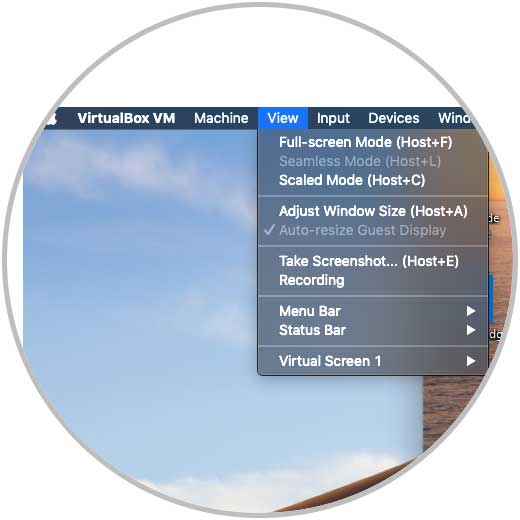
Step 15
In the View menu, it will be possible to see various virtual machine view modes, as well as record the screen or take screenshots of it:
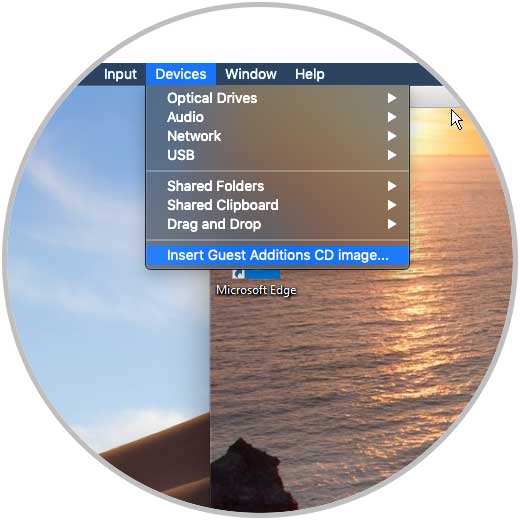
Step 16
One of the most important aspects to consider when creating a virtual machine in VirtualBox is to insert the Guest Additions CDs which allow all the functionality of VirtualBox to be carried out in an integral way.
To do this, we will go to the Devices menu and there we select the option Insert Guest Additions CD image:
Step 17
The following will be displayed on the virtual machine:
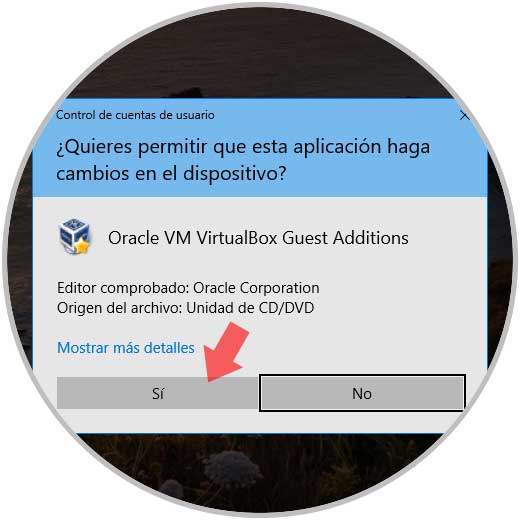
Step 18
There we click on the "Yes" button and the following assistant will be displayed:
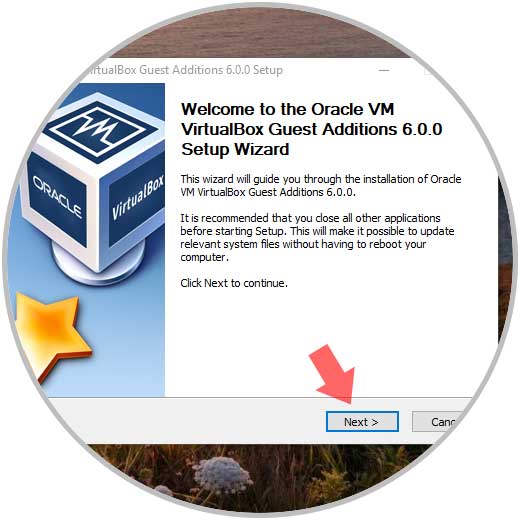
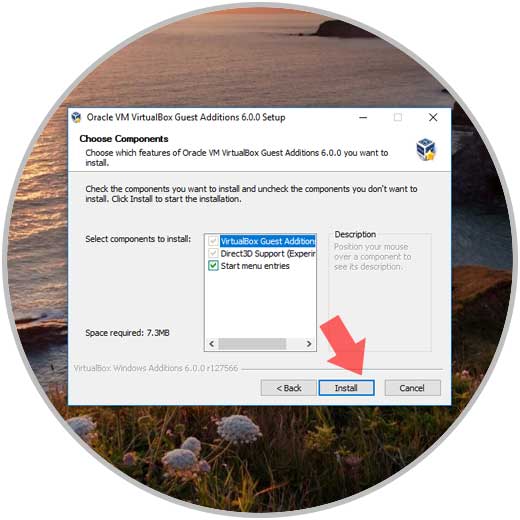
Step 19
We must follow the entire process indicated to enable all VirtualBox functionalities:
Step 20
Once this is over we will see the following:
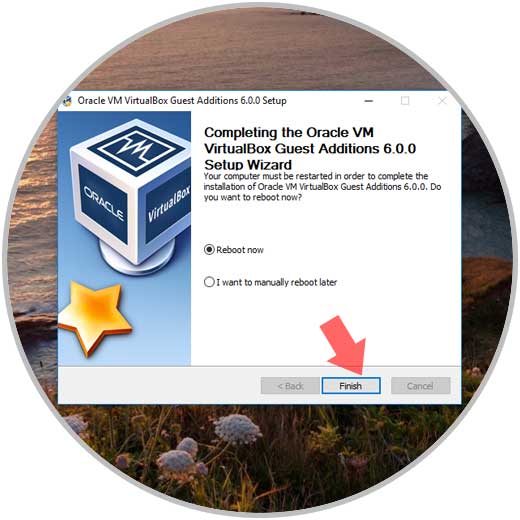
There it will be necessary to reboot the system to complete the changes and then we can make the most of each of the features integrated in VirtualBox 6.0.
We have seen how VirtualBox simplifies virtualization tasks to be able to perform all the actions relevant to systems or applications tests..