When we work with documents in Windows 10 we carry out various tasks focused on improving the presentation of the information to be provided, one of the most normal actions is to capture screenshots of the processes in order to show step by step or to have some type of support in case of assistance. The Windows 10 operating system gives us the opportunity to capture the active screen in a useful way by simply pressing the following keys simultaneously. By default this screenshot is automatically saved in the Images / Screenshots folder..
+ Imp Pant (PrtSc)
Screenshots favor us in different aspects. You can reinforce our communication since we can attach images of something concrete at a given time. For analysis and statistics it is really useful to display data in real time without giving access. Although it is easy to make these captures, sometimes we can not find your save path or just give an error.
Now, in some cases it happens that when the screen is captured in Windows 10 with the indicated method they are not hosted in the default system folder:
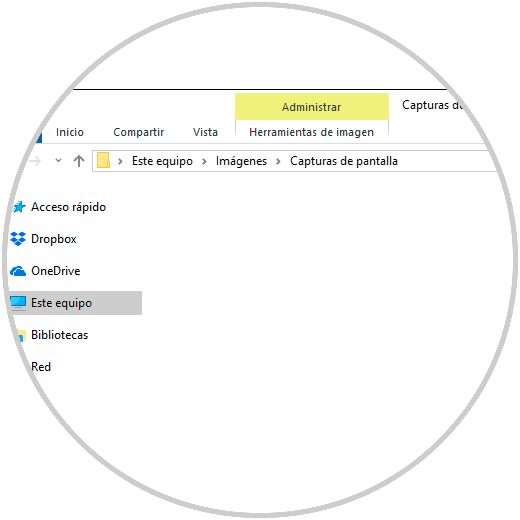
For this reason TechnoWikis will give some guidelines on how we can allow screenshots to be saved again in the default folder..
1. See save path of Screenshots in Windows 10
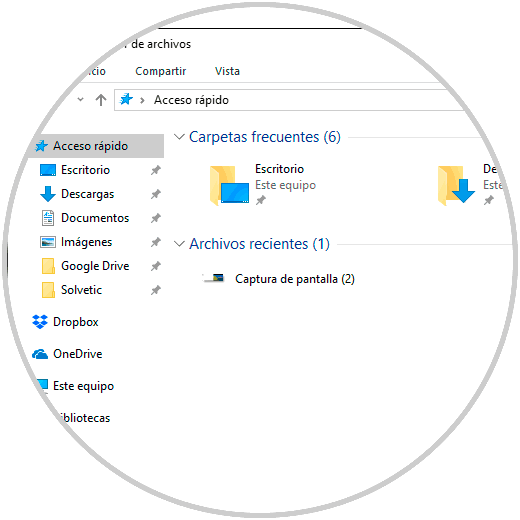
When we capture a screen in Windows 10 with the indicated keys we can see that for a period of seconds the screen darkens, this means that the capture has been taken, but in the default folder there is no such image, it is necessary to validate in which route Windows 10 is saving the captured images. To verify this we access the Windows 10 File Explorer and there we will go to the "Quick access" section and in the "Recent files" category we will see the image capture with its respective hosting path:
Note
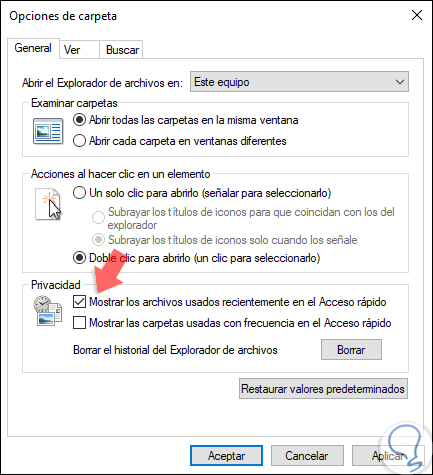
In case the “Recent files†section is not visible we must go to the View / Options / Change folder and search options menu from the File Explorer and in the “General†tab we activate the “Show recently used files in the Quick access". That way we will know exactly where our catches are.
2. View permissions from the Screenshots folder in Windows 10
Permissions are an essential factor for Windows 10 to host the captures in that folder, this means that if our account does not have the appropriate permissions, the captures cannot be saved there since access is denied.
Step 1
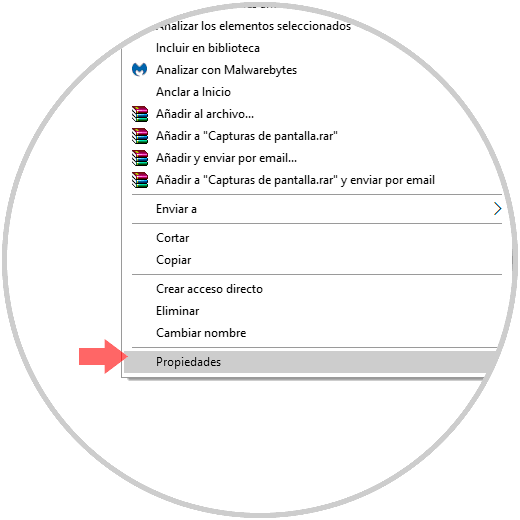
We can verify this by right clicking on the Screenshots folder and selecting the "Properties" option:
Step 2
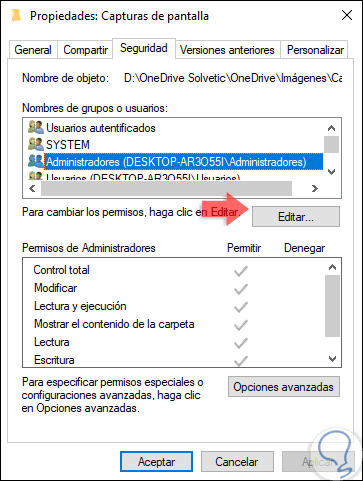
In the displayed window we go to the "Security" tab and there we validate that our user, or the group to which we belong, has the necessary permissions and it is recommended that it be Total Control:
Step 3
If the user does not exist there, click on the "Edit" button and the following will be displayed:
Step 4
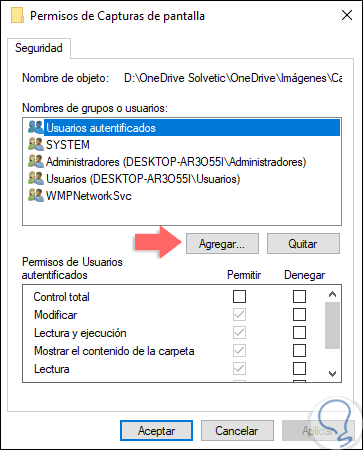
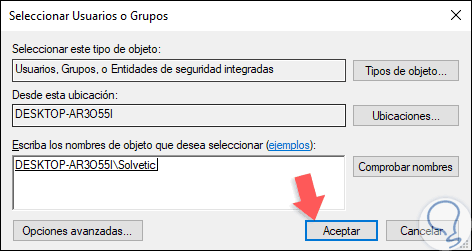
There we click on the “Add†button and in the pop-up window we will place the user to add:
Step 5
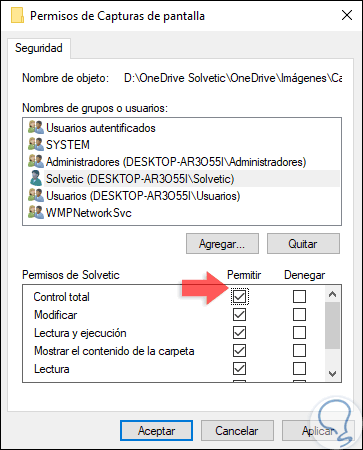
Click on Accept and then activate the “Total control†box with the selected user. Click on Apply and Accept to save the changes.
3. Configure OneDrive to save Screenshots in Windows 10
OneDrive is the Windows 10 cloud platform where we have 5 GB of capacity to upload various types of files, but with its default settings it is possible that the captures are automatically saved in the cloud.
Step 1
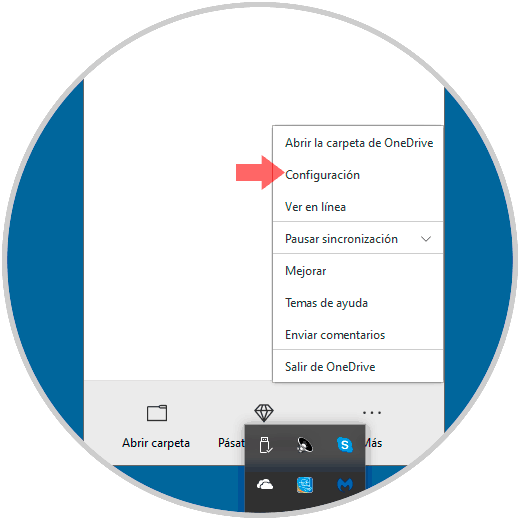
To validate this we will right click on the OneDrive icon located in the taskbar and in the drop-down list select “Configurationâ€:
Step 2
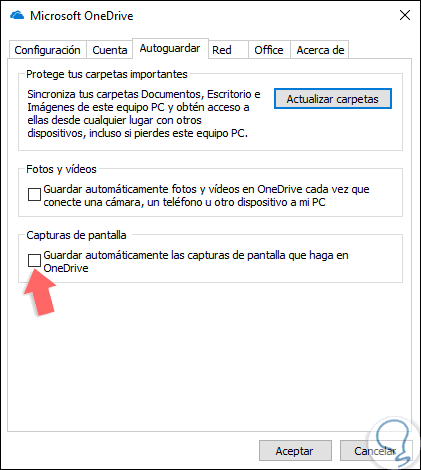
In the pop-up window we will go to the Autosave tab and there we must verify that the box “Automatically save the screenshots you make in OneDriveâ€. Click on OK to apply the changes.
With any of these methods it will be possible to check where our screenshots are saved in Windows 10 and restore the default settings.