PowerPoint is one of the applications integrated in the Office suite thanks to which it is possible to make professional presentations thanks to all its integrated tools such as effects, transitions, multimedia elements and much more. We currently have the 2016 version of PowerPoint, but Microsoft incorporates the new PowerPoint 2019 version that comes loaded with notable improvements..
The process of creating a presentation can take days based on the data to be presented, the desired transitions and in general all the available formatting options so that a good alternative is to protect said slide or presentation to prevent other users from accessing the presentation and make changes or edit those already established.
Having our presentations protected is important when we have to deliver them, especially. The main reason in addition to aesthetics is to reduce the option of plagiarism or copying of information from the slides themselves. A protected presentation can directly block its opening and also its edition. The receiver will either need an opening password or can only view it from a read mode that does not allow him to edit. Taking protective measures will improve the security of our information something important at the corporate level. TechnoWikis will explain some methods to protect and block PowerPoint presentations and this method applies to both the 2016 and 2019 edition of PowerPoint ..
To keep up, remember to subscribe to our YouTube channel! SUBSCRIBE
1. Block presentation using read-only mode in PowerPoint 2019, 2016
We know that the read-only mode allows users to access the presentation but prevents editing tasks on it.
Step 1
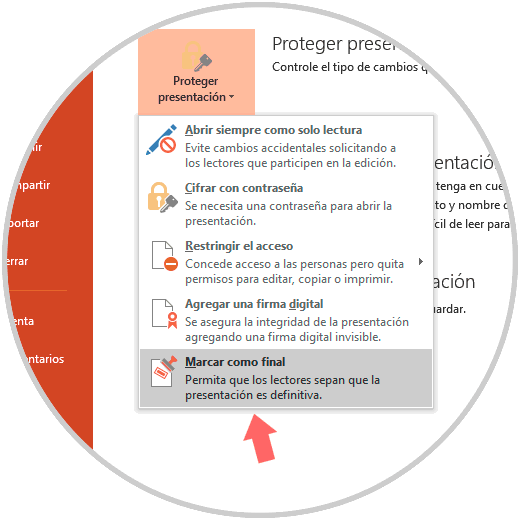
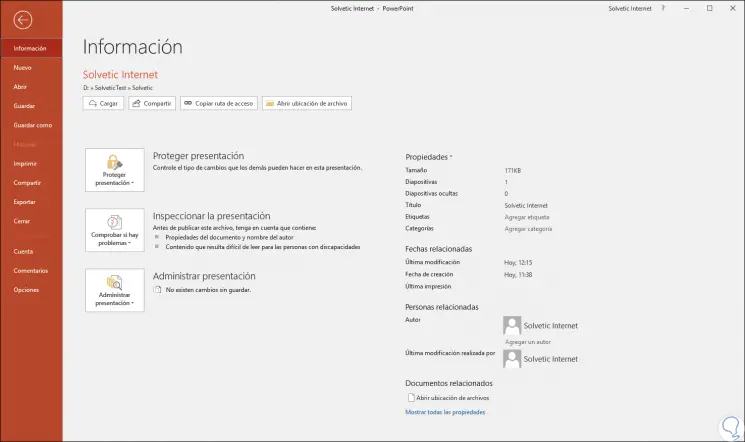
For this action we must use the “Mark as final†function, so when the presentation is marked as final, options such as writing, editing, commands and revision marks are deactivated preventing other users from editing it. To mark a presentation as final we will go to the "File" menu and in the "Information" section click on the option Protect presentation "and in the available options select" Mark as final ":
Step 2
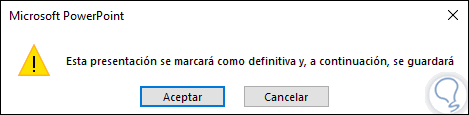
Clicking there will display the following message:
Step 3
Click on Accept and proceed to save the presentation, after this we will see the following message. Click on OK to close this message.

Step 4
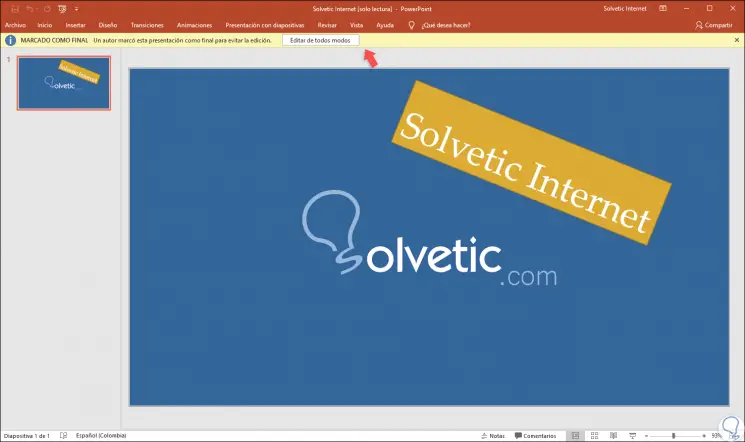
Now, when the presentation is accessed, we will see the legend "MARKED AS END" at the top of the presentation. If there we click on the “Edit anyway†button, this legend will be removed and we can continue using the slide and apply changes to it.
2. Block presentation using access restriction in PowerPoint 2019, 2016
This option prevents other users from applying changes to the selected presentation.
Step 1
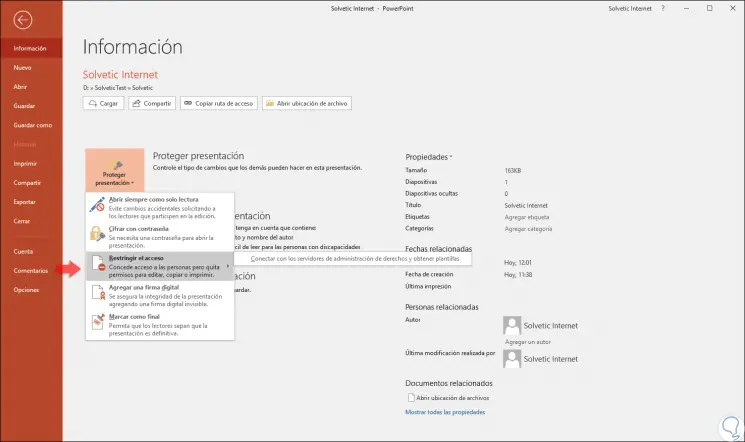
For this method, we go to the "File" menu and in the "Information" section click on "Protect document" and there we select the option "Restrict access":
Step 2
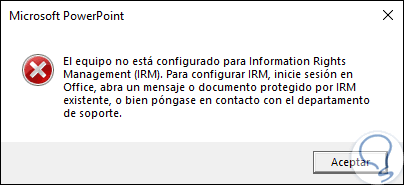
The problem with this method is that you need to have configured MRI, otherwise we will see the following:
3. Block presentation using password in PowerPoint 2019, 2016
It is the most essential method since the use of a strong password will be required to access the presentation.
Step 1
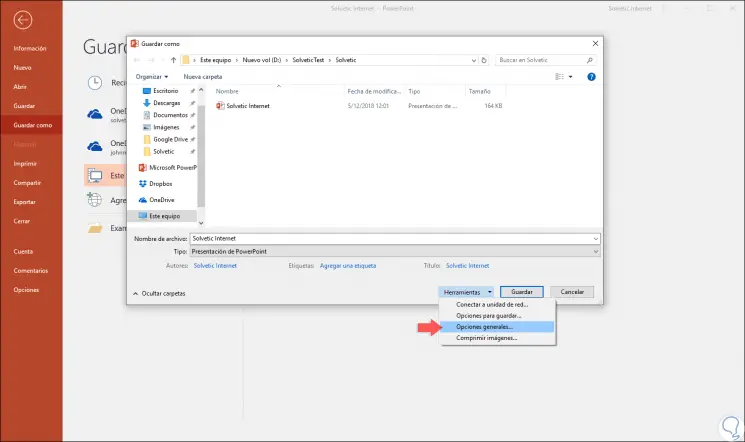
For this method we must go to the “File†menu and there select the option “Save asâ€, in the window that will be displayed we will define the route where the presentation will be saved and we must click on the “Tools†field and there select the “General options†line :
Step 2
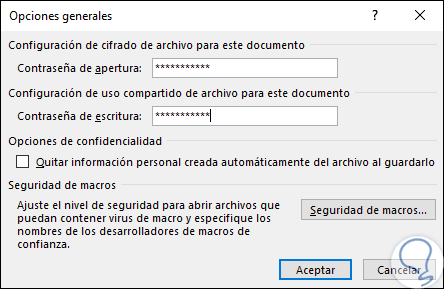
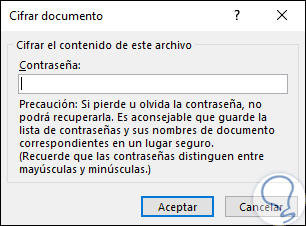
In the next window we enter and confirm the password to use on the slide:
Step 3
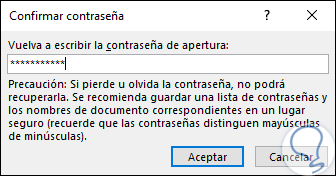
Click on the "Accept" button to apply the changes and a new window will be displayed where we confirm the password entered:
Step 4
Once entered press OK to confirm the action. Now, when we try to access this presentation we will see the following:
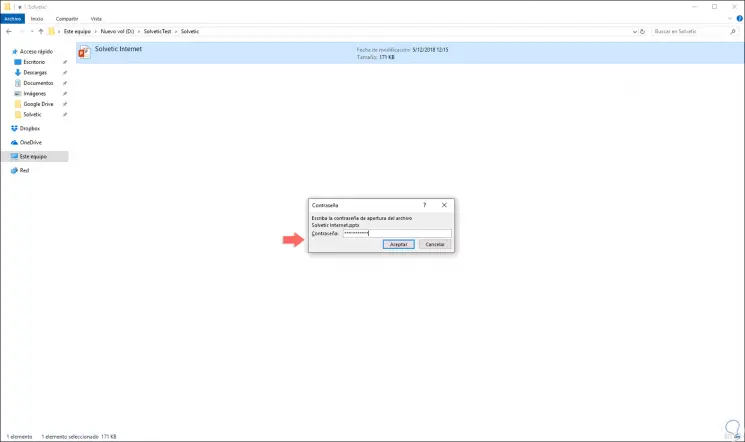
Step 5
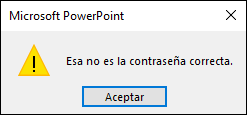
There we enter the established password and click on OK, in case of entering a wrong password we will see the following:
Step 6
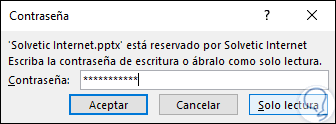
On the contrary, if we enter the correct password, the following window will be displayed where we must confirm it or open the file in read only:
Step 7
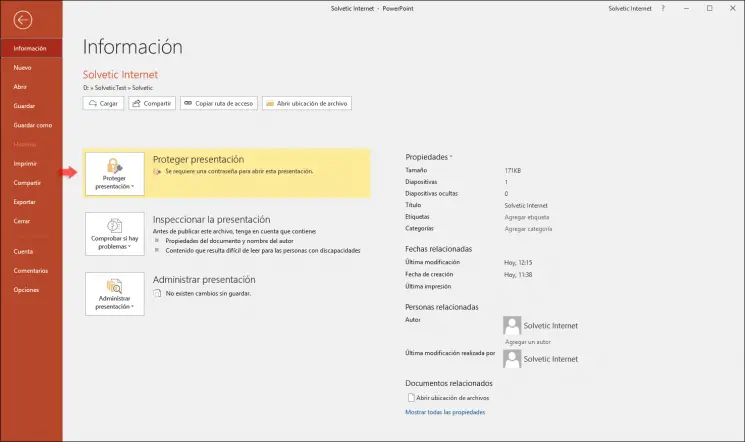
When accessing the presentation, in the “Information†field, we will see that the need to use a password to access is indicated:
Step 8
If we want to delete the password, we must click on the “Protect presentation†option and select the “Encrypt with password†line, in the pop-up box we leave the field blank:
Step 9
Click OK and in this way we have removed the password from the PowerPoint presentation 2016 or 2019:
We can see that the options to protect our presentations are diverse and each one can be used based on their current protection needs, but each one is safe.