Microsoft Outlook is one of the most used mail platforms today for its different characteristics and performance in both mail management and contacts and calendars . It is natural that we receive hundreds or thousands of emails but these messages will soon fill the Outlook Inbox without us noticing either new messages, replies or forwarding..
To solve and help improve this situation, Outlook offers us the function of self-archiving which moves the old elements. This is done because we may want to keep a file in order to keep the Inbox and their respective folders in order.
We will learn to activate the auto-archive option and this process is identical in the 2013, 2016 and 2019 versions of Outlook..
1. How to self-archive emails in Outlook 2013, 2016
Step 1
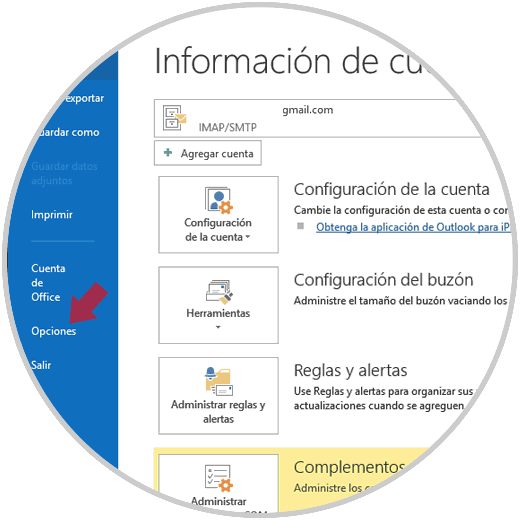
To start this process, we access Outlook and there we must go to the "File menu" and there we must click on the "Options" section
Step 2
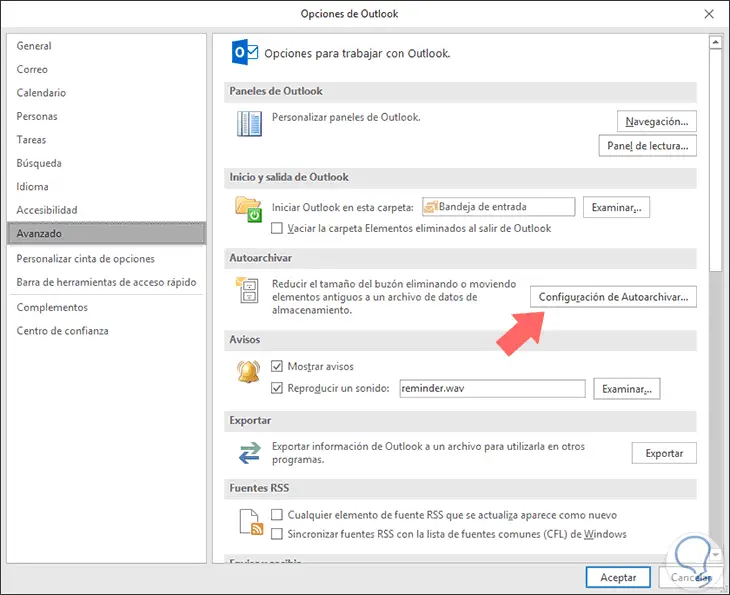
In the pop-up window we will go to the "Advanced" category and in the right panel we will locate the "Auto-archive" section and we will see the following:
Step 3
There we click on the "AutoFile Configuration" button where the following will be displayed:
Step 4
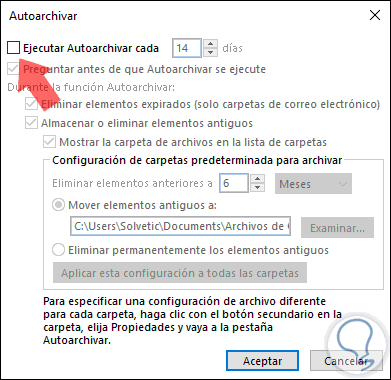
As we can see, the option "Run AutoFile" is deactivated every time, when activating this box we will see the following options:
Configurations
As we see there it will be possible to carry out configurations such as:
- Ask the user before performing the task.
- Delete items whose age is greater than a certain period.
- Define the route where the old elements are to be moved.
- Define the frequency of AutoFile execution and more.
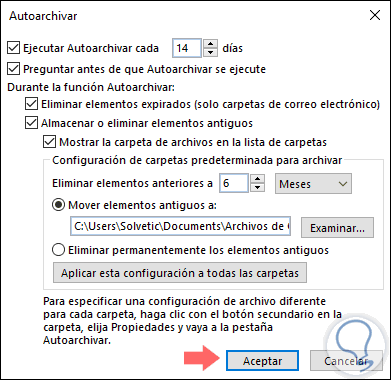
Once this is defined, click on OK to apply the changes.
AutoFile Settings in Outlook
At the top we can see that the AutoFile task will run every 14 days. If we want to edit this, just change it using the up and down arrows or by typing a number between 1 to 60 days.
The next option is "Ask before AutoFile runs" which allows Outlook to launch a message before the action. This will allow us to confirm or not if we want the process to take place.
In the other options we can define routes, periods and type of emails that have to be involved in the AutoFile process.
2. How to self-archive different objects in Outlook 2013, 2016
The folders that default Autoarchiva Outlook are:
Step 1
To add a new folder, we will right click on it and select the option "Properties"
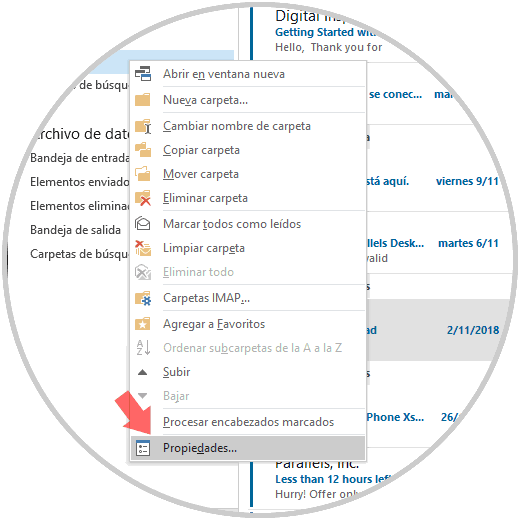
Step 2
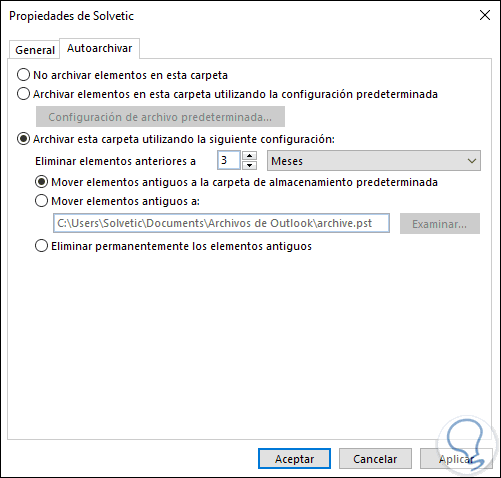
It will also be possible to access the properties of the folder in the path "Folder / Folder Properties" in the menu. In the displayed window we will go to the "AutoFile" tab where we will see the following:

Step 3
There we can activate some of the boxes like:
- Archive items in this folder using the default settings which make use of Outlook default values.
- Archive this folder using the following configuration which allows us to establish our own methods of use.
As we see, the process is simple to Autoarchive old emails in Outlook 2013, 2016 or 2019..