Nowadays having an internet connection on our mobile devices is essential to be able to use most of its functions. Most applications need this type of connection just like if we want to browse the different websites, check our email, or manage our social networks ..
This means that if for some reason we do not have access to a nearby WiFi network and our mobile device does not have access to the network, we will stop being able to do everything we just mentioned. However, there is the possibility of connecting to another device to share your connection with us.
In the case that we have a Huawei Mate 20 with connection, we have the possibility of turning this phone into a WiFi access point, so that other devices can connect. Here’s how to activate this step by step..
To keep up, remember to subscribe to our YouTube channel! SUBSCRIBE
1. How to set Huawei Mate 20 WiFi access name and password
Step 1
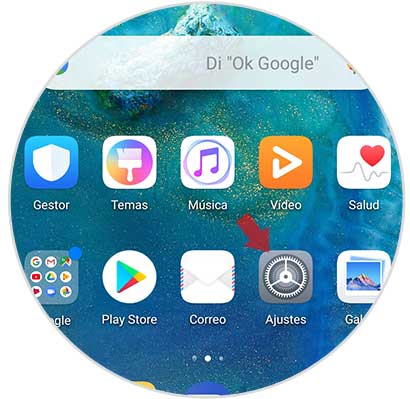
The first thing you should do is enter the Huawei settings from the main menu
Step 2
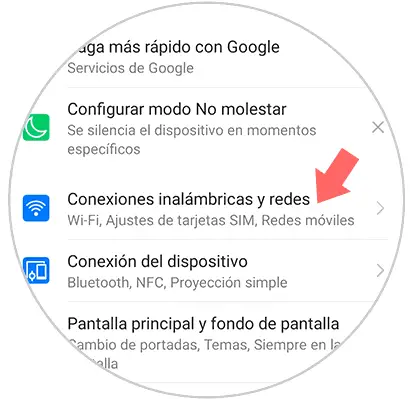
Once inside the settings, you must select the option “Wireless and networksâ€
Step 3
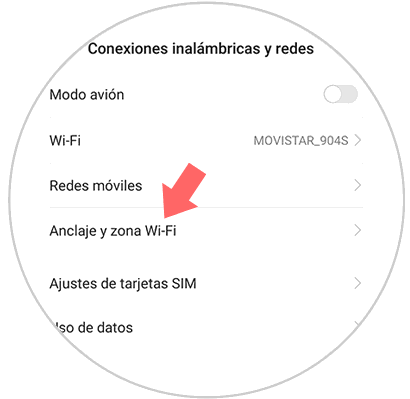
Now you must select “Anchor and WiFi zoneâ€
Step 4
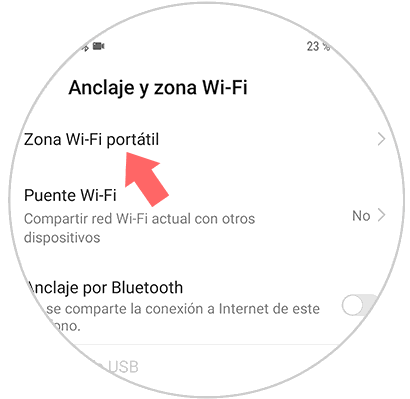
In the new tab, enter “Portable WiFi Zoneâ€
Step 5
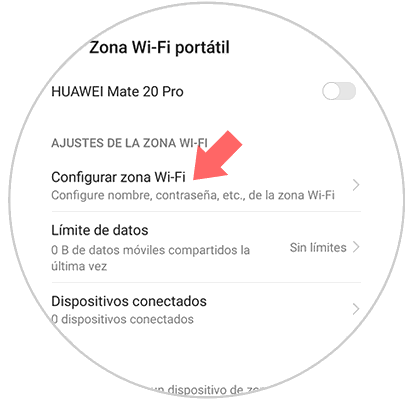
Next, you must select “Configure WiFi zoneâ€
Step 6
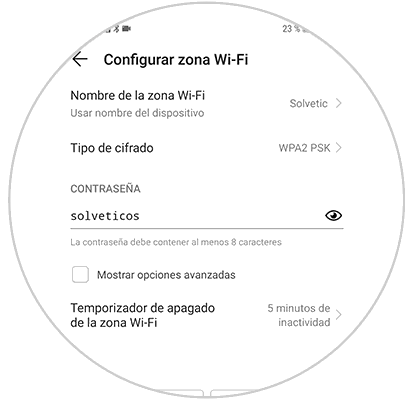
Once here, you will be able to select the name you want to put to your WiFi network, the type of encryption and the password you want to be entered in order to access it.
2. How to share Huawei Mate 20 WiFi
Step 1
The first thing you should do is enter the Huawei settings from the main menu

Step 2
Once inside the settings, you must select the option “Wireless and networksâ€

Step 3
Now you must select “Anchor and WiFi zoneâ€

Step 4
In the new tab, enter “Portable WiFi Zoneâ€

Step 5
Now you must select the tab at the top so that it is activated in blue by moving it to the right.
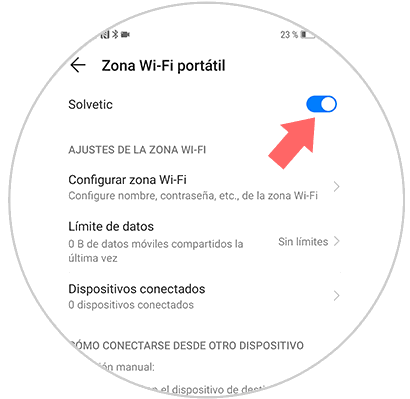
In this way we will be able to offer other devices of our trust or our own, the possibility of connecting to the network through our Huawei Mate 20 connection.