There are several techniques to test new applications, new operating systems and new styles of IT infrastructure, but many of them can have a negative impact on either equipment or productivity. This may affect issues of compatibility, performance or recursion..
To prevent this, there is the virtualization technique which allows you to create virtual machines of Windows, Linux, macOS and more operating systems (even on computers that are not compatible with each other) and from there execute tasks such as:
Virtual machine tasks
- Know the new features of the operating systems that are released.
- Prove that applications (new or existing) are compatible and run fully in a system.
- Create new development scenarios.
- Validate configurations between programs.
- Avoid damage to services and processes.
- Interact between various operating systems to test commands, cmdlets and other support lines.
Virtualization has a positive impact on something that thousands of users fear: "Costs", since virtualization will make use of the same physical resources of the equipment and it will not be necessary to invest in additional hardware.
Note
TechnoWikis recommends that to optimize the use of virtual machines we have good hardware parameters both at disk level, CPU and RAM.
One of the most versatile platforms for virtualization is VirtualBox which we can download for free at the following link:
Virtualbox
Virtual features
Some of the features of VirtualBox are the following:
- It does not require hardware virtualization.
- Compatible with 32 and 64 bit architectures.
- It offers various screen resolutions.
- Compatible with USB devices.
- Possibility of creating groups to manage virtual machines.
VirtualBox can be installed on the following operating systems:
Windows operating systems compatible with VirtualBox
- Windows 10 RTM (1507) build 10240
- Windows 10 November Update (1511) build 10586
- Windows 10 Anniversary Update (1607) build 14393
- Windows 10 Creators Update (1703) build 15063
- Windows 10 Fall Creators Update (1709) build 16299
- Windows 10 April 2018 Update (1803) build 17134
- Windows 10 October 2018 Update (1809) build 17763
MacOS operating systems compatible with VirtualBox
Linux operating systems compatible with VirtualBox
- Ubuntu 16.04 LTS, 18.04 LTS and 18.10
- Debian GNU / Linux 9 ("Stretch")
- Redhat Enterprise Linux 6 and 7
- SUSE Linux Enterprise server 12 and 15
- openSUSE Leap 42.3 and 15.0
CentOS 8 is the new version released of this powerful and safe operating system which offers some features such as:
- Administration from web console.
- New Systemwide crypto policies.
- Improvements in TCP Stack.
To know in detail everything about CentOS 8 we can visit the following link:
Now we will learn to install CentOS 8 in VirtualBox and thus get to know its latest features and features before being mounted in a productive environment..
1. How to configure VirtualBox
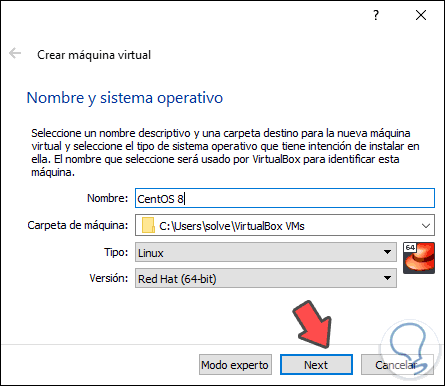
Step 1
To start this process, we access VirtualBox and there we can create our virtual machine using one of the following options:
- By clicking on the New button in the center panel

Step 2
Clicking there will display the following window where we configure:
- Name of the virtual machine.
- Type of operating system, in this case Linux.
- System version to use which will be Red Hat (64 bit).
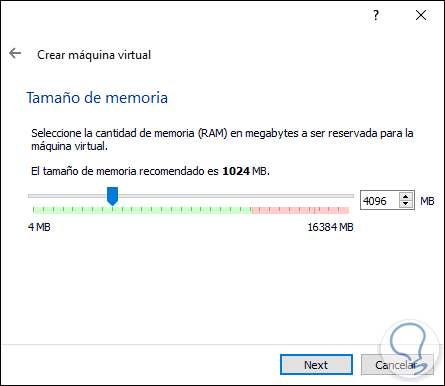
Step 3
We click Next and now we will assign the desired amount of RAM:
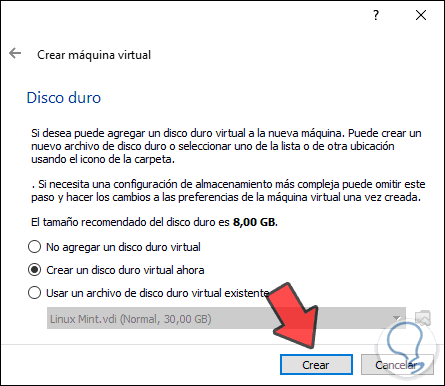
Step 4
We click on Next and it is time to configure the hard disk, there the options are:
- Do not add a virtual hard disk (we must do it later).
- Create a virtual hard disk which is the default value.
- Use an existing virtual hard disk.
Click on the Create button
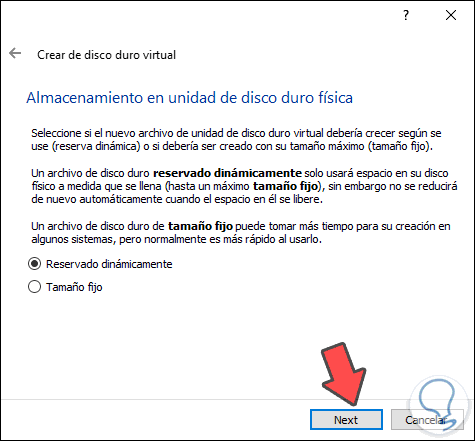
Step 5
We proceed to select the type of hard disk to use:

Step 6
Once selected, in the next window we will define the type of storage. There we can use the dynamic space which will grow as we enter information on the disk or use the fixed size which will be limited to the established size:
Step 7
Defined this we click on Next and it is time to assign the virtual hard disk path, as well as its size:
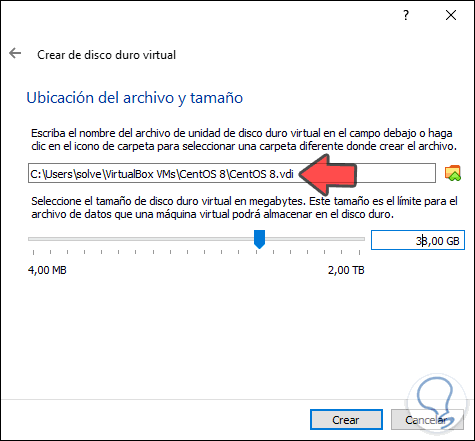
Step 8
Once this is completed, click on the “Create†button to proceed with this action and we will see that the virtual machine has been created in VirtualBox:
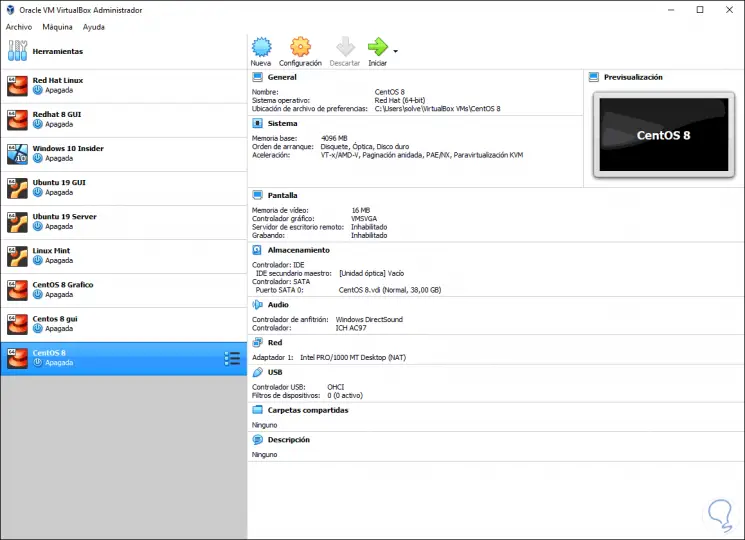
Now we have the option of making some virtual machine configuration settings for this we can:
- Click on the Settings button
- Go to the Machine / Configuration menu
- Right click on the virtual machine and select Settings
There we found several sections such as:
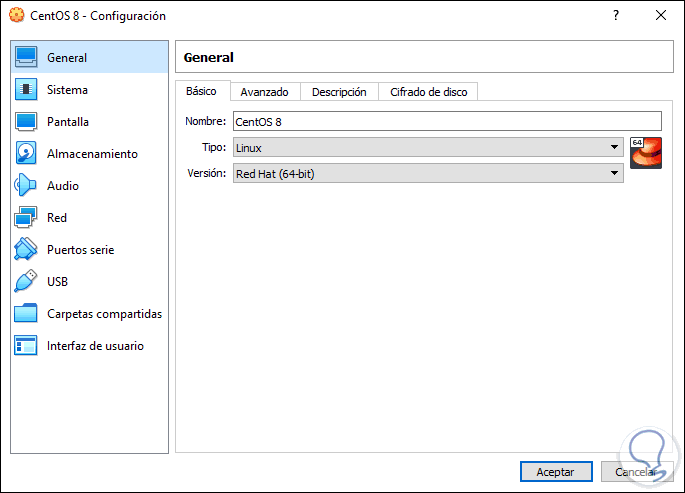
general
In this section we can perform actions such as:
- Modify the name, type or version of the virtual machine.
- Enable clipboard and drag options.
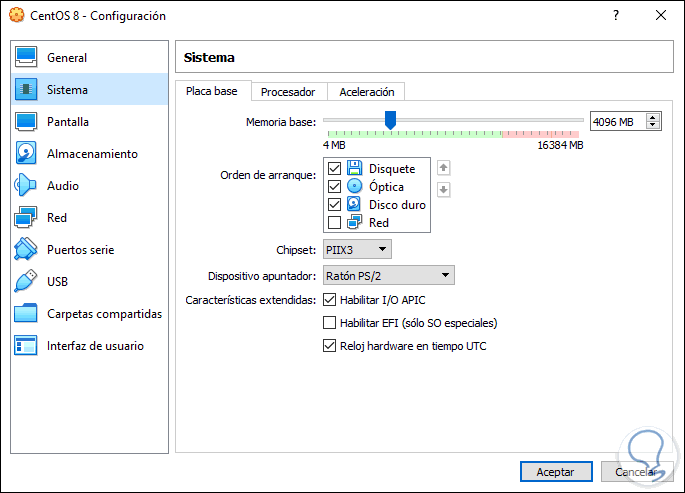
System
It is one of the most delicate sections since there we can:
- Define the RAM for the machine.
- Configure virtual processors.
- Enable acceleration functions.
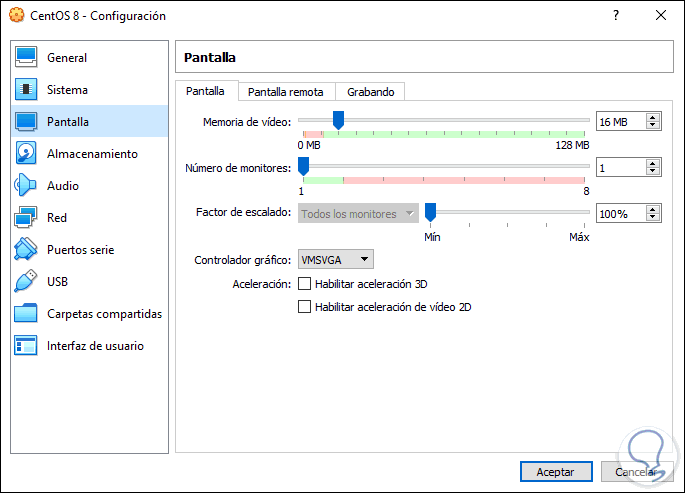
screen
As the name implies there we can manage the screen with actions such as:
- Define the number of monitors.
- Enable the remote screen server.
- Enable and configure screen recording.
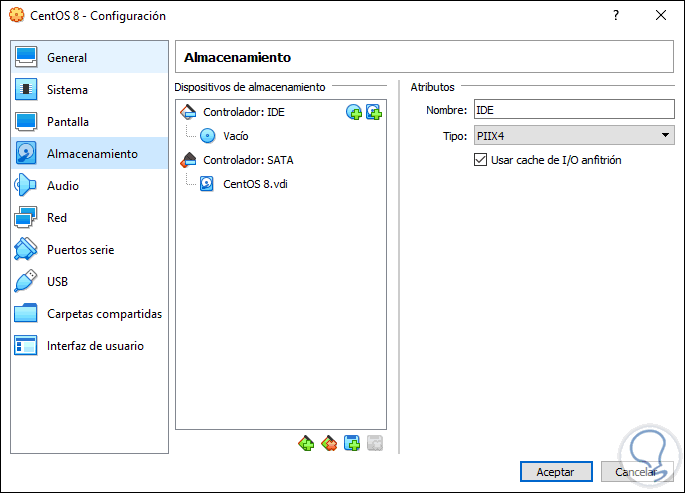
Storage
In this section we find what is related to the virtual hard disk and the units that we can add or delete:
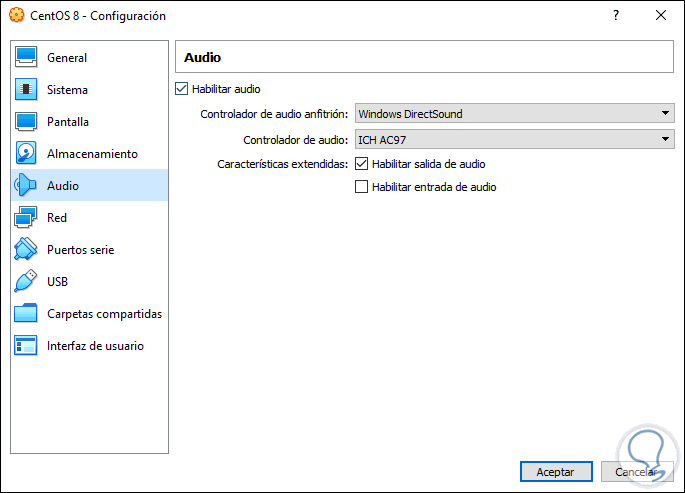
Audio
It allows us to enable audio and select the controller to use:
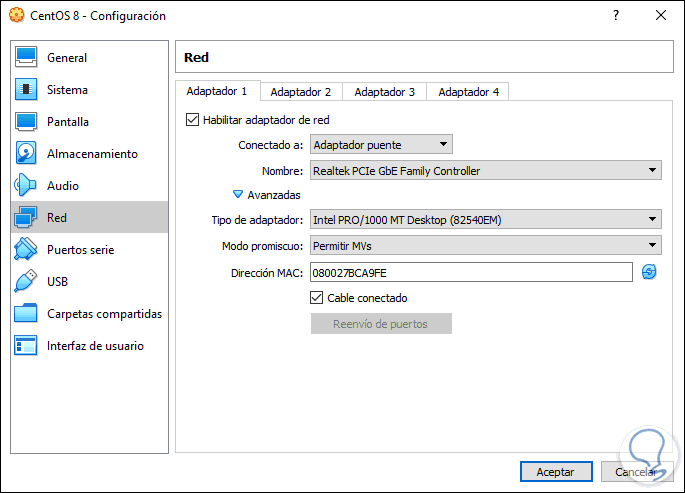
Net
There it will be possible to enable the network adapter (s) and configure their connection method (NAT, local, bridge adapter, etc.), this will allow the virtual machine to connect to the network
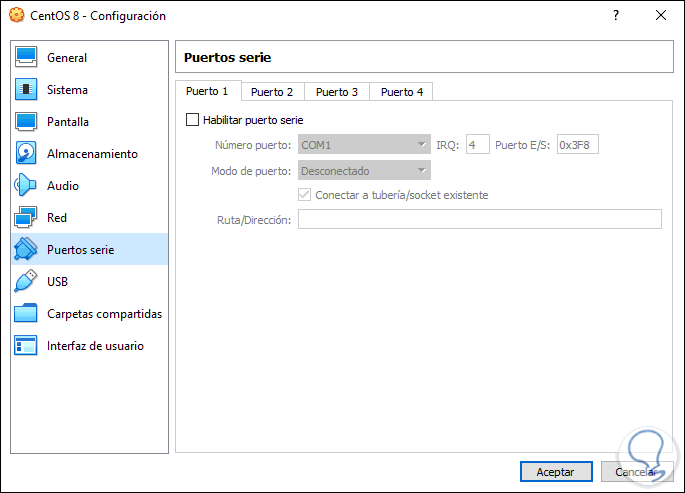
Serial ports
There we can enable this type of ports if we wish:
USB
There we find the different versions of USB that we can activate in the virtual machine:

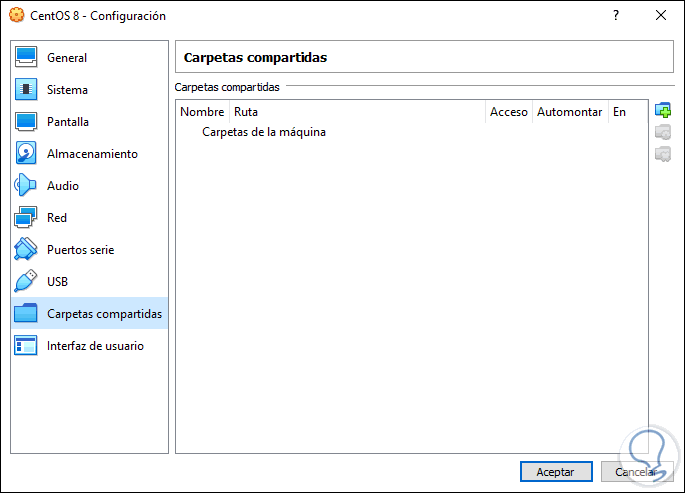
Shared folders
Here it will be possible to add folders between the physical machine and the virtual machine:
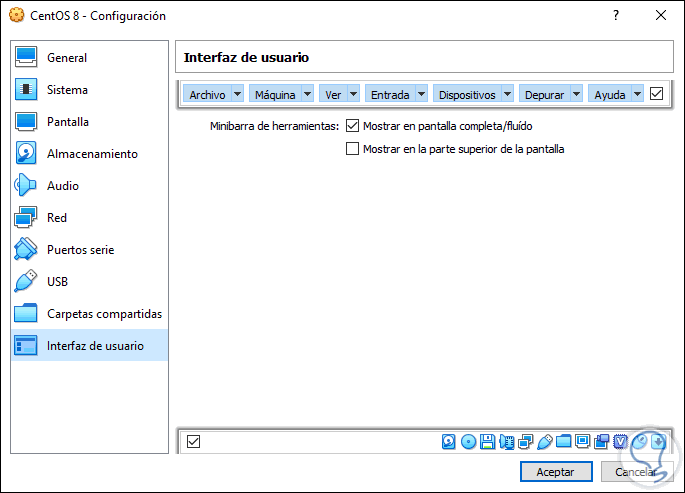
User interface
In this section we can make some adjustments to the VirtualBox appearance:
With this configured we can click on OK to proceed with the CentOS 8 configuration.
2. How to install CentOS 8 on VirtualBox
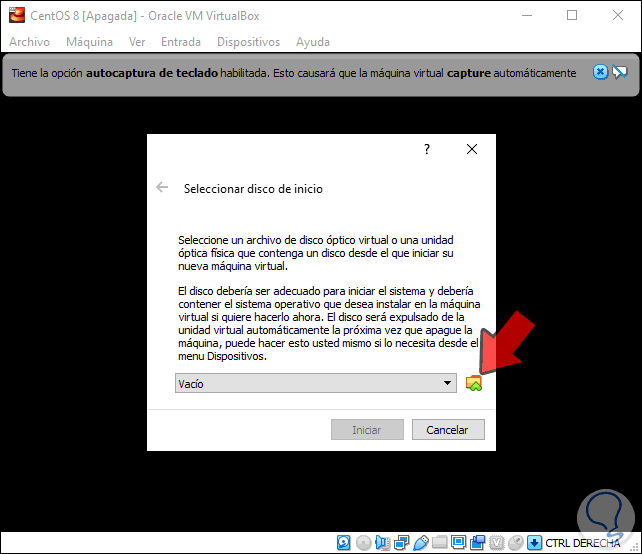
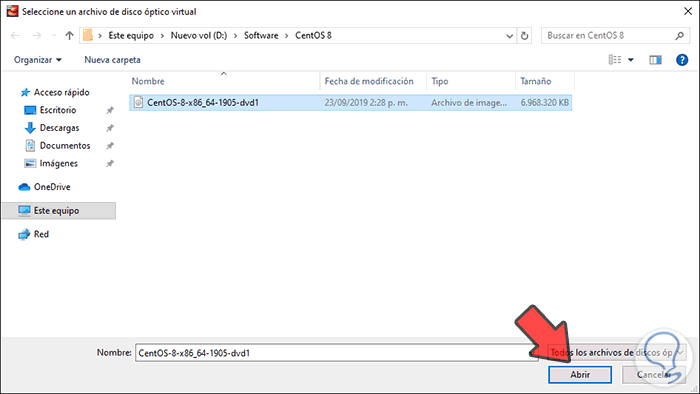
Step 1
To give way to this process, we click on the Start button and the following will be displayed. There we must click on the folder icon and go to the path where the CentOS 8 ISO image is located, which we can download at the following link:
CentOS 8
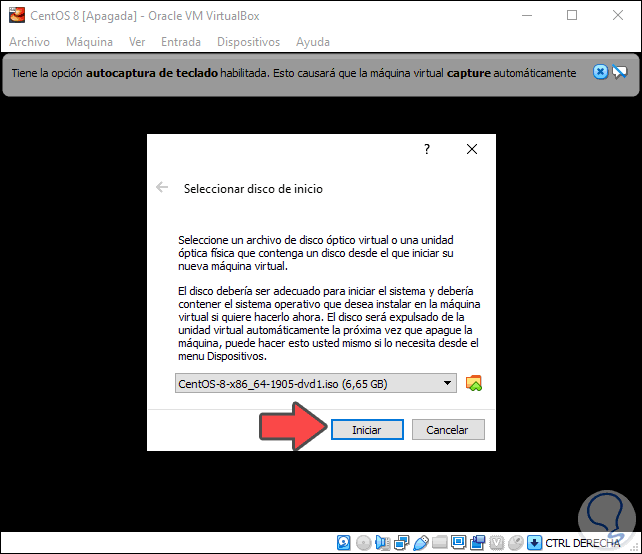
Step 2
We click Open and the ISO image will be integrated in VirtualBox:
Step 3
We click on Start to proceed with the startup of CentOS 8
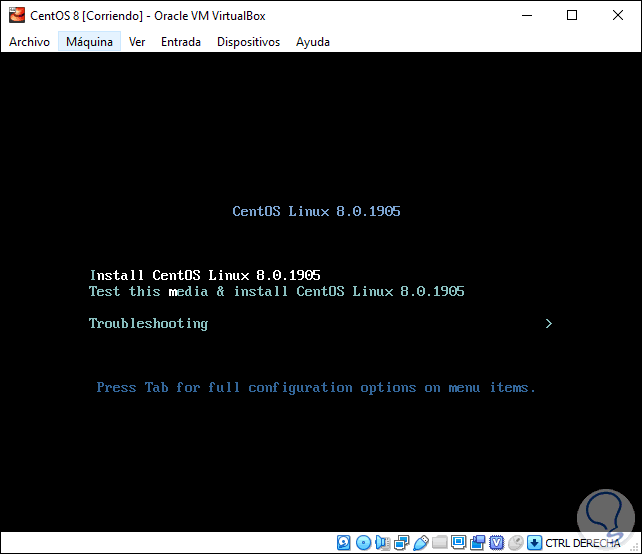
Step 4
The first window we will see will be the following where we will have the following:
- “Install CentOS Linux 8.0.1905â€: this option allows us to execute the system installation immediately.
- "Test this media & Install CentOS Linux 8.0.1905": is an option that allows you to perform a previous analysis of the hardware of the equipment before proceeding with the installation to validate that everything is in line.
- "Trubleshooting": allows you to correct problems before installing CentOS 8.
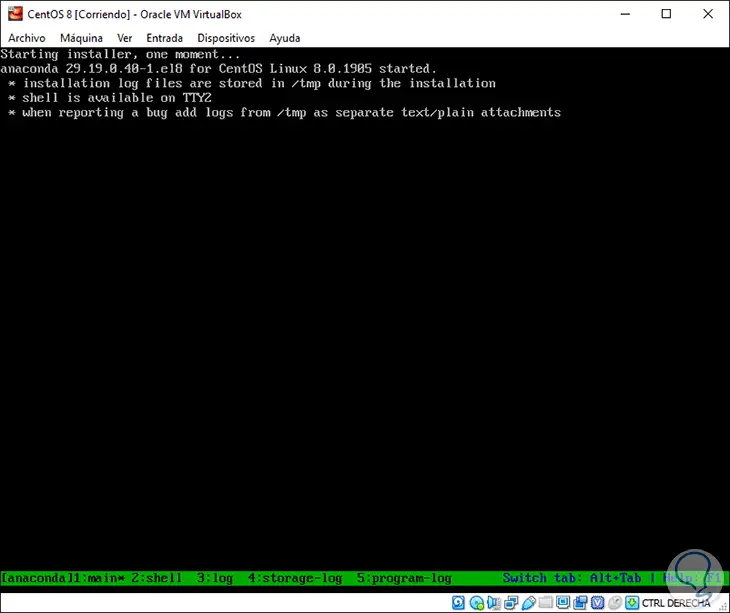
Step 5
The installer will give way:
Step 6
We select the first line and we are going to select the CentOS 8 installation language:
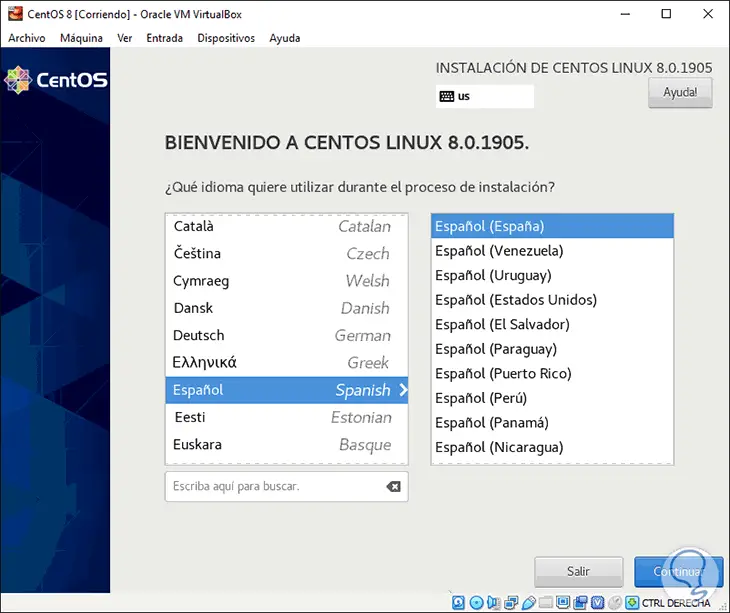
Step 7
We click on Continue and access the general system settings:
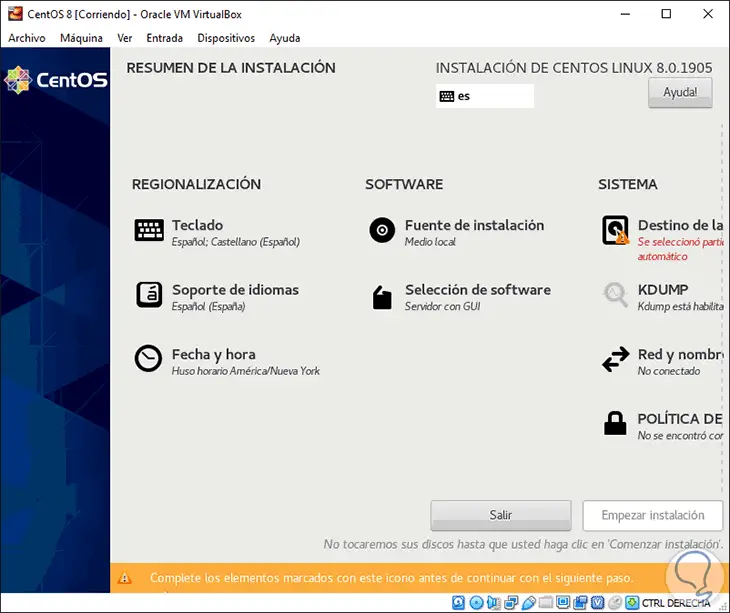
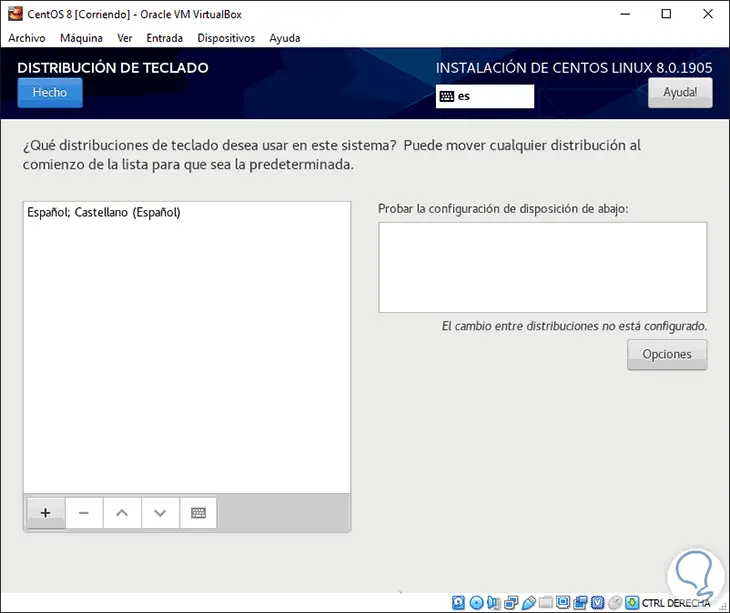
Step 8
In the Keyboard section we can define a new keyboard for CentOS 8:
Step 9
In Language Support it will be possible to add more languages ​​to CentOS 8:

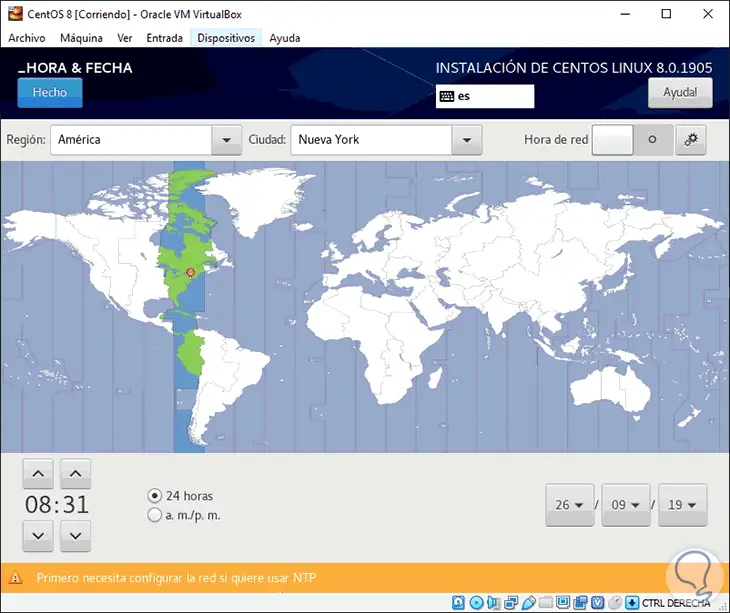
Step 10
In Date and time we can configure these values ​​according to our physical location:
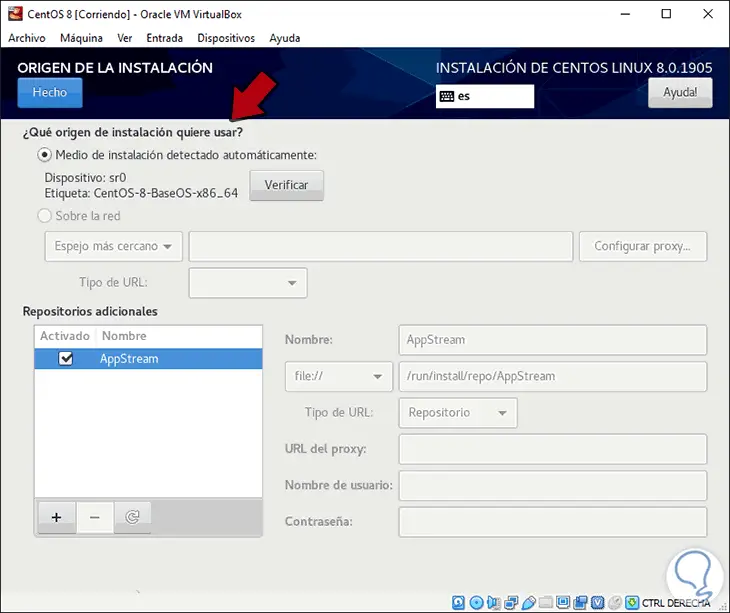
Step 11
In Installation Source we find the CentOS 8 ISO image that will be the origin of the installation:
Step 12
In Software Selection we find all the CentOS 8 installation options, by default the initial value is “Server with a GUIâ€:
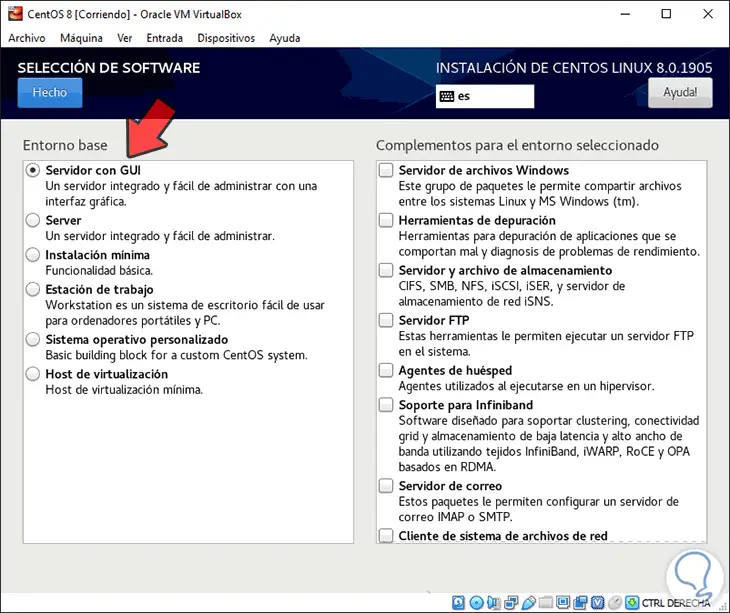
Step 13
But it is possible to assign a server only in terminal mode, set it as a virtualization host, as a workstation, etc. In the right panel it will be possible to mark the desired functions for CentOS 8.
If we edit any value we must click on the Done button to confirm the changes.
In the section “Installation destination†we must select the virtual hard disk where the operating system is to be installed:
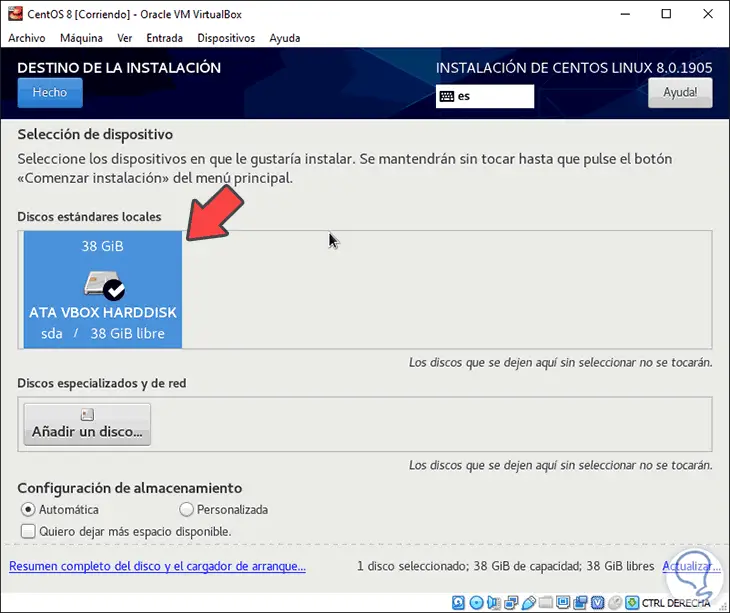
Step 14
Once selected, additional options such as:
- Configure partitioning both automatically and manually "Custom" which allows you to manually enter how the hard drive will be distributed with its partitions.
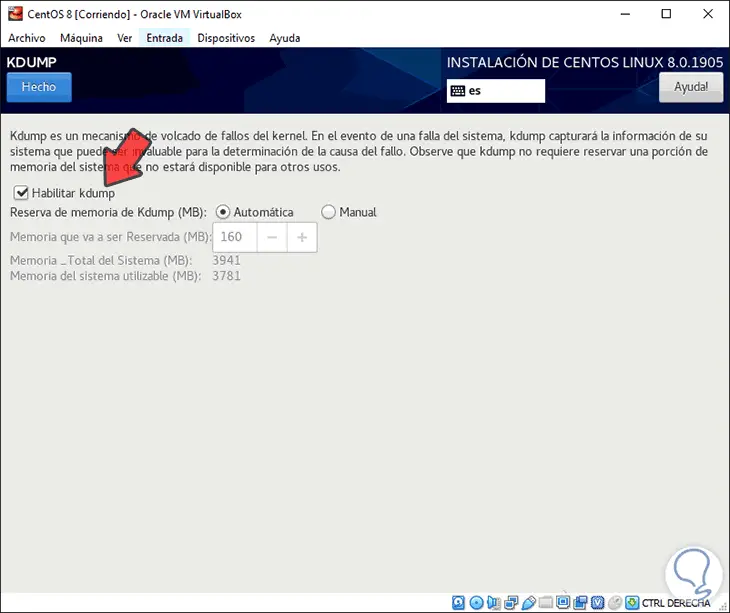
In the KDUMP section it is ideal to enable it since it is a function that manages the memory dump of damages in the operating system kernel
Step 15
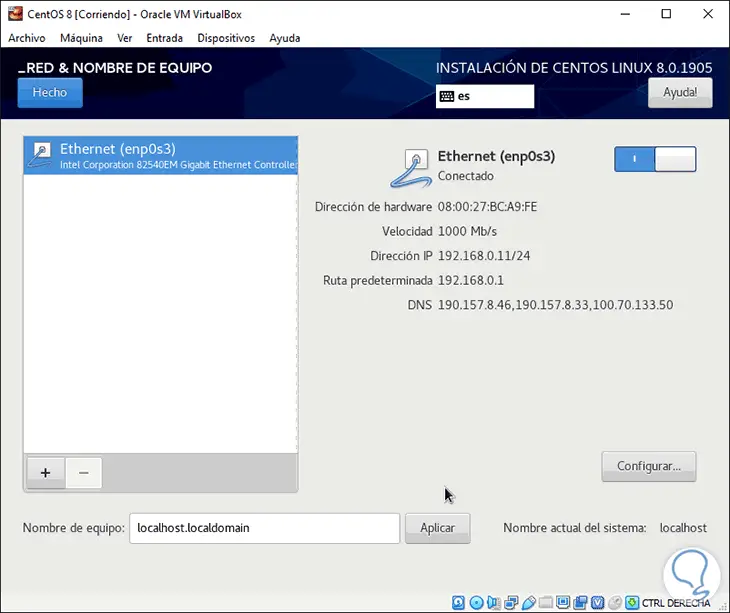
In Network and equipment we must press on the switch to enable the network which is disabled by default to assume the properties of the network. There we can add network adapters or click on Configure to edit its properties and as an additional point it will be possible to change the host name in the "Computer name" field.
Step 16
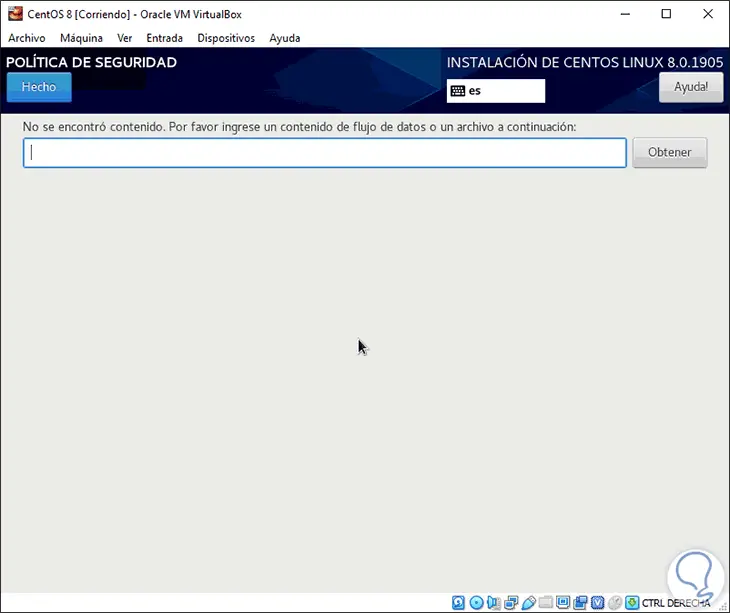
Finally, in the Security Policy section we can add data flow files if applicable:
Step 17
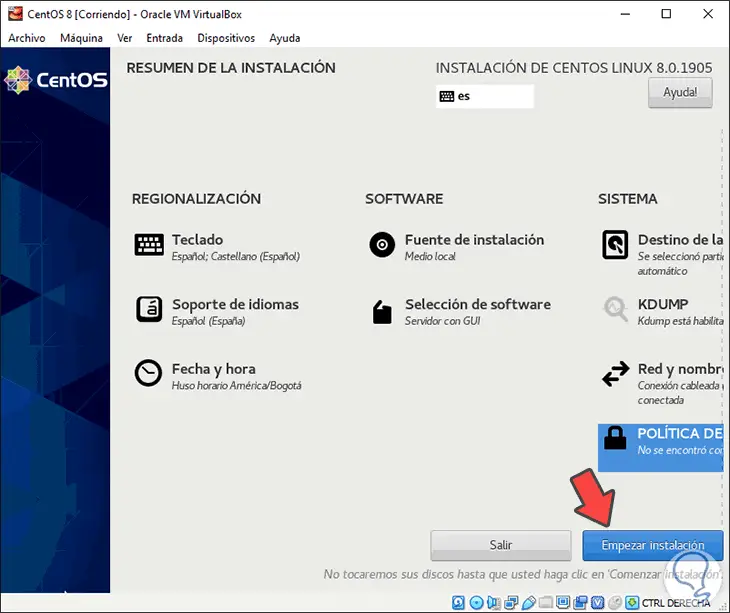
When all the parameters are configured it will be possible to see that the “Start installation†button is enabled:
Step 18
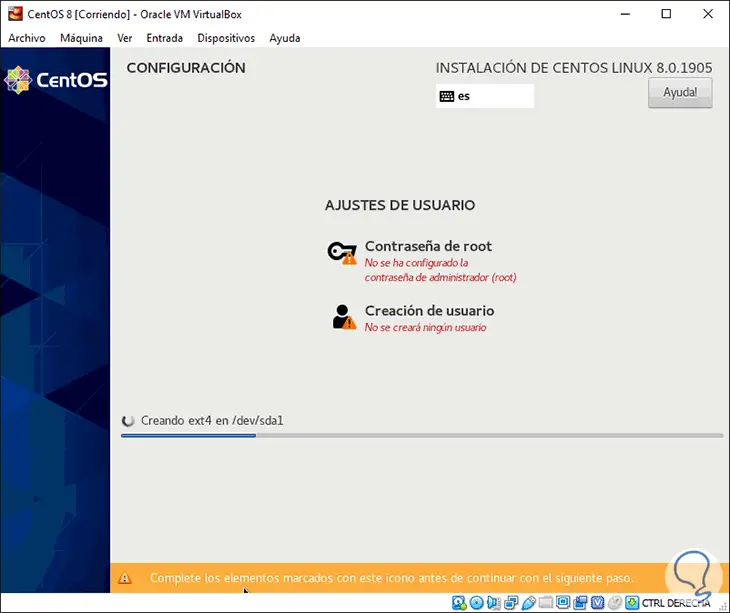
By clicking there we will see the following:
Step 19
It will be necessary to assign the root password and configure the administrator user. We click on “Root password†and proceed to assign and confirm it:
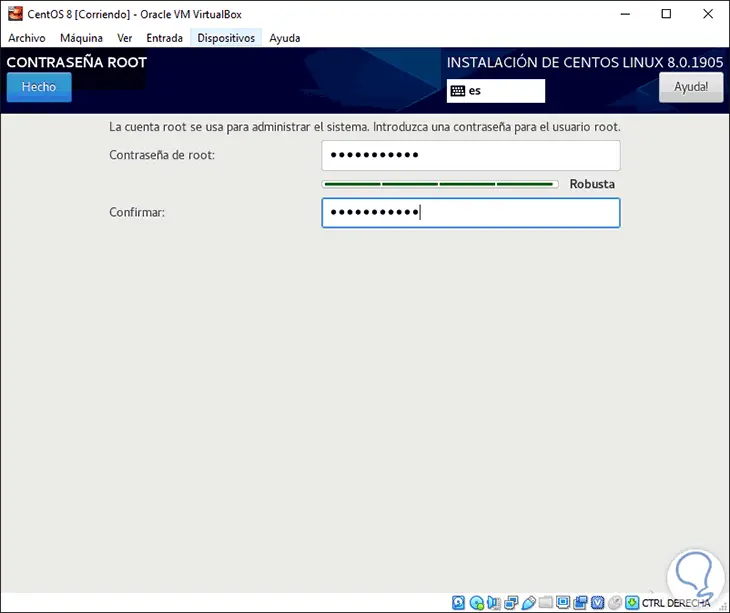
Step 20
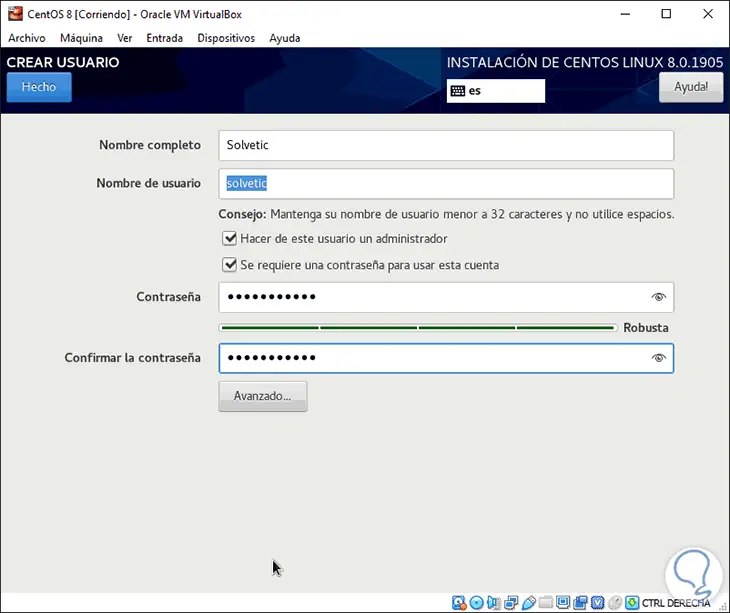
We click on Done and now click on “User Creation†and define your name, password and administrator permission:
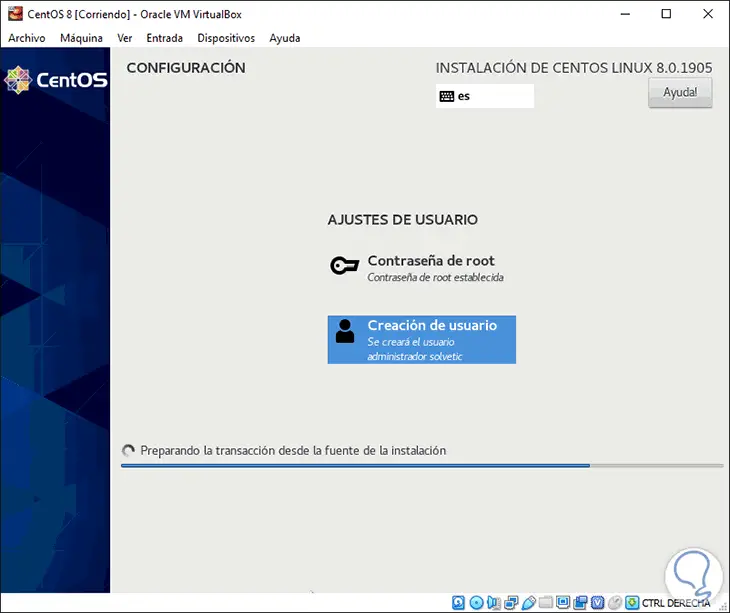
Step 21
We click on Done and we see that these values ​​have been defined and we proceed with the installation:
Step 22
When the installation process finishes we will see the following message. There we must click on Restart

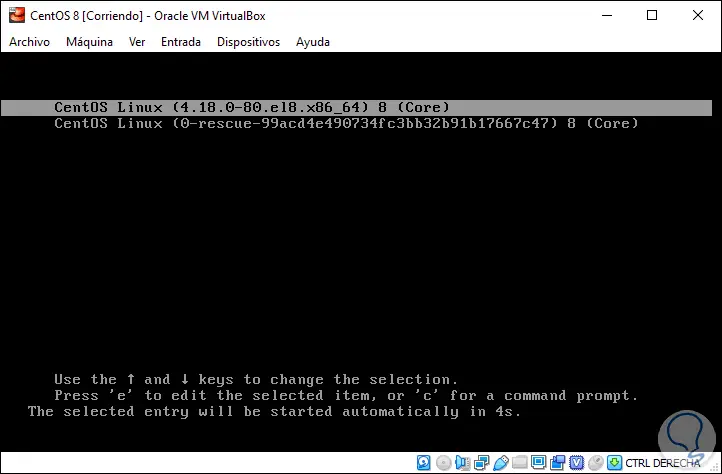
Step 23
Remove the virtual drive with the ISO image and we will access the CentOS 8 GRUB:
Step 24
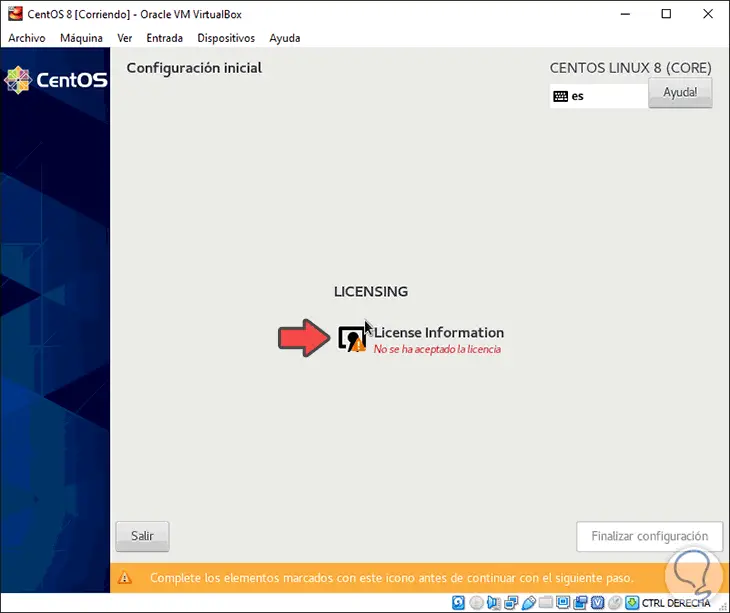
After this process the following window will be displayed where it is necessary to accept the terms of the license. To do this we click on “License Informationâ€
Step 25
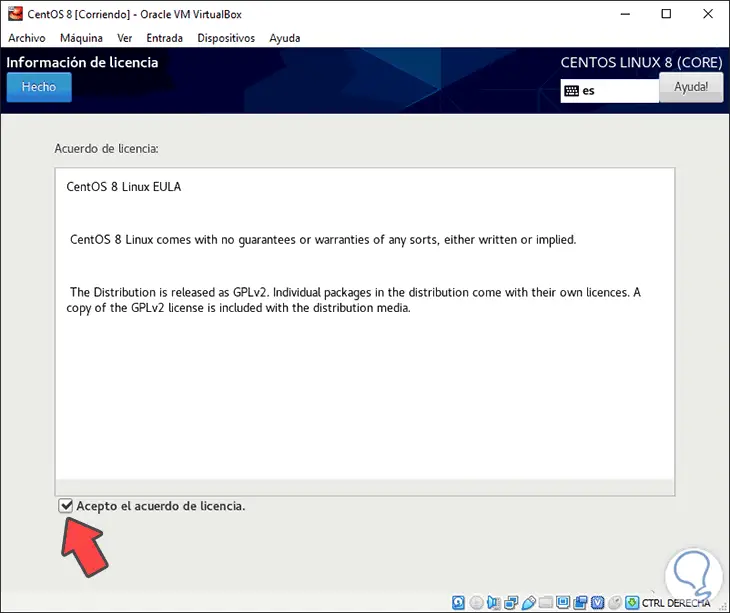
Next we activate the “I accept the license agreement†box:
Step 26
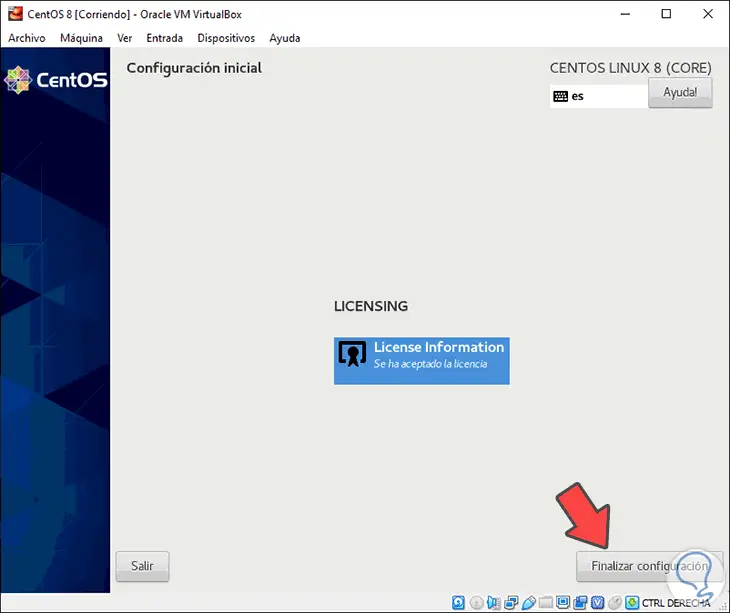
We click Done and see that this step is completed. Now we click on “Finish configurationâ€
Step 27
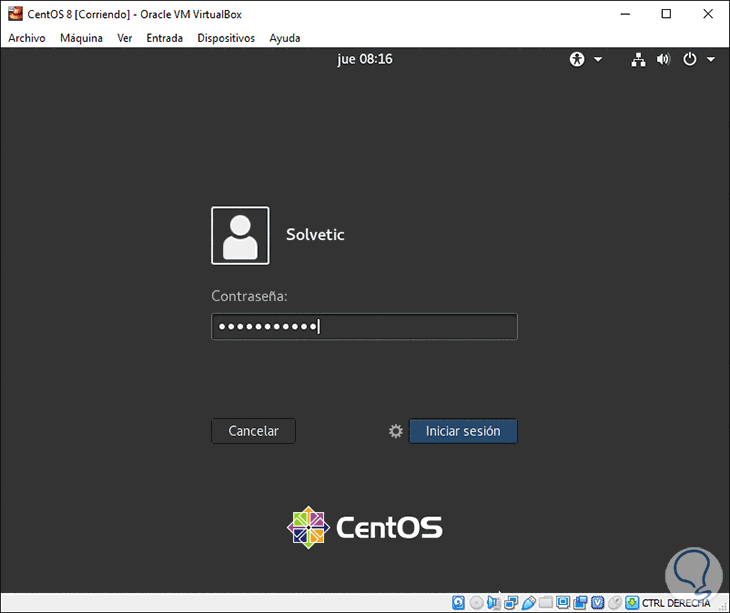
We proceed to log in with the user created during the process:
Step 20
Being the first time to access CentOS 8 and the following wizard will be deployed. We click Next and we can assign more writing languages. In the next window we can activate the location services. Here is the possibility to connect accounts online:

Step 24
After this we will finish the basic configuration of CentOS 8:
Step 25
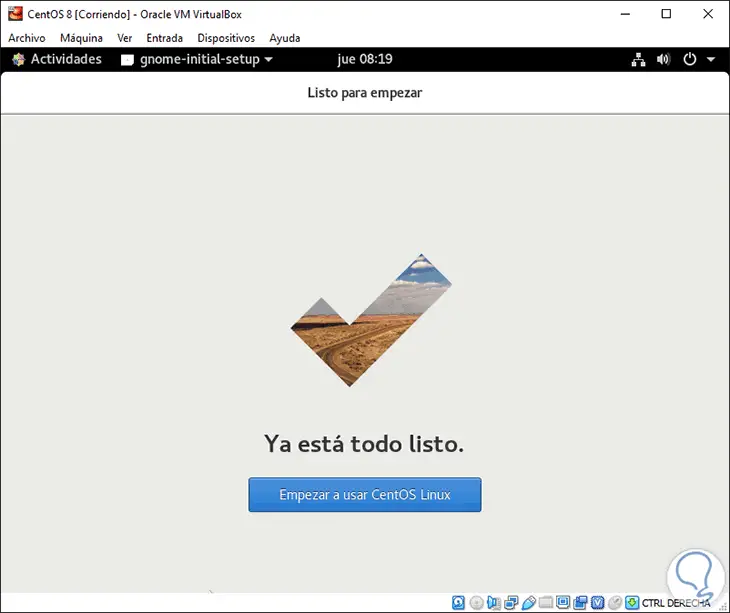
Finally the GNOME wizard will open:
From now on we are ready to use CentOS 8 in VirtualBox..
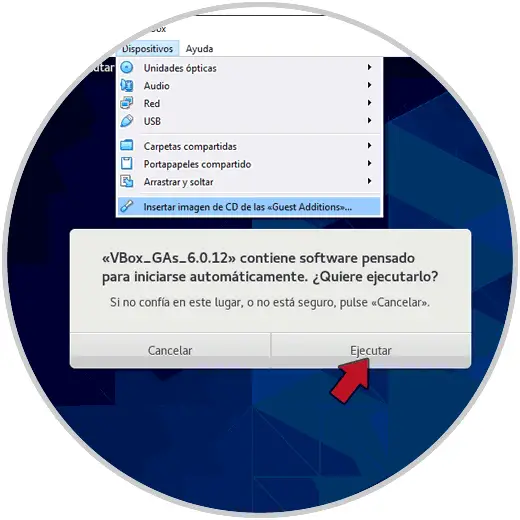
3. How to install VirtualBox Guest Additions on CentOS 8
Guest Additions in VirtualBox are a series of complements and functions that allow the interaction between the physical and virtual machines, as well as the full execution of VirtualBox functions.
Step 1
To install these Guest Additions, we will go to the Devices menu and there we select the line “Install CD image of the << Guest Additions >>:
Step 2
We see that clicking there will open the wizard where we will click on "Run", then we must enter the administrators password:
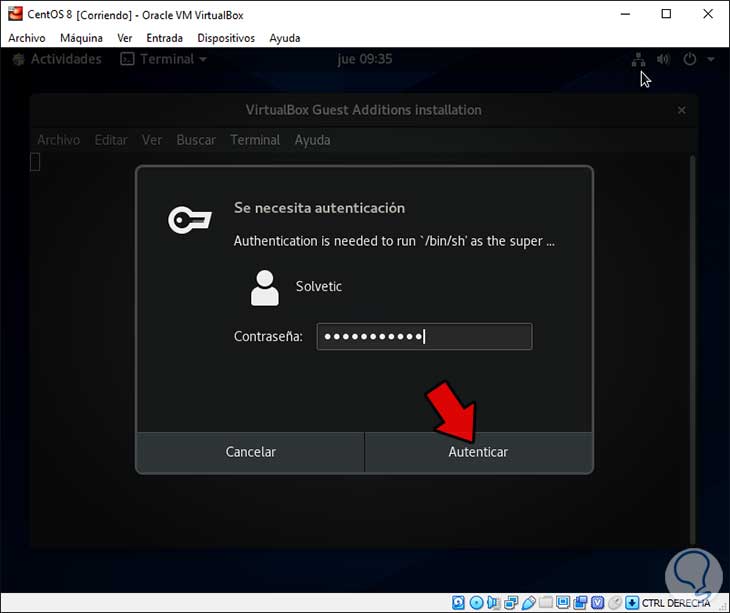
Step 3
Enter the password and click on Authenticate and the Guest Additions installation process will begin in CentOS 8:
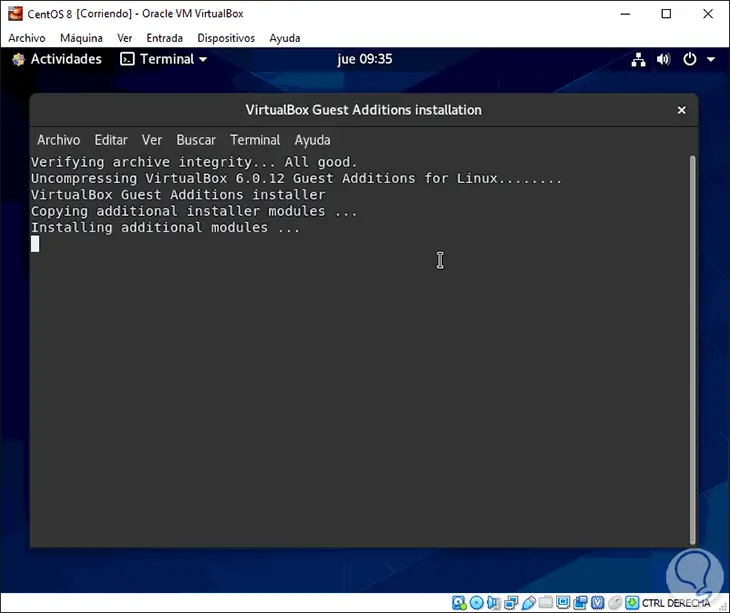
Step 4
When it finishes we will see the following:
There we press Enter to return to the system and in this way the Guest Additions have been installed in CentOS 8.
We have seen how to install the new version CentOS 8 in a virtualized environment to know in advance its operation and compatibility before deciding to launch it to our main computer.