Not always everything that appears in our photographs ends up being useful, it does not convince us for our final results. When we have a session scheduled, it is usual to have predefined what we are going to photograph and how we are going to do it, this will avoid unforeseen problems that may arise and that in the end end up ruining our work. But the world of photography is not that simple and many times the final result already edited is far from the previous idea that we have carried out..
Surely many times you have taken a photograph in which a person or an element that you did not want has slipped into it. How common to take photographs on the street and that someone passing behind, a car, etc. ends up slipping through. At that point, you may be angry that you screwed up a good photo, or you may not even realize it until you review the material. Although locations are important when it comes to photography, many times we cannot control the entire environment and we have to photograph our subject in a place that we do not like at all or that simply has no relevance to photography.

The background of a photograph can play a fundamental role in our composition or only be a complementary element in it. Even in the style we are talking about, working on blurring, this will also be allowing our subject that is in the foreground to take on much more prominence and in the end whoever sees the photograph can focus on what really matters to us and not be distracted by secondary elements that may appear in the background of the photograph. Many times, even solely for brand reasons, we must blur the background to prevent data or elements that cannot be displayed from appearing. Depending on the degree of blur that we apply, we can let or not intuit what type of background we have been using when taking the photograph..
Although blurring the background of our photographs may seem like a tedious process, the truth is that we already have professional tools that allow us to do it even from our mobile phones or tablets. In this case we will be talking about Lightroom Mobile and its options to work through the use of masks. These tools that we will see inside the masks will allow us to be able to make edits and adjustments in specific areas of the image, thus avoiding everything that we want to leave intact from being modified. That is why today we are going to see how to use one of its most useful masks and direct it to blur the background in a photograph from Lightroom Mobile.
To stay up to date, remember to subscribe to our YouTube channel!
SUBSCRIBE ON YOUTUBE
How to Blur the Background of a Photo in Lightroom Mobile
As we have previously mentioned, Lightroom Mobile allows us to work with its mask options to be able to make adjustments and modifications in specific areas of our photographs, avoiding influencing those areas that we want to leave as they are. This is really useful since we will be able to segment the way of acting in our photographs, allowing us to choose which areas we want to influence and which ones we do not. In this case, how do we want to blur the background of a photo? Lightroom Mobile has a really useful mask option, Subject Selection, which will allow us to quickly select the subject or our background and modify it without influencing the rest of the photo. composition.
mask tools
Within the mask tools that Lightroom Mobile offers us, we will be able to find the following:
- Select Subject. It allows us to make an automatic selection of a subject within the photograph.
- Select sky. In case of wanting to work with the sky we can use it to make a selection of it automatically.
- Brush. We can select areas manually by using a customizable brush.
- Linear Gradient. It is a very useful tool if we need to make adjustments to a large part of the image using a transition effect that is applied gradually with smooth steps.
- Radial Gradient. We will be able to apply the modifications in areas that will be selected by an oval shape. We can configure its use and blending mode in the image.
- color range. With this option we will be able to make changes within a specific color range and only change this color.
- Luminance range. It will allow selecting a point that will form an area where those that coincide in the image with the chosen brightness range will be part of the mask. This is how we will work on adjusting brightness levels in a concrete way.
- Depth range. It is a tool oriented to images with depth information and it will not allow you to make selections according to the distance of the camera that exists.
As we have seen we have a series of really interesting mask tools, but for today we are going to focus on the subject selection tool to get a professional background blur in no time using Lightroom Mobile..
Step 1
The first thing we will do is click on our image to edit within Lightroom Mobile or import it or do it directly with the lower right icons that appear on the screen. In this case we will use a previously imported image that is stored in one of our albums.

Step 2
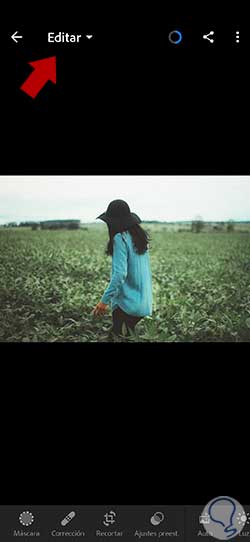
Once we have our image open, we make sure that we are in the "Edit" mode at the top and thus the lower editing options appear.
Step 3
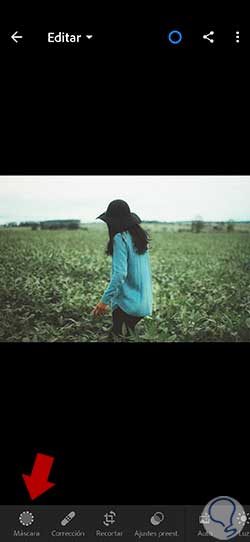
In order to blur the background we will have to separate the element or subject from that background to be able to blur only what interests us. For this we are going to work with selections for which we will use the "Mask" tool that you can find in the lower panel of tools.
Step 4
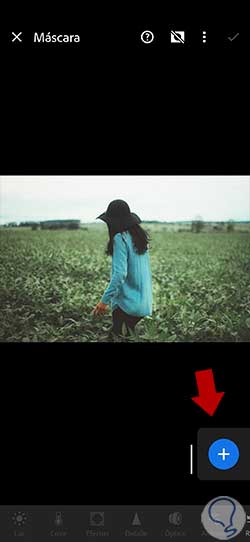
Once inside the Masks mode we will see an icon that appears as a "+" that corresponds to "Create a new mask". We will click on it to create a new mask. In this same place, the masks that you create will also appear.
step 5
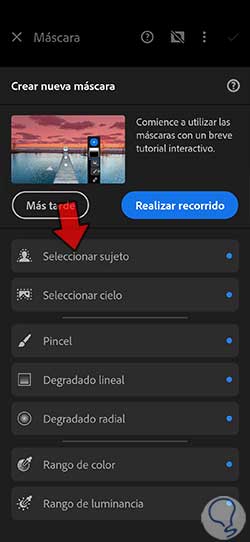
Here we will see different options when creating a mask. In this case we are going to work with the "Subject selection" option that will allow us to make a faster selection of our main element. This is a function within the premium options but it is worth having if we want professional editions from our phone.
Note
In case there are several subjects or elements within the image or it is something complicated to select, you can instead use the "Brush" tool and manually paint the layer mask where we want to act.

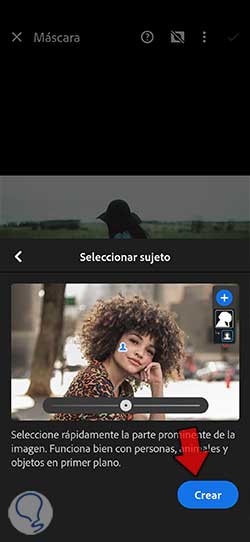
step 6
To start the automatic selection process, click on the "Create" option that you see at the bottom once this type of skin has been downloaded.
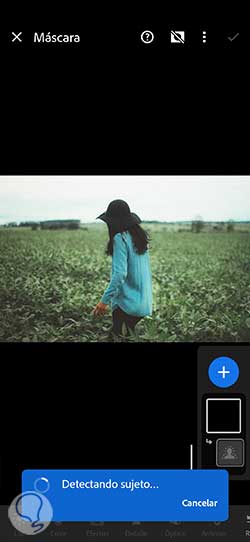
step 7
The mask effect that we have selected will begin to be applied and we will see it indicated on the screen by a message that the process has started, it will take a few seconds to apply.
step 8
We will see that the subject of our photograph will automatically be selected for us. This will save us a lot of time when making a selection, thus improving precision. We will have our subject or element with a mask selected quickly.

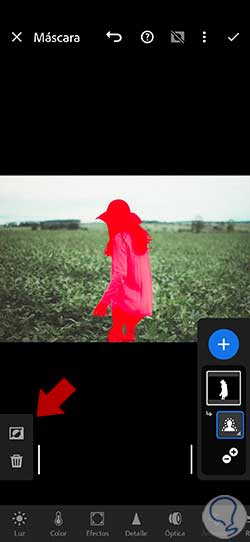
step 9
Since we are interested in blurring the background, we are going to invert our layer mask so that it only affects the background. For this there is an icon on the left side that corresponds to it, click on it.
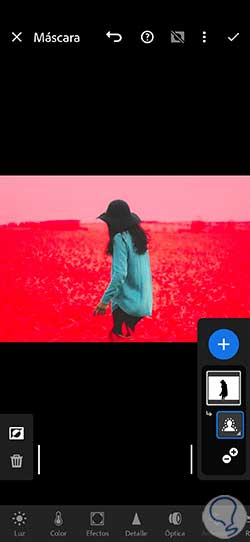
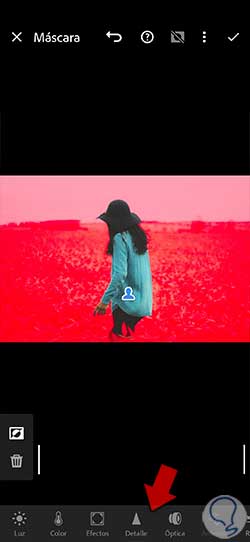
step 10
We will see how now the part where the modifications we make will act will be in the indicated red part that is now our background.
step 11
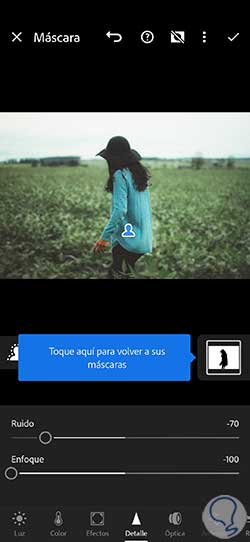
Now we can apply the changes that we want and that only apply in the area that we have selected. In this case we are going to click on the "Detail" option at the bottom.
step 12
Here we are going to move the "Focus" and "Noise" levels to create that blur effect in our background quickly and with quality.
step 13
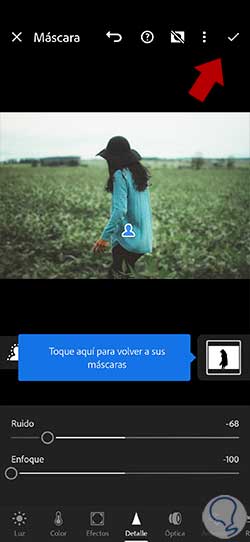
Once we have adjusted the blur of our background, we will apply the changes with the upper option of the check that we see:
step 14
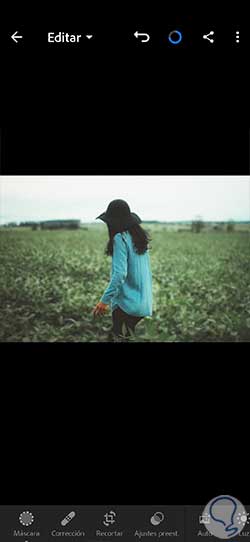
We will have our image with the background out of focus quickly. The more focused the background was at the beginning, the greater we will see the blur change applied also linked to the blur level we have applied.
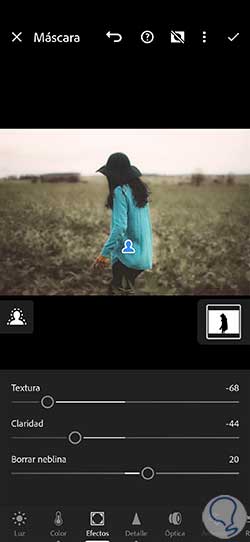
step 15
If you also want to apply more effects to your background, you can take advantage and go back to "Masks" to use the one we have already created and add the effects we want, such as playing with color or textures without influencing our subject.
In this way we will be able to blur our backgrounds in the images professionally using Lightroom Mobile on our phone or Tablet in a very complete and efficient way.