Word is part of Office and offers us a wide set of options to manage text and within all these options we find work with images, audio, Excel tables and much more. On many occasions, when working with multiple sheets, they are added or entered. blank sheets that ultimately only take up space in the document but do not fulfill any task, if this is your case TechnoWikis will explain how to remove these blank sheets from Word..
If after deleting a sheet in Word you need another one, you can simply open another sheet in Word to continue working on your document. In this way you will be able to manage your different pages in Word and decide if you want to remove a blank sheet in Word or insert a blank sheet in Word because you need more. If you don't want that blank page to appear when you save Word, don't miss out on how easy it is to delete it.
To stay up to date, remember to subscribe to our YouTube channel!
SUBSCRIBE ON YOUTUBE
How to remove blank sheets from Word
Step 1
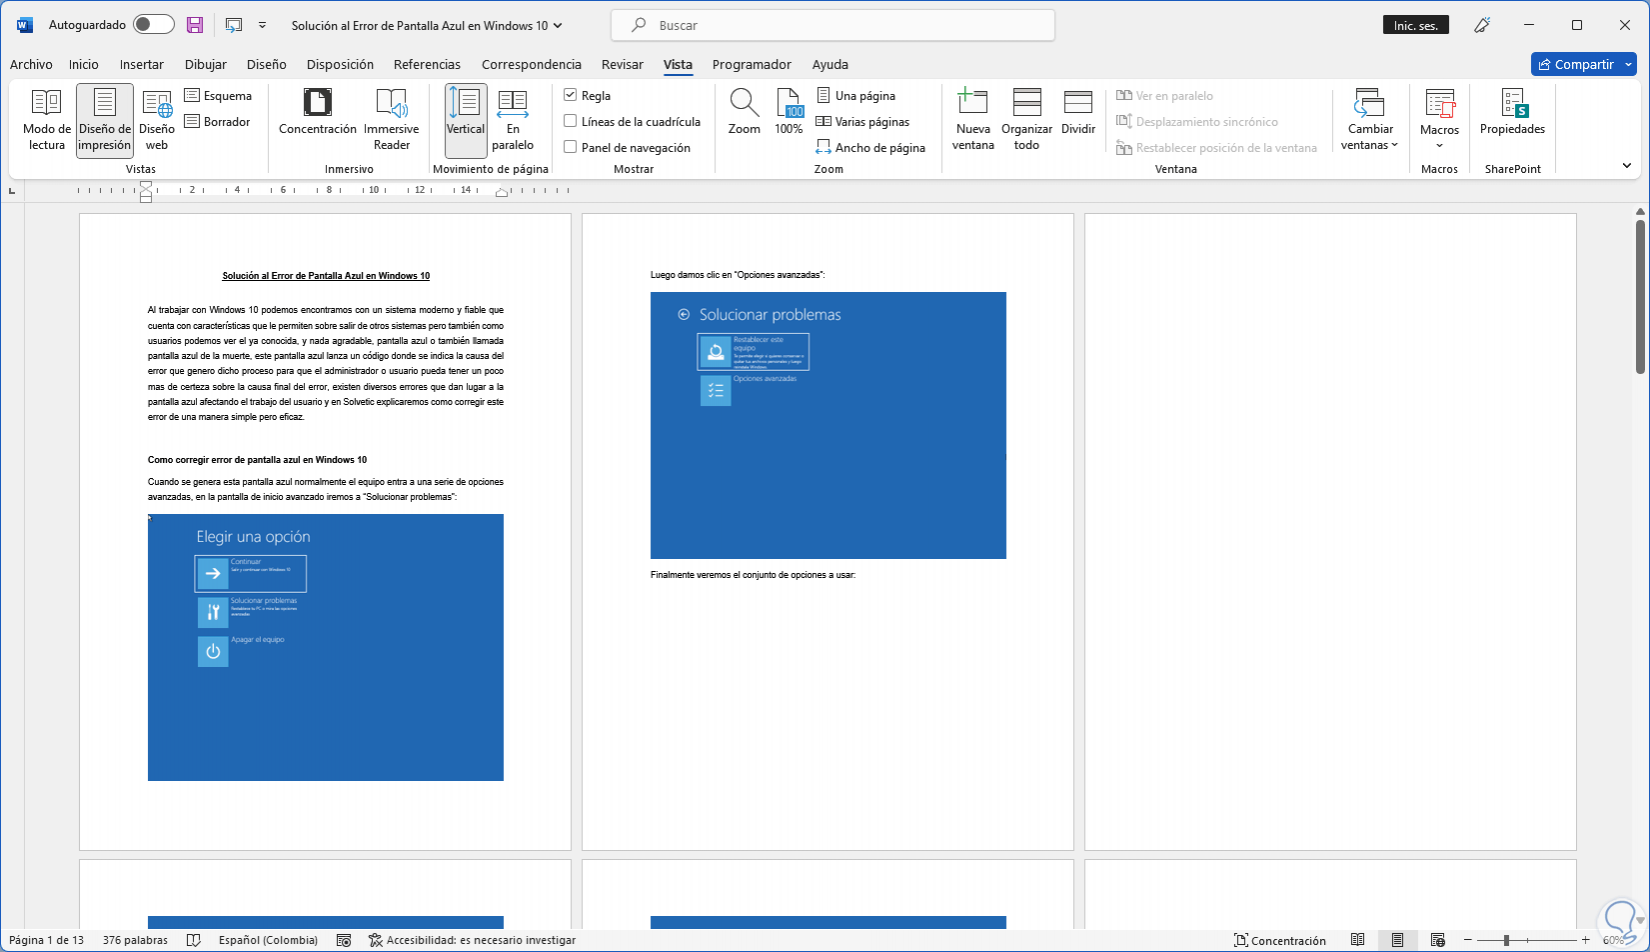
Open Word and check the blank sheets:
Step 2
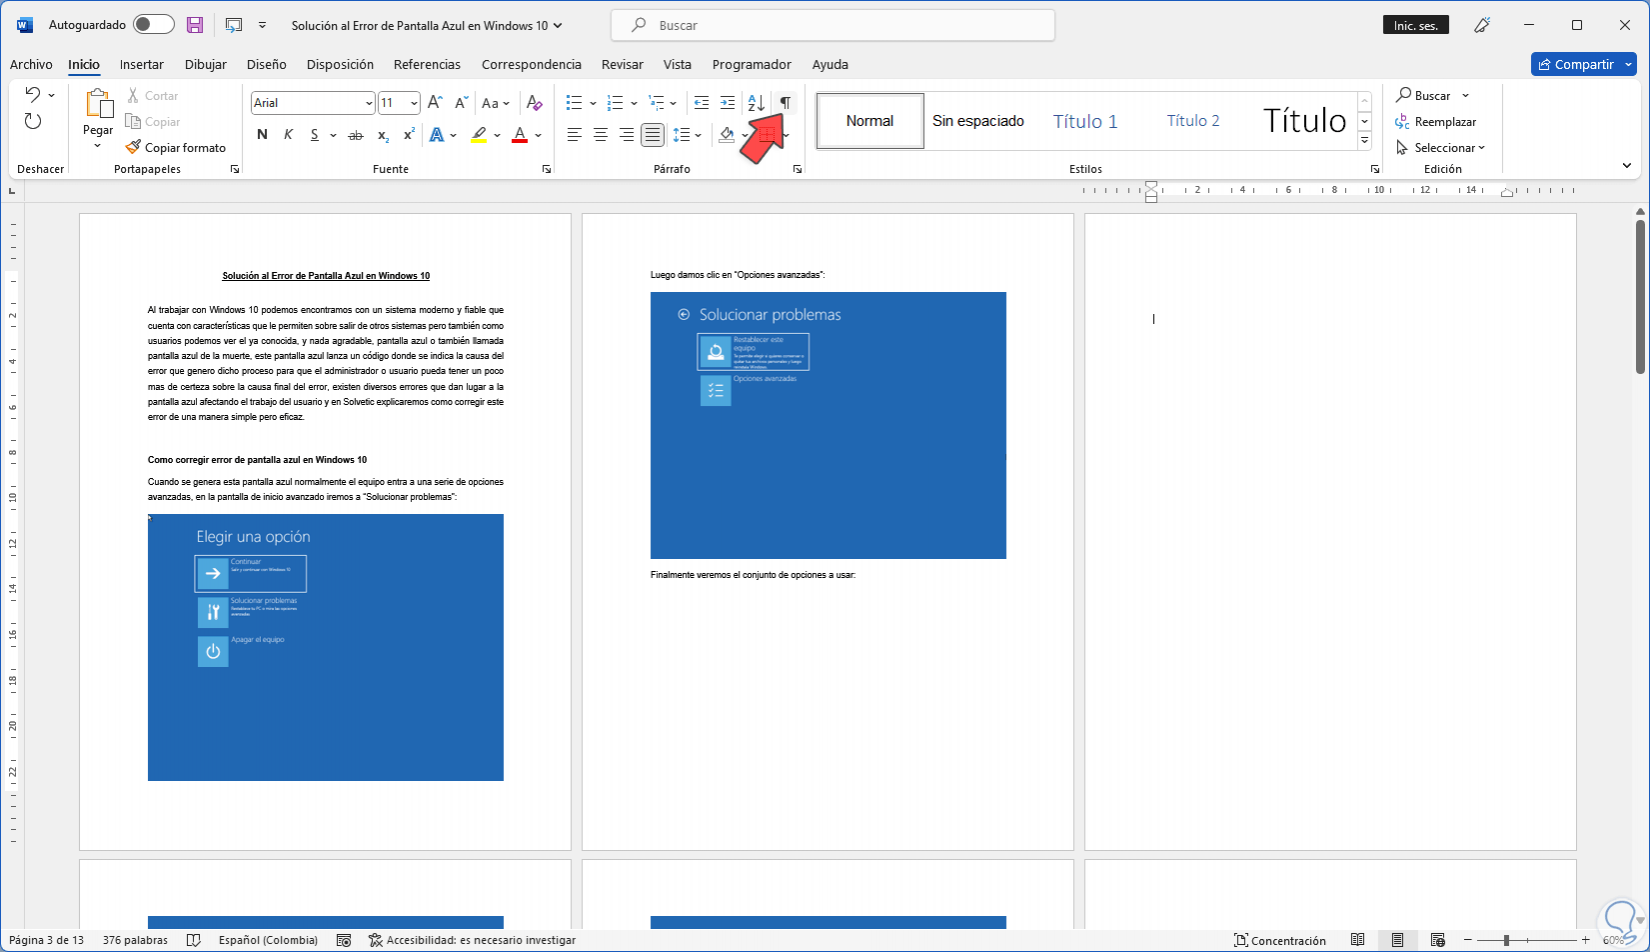
To manage the sheets in the "Start" menu, click on "Show all" located in "Paragraph":
Step 3
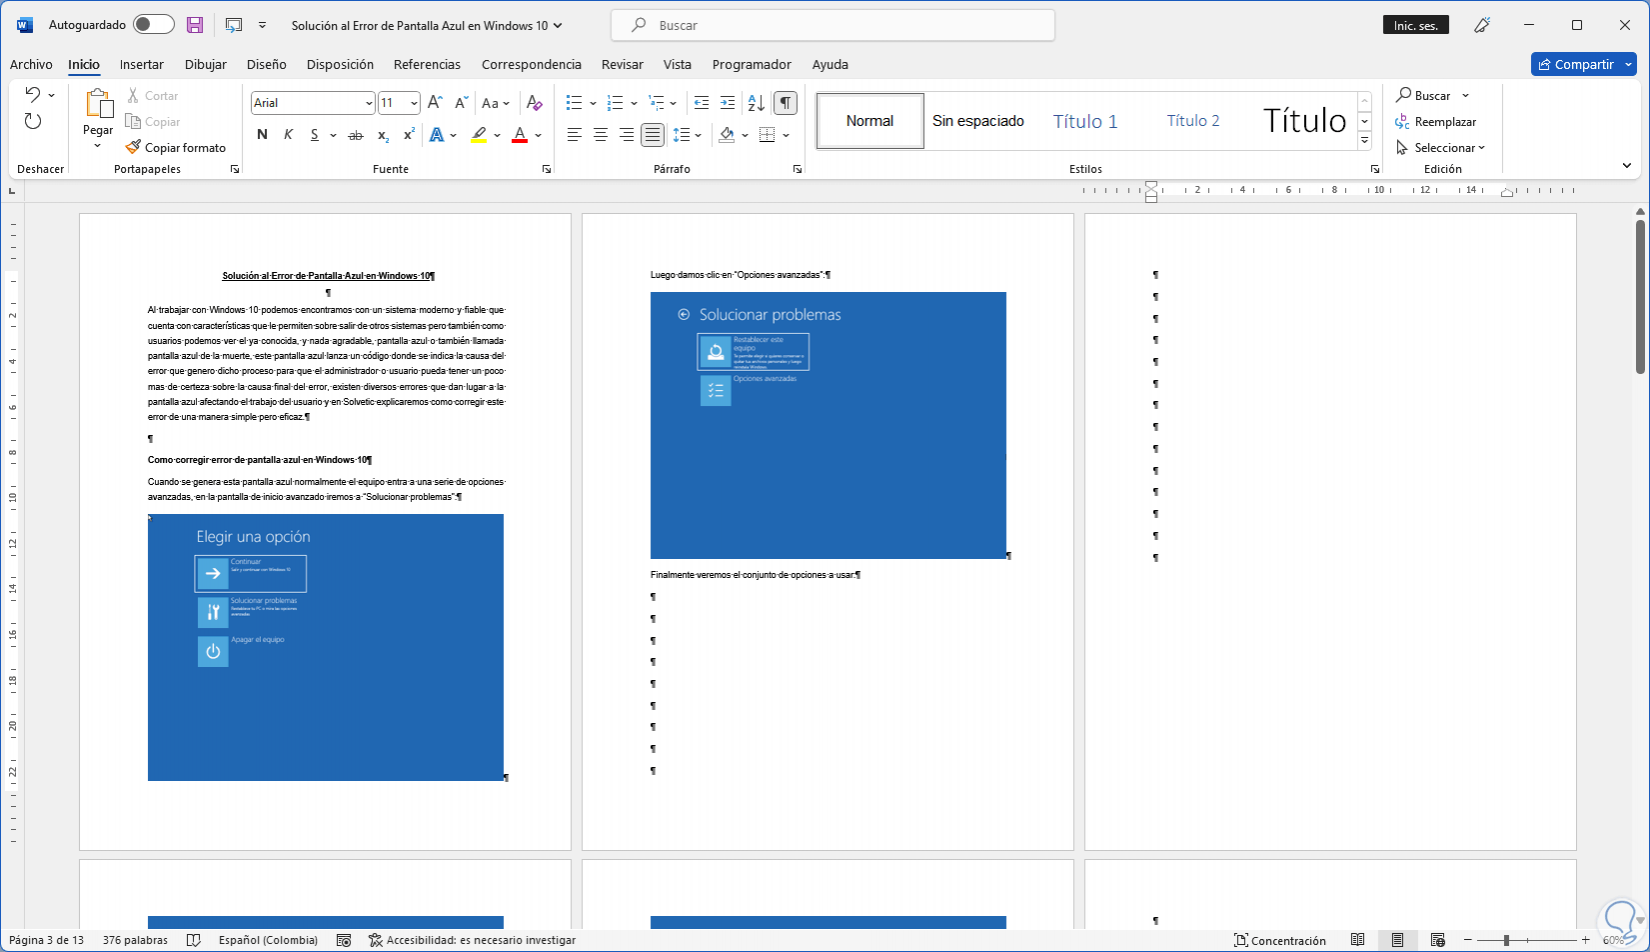
We will see the editing marks in the document:
Step 4
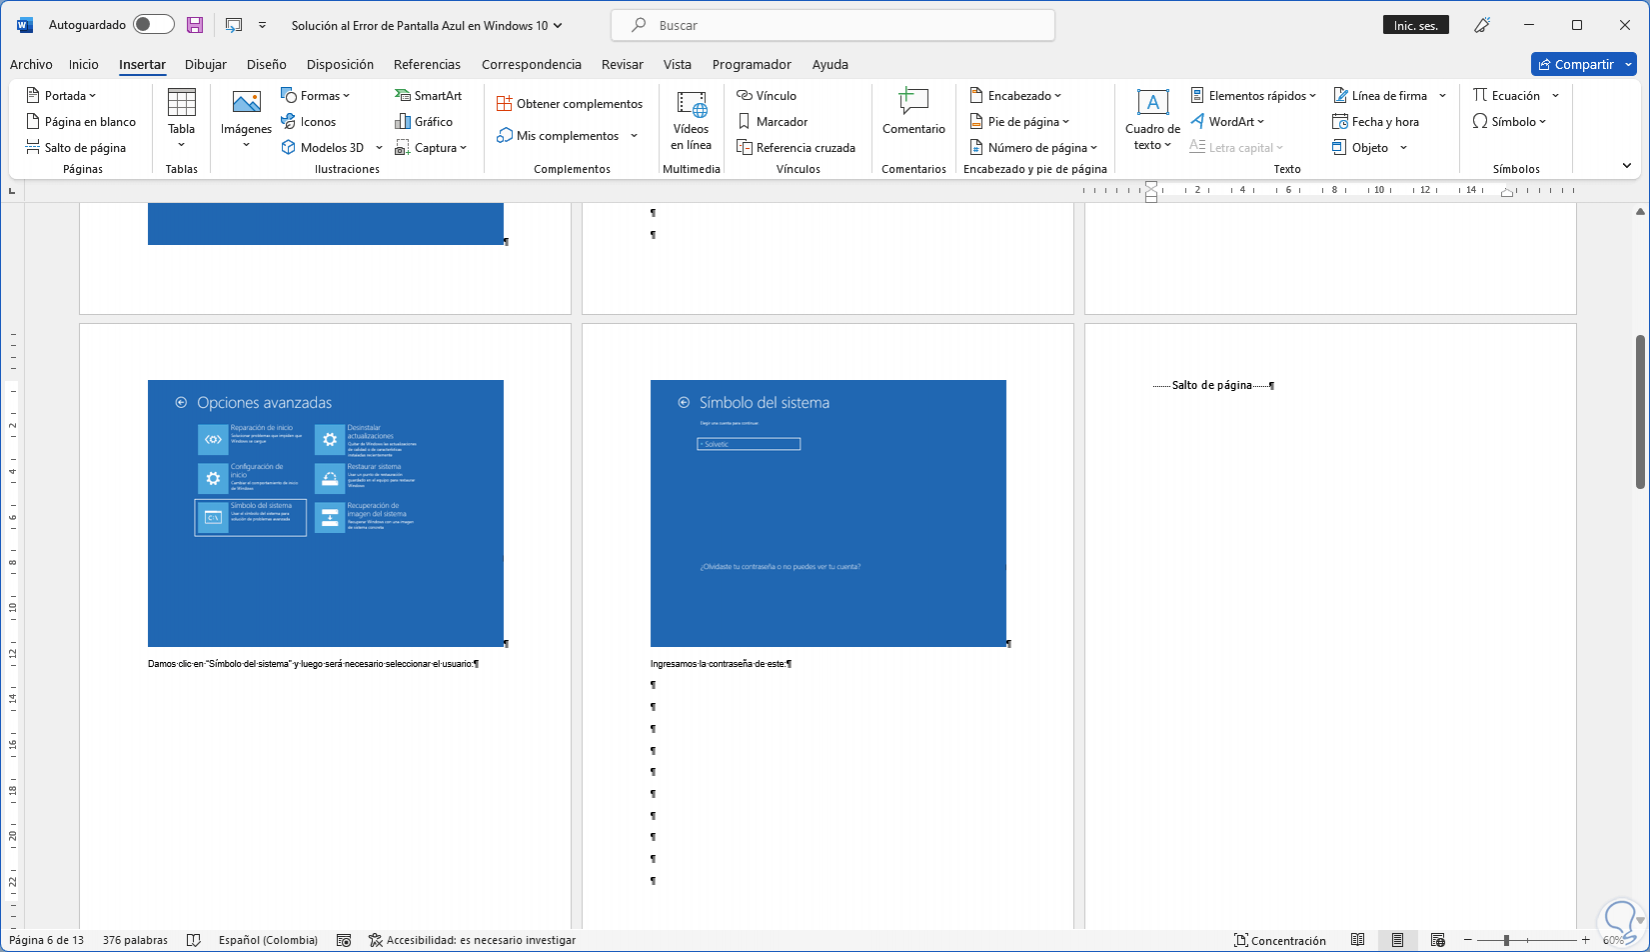
There we can know if the blank pages were due to page breaks or by pressing the Enter key:
step 5
Select the line "Page break":
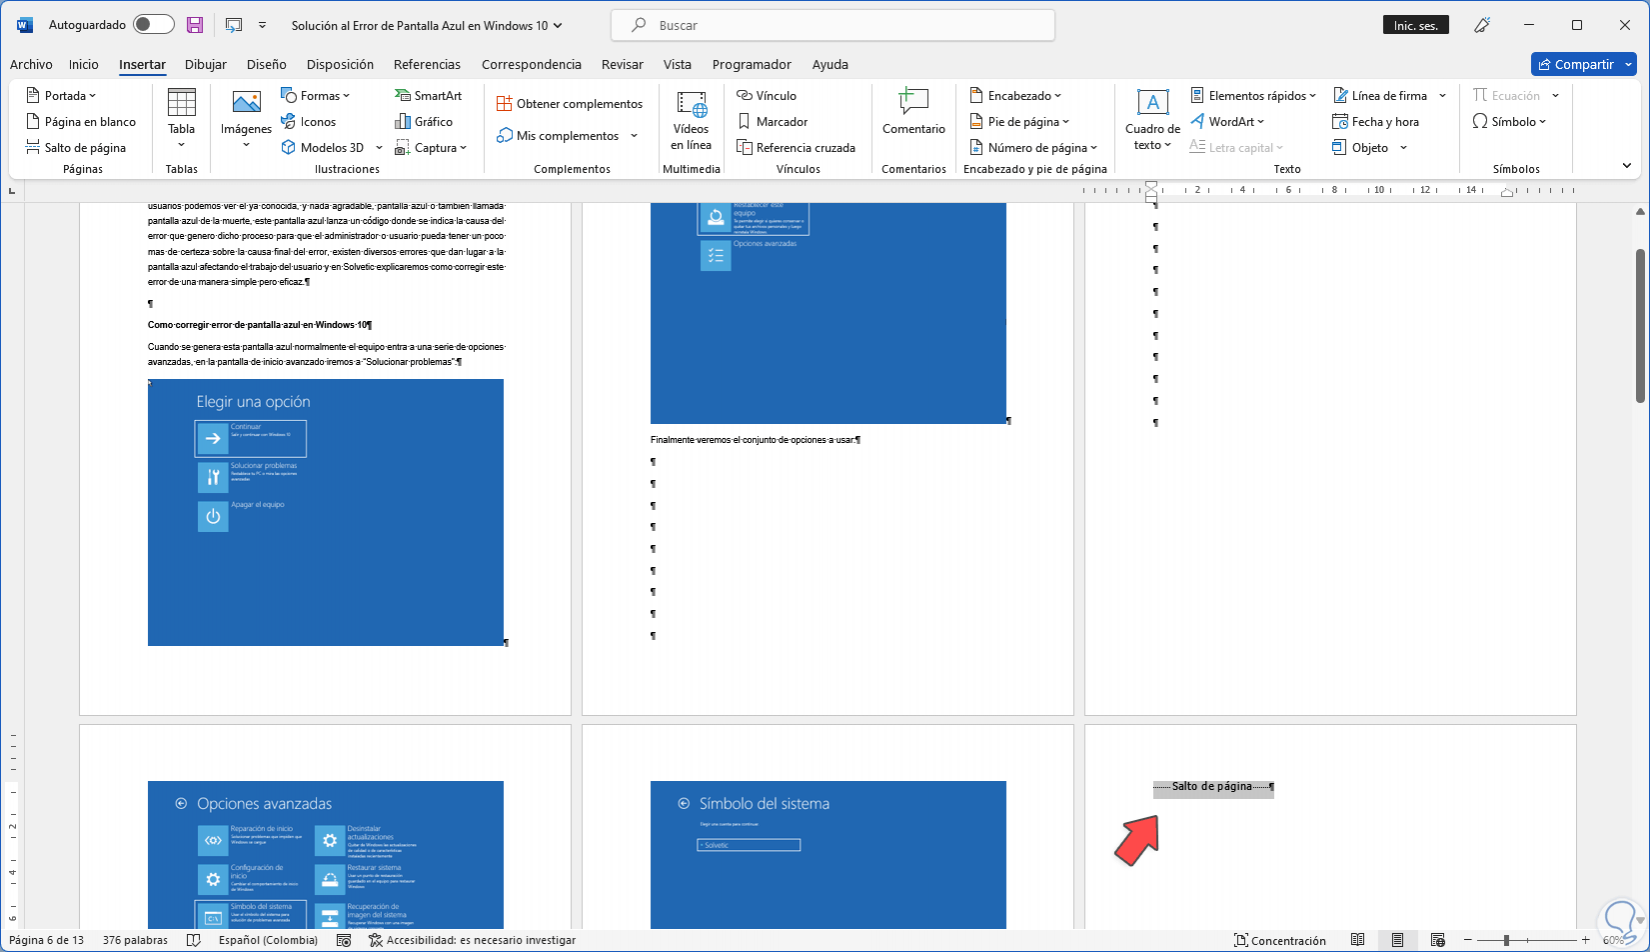
step 6
Press the Delete key and the content of the sheet will automatically go up:
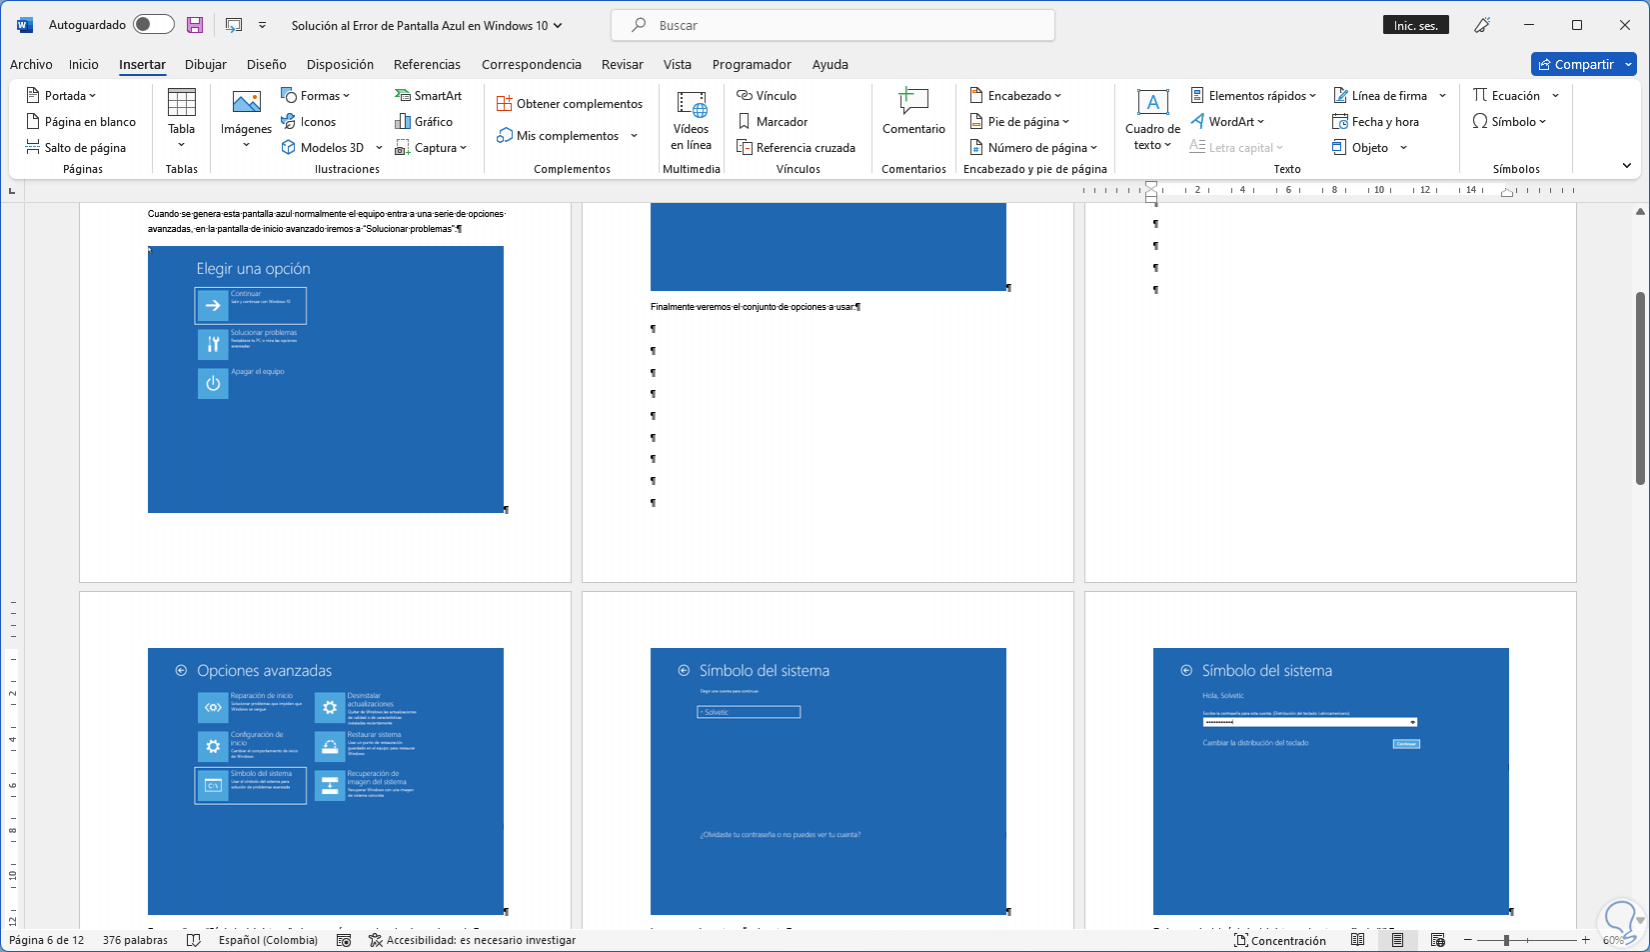
step 7
Where we have marks from having used Enter, we select the entire line of marks using the left click of our mouse:
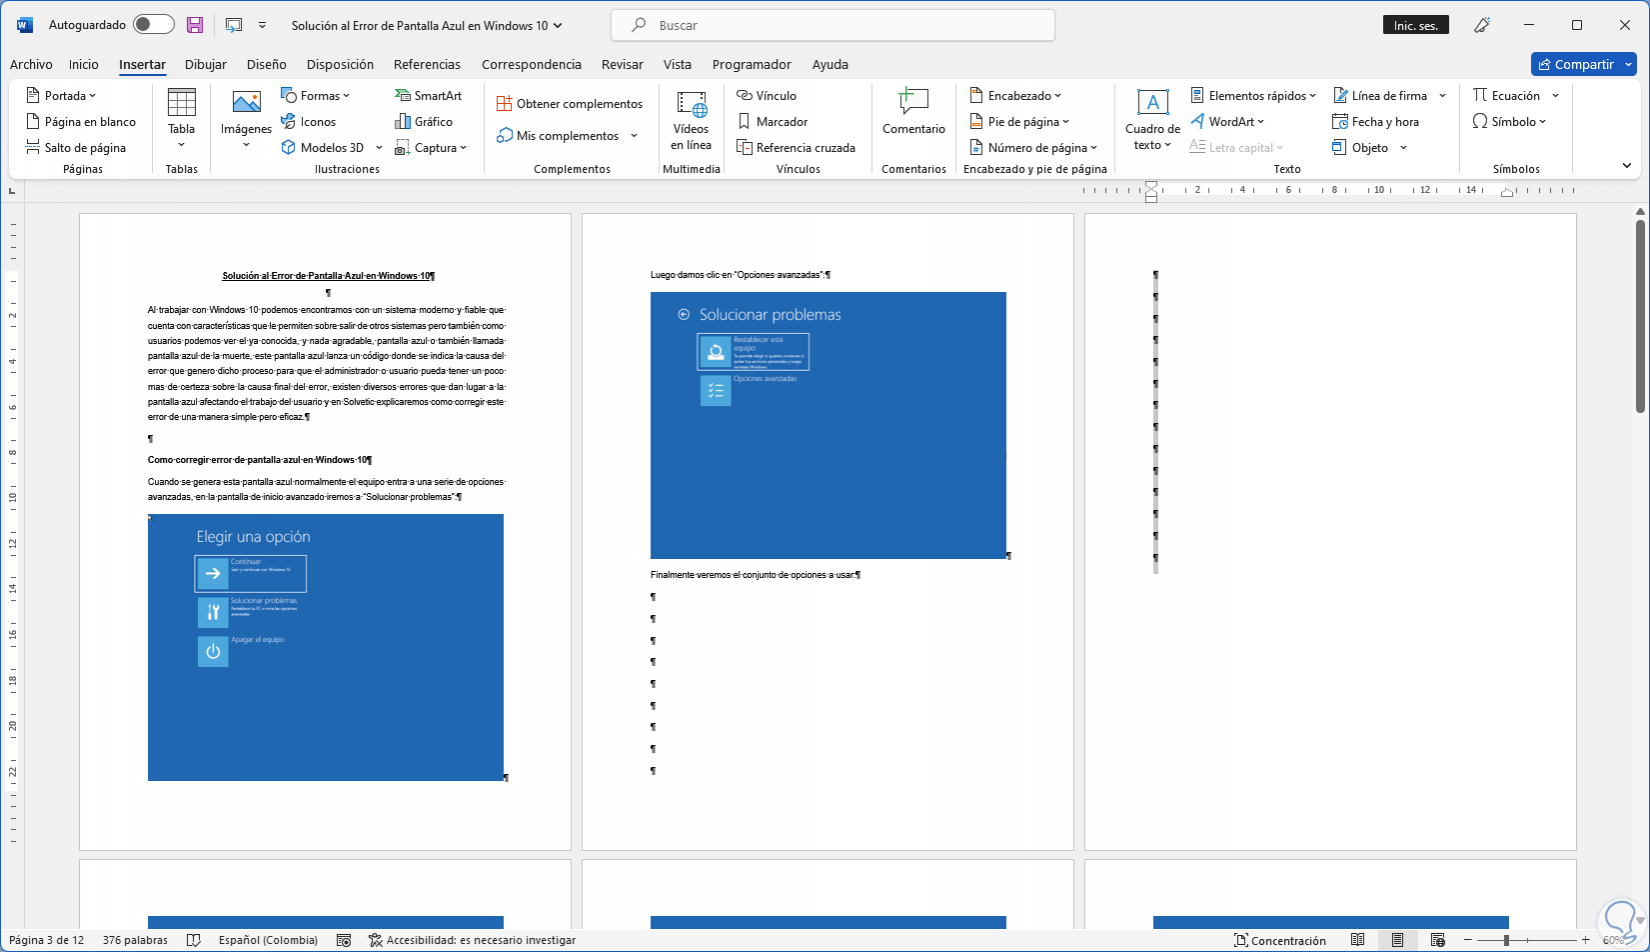
step 8
Press the Delete key to adjust the content:
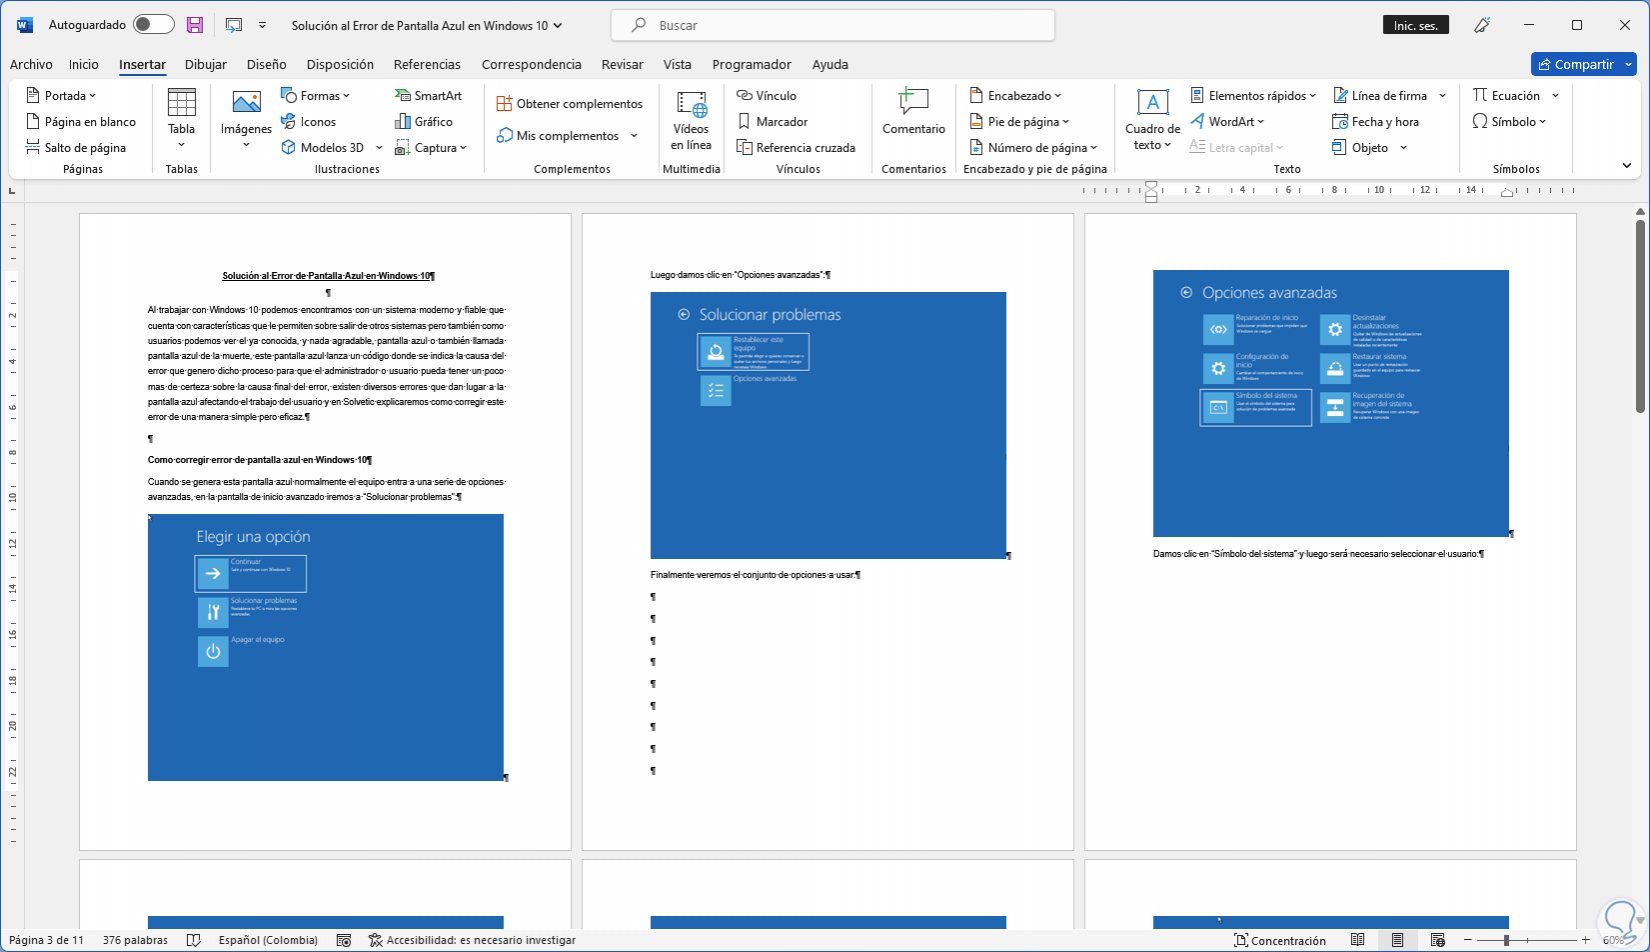
step 9
Alternatively it is possible to place the cursor on the last mark:
step 10
Pressing the Backspace key we delete each mark until adjusting the content. We click on "Show all" to remove the marks.
With these options it is simple to eliminate blank sheets of Word and thus better manage the content..