We use our computer for a number of things, so it is interesting that we know how we can solve the different problems that may arise, so that its use is more productive and we do not have complications during its use..
Windows 10/11 is not exempt from errors, but one of its advantages is that when an error is generated, it has an identifier with which the administrator or the user himself can find the solution. One of the errors that we can see is the error 0x00000b11 associated with printers which carries the message "Windows cannot connect to the printer", as such it is a message that we will see when trying to connect to a network printer and it is a common error that we can solve with some steps that TechnoWikis will explain in this tutorial.
Below we will see two possible ways to fix the printer error 0x00000b11 "Windows cannot connect to the printer" in a detailed step-by-step manner..
To stay up to date, remember to subscribe to our YouTube channel!
SUBSCRIBE ON YOUTUBE
1 Solution printer error 0x00000b11 "Windows cannot connect to the printer" from Control Panel
Step 1
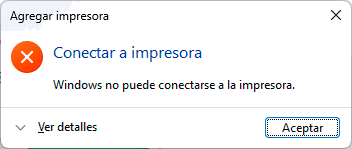
We try to establish connection to the printer to see the mentioned error:
Step 2
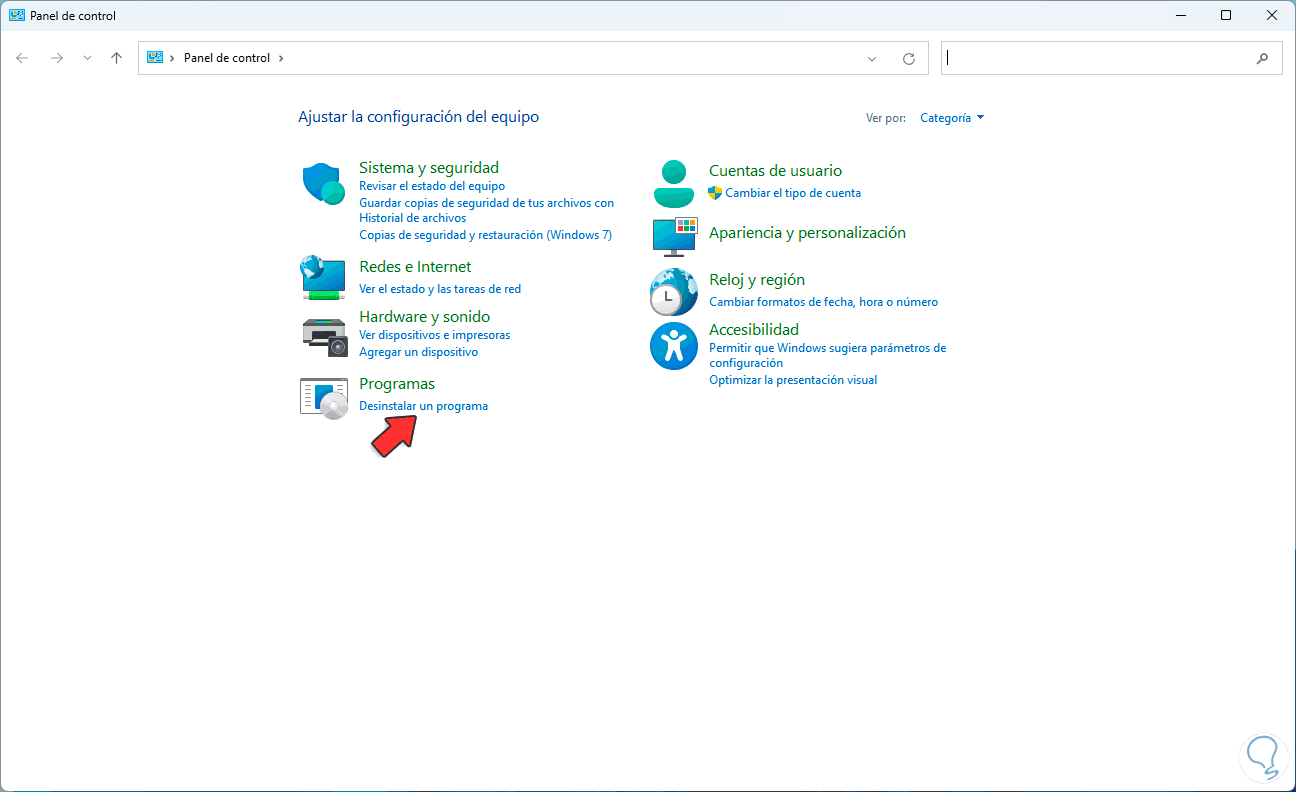
The first symptom or cause of the error is due to certain updates that have been downloaded and installed in the operating system, but there are some in particular that are directly related to the error and if we see them installed we can easily uninstall them, to do this we open Control Panel:
Step 3
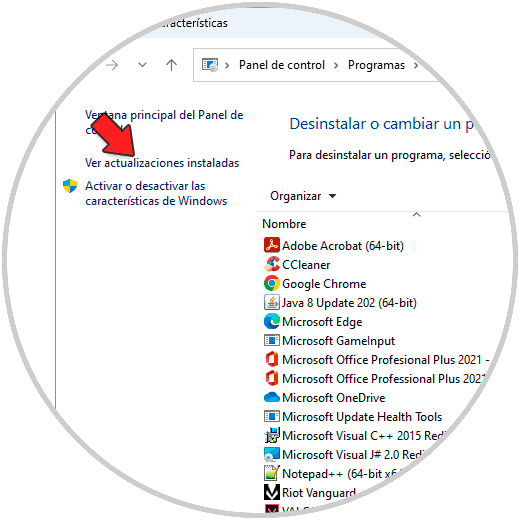
We click on "Uninstall a program" to see the following:
Step 4
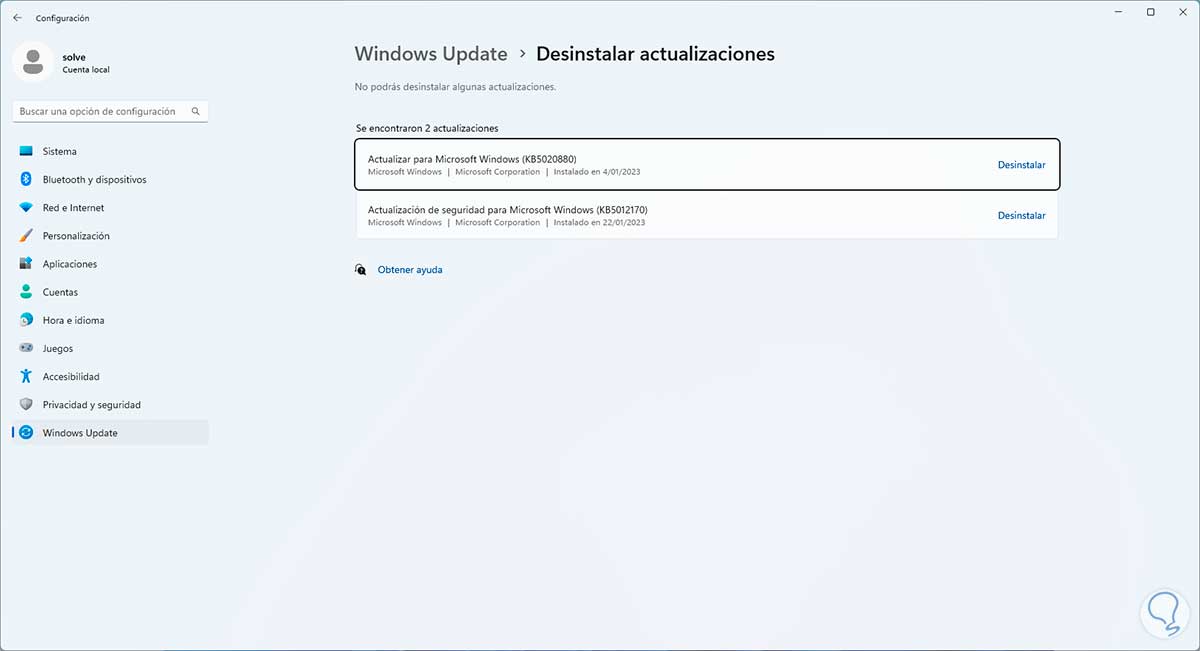
We click on "View installed updates" and the Settings application will open, there we uninstall if there is any of the following updates:
2 Solution printer error 0x00000b11 "Windows cannot connect to the printer" from Registry Editor
With this step we seek to deactivate the RPC encryption of the print queue, the error in this case is that when it is enabled, errors can occur between the communication of the printer and the network to which we are connected.
Step 1
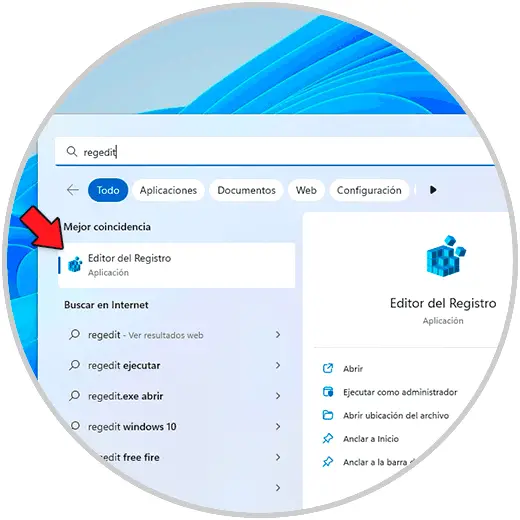
We open the Regedit Registry Editor:
Step 2
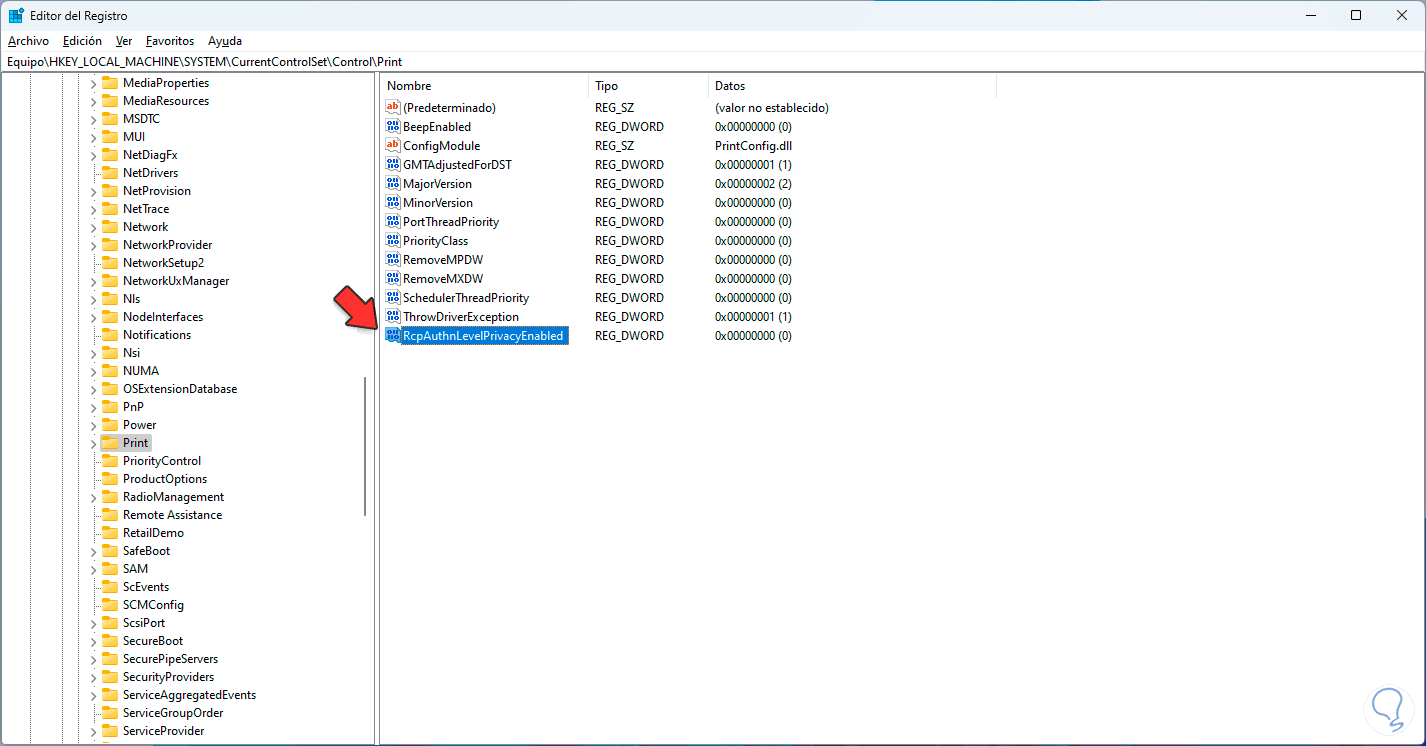
Let's go to the route:
HKEY_LOCAL_MACHINE - SYSTEM - CurrentControlSet - Control – Print
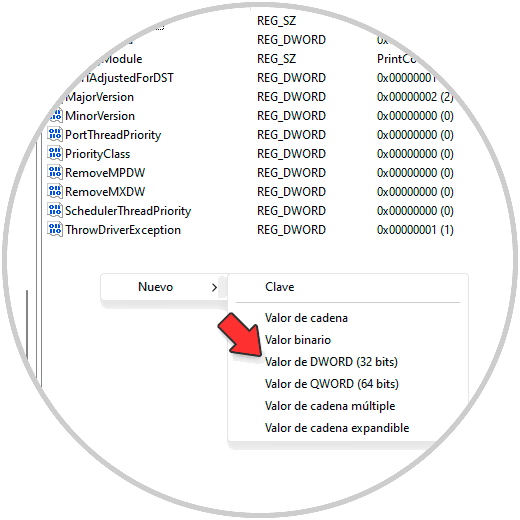
There we right-click somewhere and select the option "New - DWORD Value (32 bits)":
Step 3
Assign the name "RcpAuthnLevelPrivacyEnabled":
Step 4
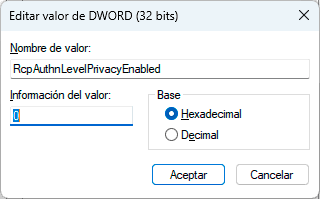
We double click and confirm that its value is zero:
step 5
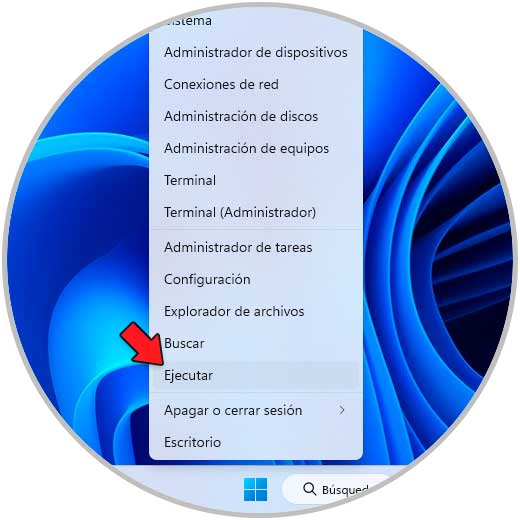
It is time to validate the connection, we open Execute:
step 6
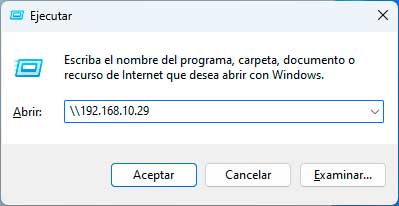
Enter the IP of the computer where the network printer is connected:
step 7
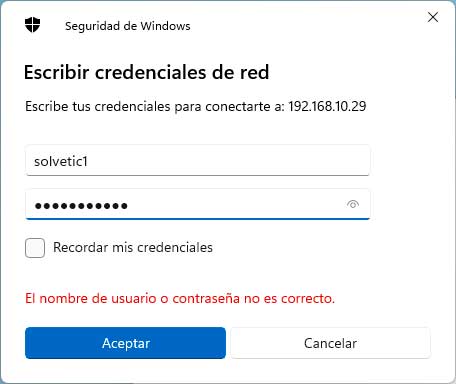
Click OK to access the local resources of that computer but first we must enter the credentials of an authorized user:
step 8
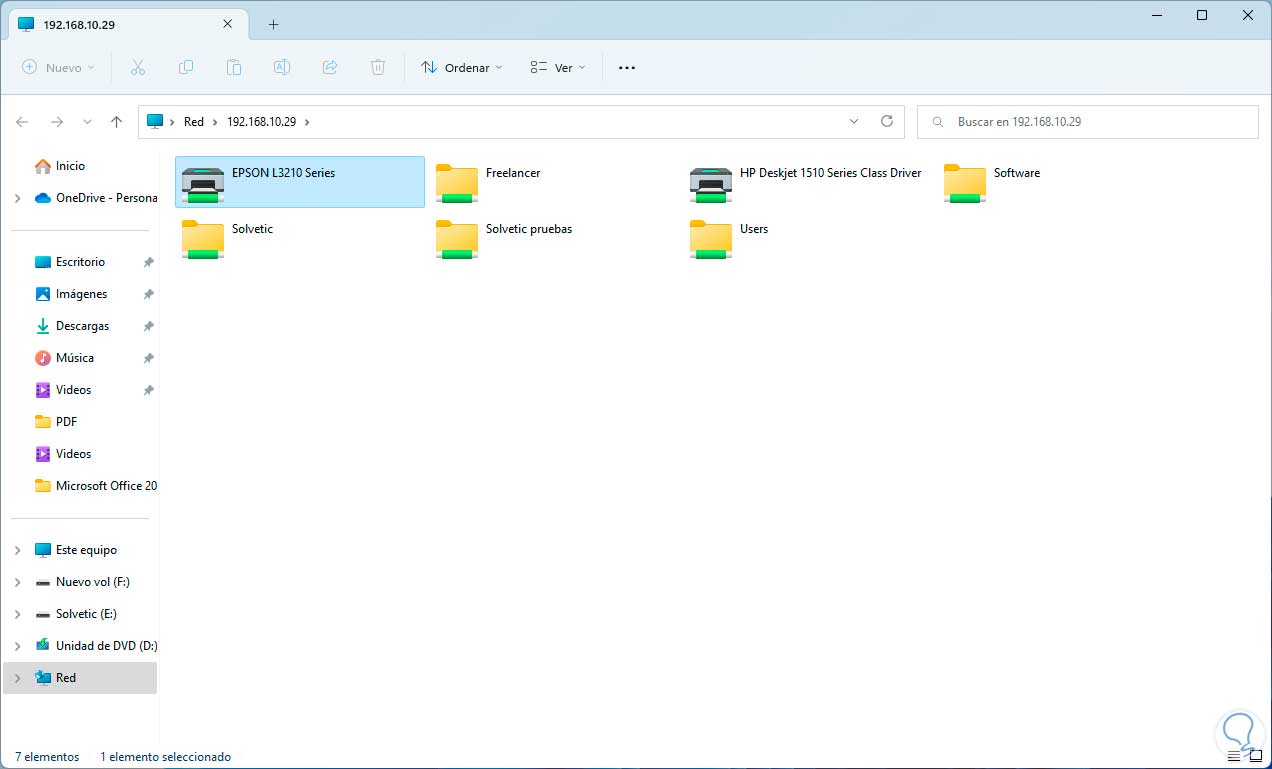
We will see each shared resource:
step 9
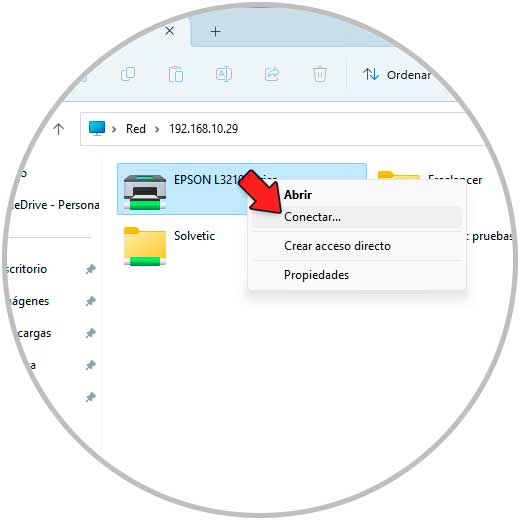
We right click on the printer and select "Connect":
step 10
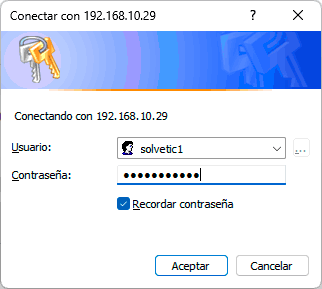
It will be necessary to enter the credentials again:
step 11
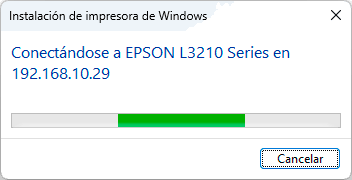
The connection process with the printer will start:
step 12
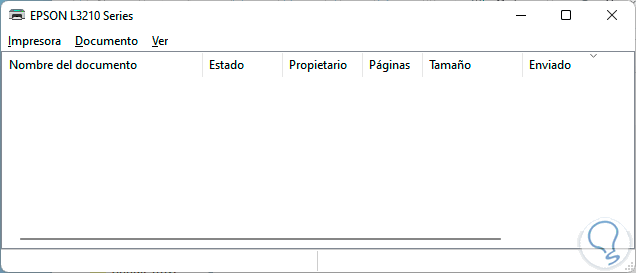
When establishing communication we can double click on the printer and have access to its print queue:
With one of these two methods it will be possible to correct this error and without having access to the available network printers, let's remember to also check the network settings of the local computer before any change.