Our team is made up of various elements, so it is important that we know each one of them and know how useful they are to us. The hard drive in Windows 11 is a fundamental part of the computer since the operating system and applications are installed on it..
Additionally, it is possible to configure it as a means of data backup but when the disk can be managed at the space level, be it an SSD or HDD disk, we have the opportunity to reduce its size to use a certain space for special tasks or to extend the disk when there is unallocated space.
It can be used to increase hard drive storage as well. That is why TechnoWikis will explain in detail how to change the size of a partition on the hard drive in Windows 11 in various ways, so that you can apply the one that best suits your needs and preferences, seeing the process that you must follow step by step. passed..
To stay up to date, remember to subscribe to our YouTube channel!
SUBSCRIBE ON YOUTUBE
1 Resize partition Windows 11 | reduce size
Step 1
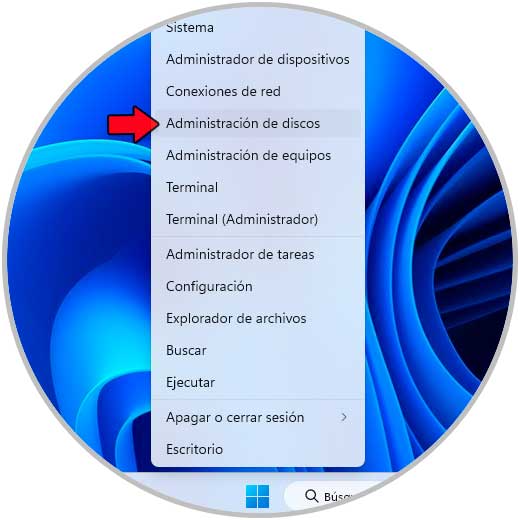
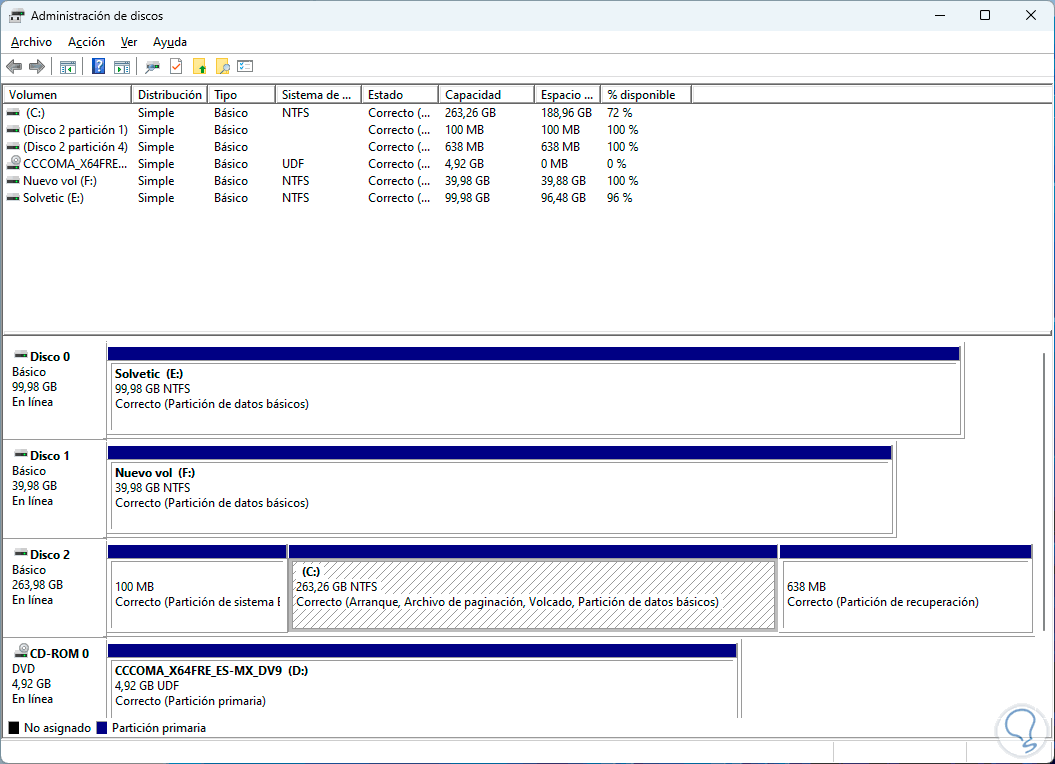
First of all we will see how to reduce the size of the hard drive to use a certain size for specific tasks, to achieve this open the Disk Manager:
Step 2
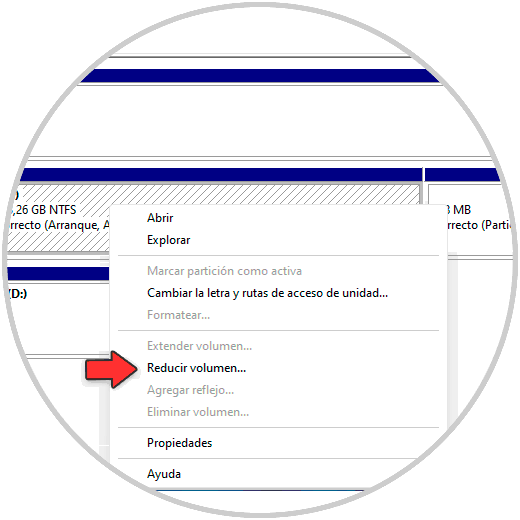
We right click on the hard drive or partition and select the "Reduce volume" option:
Step 3
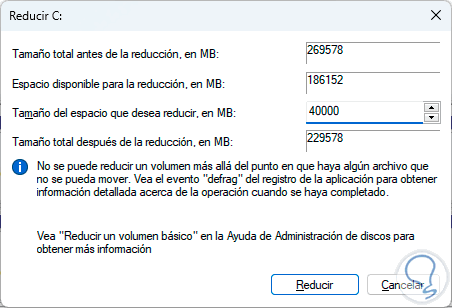
After the local analysis we enter the size to reduce:
Step 4
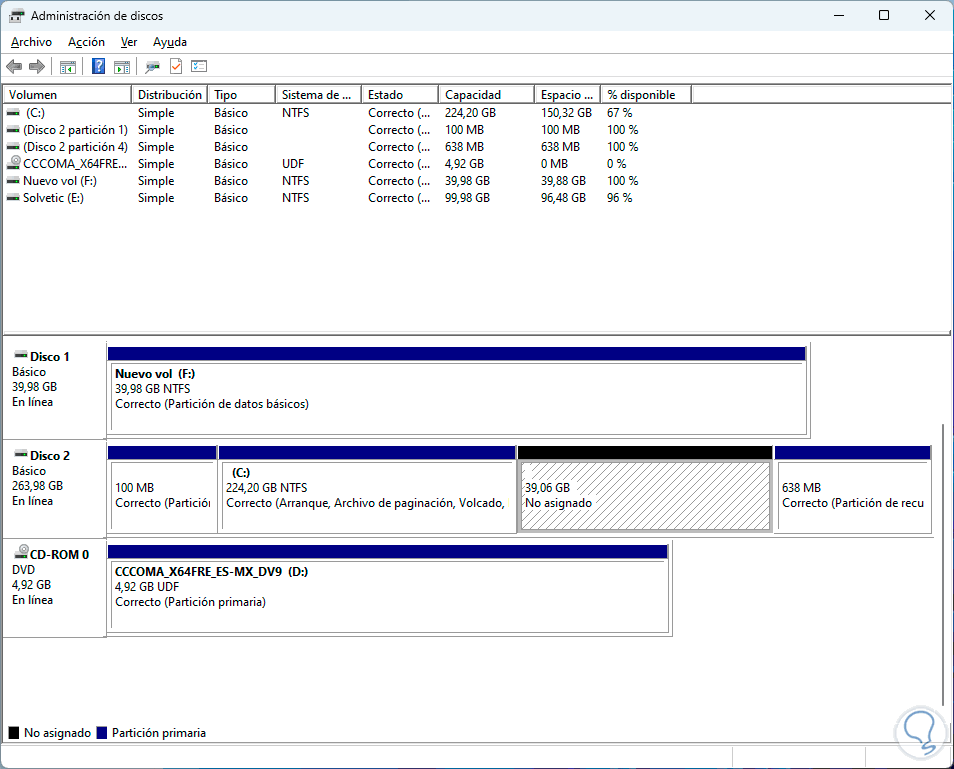
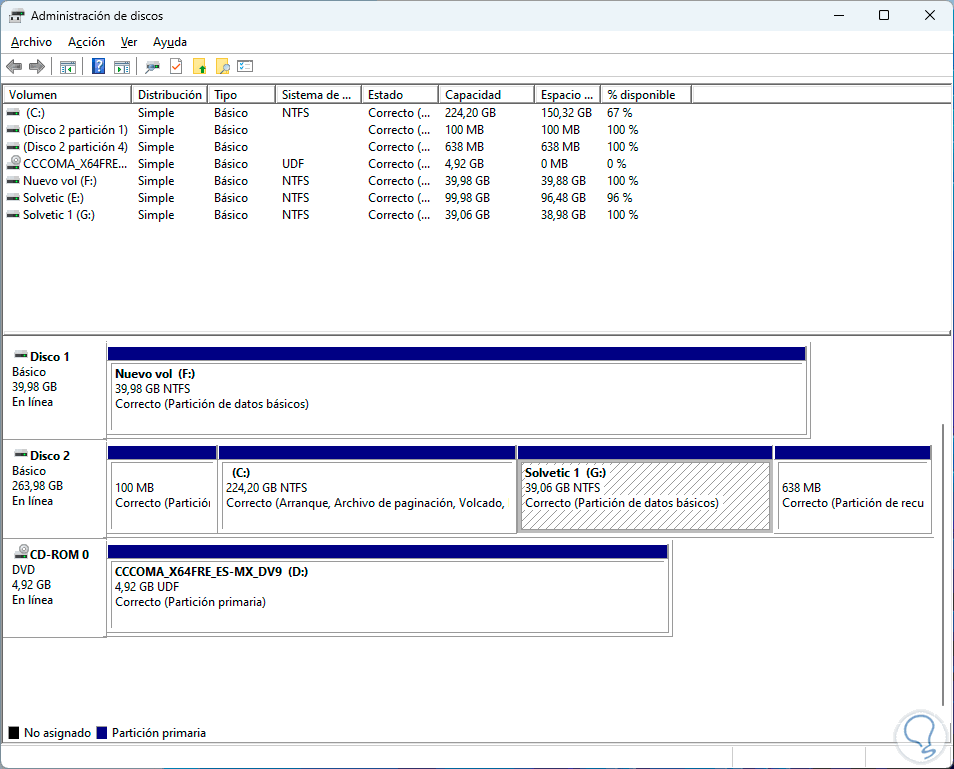
We confirm the process by clicking on "Reduce" and we will see in the Disk Manager the space that has been reduced:
step 5
From there it is possible to create a new volume if necessary, for this we right click on the space created and select "New simple volume":

step 6
The wizard will open:
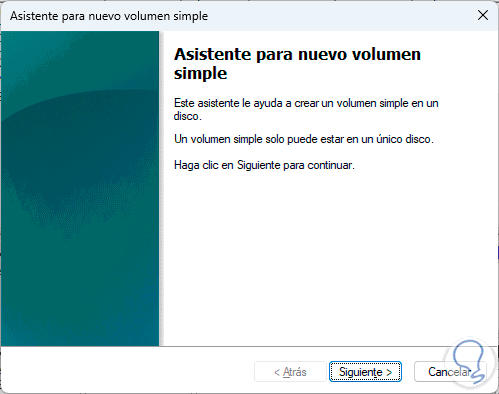
step 7
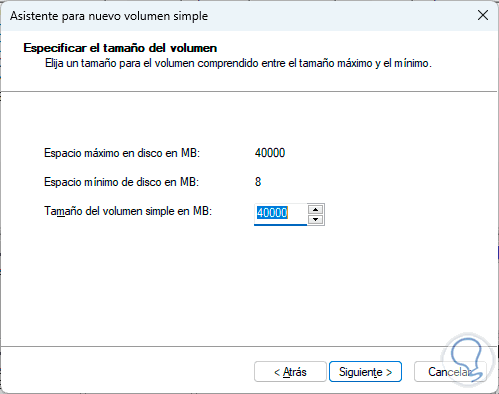
We click Next to define the size to use:
step 8
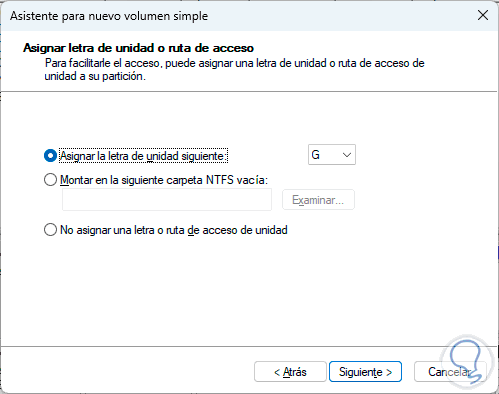
Now we select the letter to use:
step 9
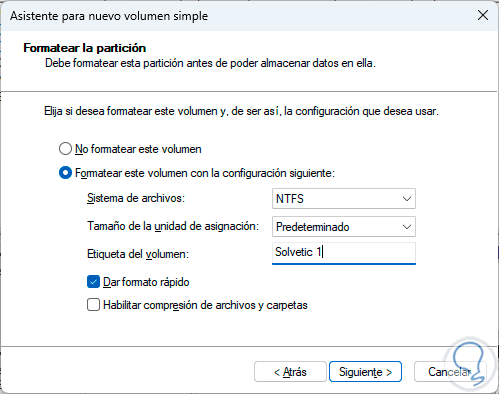
We click Next to define the format and name of the new volume:
step 10
Now we will see a summary of the task to be carried out:
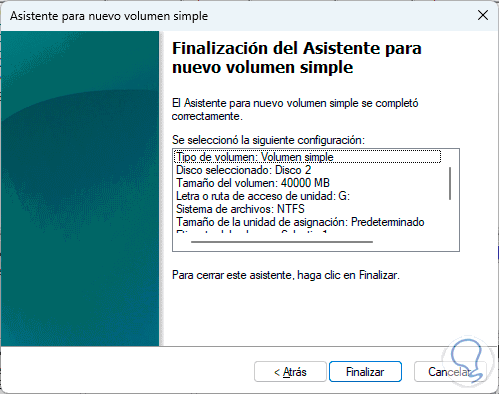
step 11
We click "Finish" and we will see the new volume created:
2 Change partition size Windows 11 | Extend from Settings
Now we will learn how to extend hard drive space and first of all we will see how to do it from Settings.
Step 1
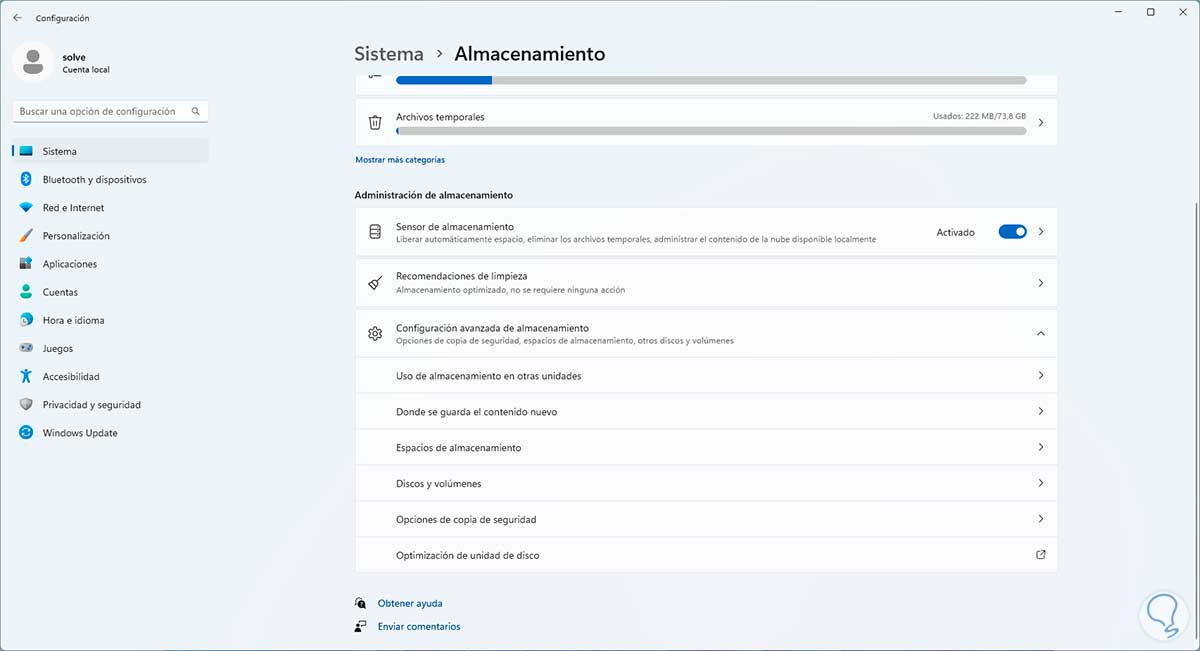
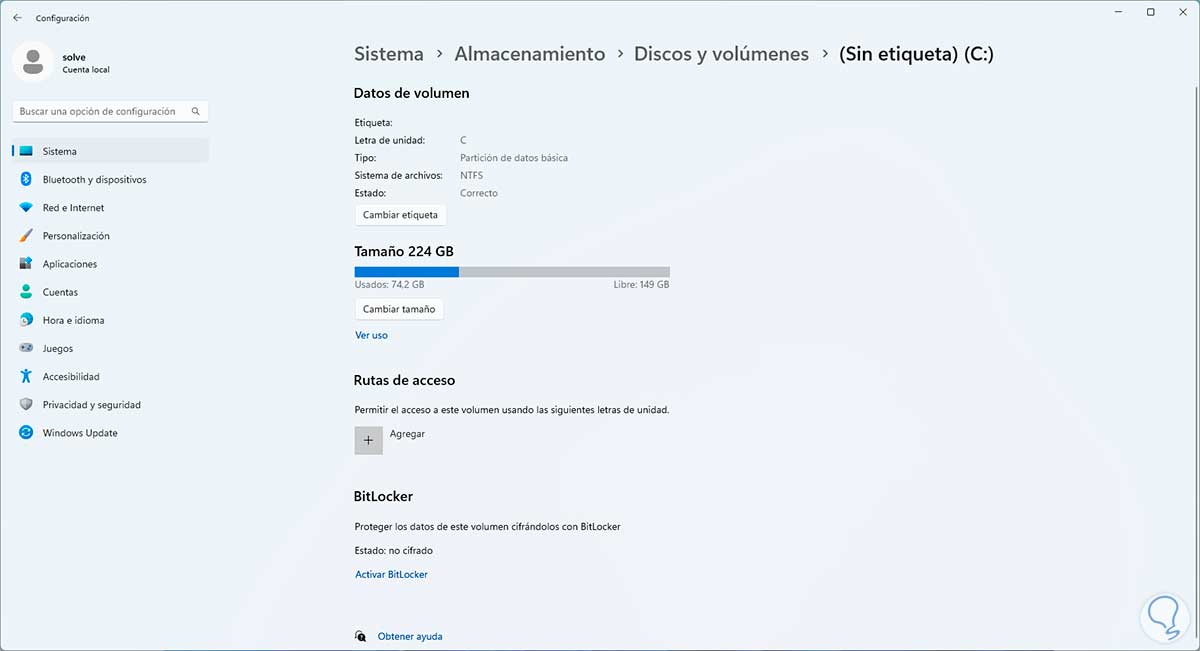
For this we go to "Start - Settings - System - Storage":

Step 2
Then we click on "Advanced storage settings - Disks and volumes":
Step 3
We will see the list of volumes available on the computer:
Step 4
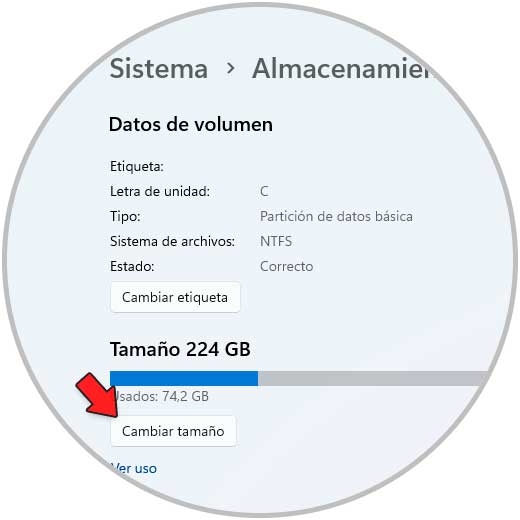
On the unit to extend we click on "Properties" to see the following:
step 5
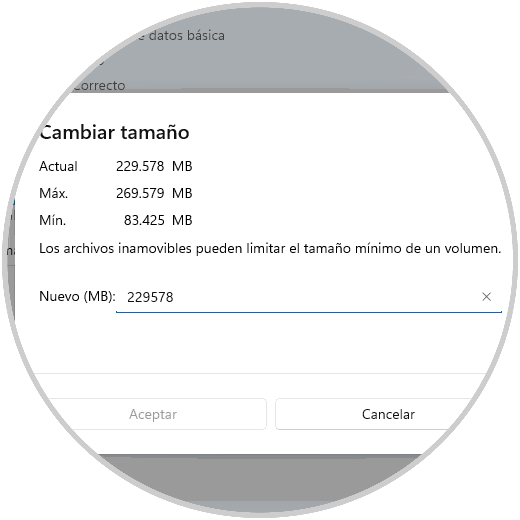
We click on "Change size" to see the current size and the available time:
step 6
We establish the new size:

We apply the changes.
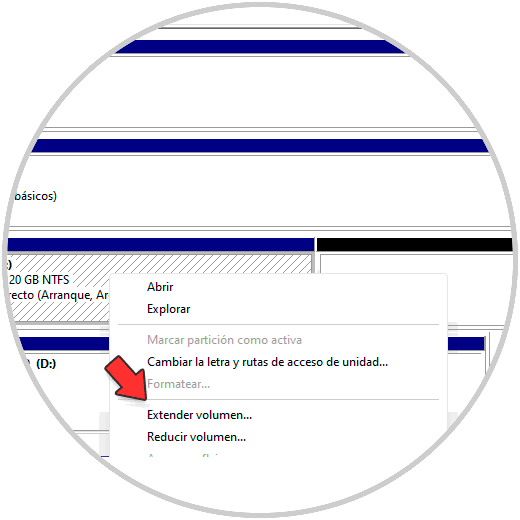
3 Change partition size Windows 11 | Extend from Disk Management
This is one of the most used options to extend partition size in Windows 11.
Step 1
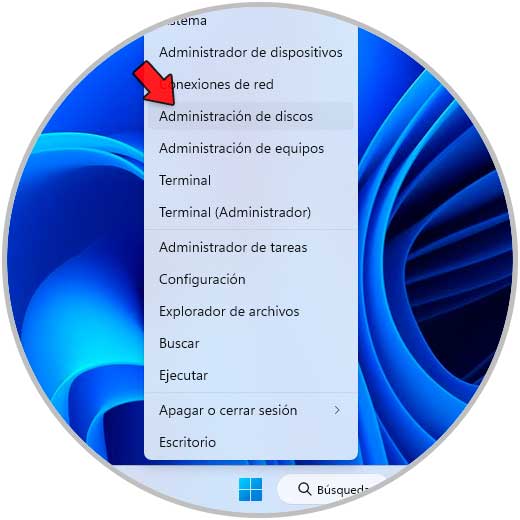
We open the Disk Manager:
Step 2
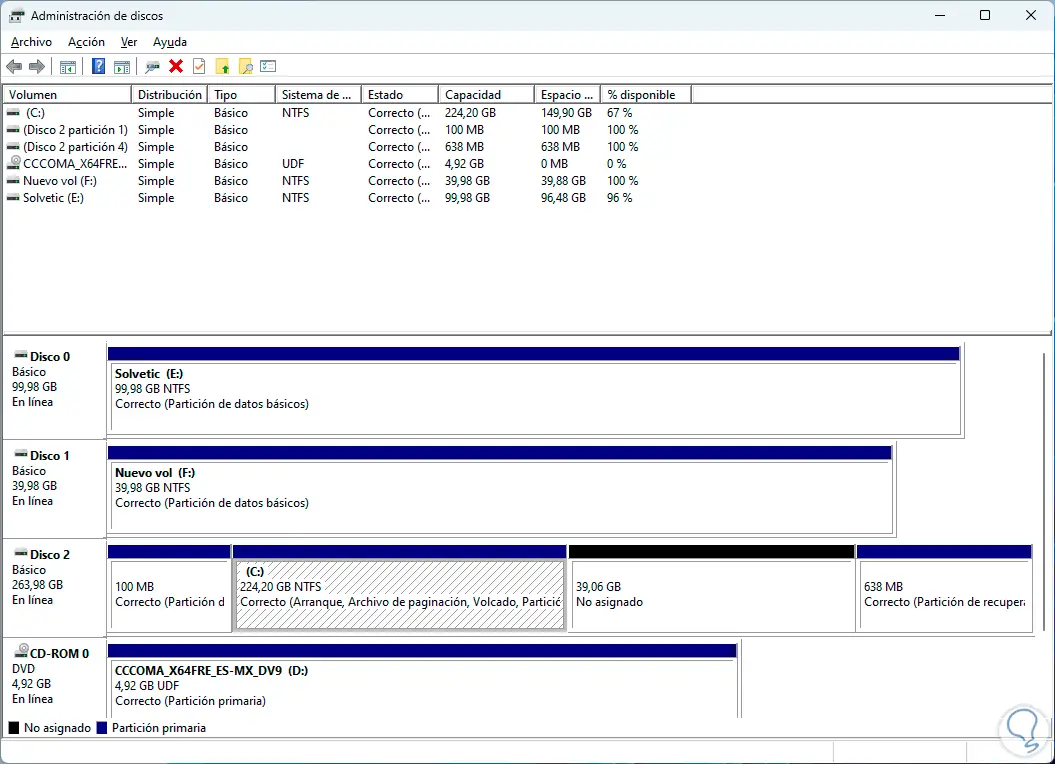
In the console we will see our partitions and the unallocated space will be seen (in black):
Step 3
We right click on the main hard drive and select "Extend volume":
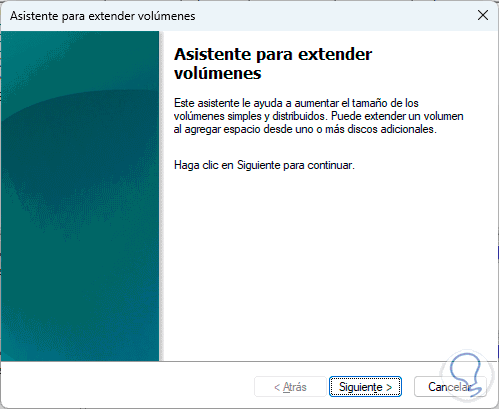
Step 4
The following wizard will open:
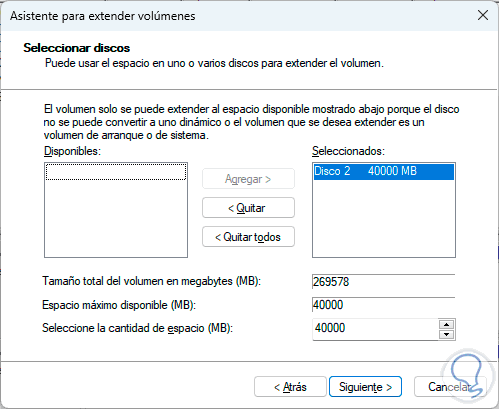
step 5
We select the space to allocate:
step 6
We click Next to see a summary:
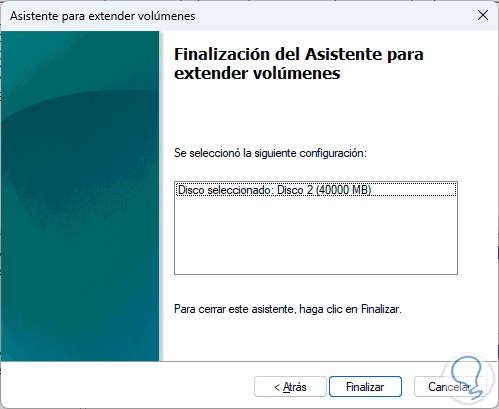
step 7
We click "Finish" to apply the changes and see the extended disk:
4 Change partition size Windows 11 | Extend from CMD
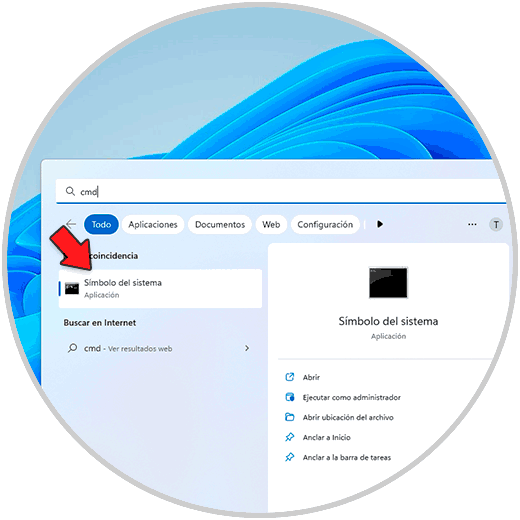
The Command Prompt console is another option to extend our partitions in Windows 11.
Step 1
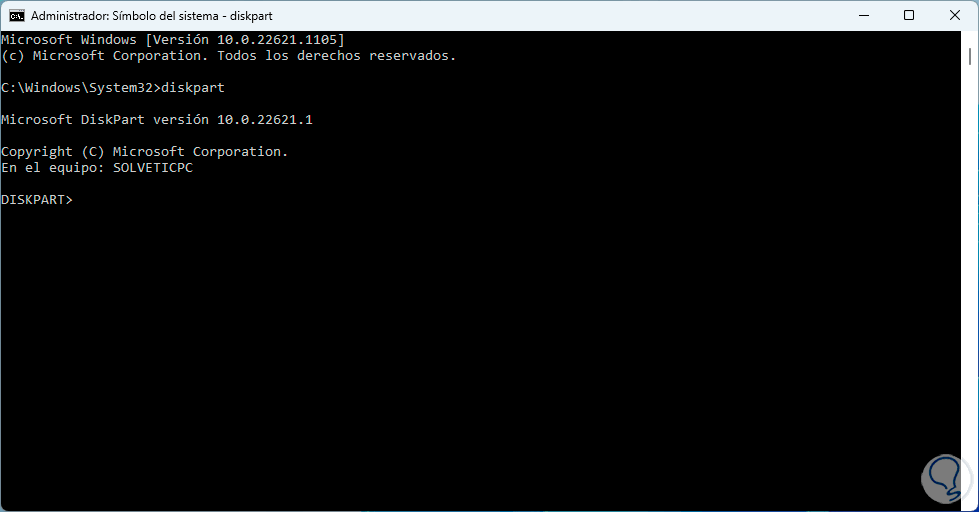
We open CMD as administrator:
Step 2
We run "diskpart" to access the disk utility:
Step 3
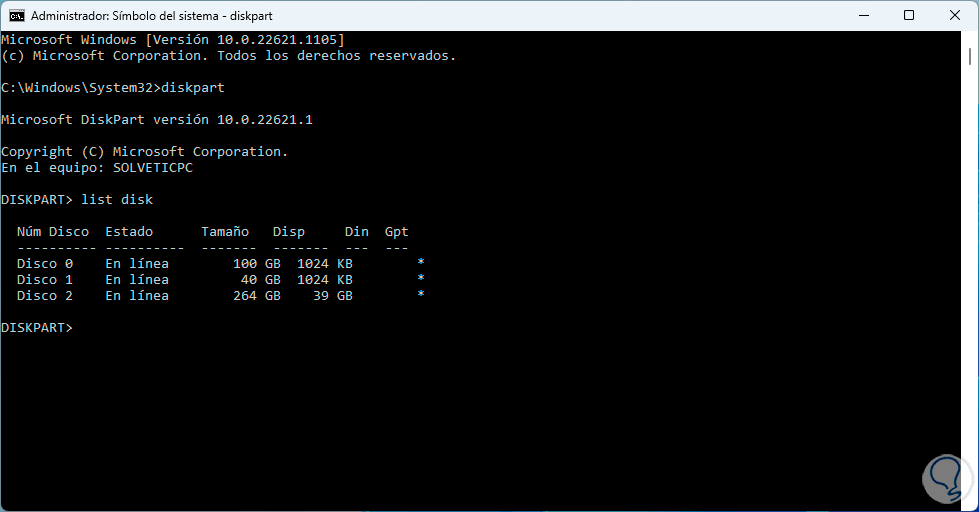
We list the discs:
listdisk
Step 4
Select the respective disk:
select disk#

step 5
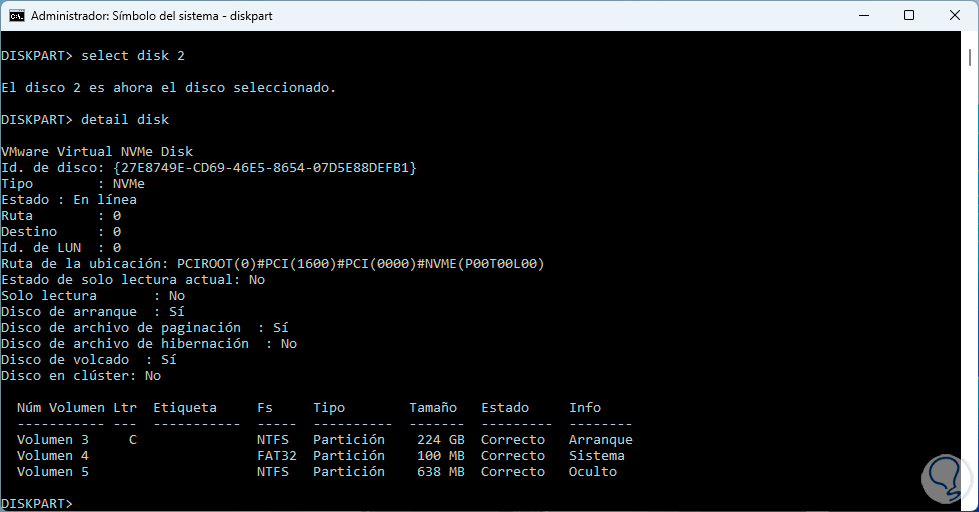
Look at the details of the disk:
detail disk
step 6
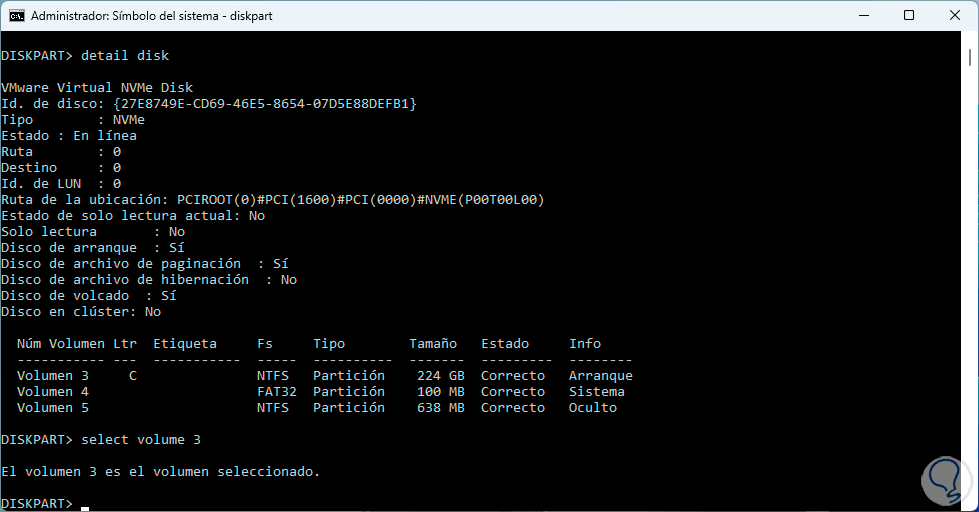
There we select the volume to extend:
select volume #
step 7
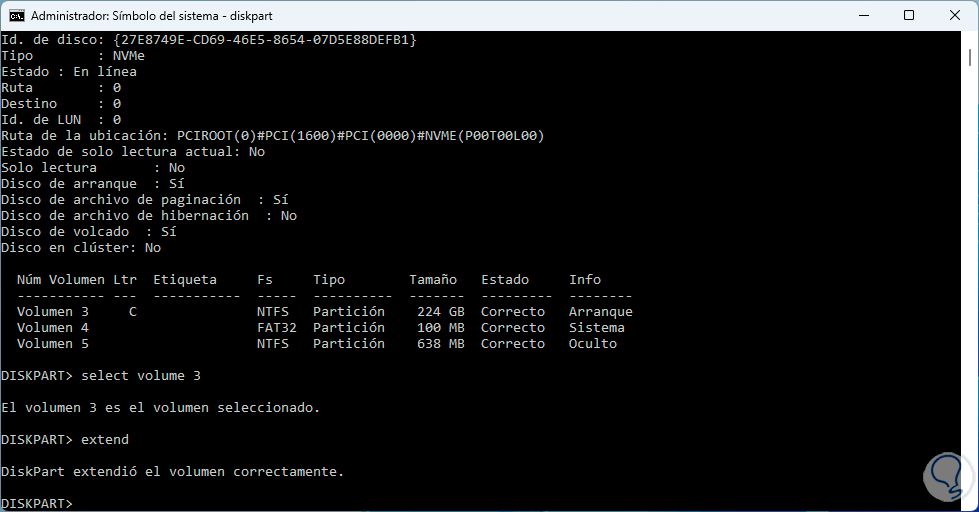
Extend the hard drive using the command:
extend
step 7
Note: In some cases you can define the amount of space to allocate using the syntax:
extend size=(value)

5 Resize partition Windows 11 | Extend from PowerShell
Finally, the PowerShell terminal is another of the options available for this purpose.
Step 1
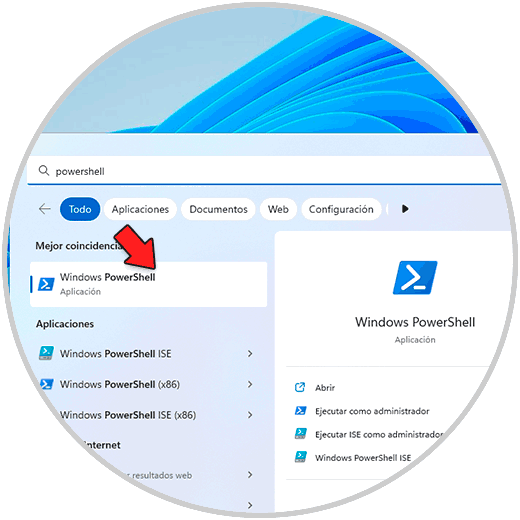
We open PowerShell as administrator:
Step 2
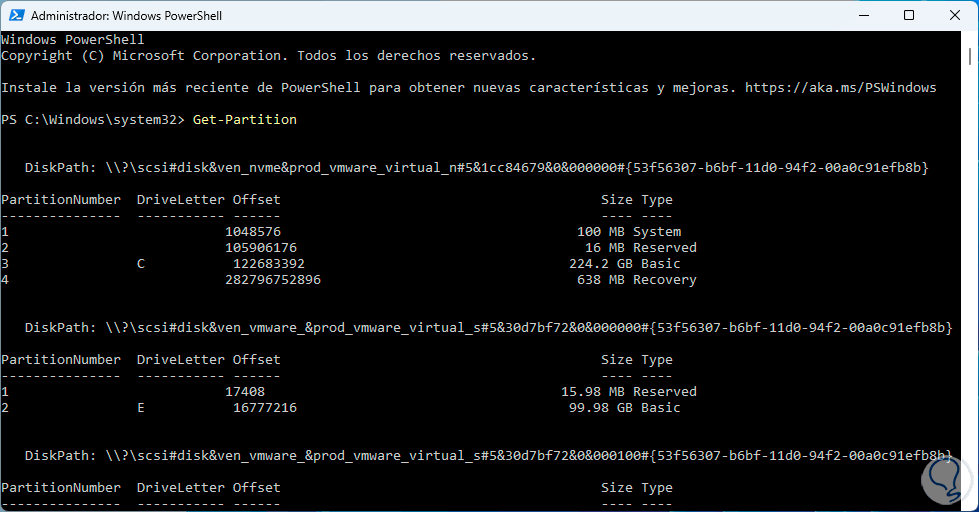
We list the disk partitions:
Get Partition
Step 3
We access the details of the partition to extend:
Get-PartitionSupportedSize -DriveLetter <letter>

Step 4
In it we find in the "SizeMax" column the maximum size of the hard disk, we extend the volume using the following syntax:
Resize-Partition -DriveLetter <letter> -Size <size>
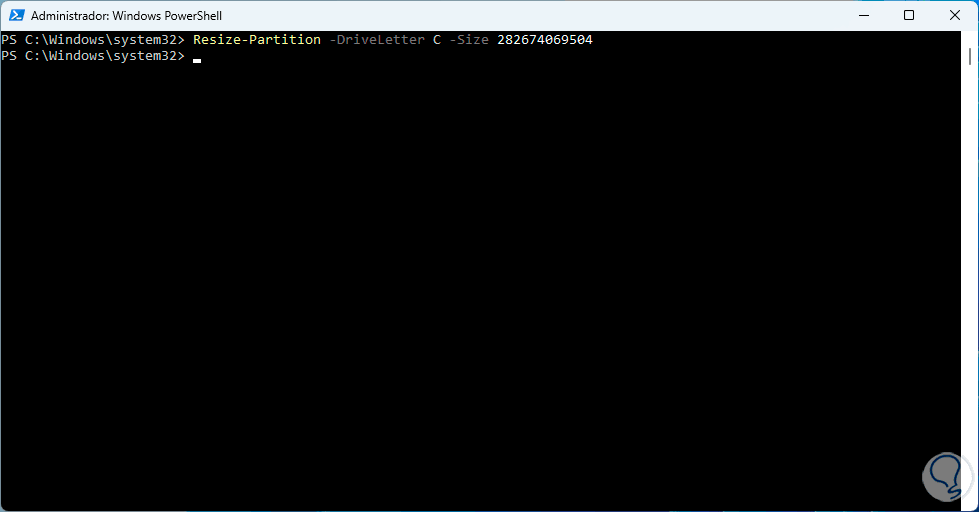
With this the partition will have been extended using all the available space.
Each of these options will be of great help in managing partition size and space on Windows 11 hard drive..