Windows Defender in Windows 10 has been integrated to provide the user with a defense system in which the computer and its data (including the user's data) are protected against various threats that exist both locally and externally, Windows Defender has options to protect accounts, the general system, folders and many more worse opportunities this protection can affect some tasks by recognizing them as threats even when we know that it is not..
For these reasons and for others of an administrative nature, it will be necessary to temporarily disable Windows Defender and thus work on what we need without error, let's see two methods of achieving it. Later, if you want to have it operational again, you can even have commands to easily run Windows Defender again and have the computer safe.
To stay up to date, remember to subscribe to our YouTube channel!
SUBSCRIBE ON YOUTUBE
1 How to disable Windows Defender in Windows 10 from Settings
Step 1
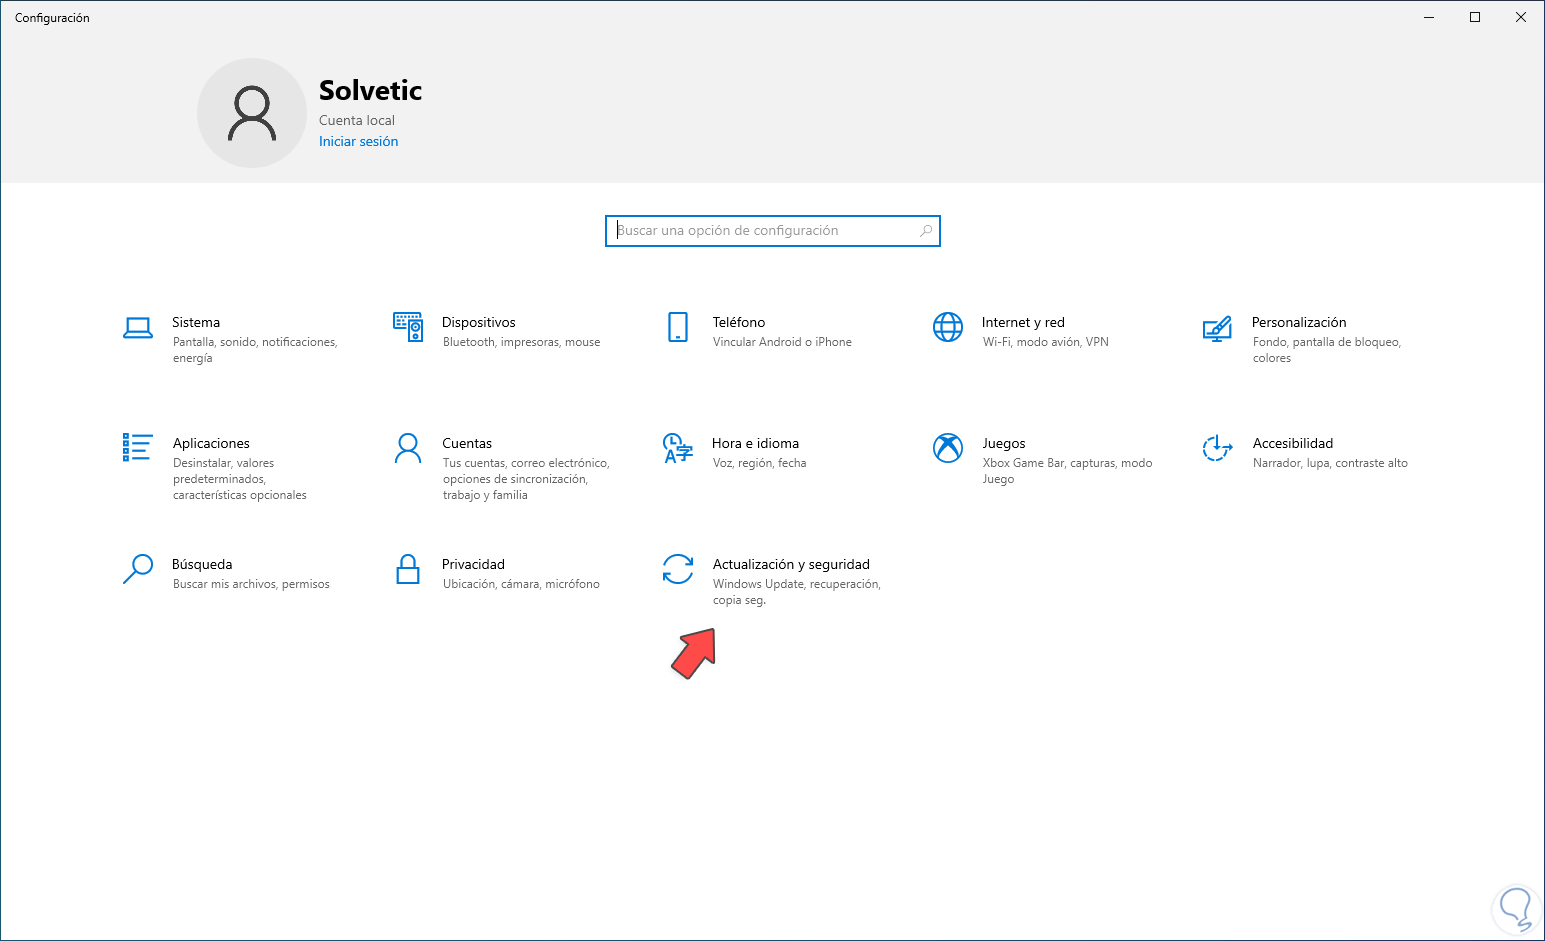
This is one of the simplest methods to achieve it in Windows 10, we go to "Start - Settings - Update and security":
Step 2
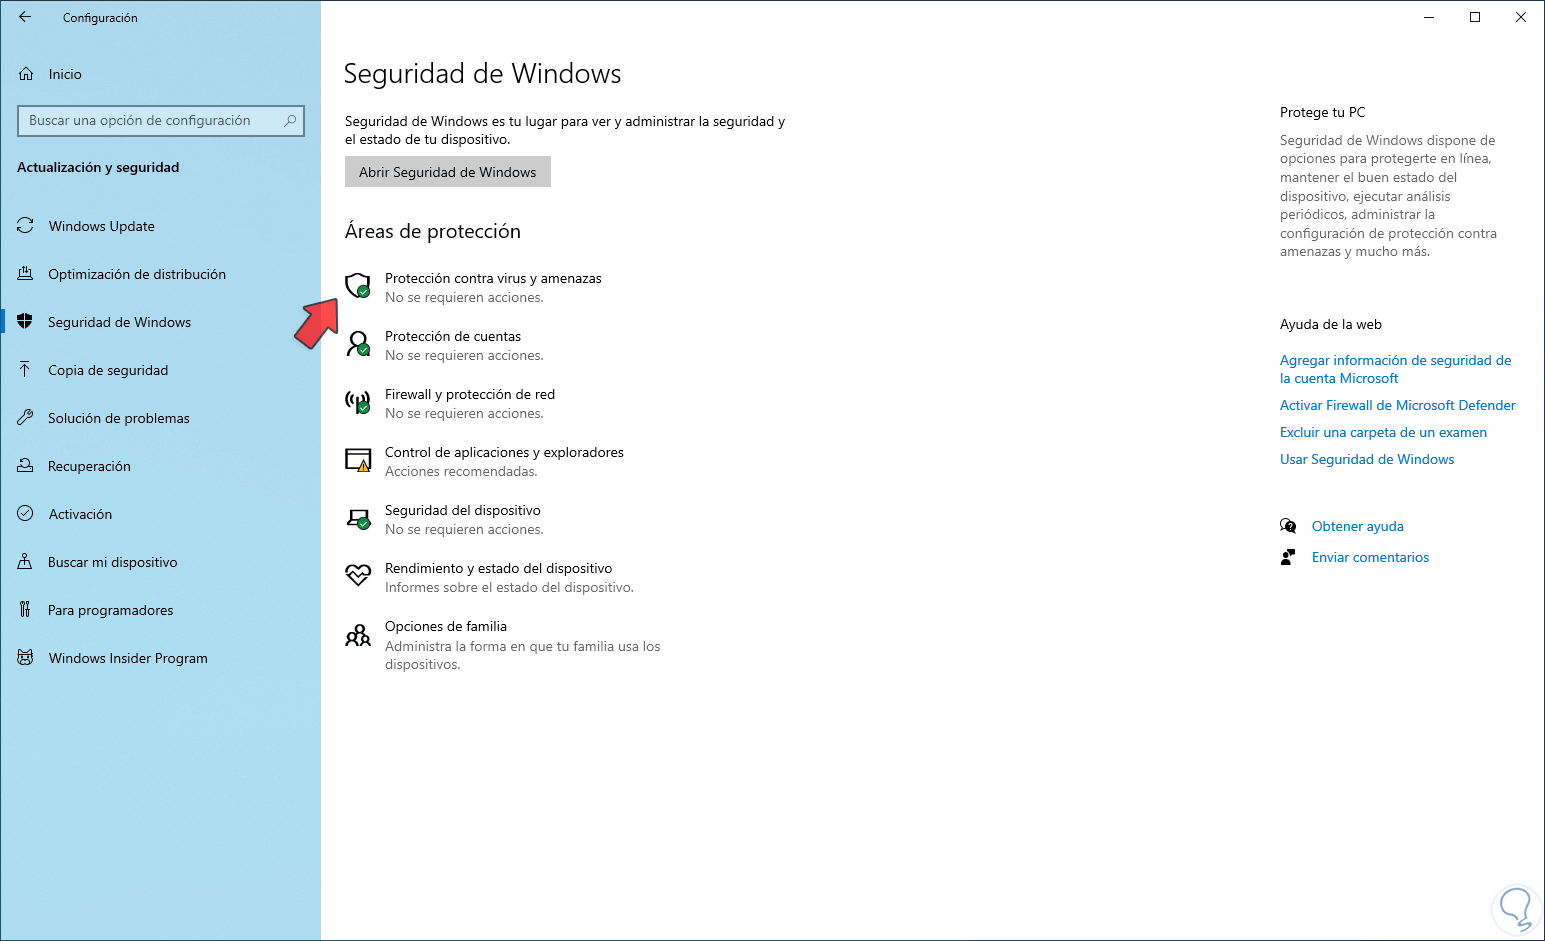
By accessing there we will go to "Windows Security". We click on "Protection against viruses and threats" and the following window will open:
Step 3
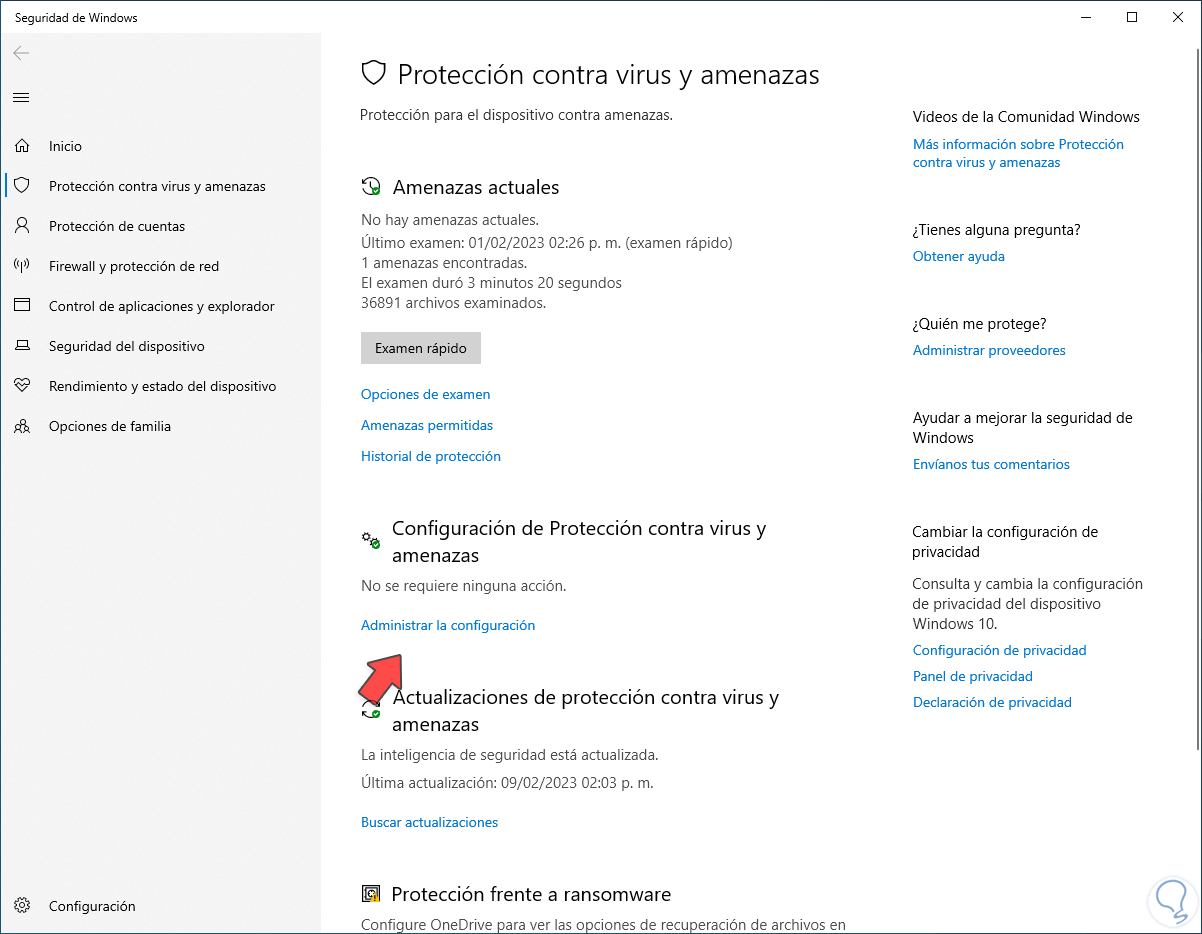
We click on "Manage settings" to access the various options to use:
Step 4
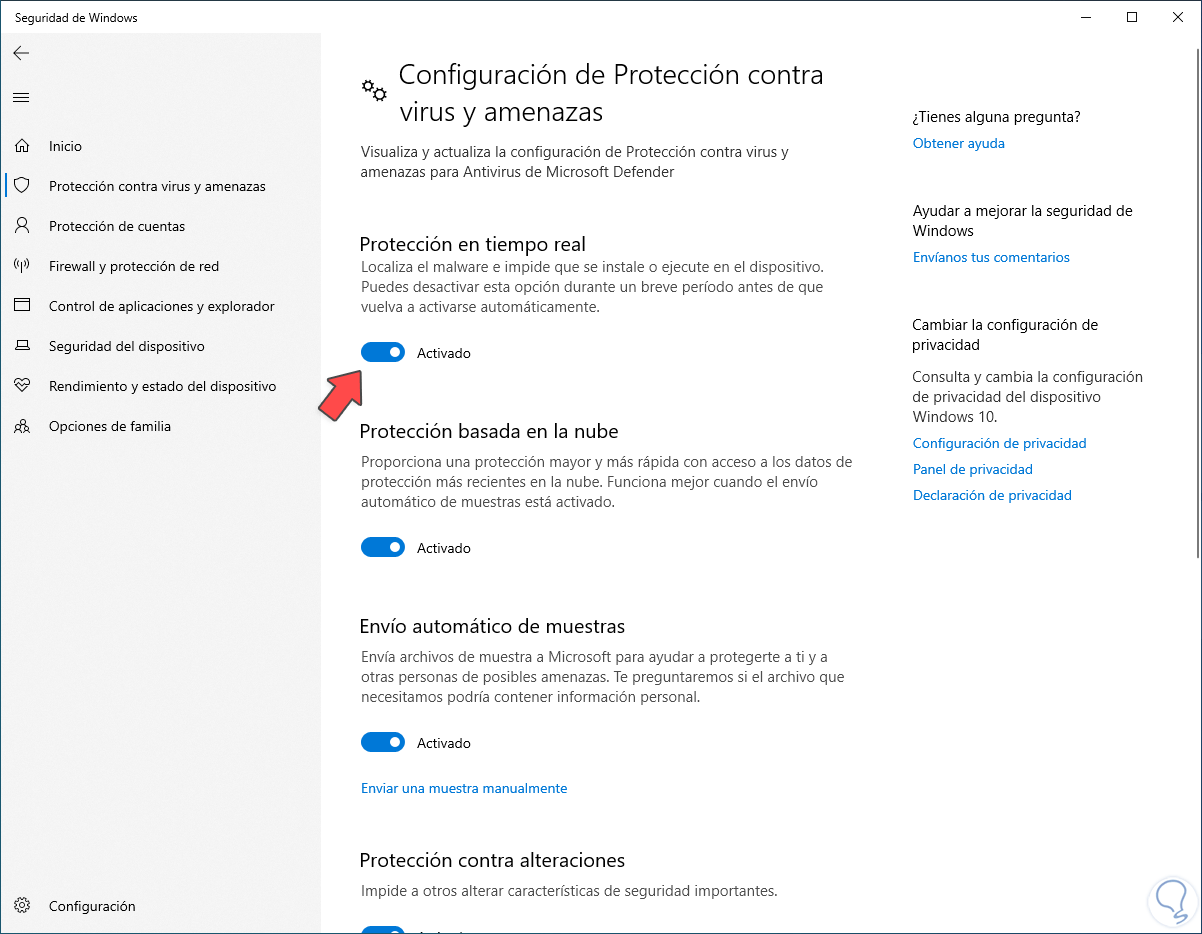
We turn off the "Real-time protection" switch.
step 5
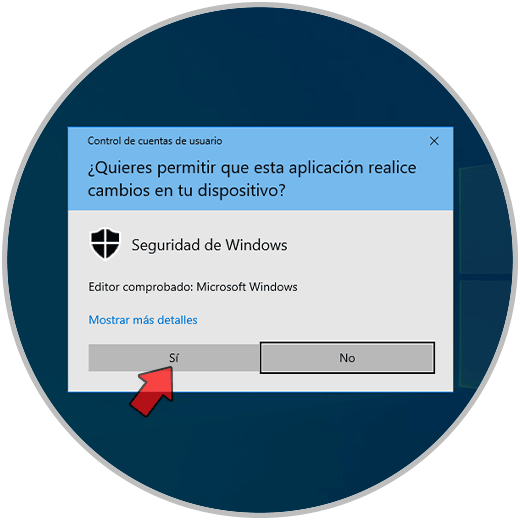
It will be necessary to accept the UAC permission:
step 6
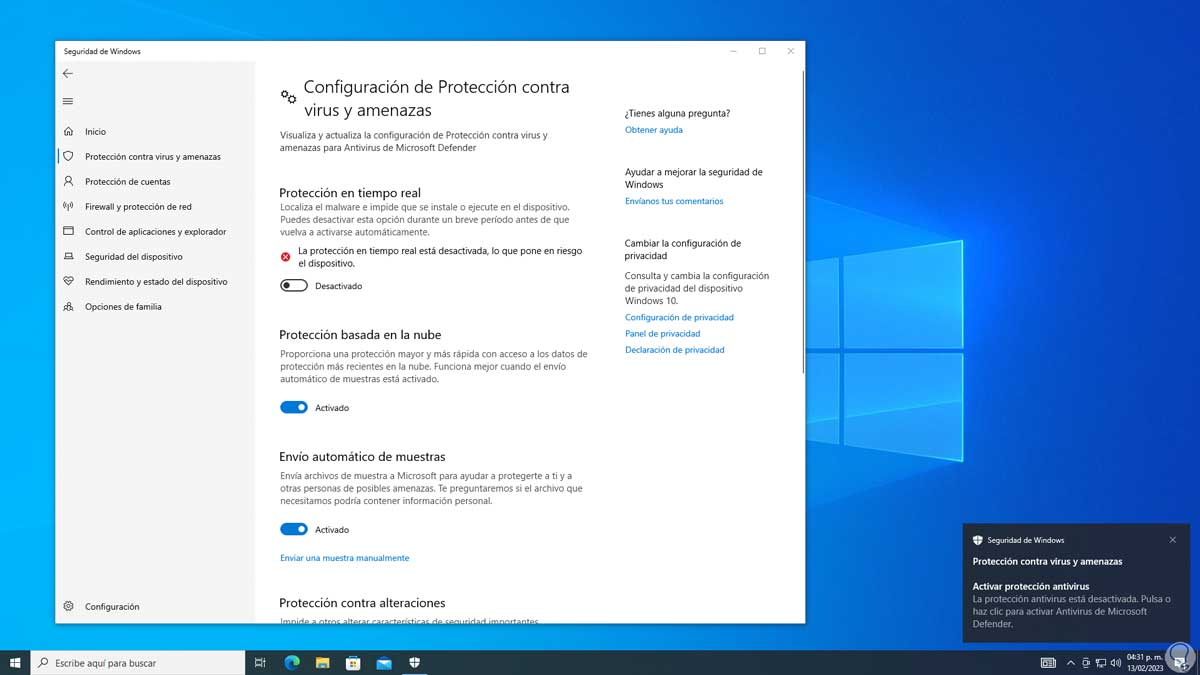
We will see that Windows Defender has been disabled:
step 7
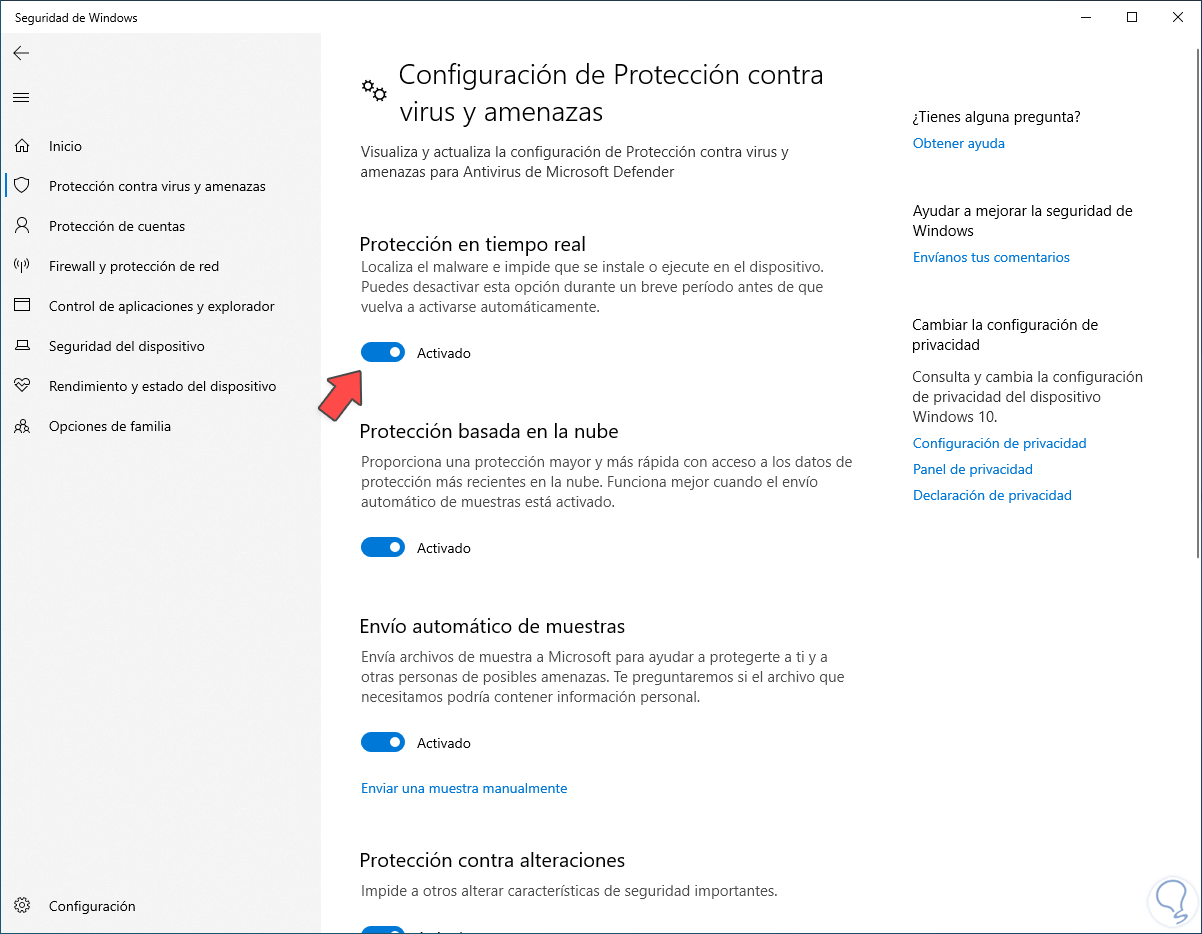
You can turn the switch back on to enable antivirus after the job is done and to keep Windows 10 secure:
2 How to disable Windows Defender in Windows 10 from Policy Editor
Step 1
This is another of the functional options that few know but that help to carry out this process, for this method in the Start search engine we enter "gpedit.msc" and select the utility:

Step 2
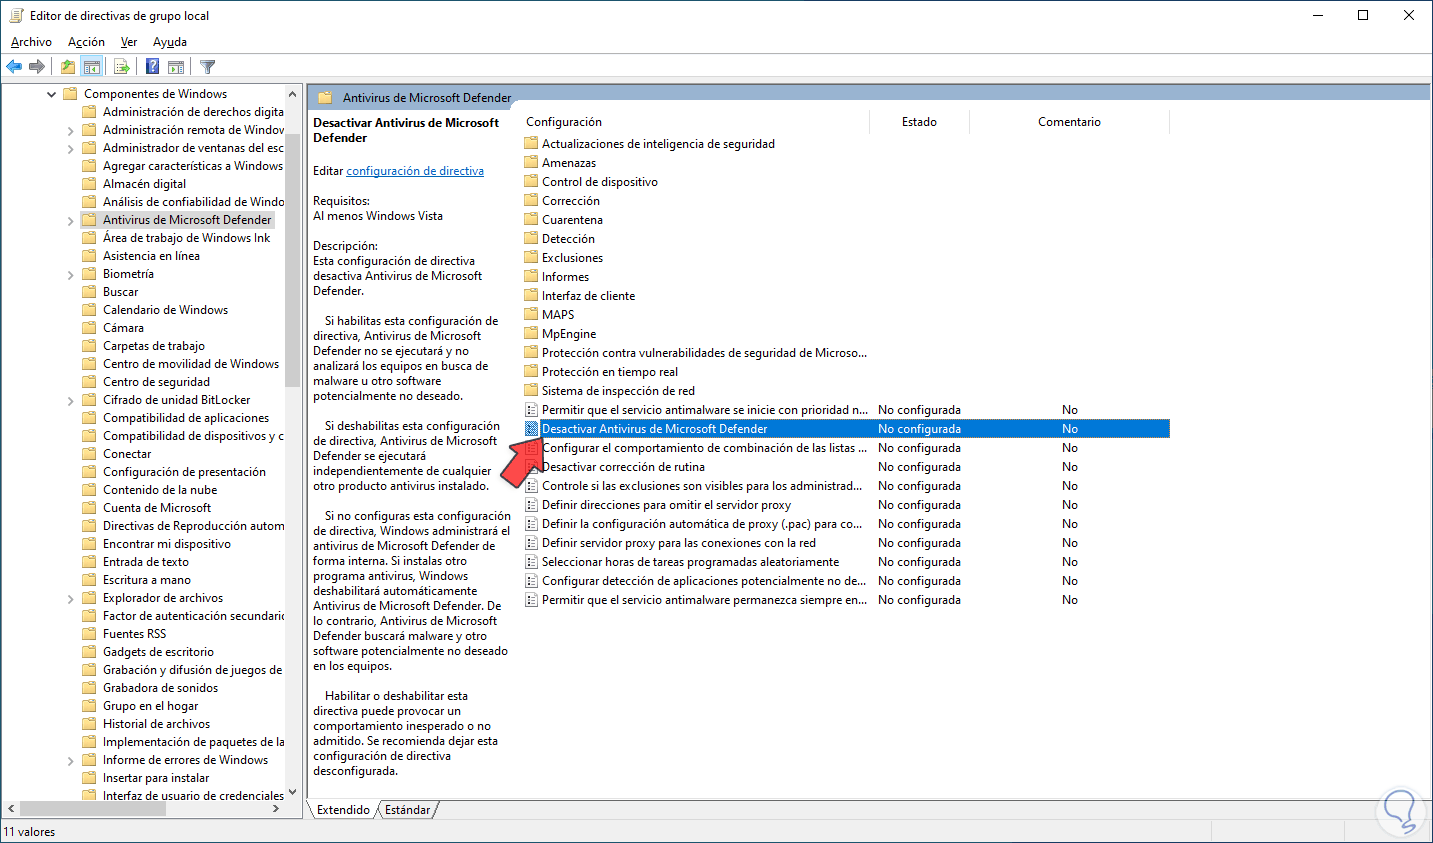
We go to "Computer Configuration - Administrative Templates - Windows Components - Microsoft Defender Antivirus", there we locate the policy "Disable Windows Defender Antivirus". Double-click on the "Disable Windows Defender Antivirus" policy to see its attributes:
Step 3
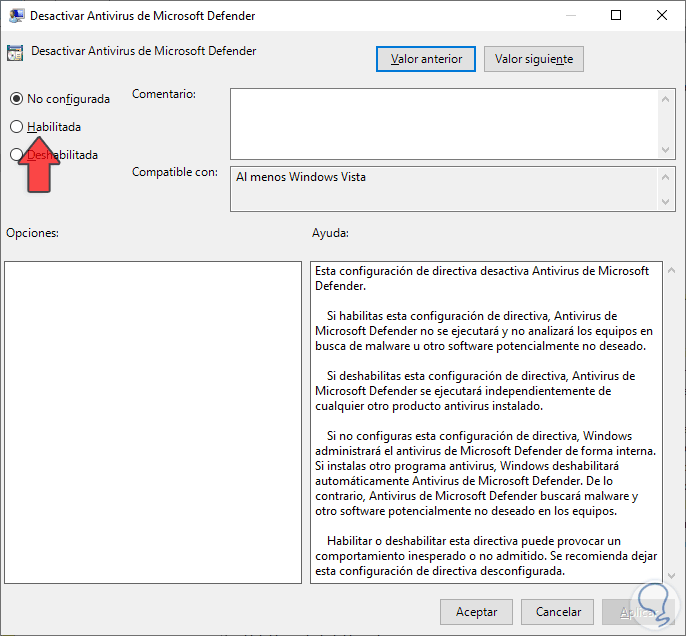
Check the "Enabled" box:
Step 4
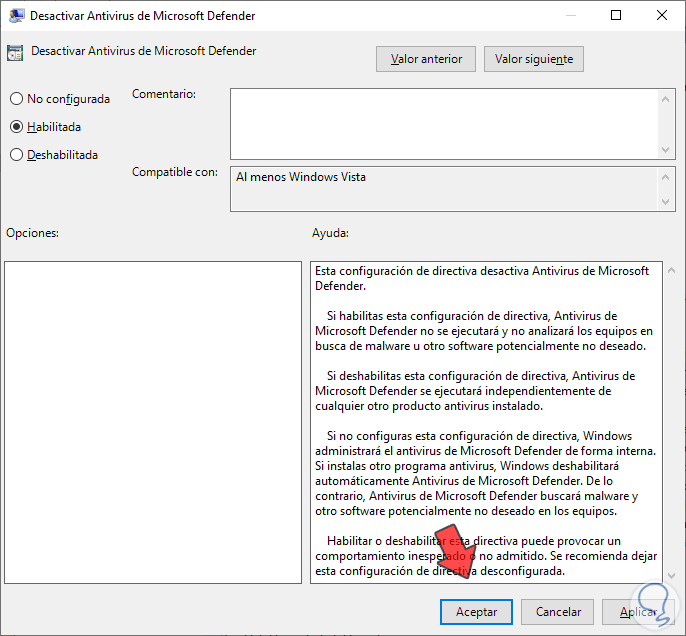
Apply the changes:
step 5
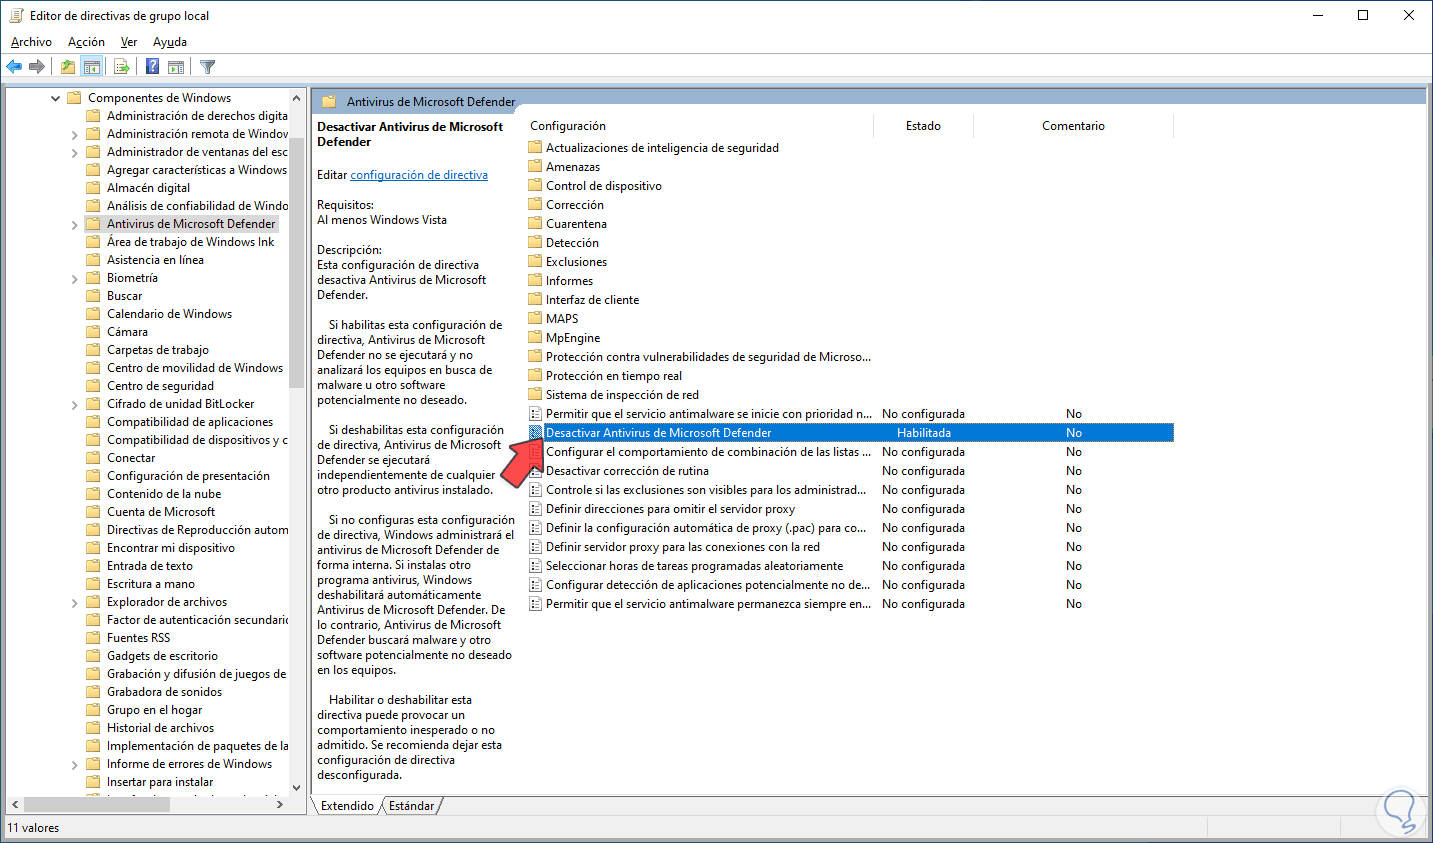
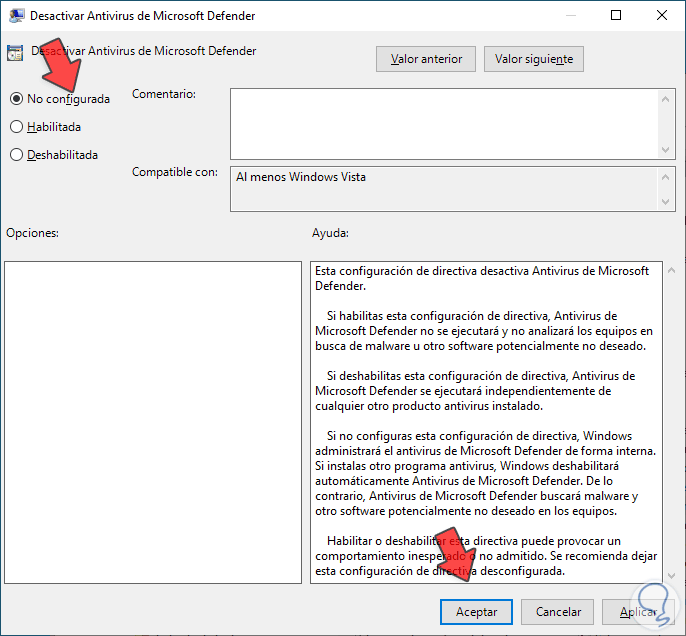
To activate the antivirus again, we double click on "Deactivate Windows Defender Antivirus":
step 6
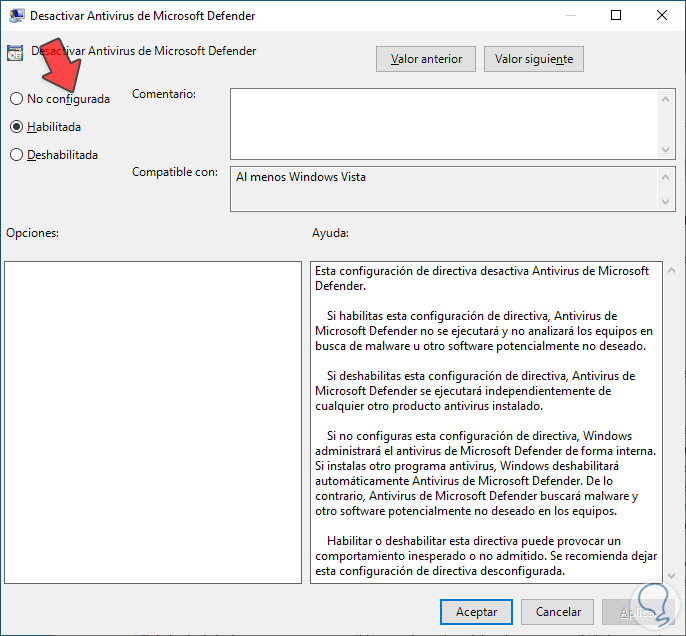
Activate the "Not configured" box:
step 7
Apply the changes:
These two ways will help us activate or deactivate Windows Defender in Windows 10 and thus manage system security..