Our Windows 11 operating system has a number of functions and options that help us at work and in the configuration of our PC. However, it is possible that certain functions are not useful to us and we want to deactivate them..
One of the main complaints that Microsoft has received for its Windows 11 operating system is the tracking function which is enabled by default and although we do not notice it, the tracking captures user data and sends it to Microsoft to adjust advertising, advertisements and the rest.
This tracking is annoying for many users and for this reason TechnoWikis will explain how to see the data collected and its respective deactivation..
To stay up to date, remember to subscribe to our YouTube channel!
SUBSCRIBE ON YOUTUBE
1 View data tracking Windows 11
Step 1
First of all we will see how to access the data collected by Windows 11, to have this access we go to the route:
Home - Settings - Privacy and security - Diagnosis and feedback
Step 2
When accessing there we will see the following:
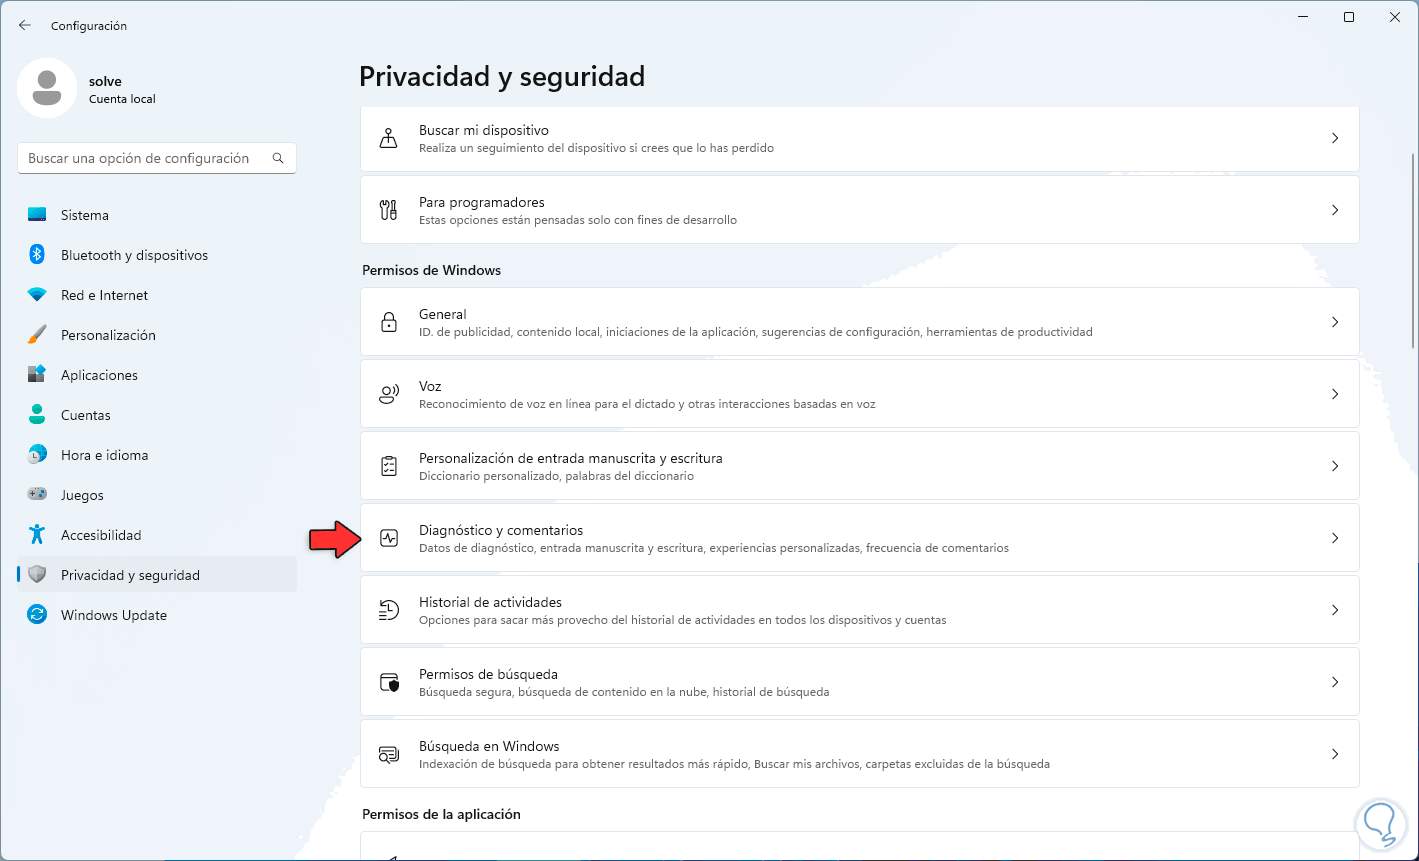
Step 3
We click on "View diagnostic data" to observe this:
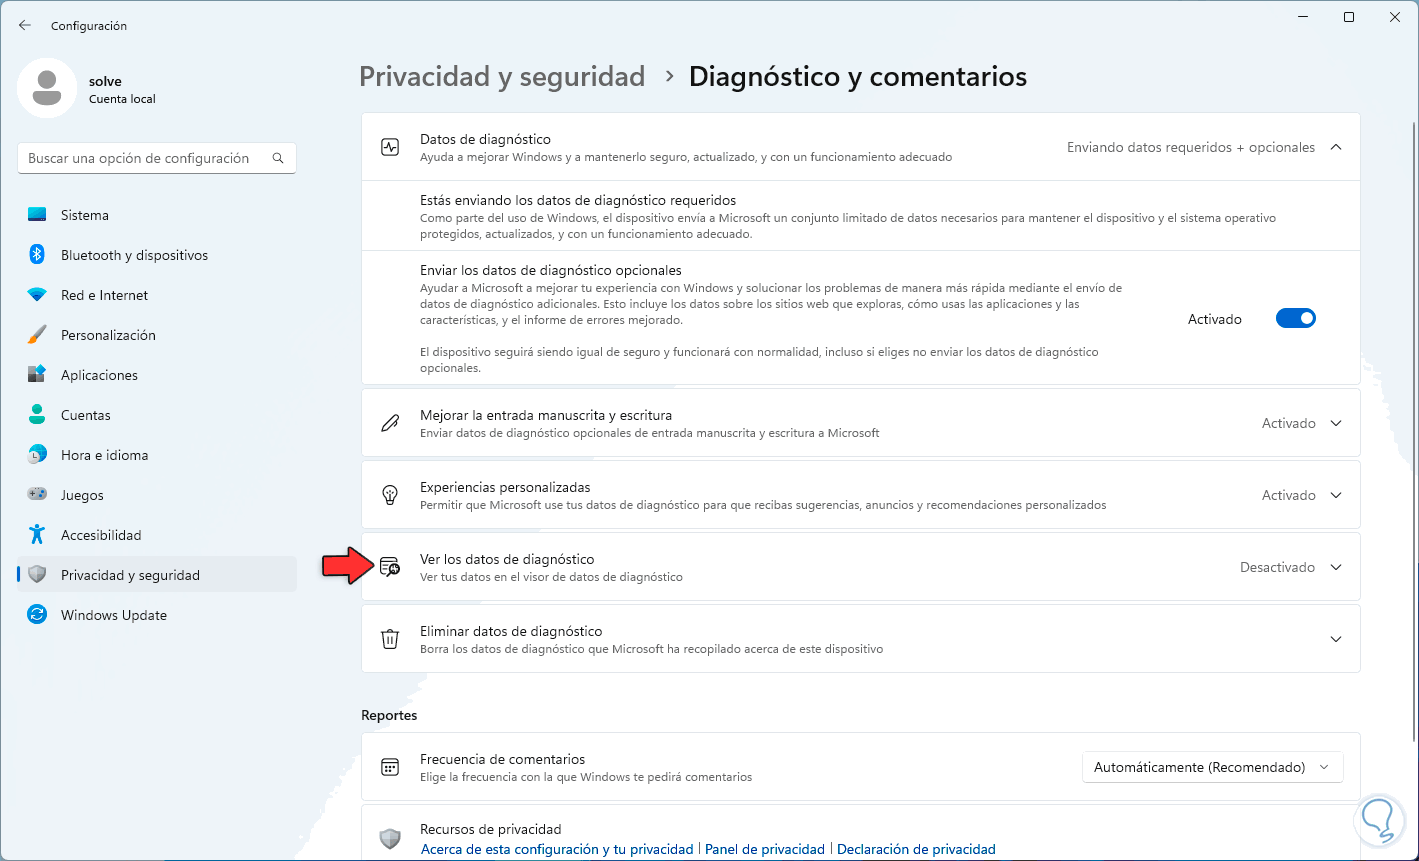
Step 4
We activate the switch to be able to access the collected data:
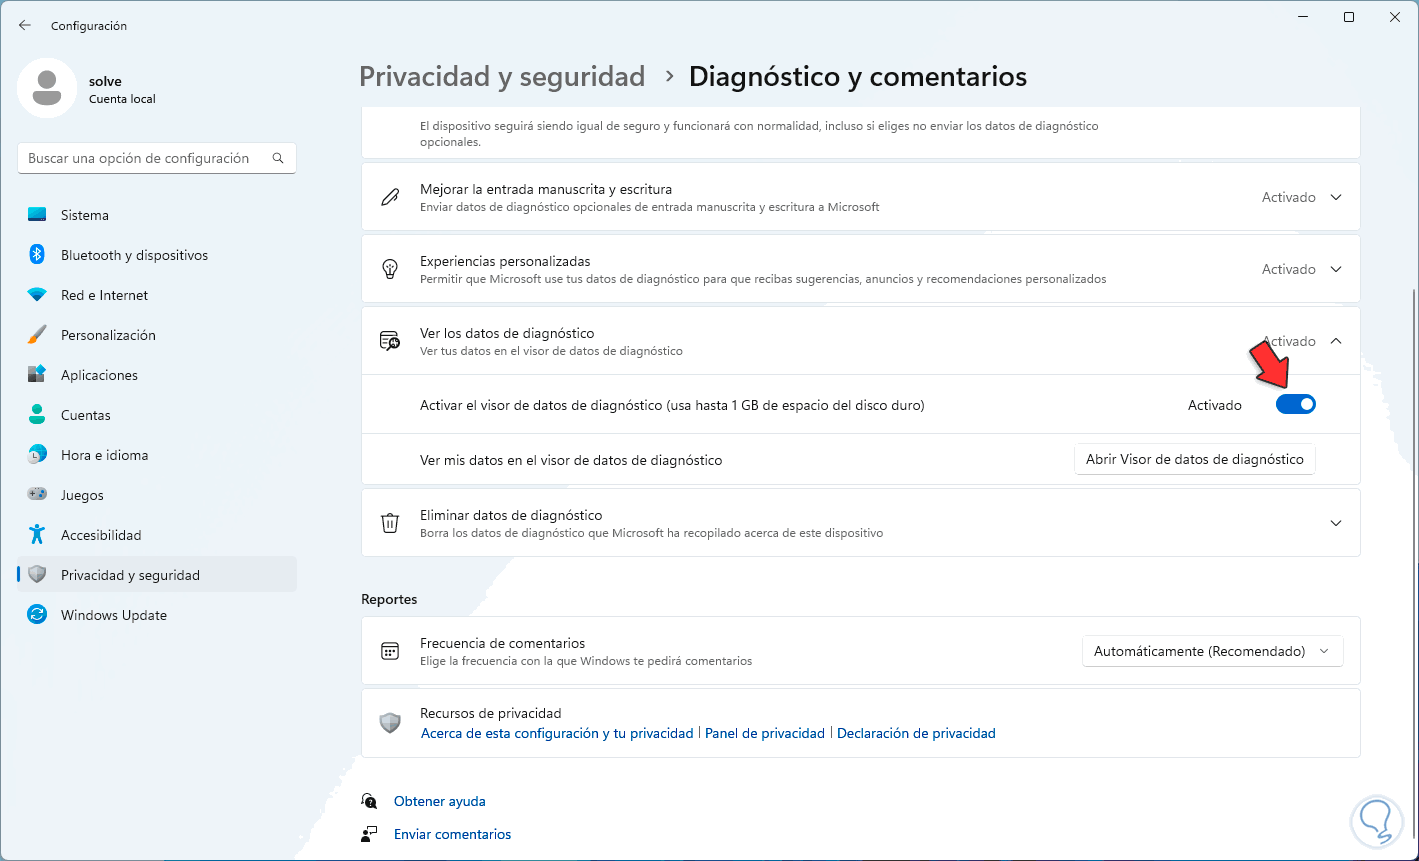
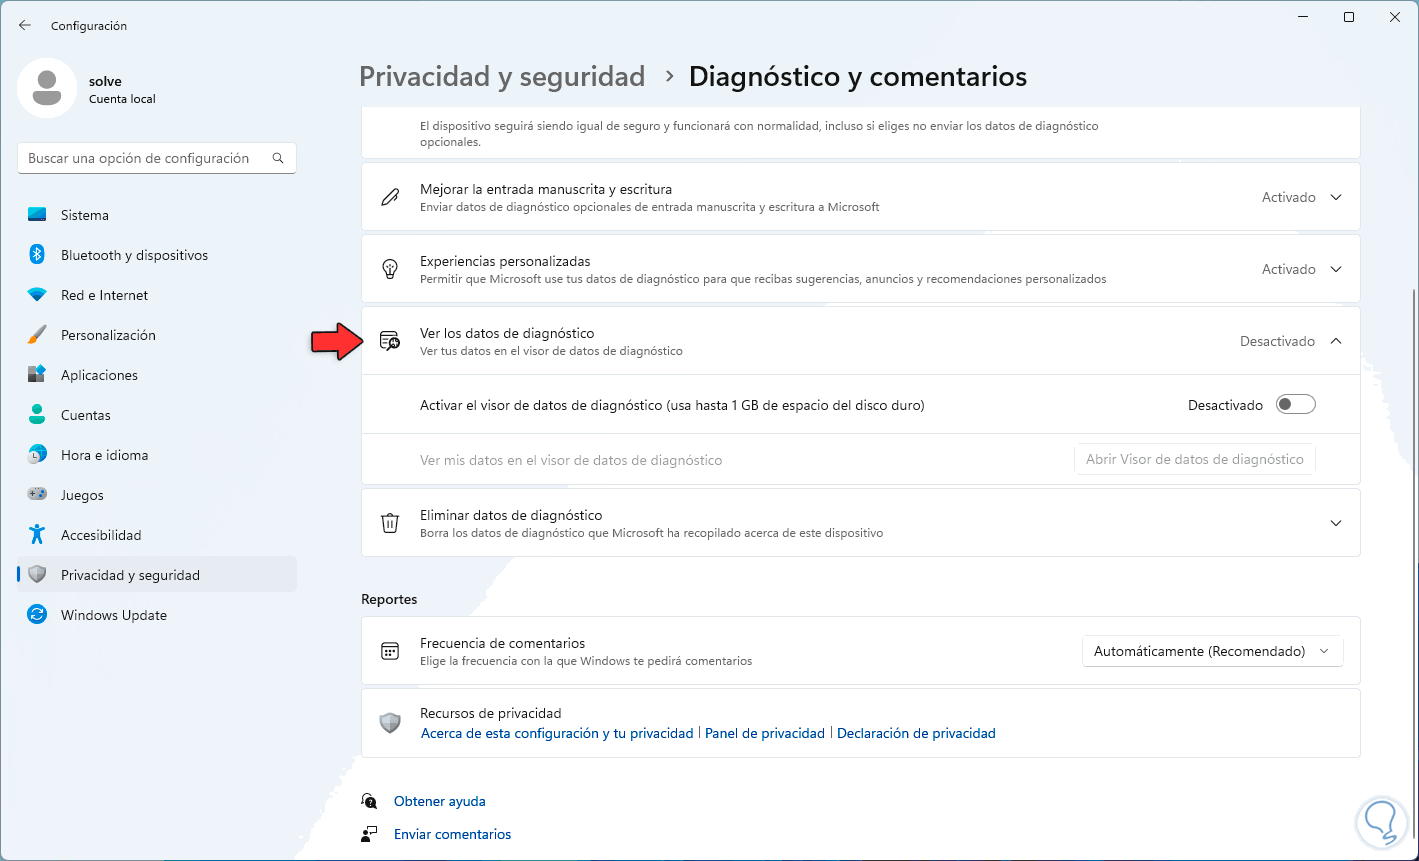
step 5
We click on "Open Diagnostic Data Viewer" and the Windows Store will open:
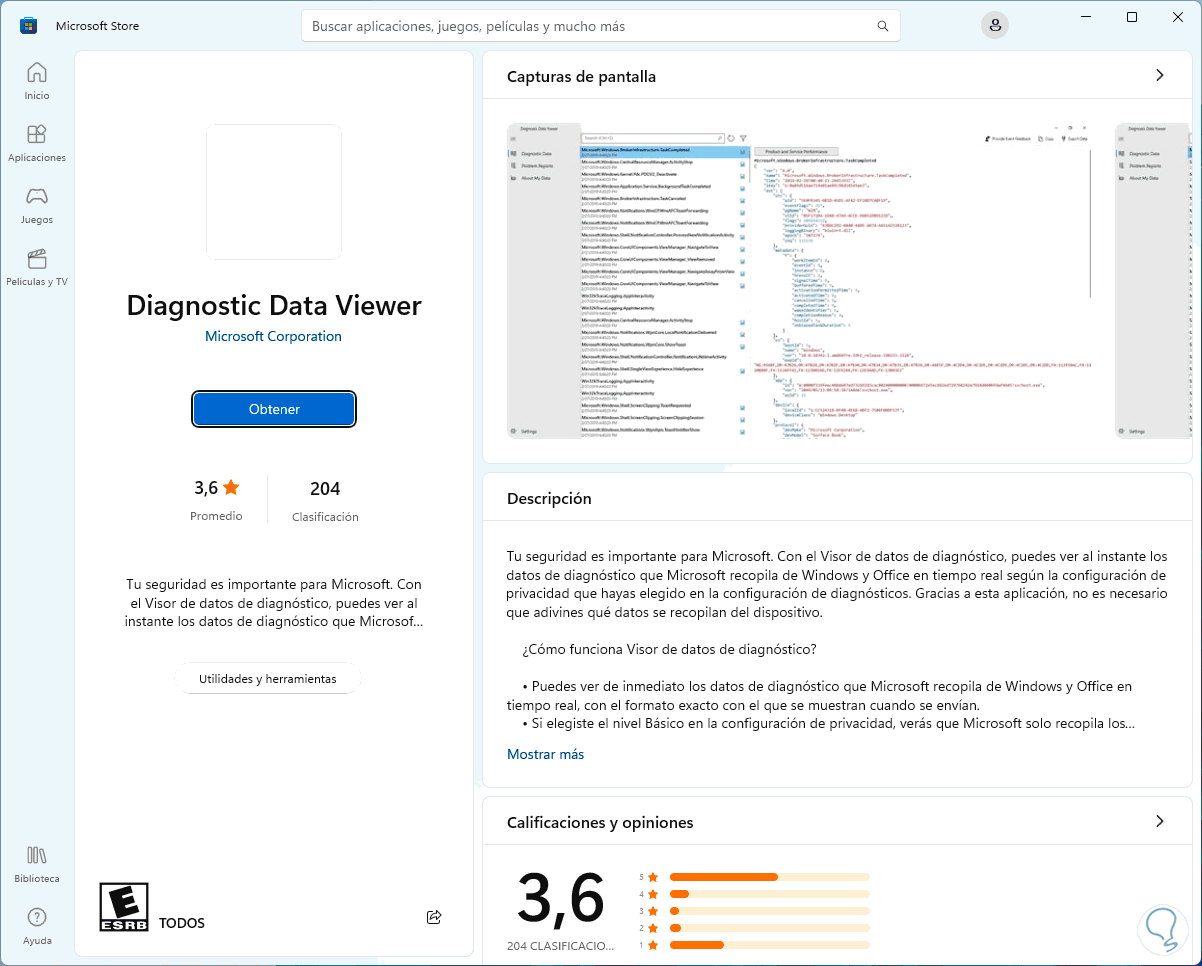
step 6
This utility, as its name indicates, allows us to view the data collected by the system and its characteristics are:
- It is possible to see the diagnostic data that Microsoft collects from both Windows and Office in real time
- Based on the selected level we will see more or less data in the report
We click on "Get" to proceed with the download and installation:
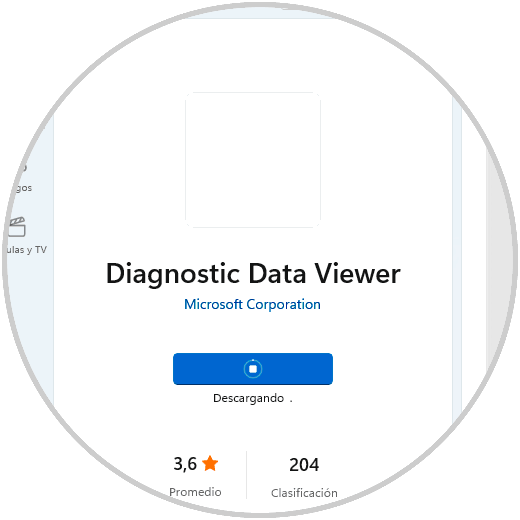
step 7
We expect it to be installed:
step 8
Once installed, we go back to "Diagnosis and comments" and click on "View diagnostic data":
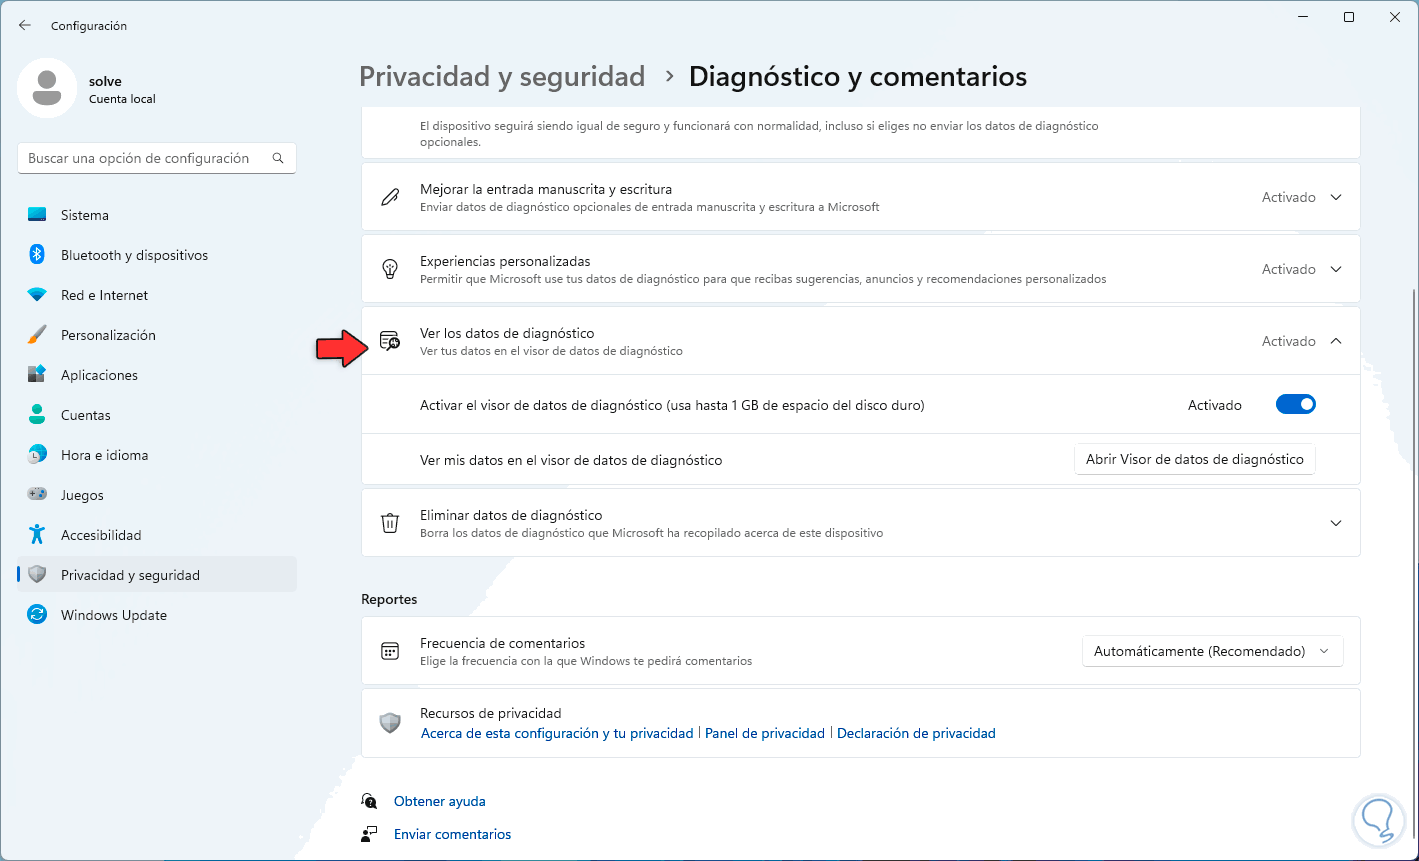
step 9
We click on "Open Diagnostic Data Viewer" and this time the utility will open:

In the "Diagnostic data" section, by default, we find each of the data collected by application and service.
step 10
In the "Problem reports" section we find the different applications with errors and in its central part the details of the error:
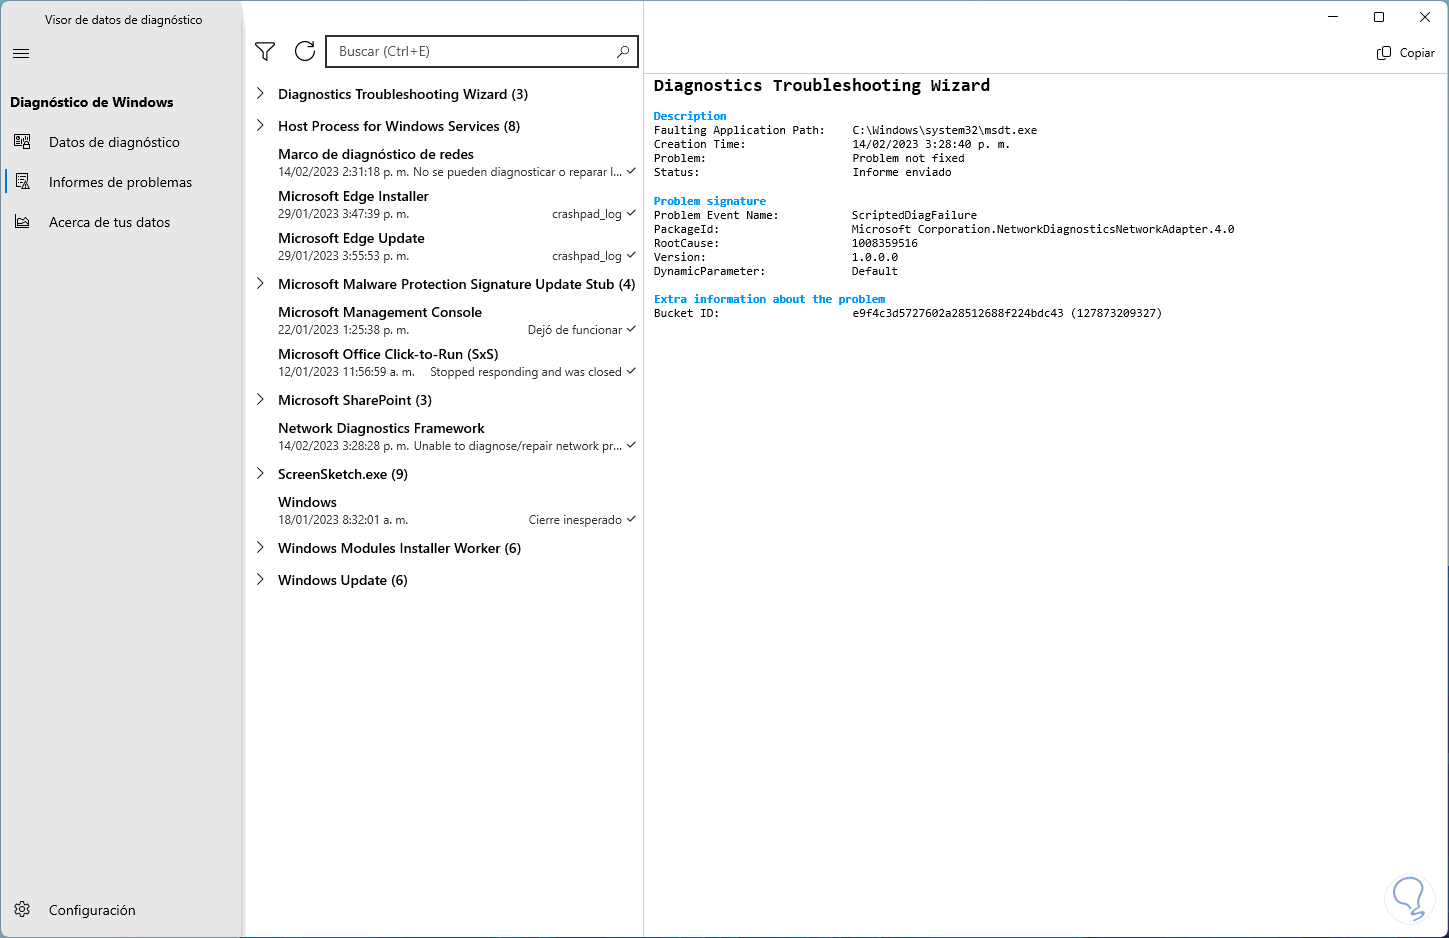
step 11
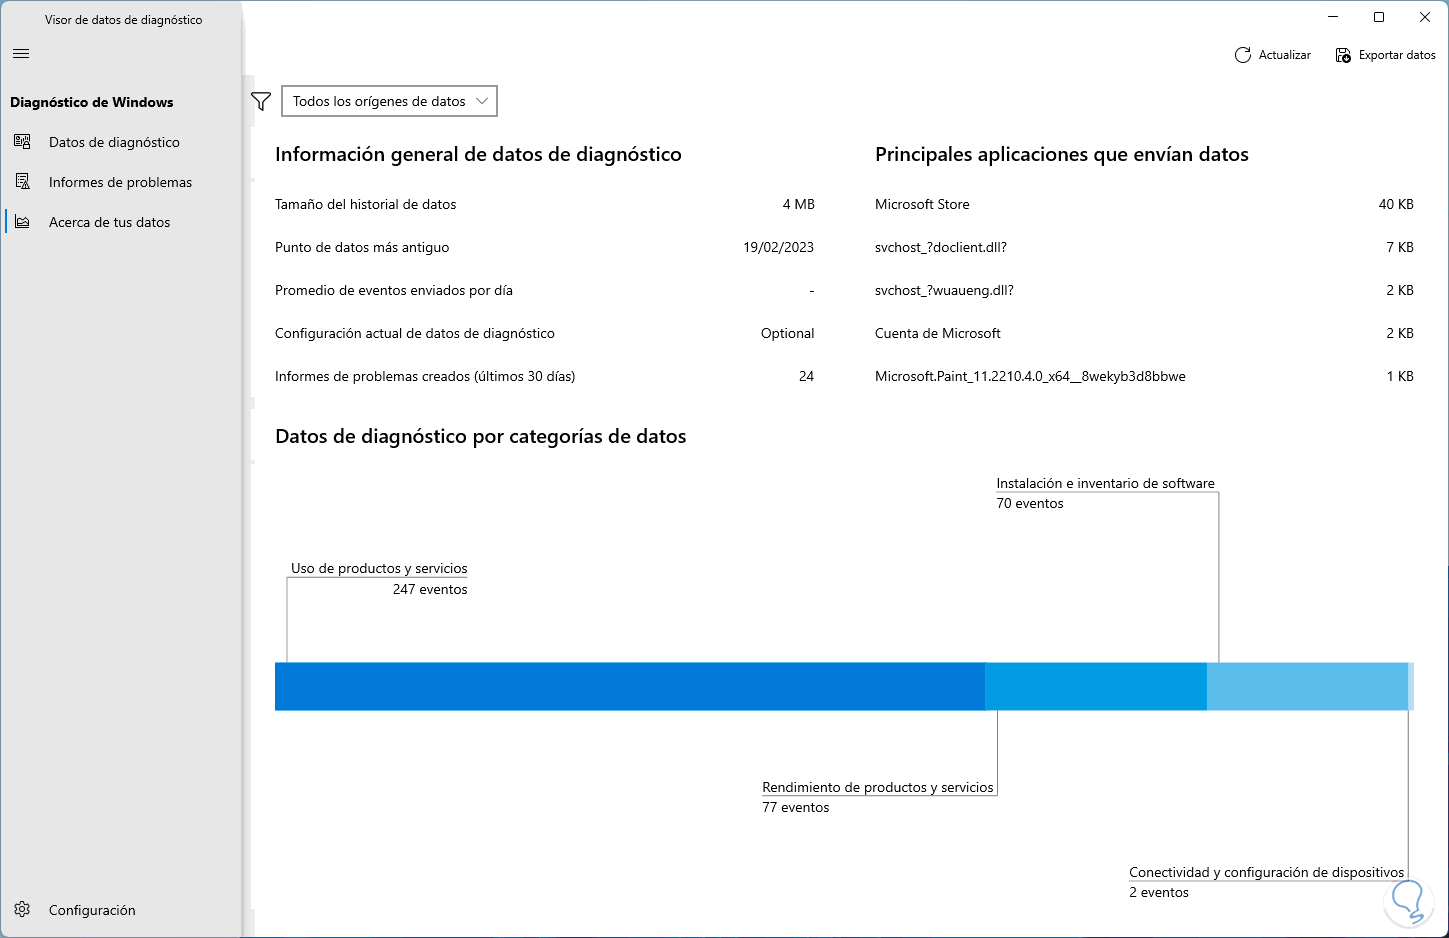
In "About your data" we find a complete summary of the data taken from Windows and each segment from which it was taken:
2 Disable data tracking Windows 11
Step 1
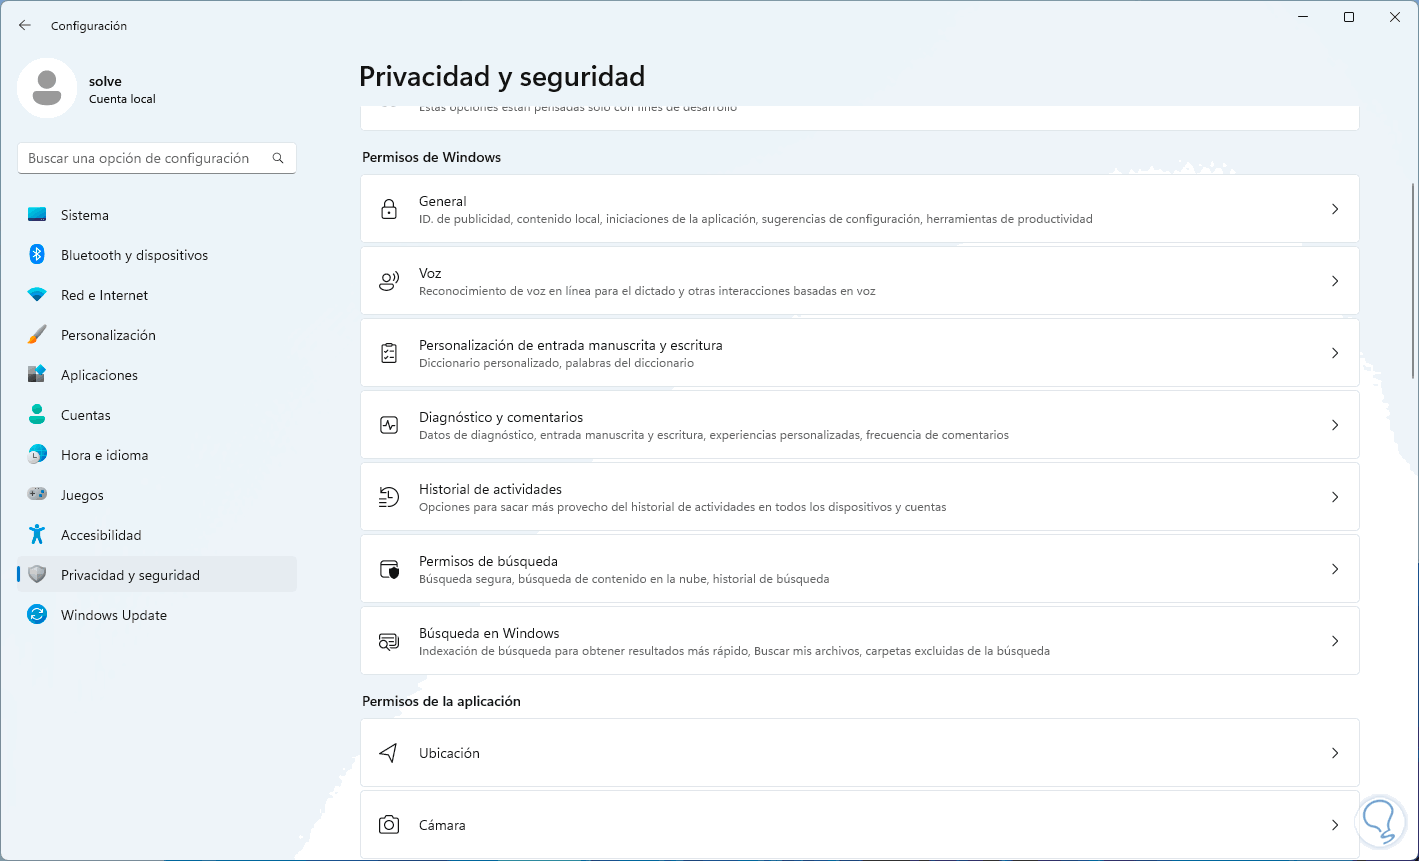
We can see how the data group is quite high, for security and privacy there are some steps to deactivate this tracking, first of all we go to the route:
Home - Settings - Privacy and security - Diagnosis and feedback
Step 2
When accessing there we will see the following options:
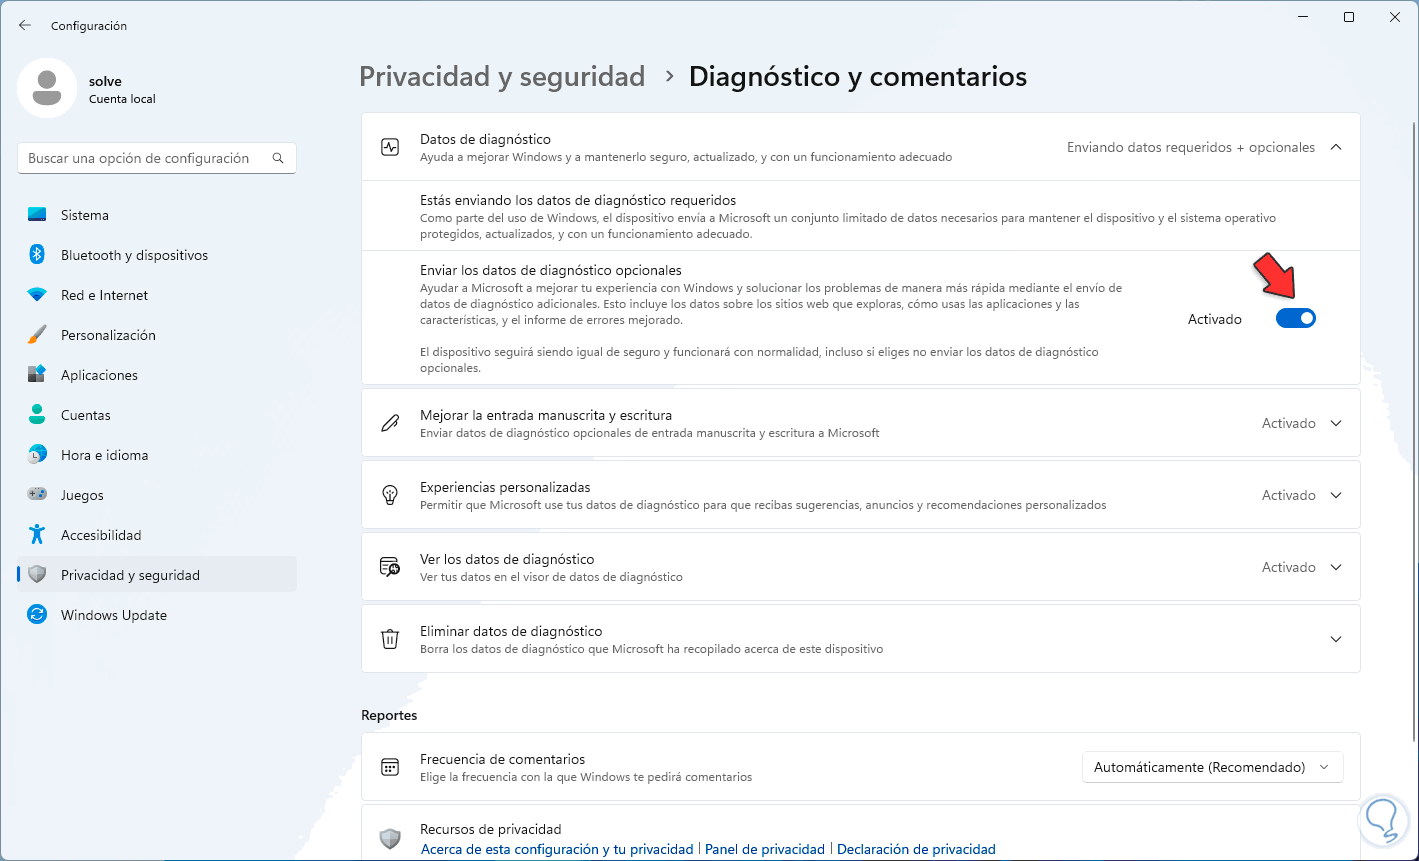
We deactivate the following switches..
3 Send optional diagnostic data
Step 1
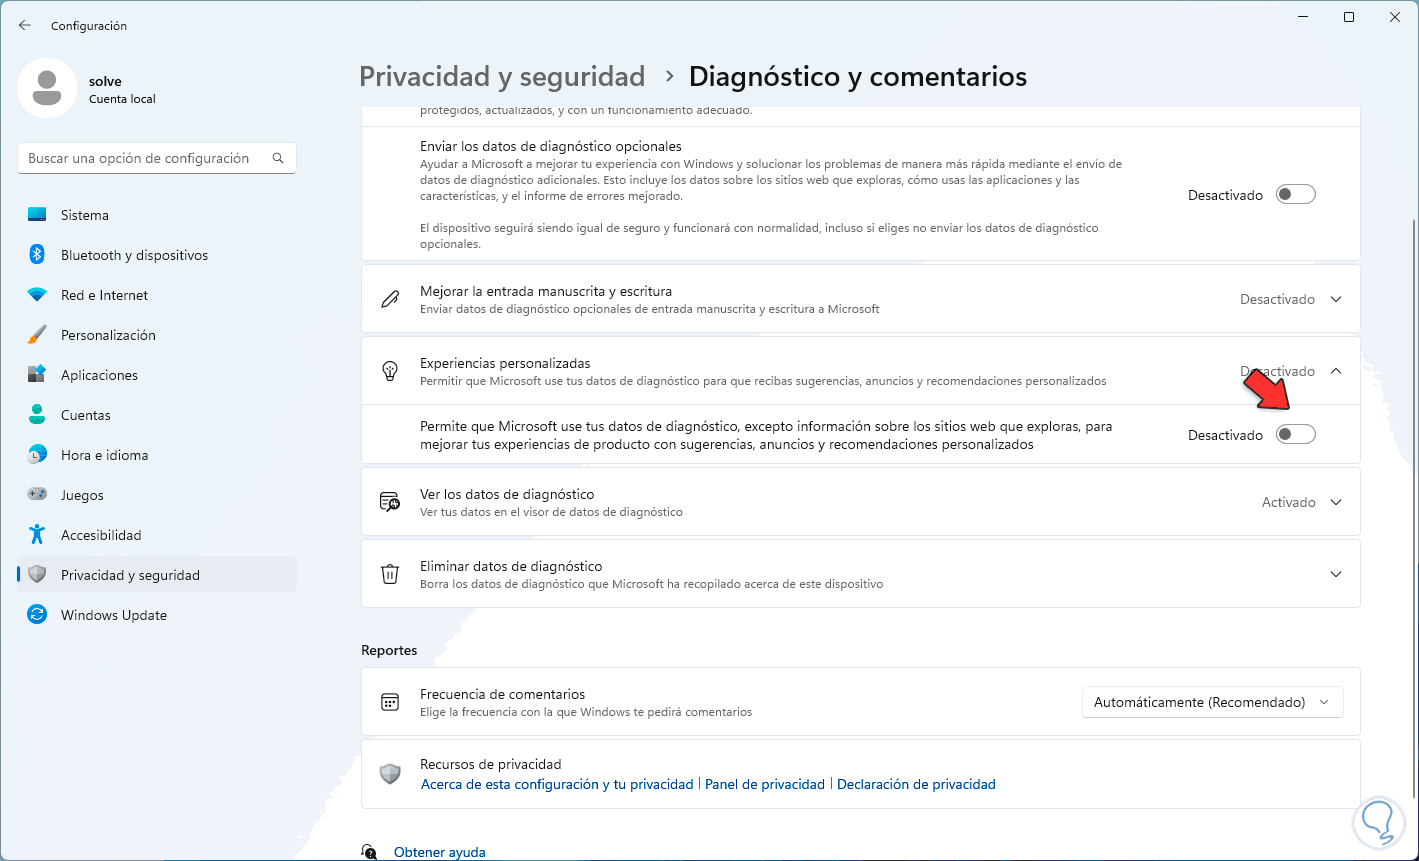
Now in "Personalized experiences" we will see the following:

Step 2
Turn off the "Allow Microsoft to use your diagnostic data, except information about the websites you browse to improve your product experiences with personalized suggestions, ads, and recommendations" switch:
Step 3
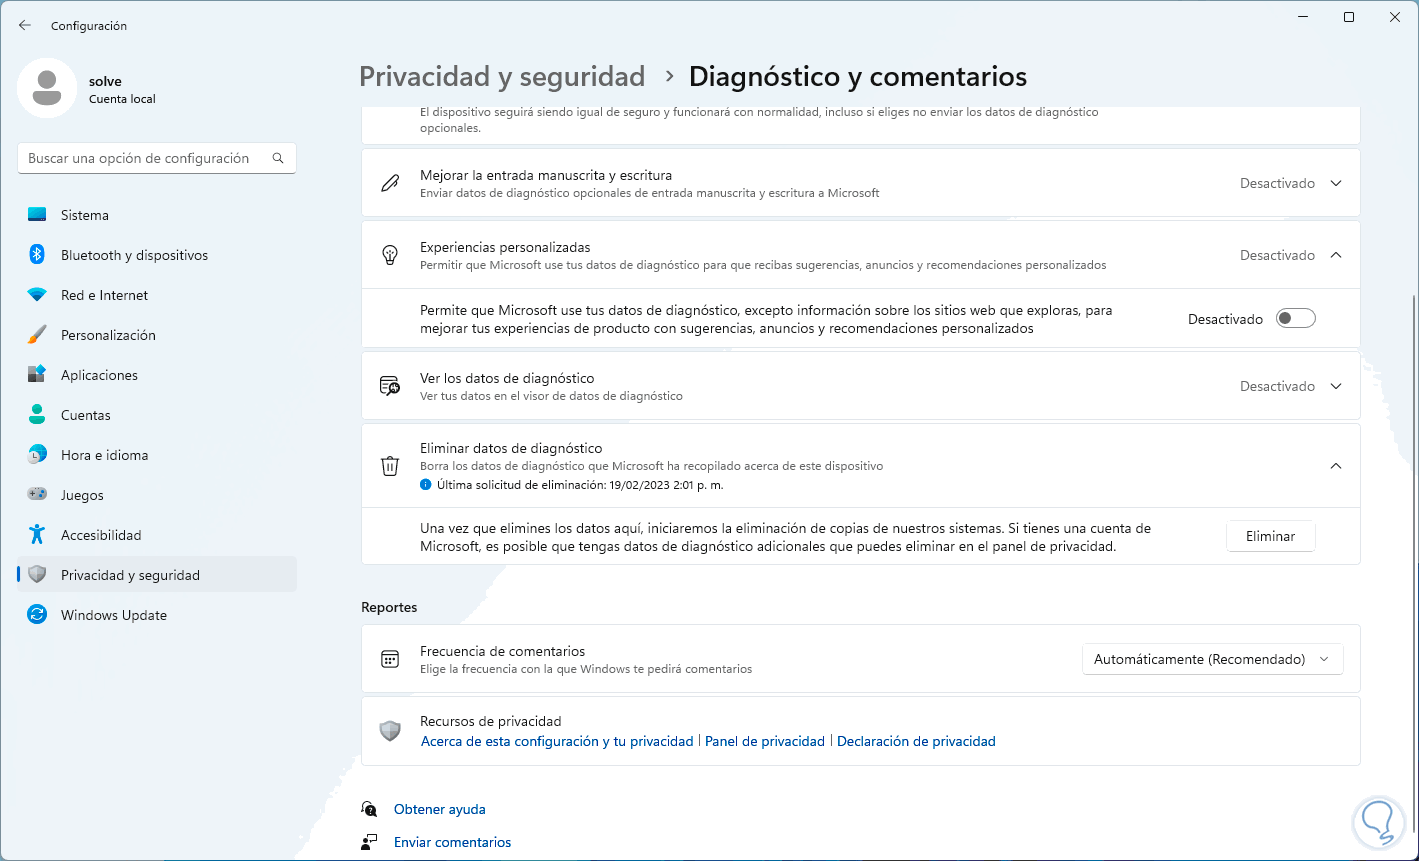
At the bottom in "Delete diagnostic data" we click "Delete":
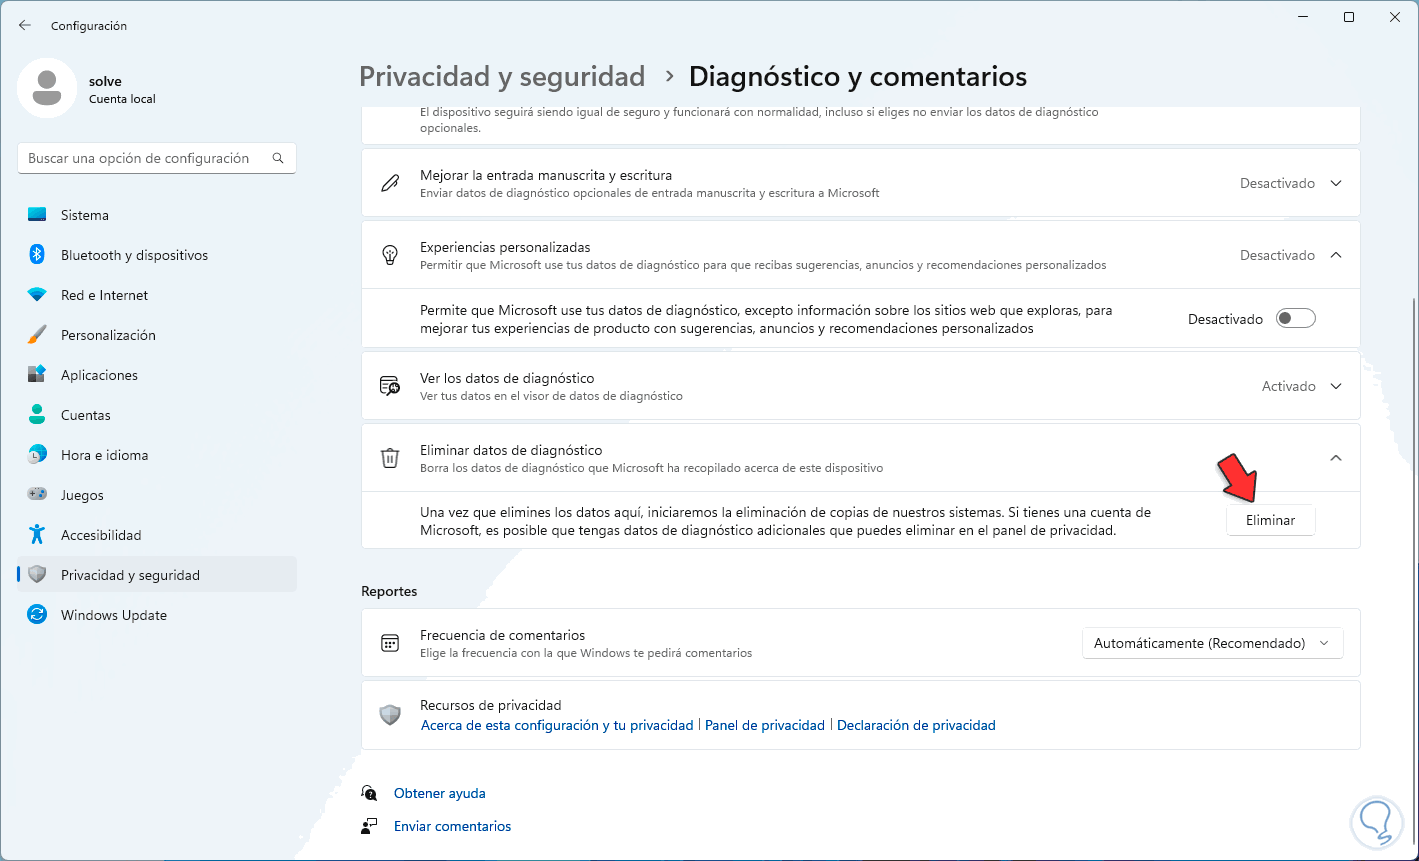
Step 4
We will see the following when clicking there:
step 5
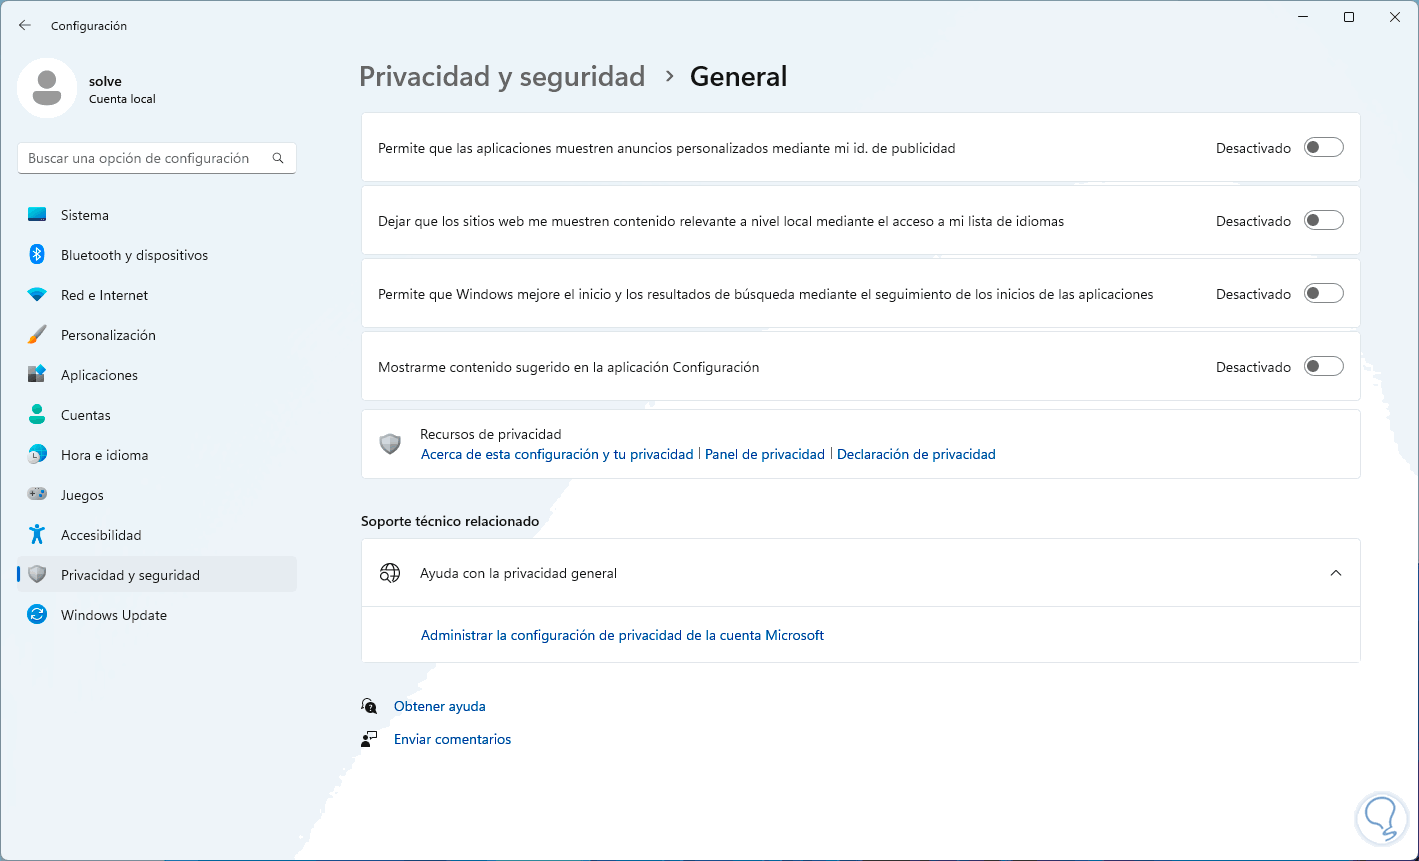
We go to "Privacy and security" and click on "General":
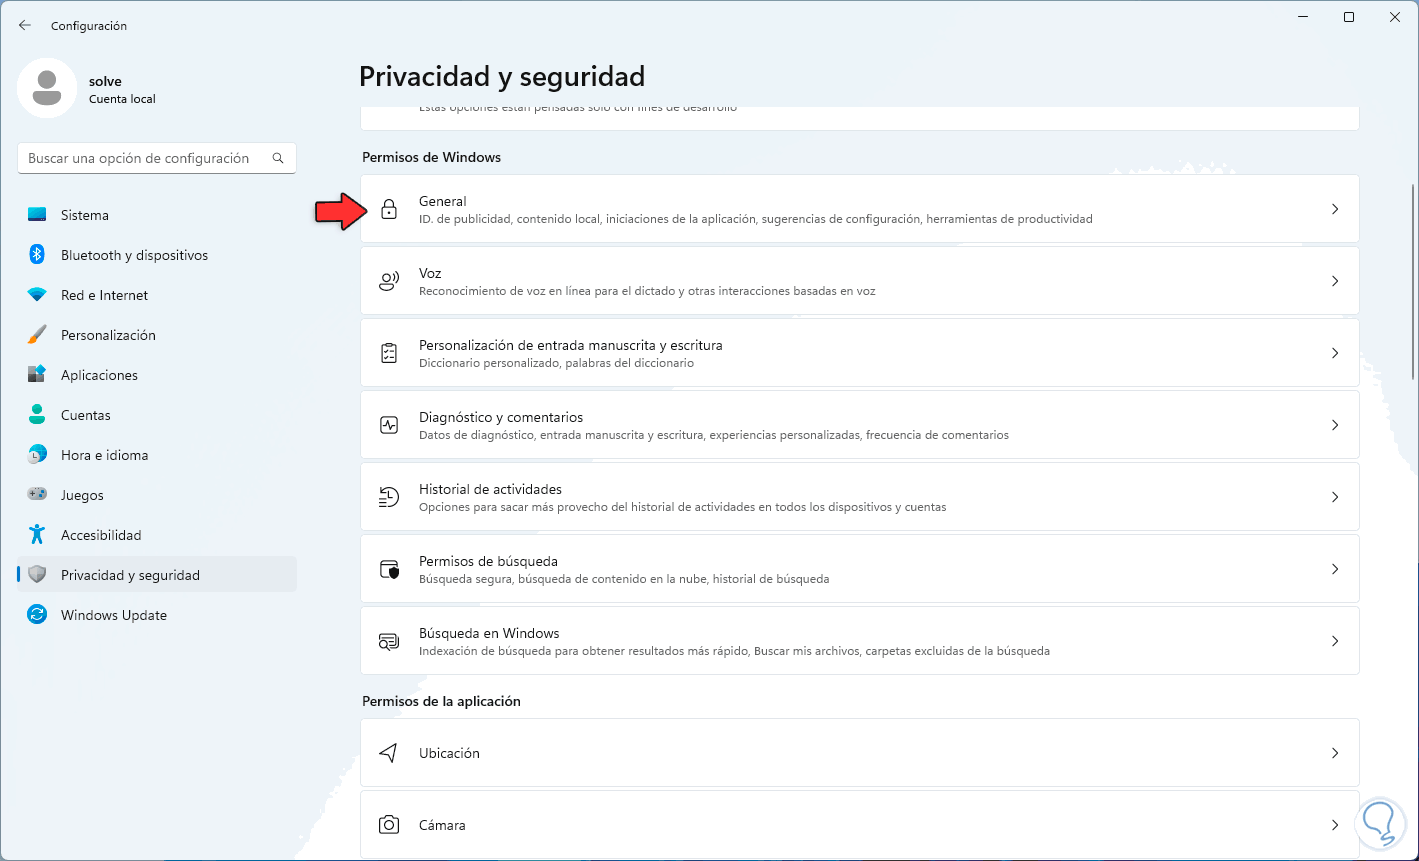
step 6
We will see the following in this section:
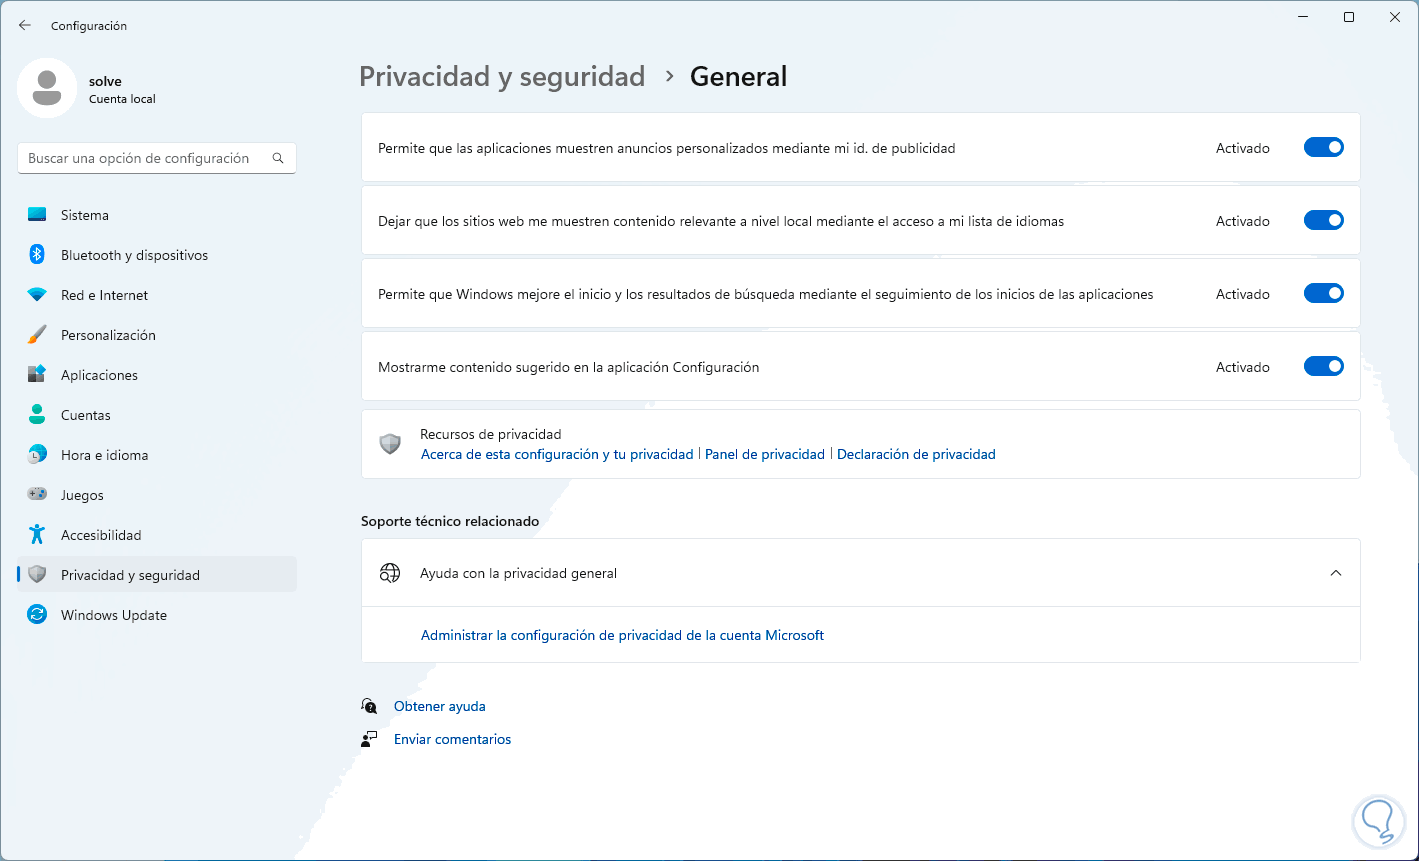
step 7
We deactivate all the associated switches:
step 8
We go to "Privacy and security" and this time we click on "Activity history":
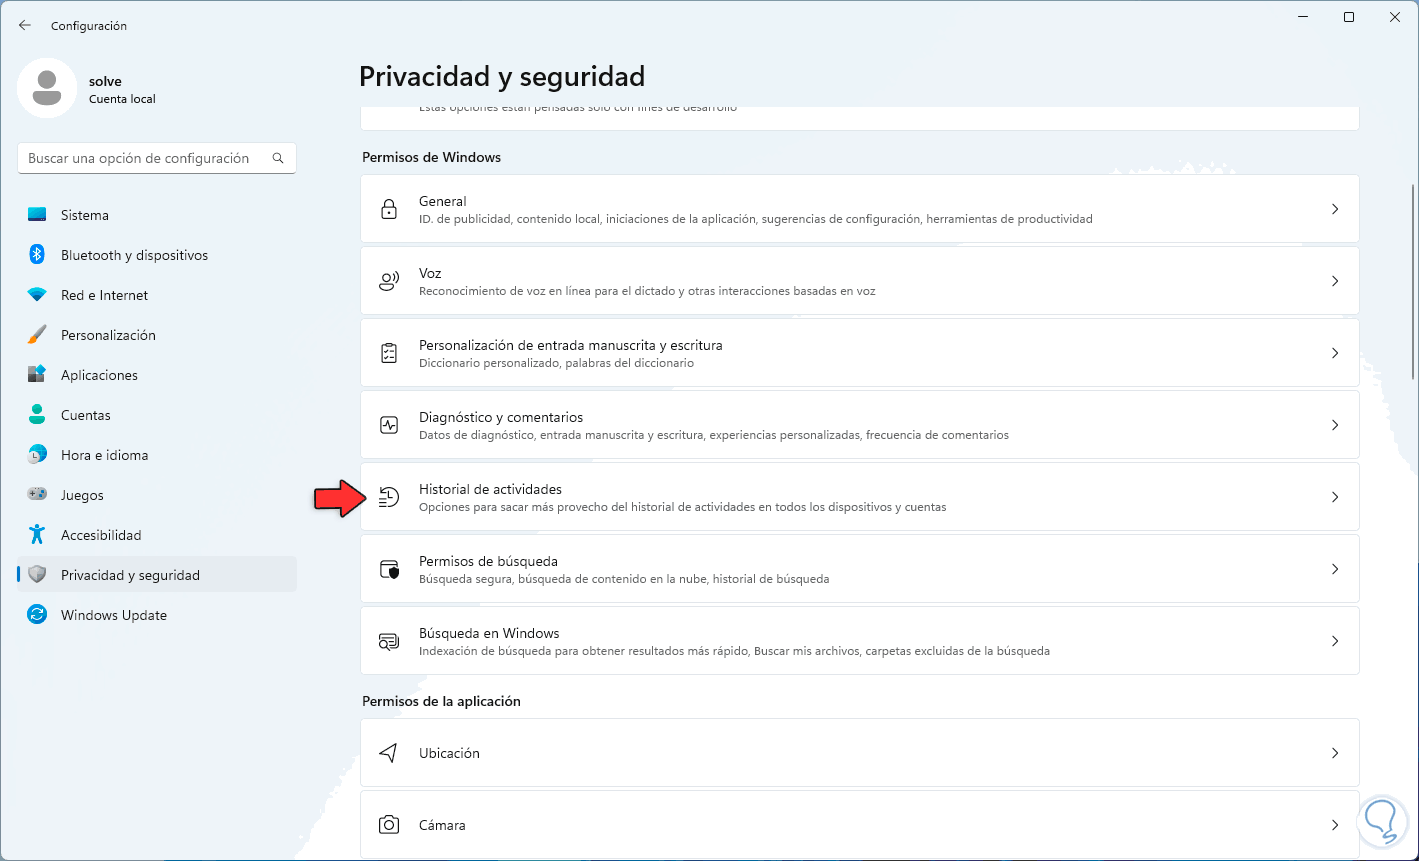
step 9
We will see the following options:
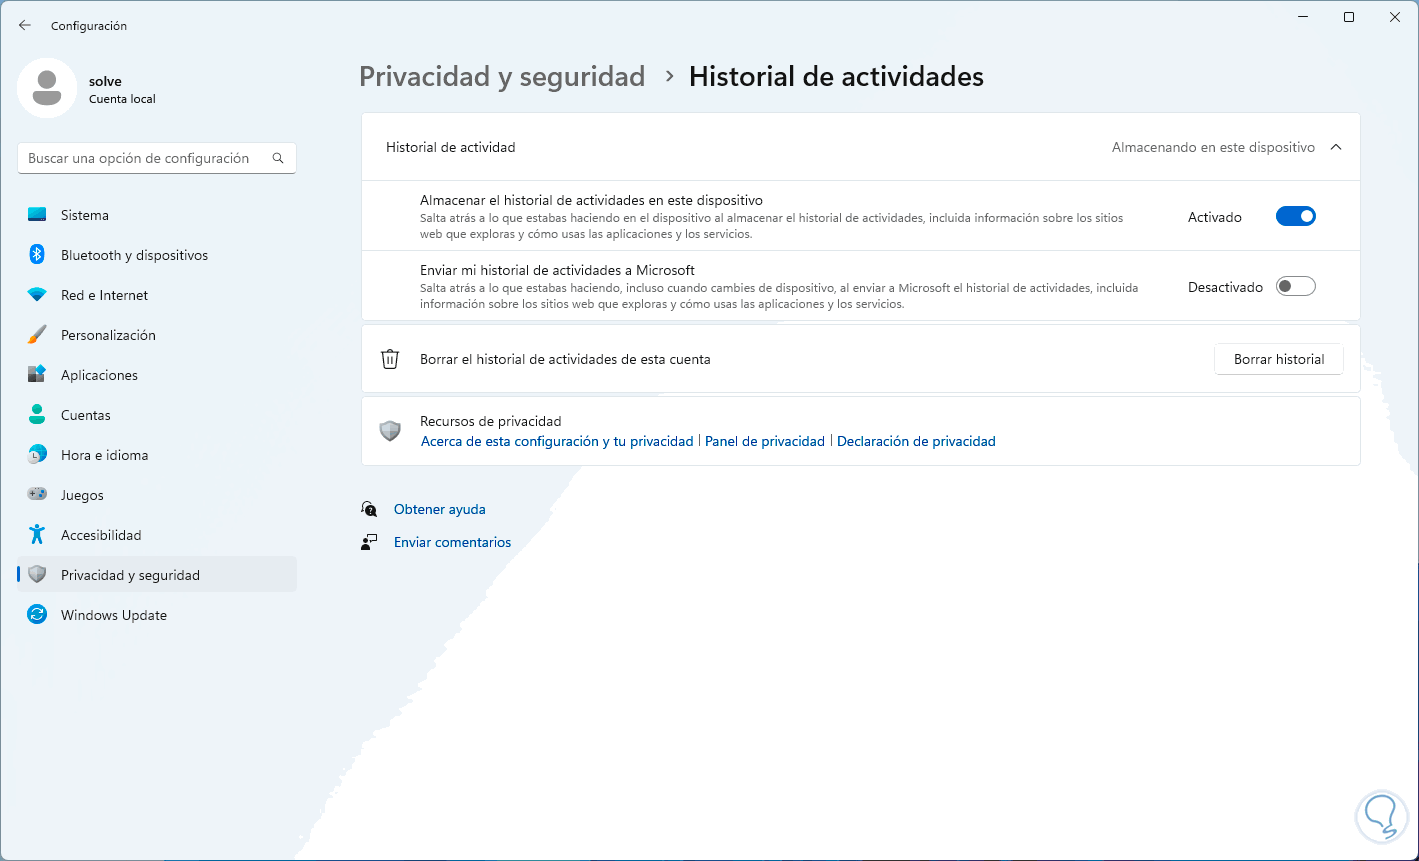
step 10
We deactivate the "Store activity history on this device" switch:
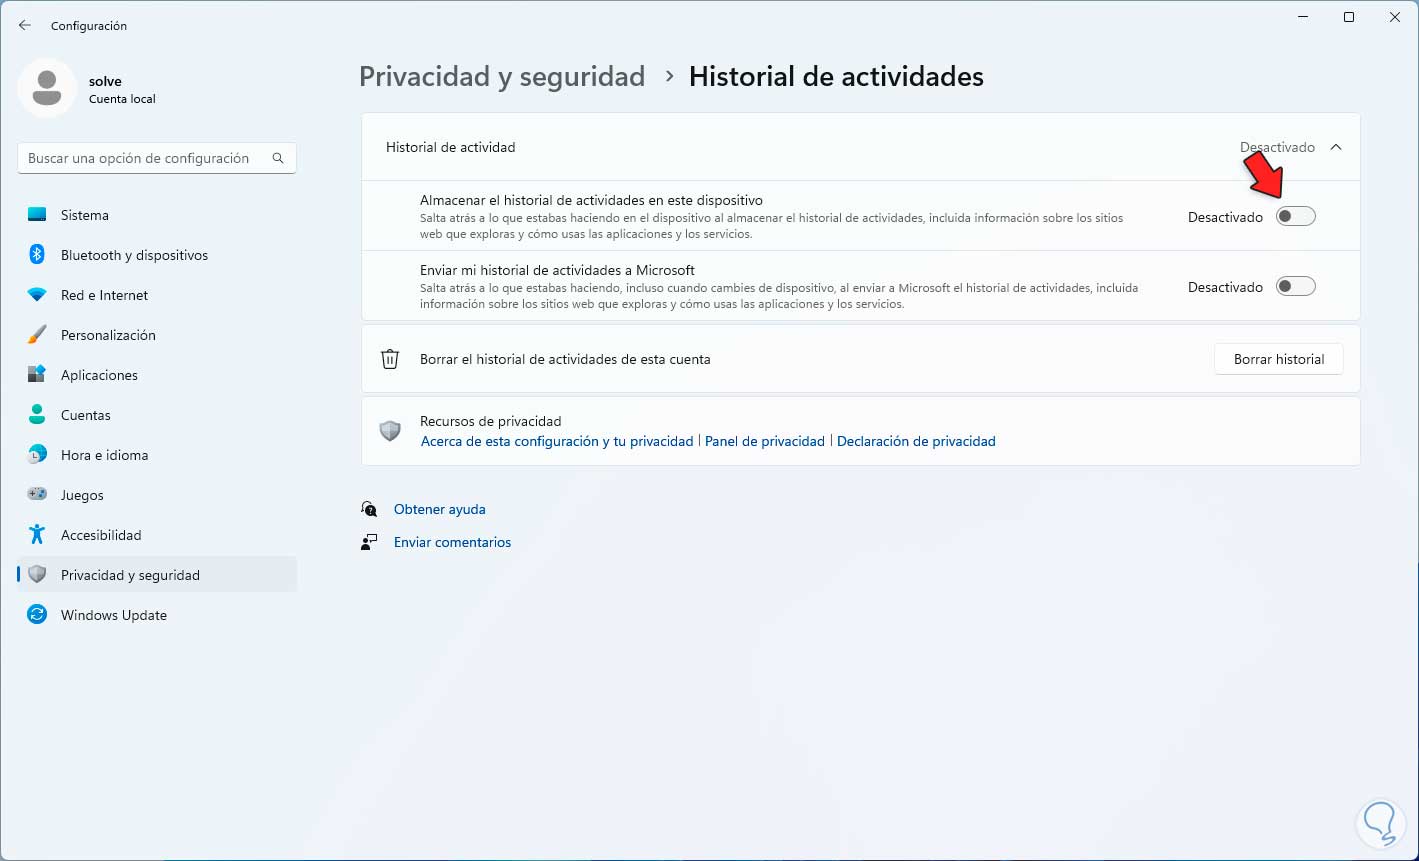
Note
If you wish, you can click on “Clear history” to clear all the history stored in Windows.
step 11
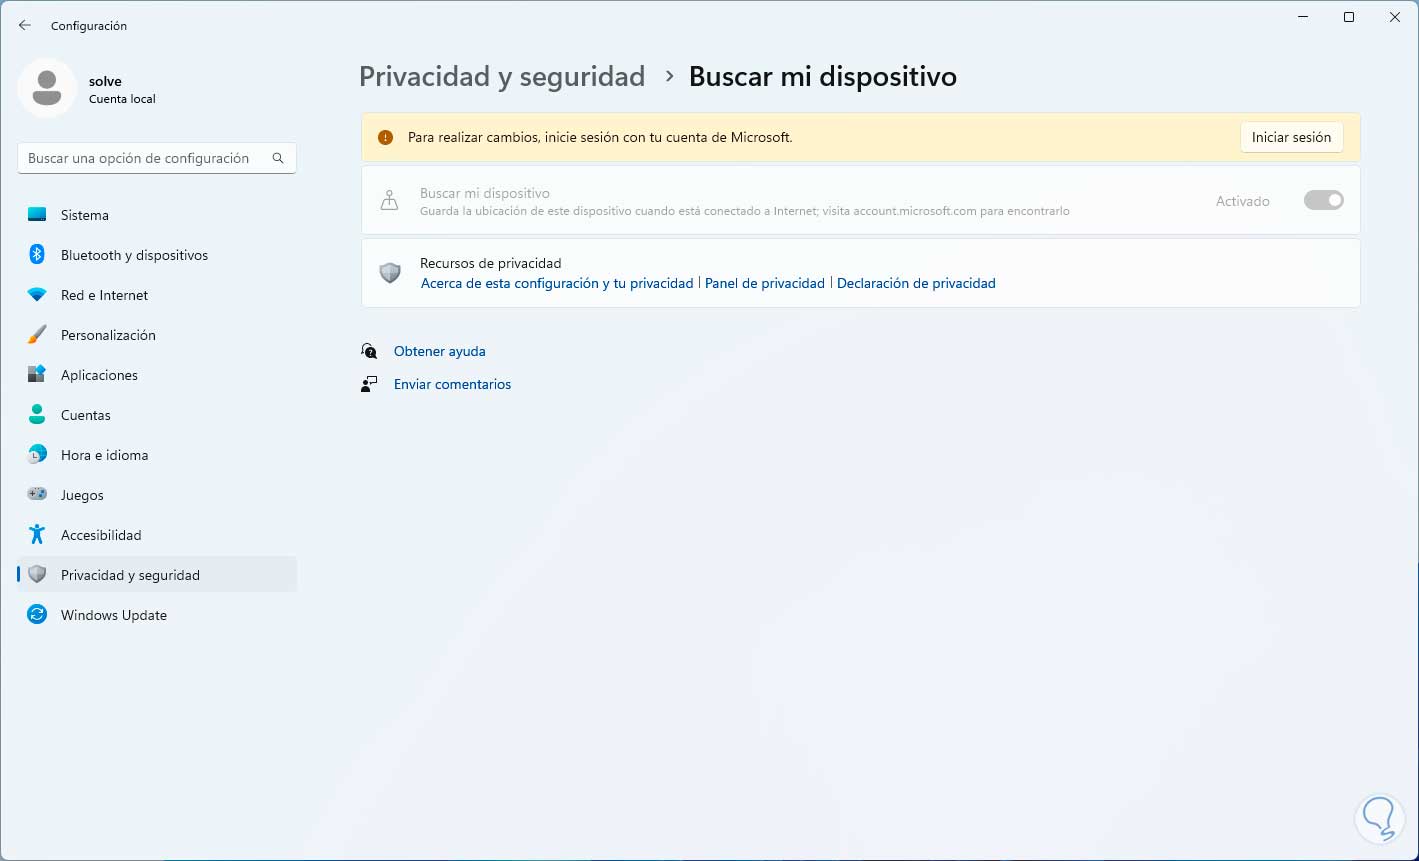
We go to "Privacy and security" and now we click on "Find my device":
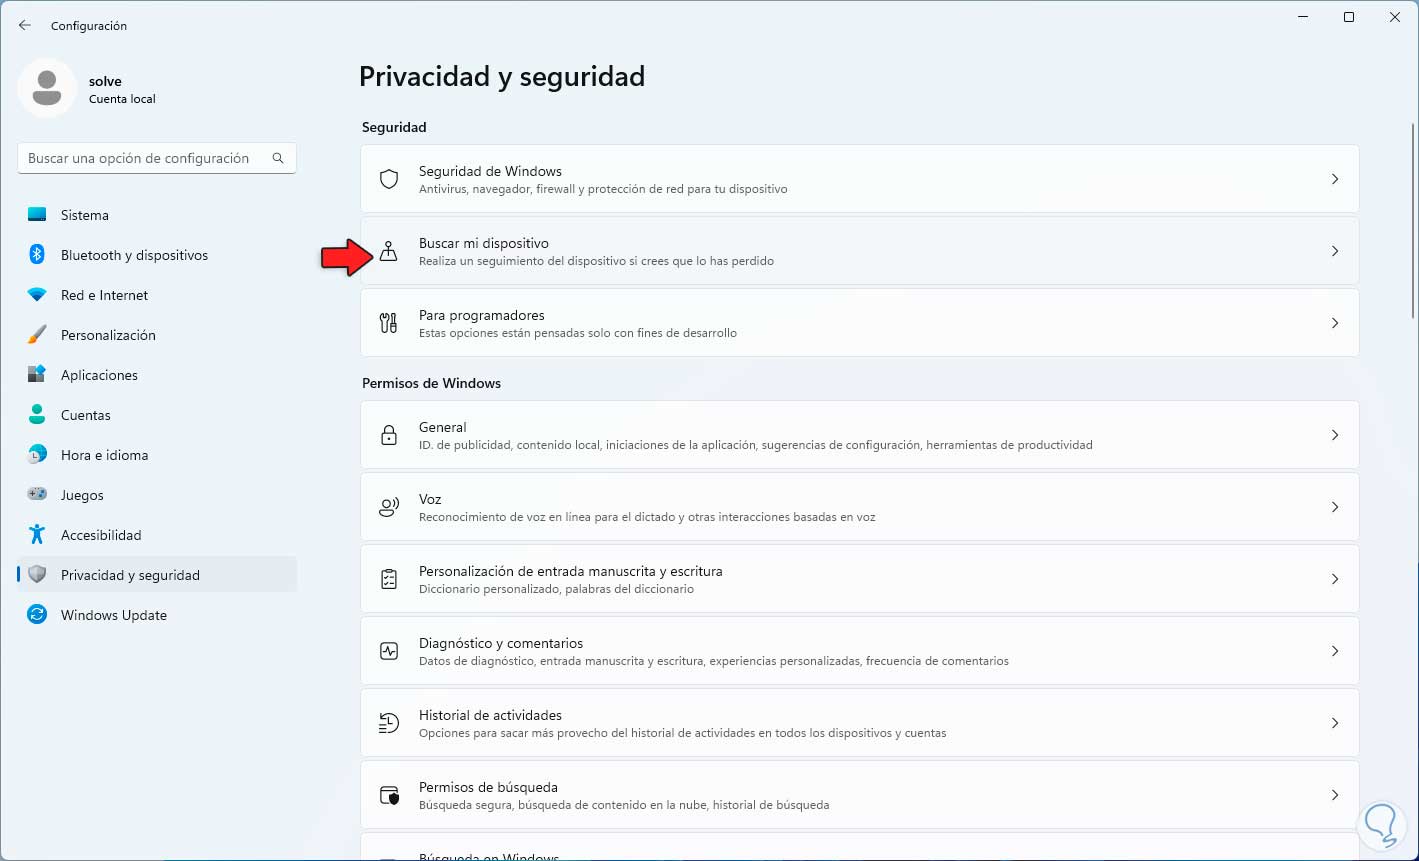
step 12
Check if it is possible to deactivate the switch:
step 13
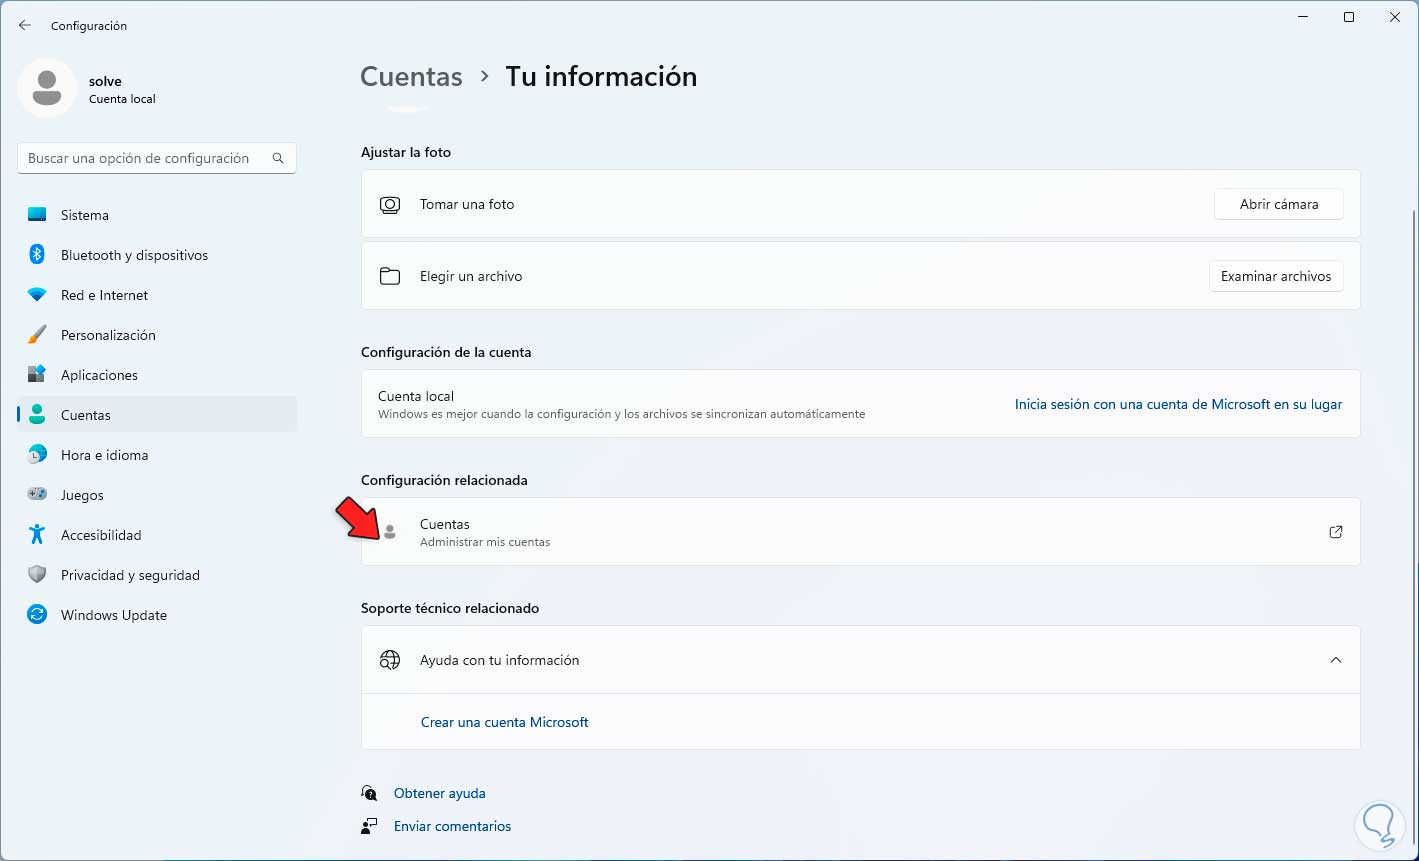
Let's go to "Accounts":
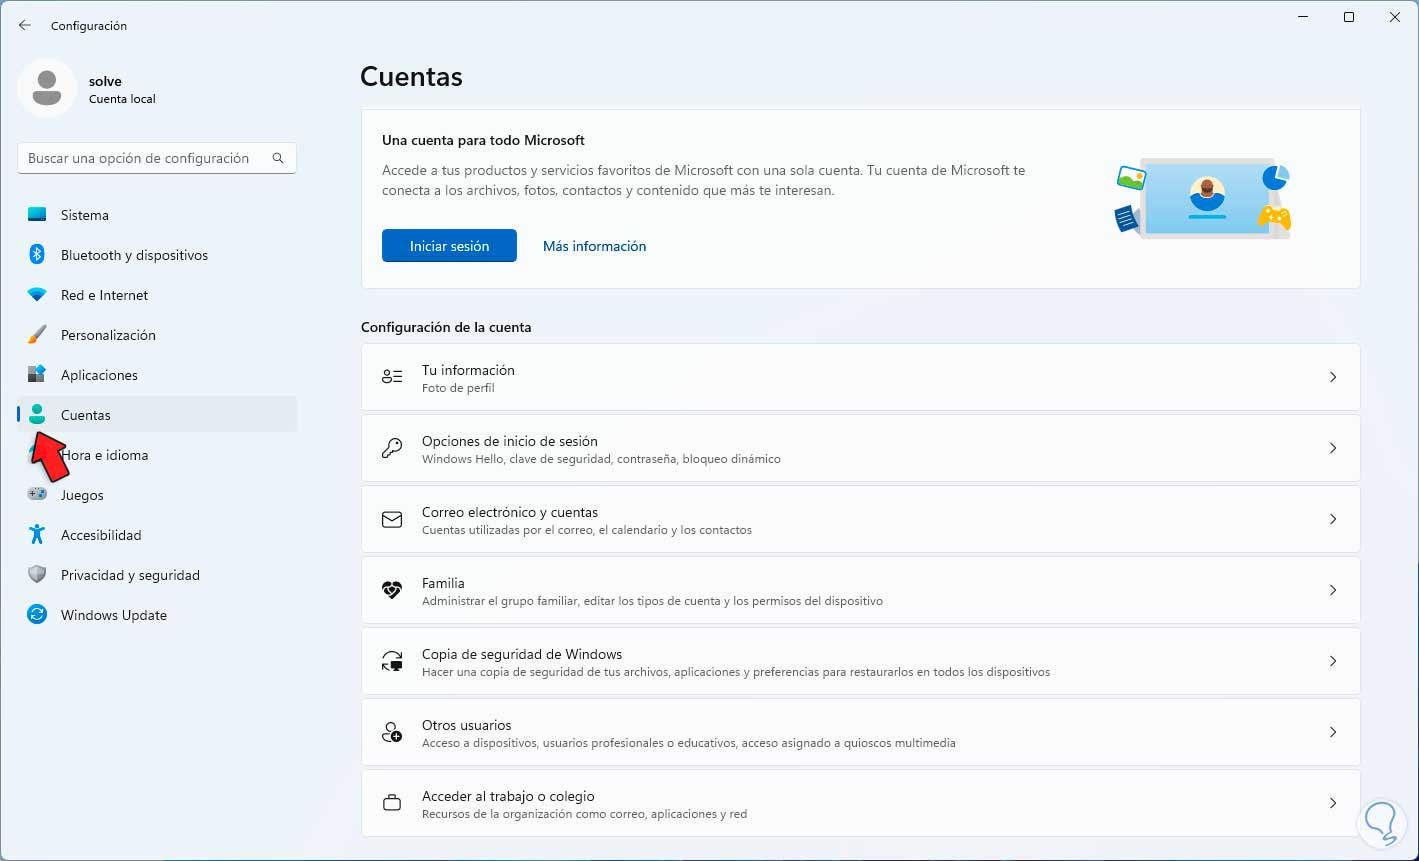
step 14
In "Your information" we click on "Accounts":
step 15
This will open the browser, there we log in to our Microsoft account:
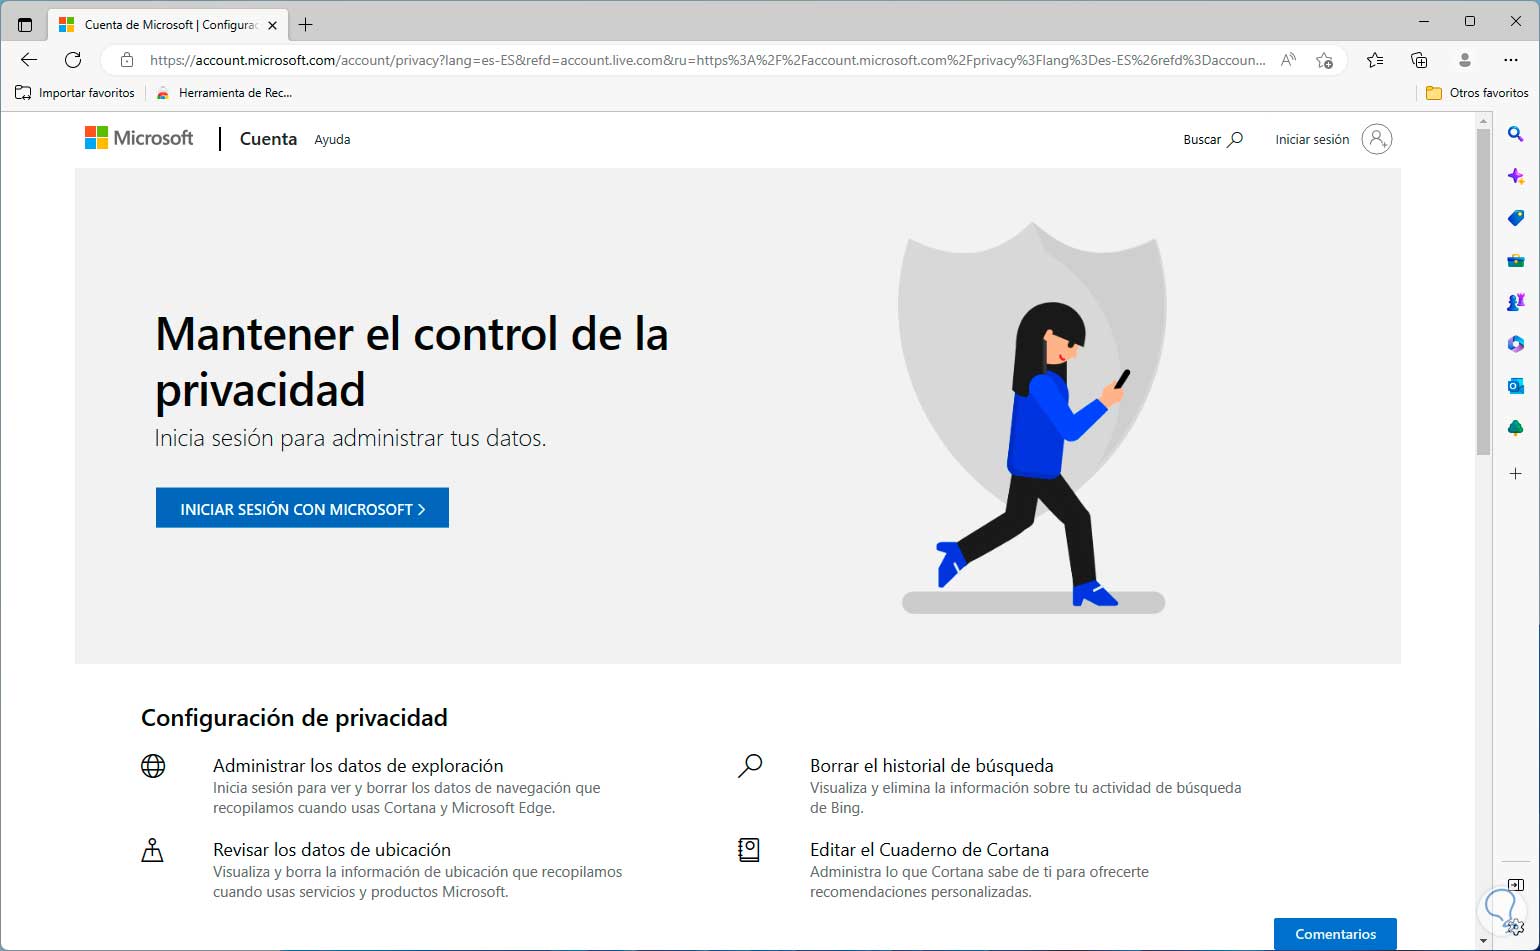
step 16
In the Microsoft account we go to the "Privacy" section:
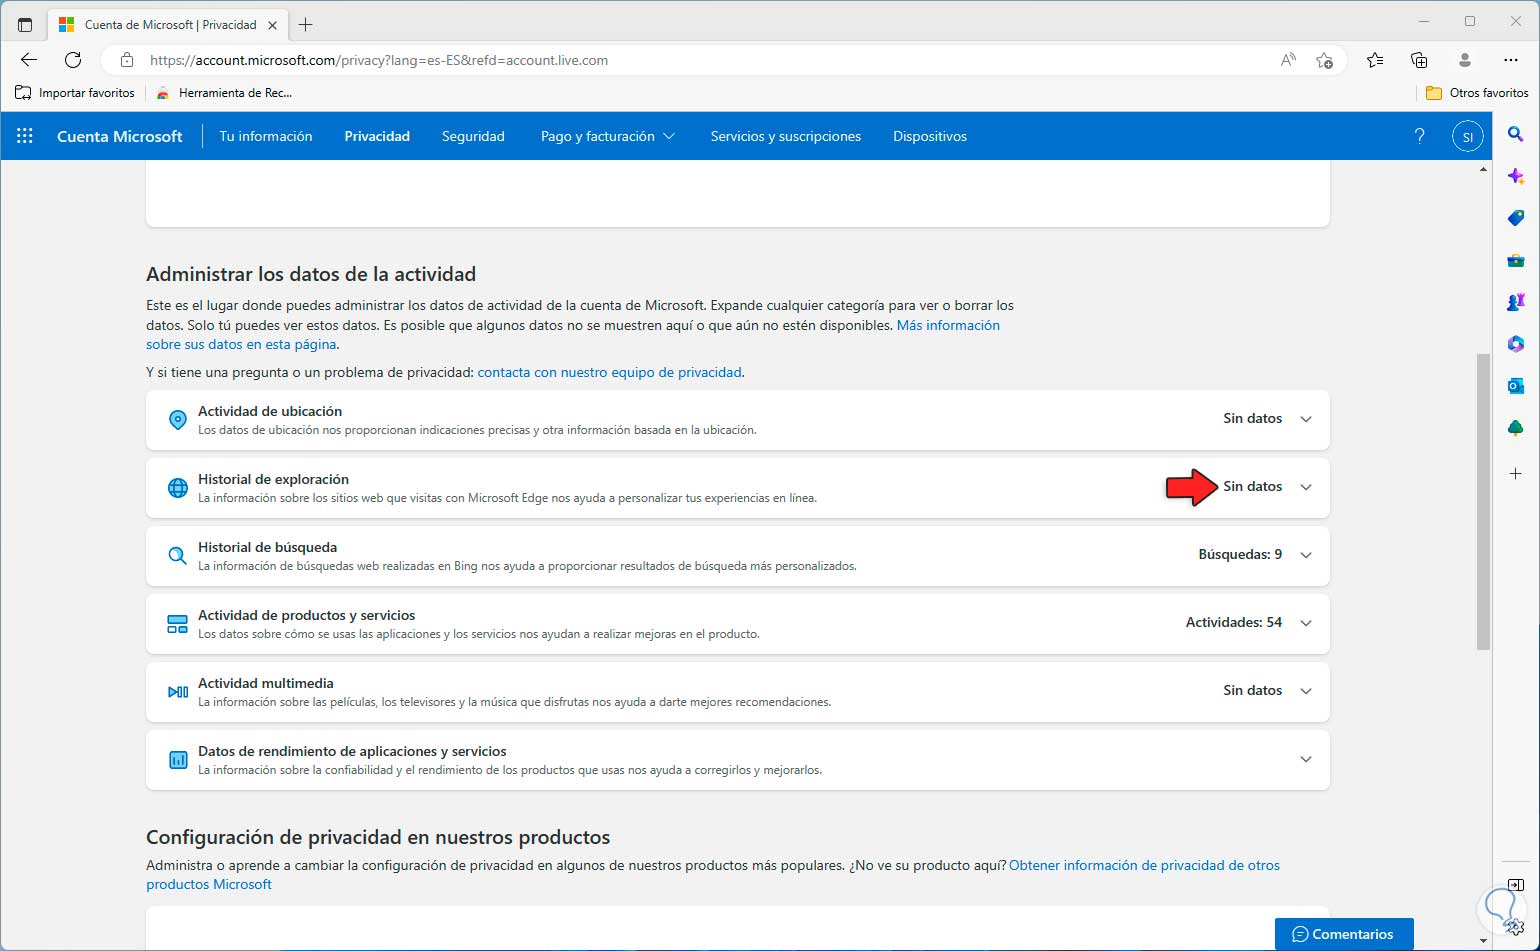
In "Browsing history" we delete all data (if any).
step 17
Finally we open Microsoft Edge and there we will go to "Settings and more - Settings":
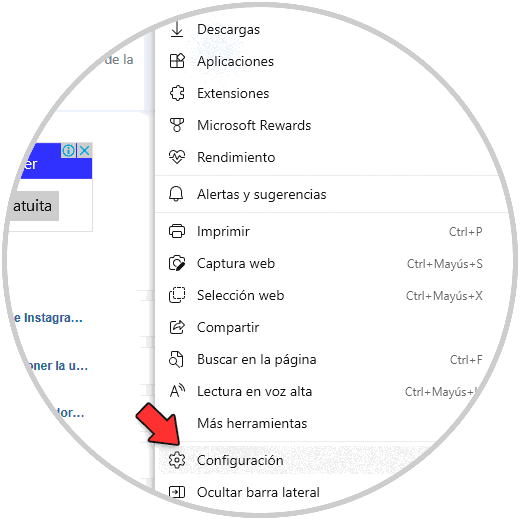
step 18
In "Privacy, search and services" we confirm that the "Tracking prevention" switch is active:
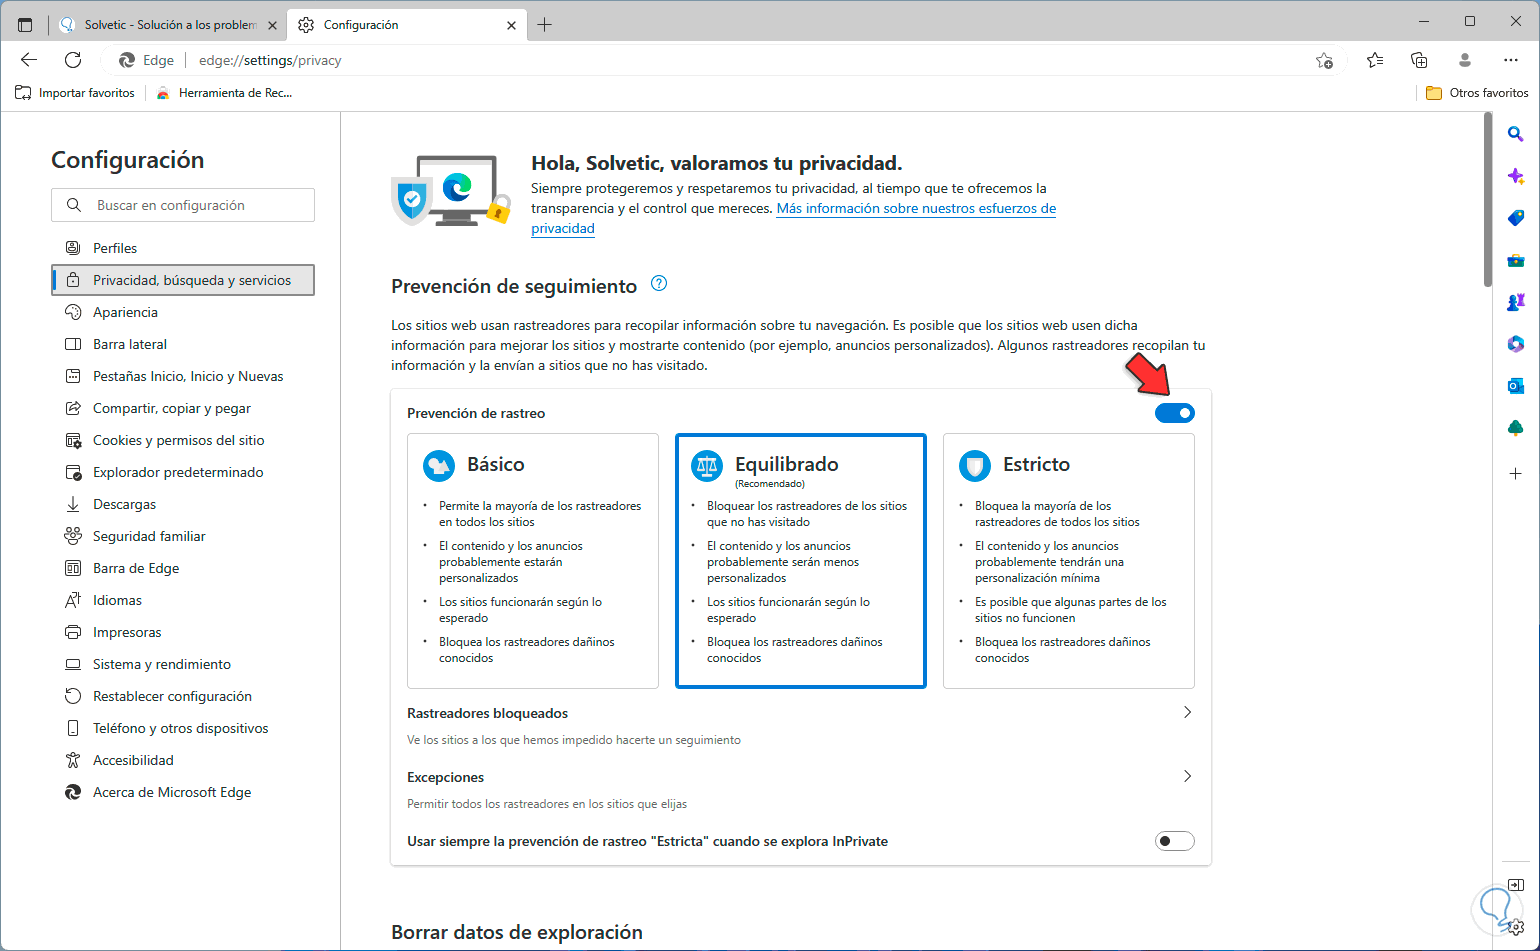
With this function, the browser's own tracking options will be blocked. These steps help us not only see the data being used from our action with the system, but use various methods to turn it off and prevent Microsoft from capturing and using it.