Word allows us as users to make use of various options when working with the available text and each of these options is focused on optimizing its presentation and one of the most common and interesting ways is to use line spacing, this means the space that exists between line and line, if the lines are very close to each other it can allow more text to be available on a sheet but visually this can be messy..
And it is that sometimes the spaces between words or lines are necessary to manage so that the result is a legible and orderly text. If you come across texts with content very close together, you will see how difficult and intelligible it becomes to be able to read it. The line spacing will be based on the needs of each one and establishing it is simple, TechnoWikis will teach you how.
To stay up to date, remember to subscribe to our YouTube channel!
SUBSCRIBE ON YOUTUBE
How to Apply Line Spacing in Word
Step 1
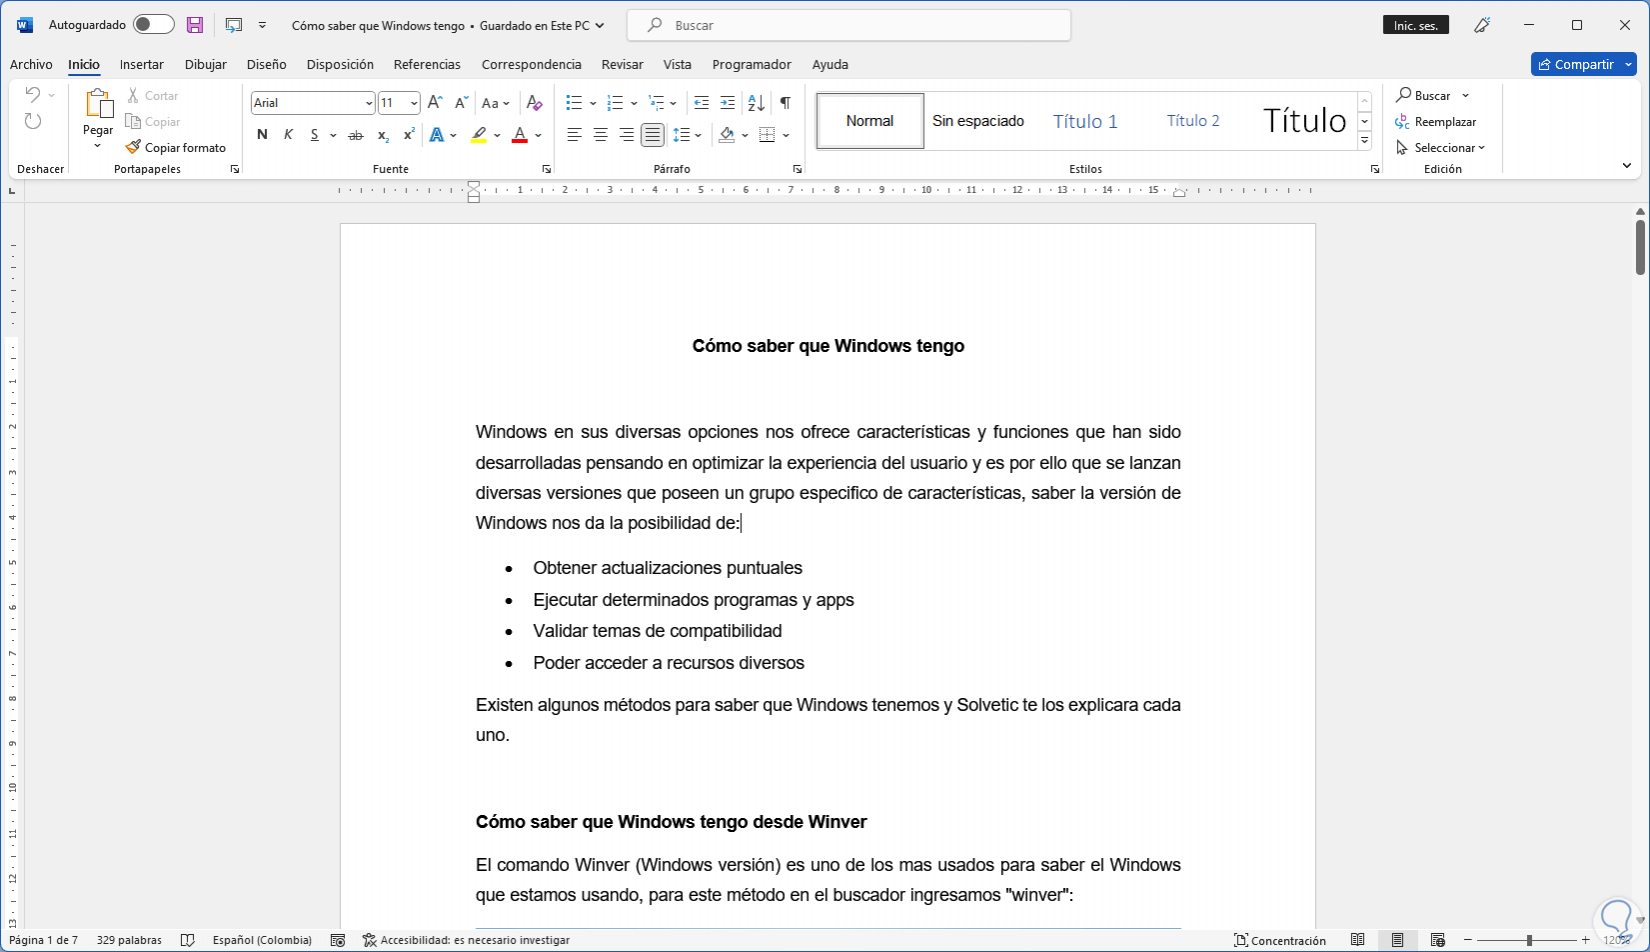
Open Word to see the content:
Step 2
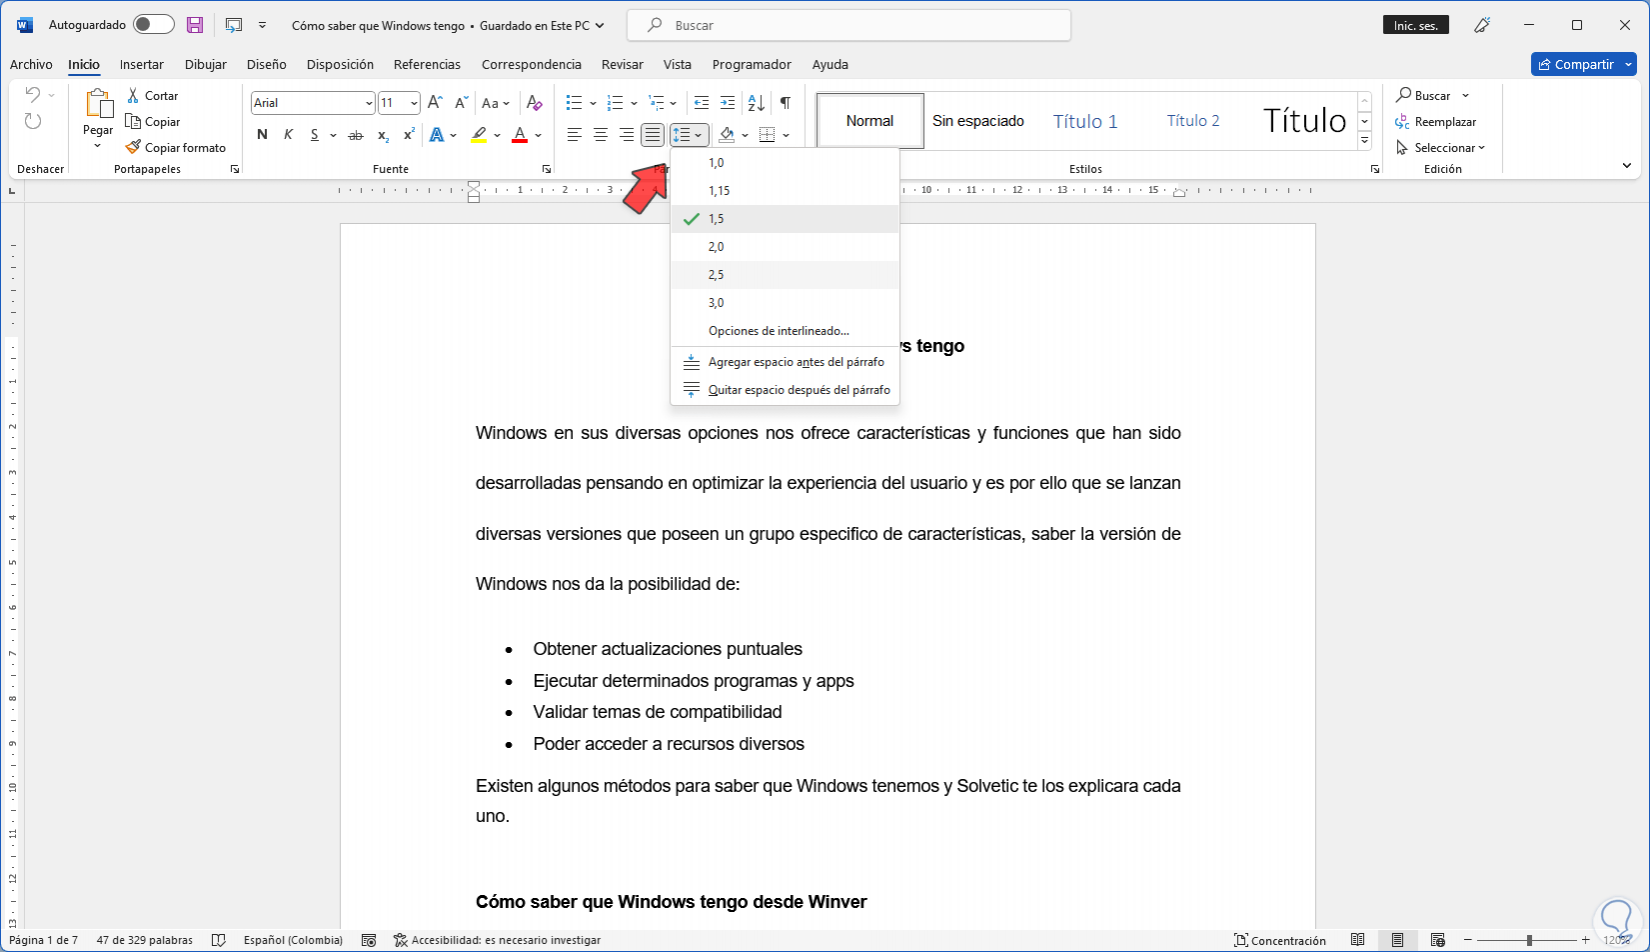
We select the desired text, click on "Spacing between lines and paragraphs" and there we select the desired space:
Step 3
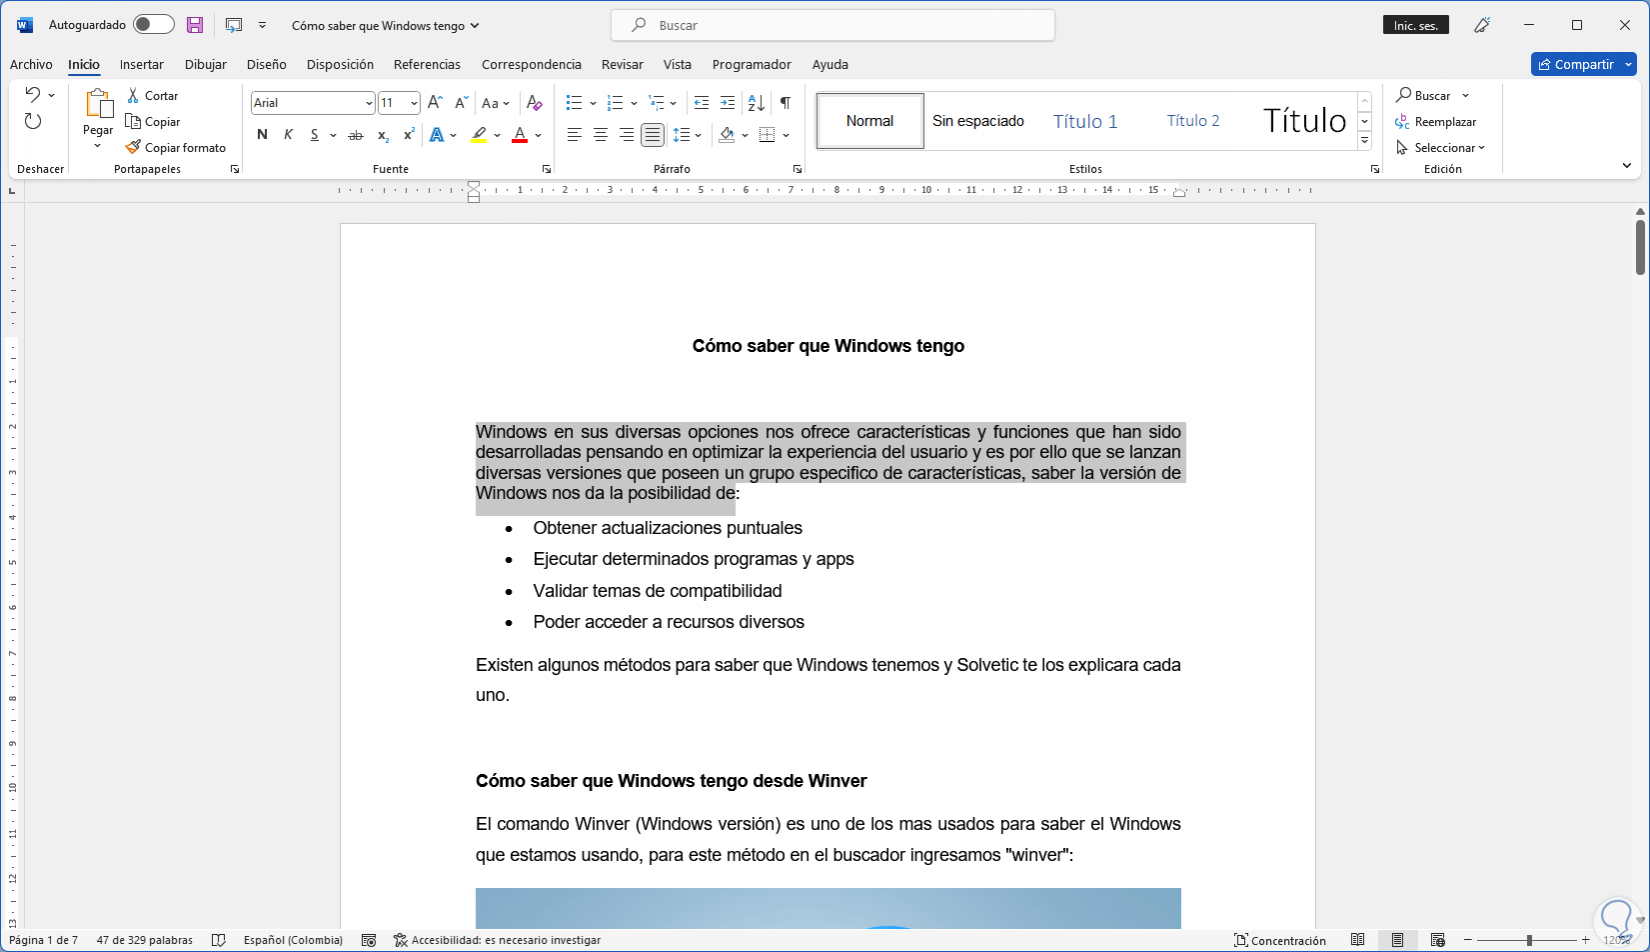
We will see the change in the text:
Step 4
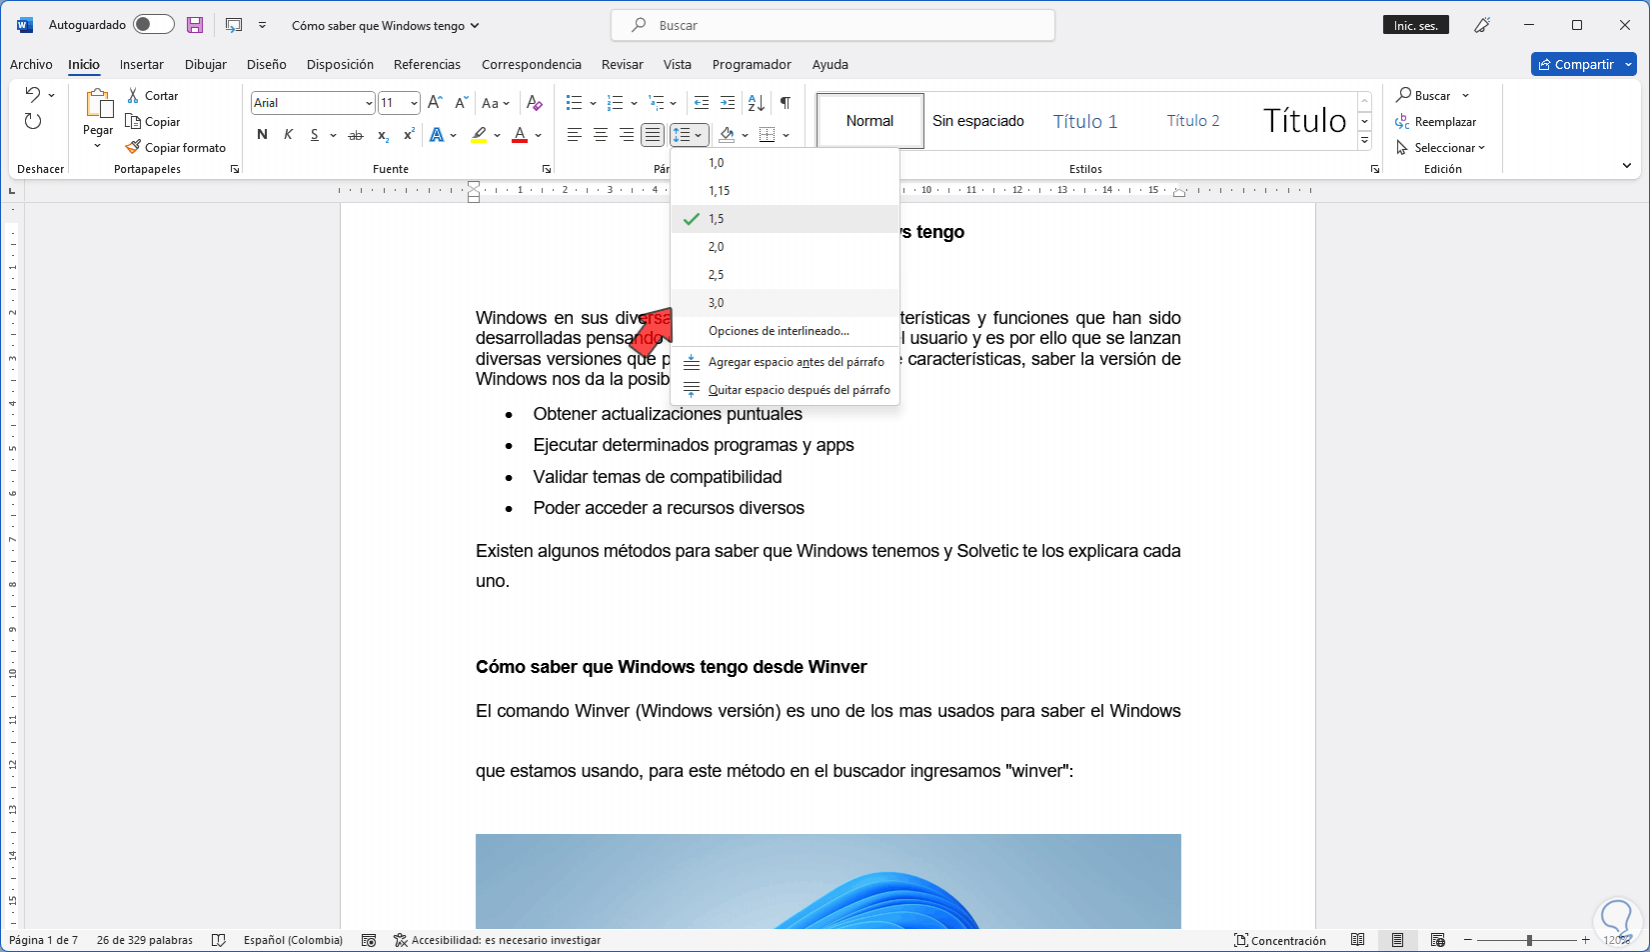
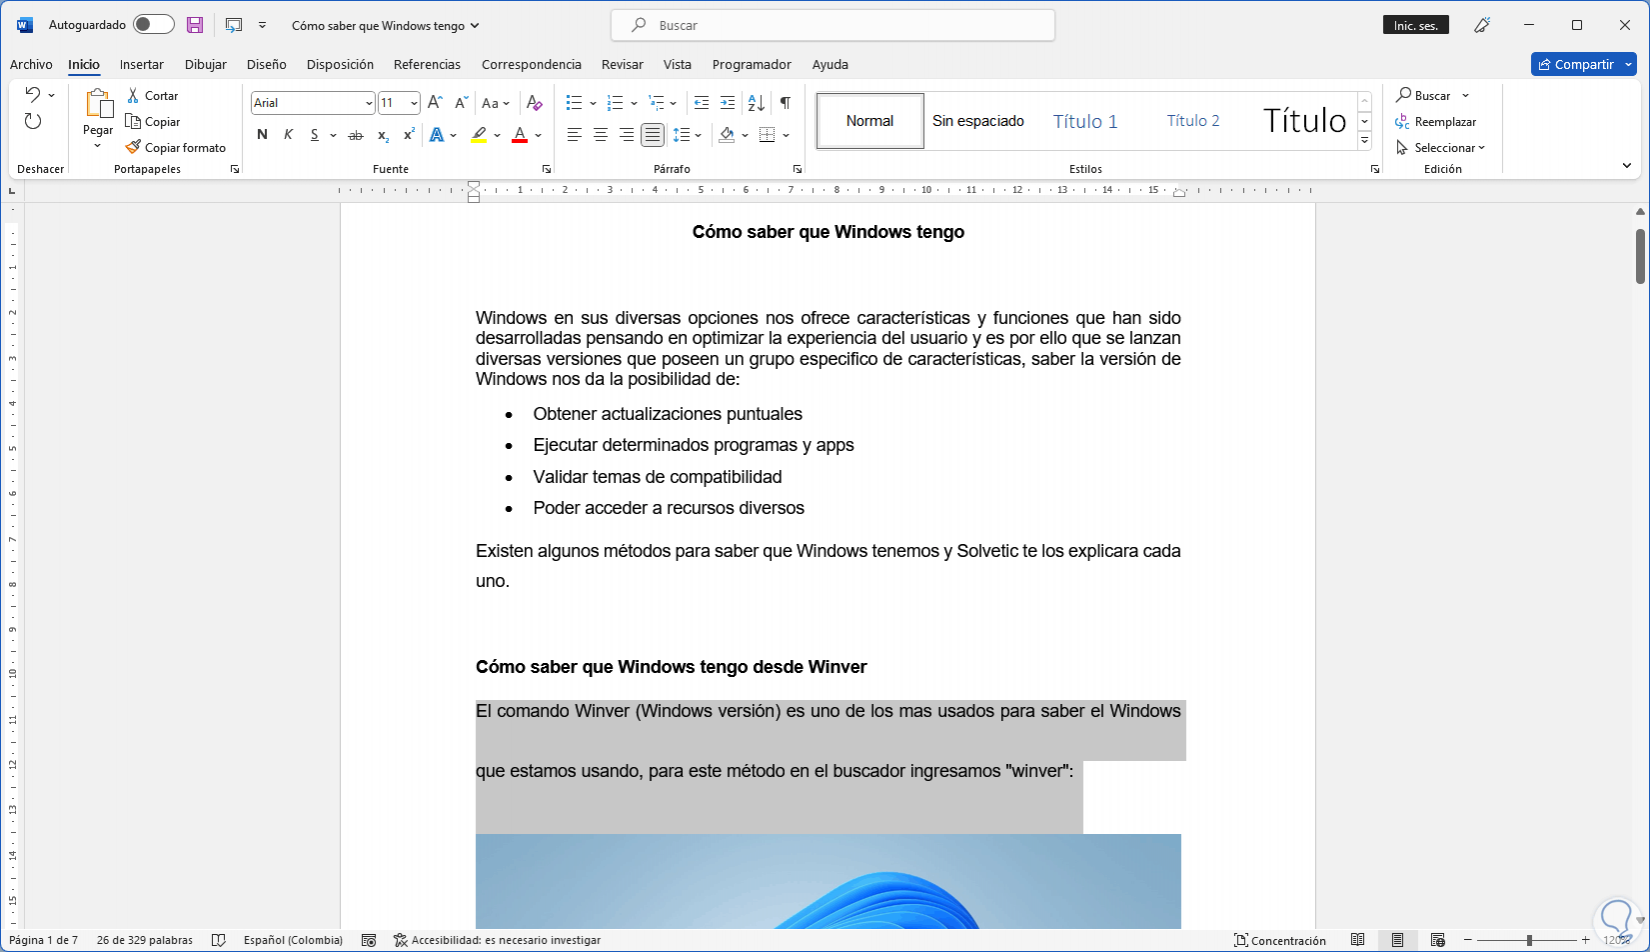
Select another paragraph and choose another spacing from "Spacing between lines and paragraphs":
step 5
We will see the difference between the various spaces:
step 6
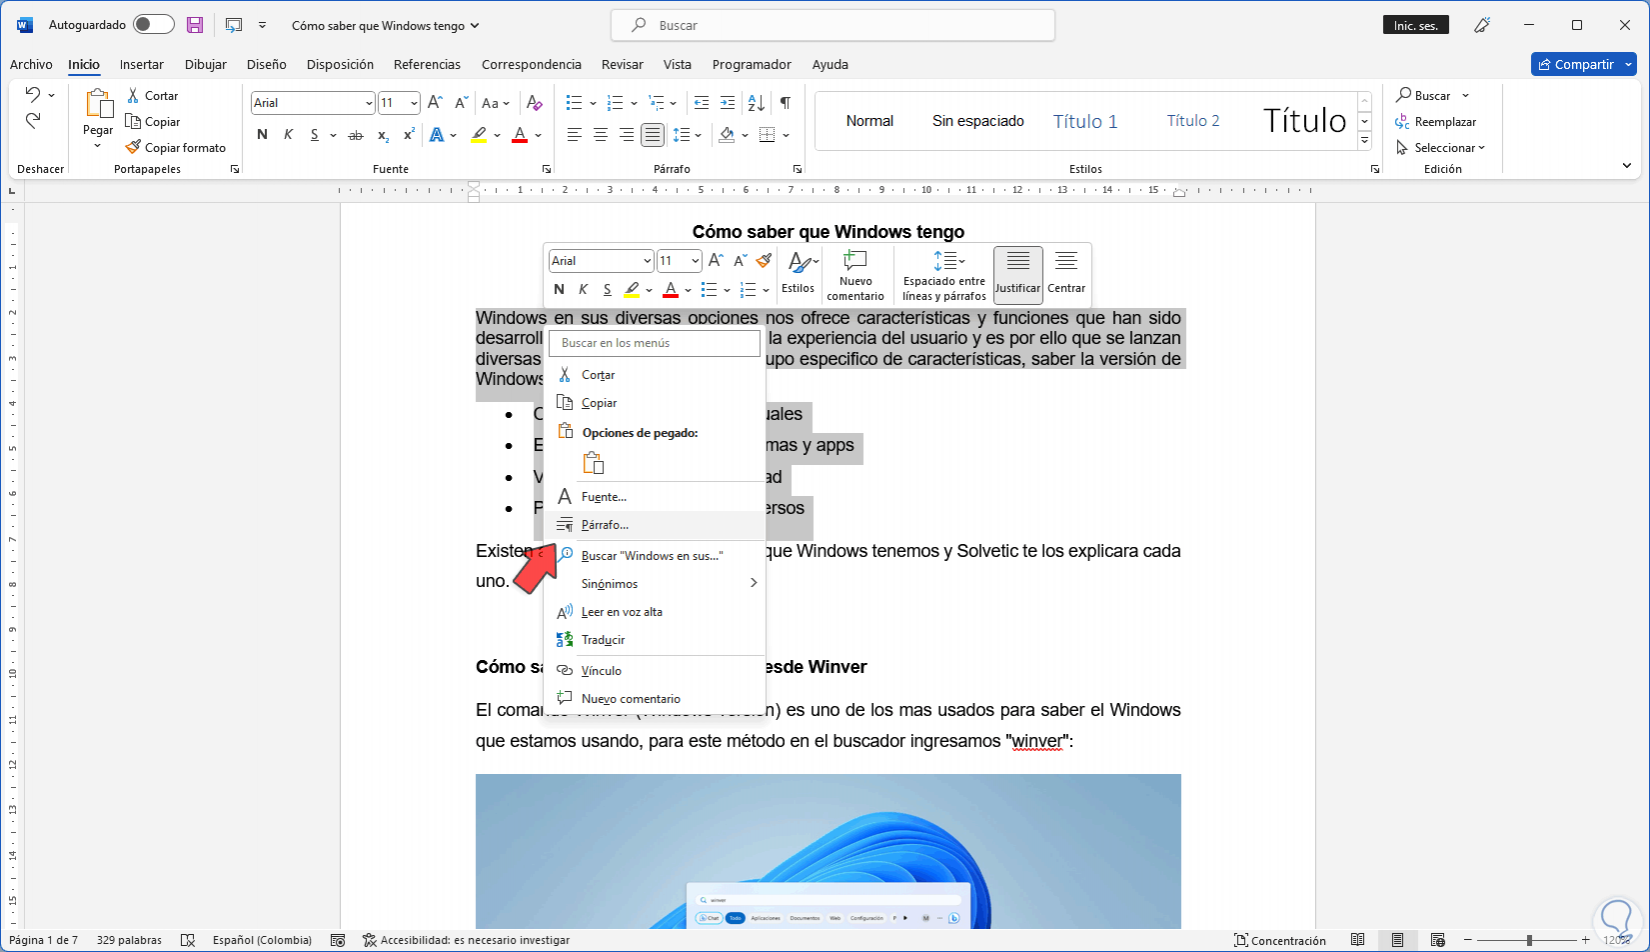
Alternatively we select the text, right click and choose "Paragraph":
step 7
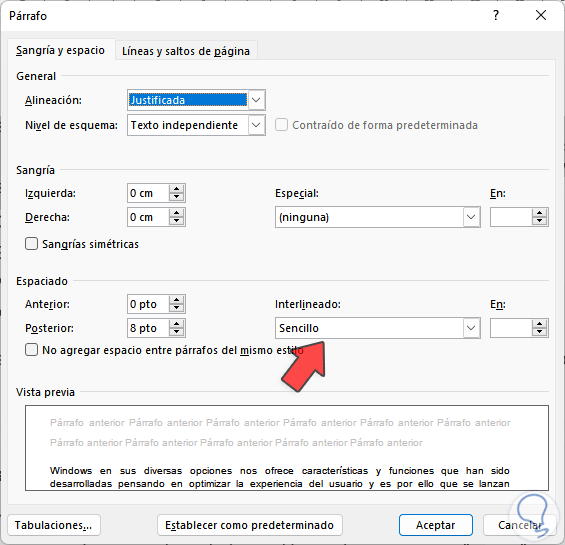
The following will open:
step 8
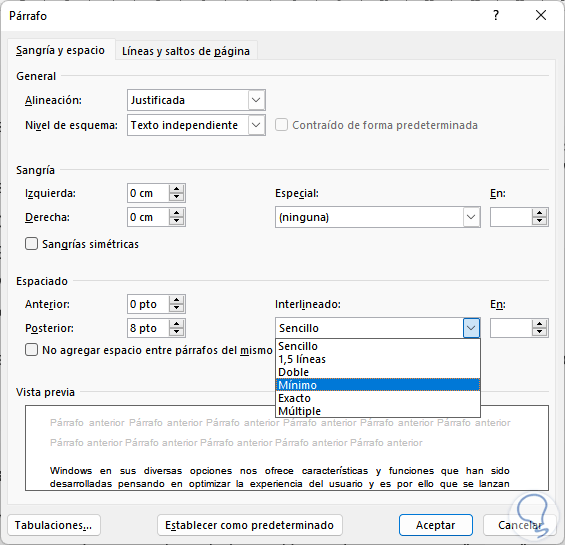
In "Line spacing" select the appropriate option according to the text or the need:
step 9
We choose the appropriate spacing:
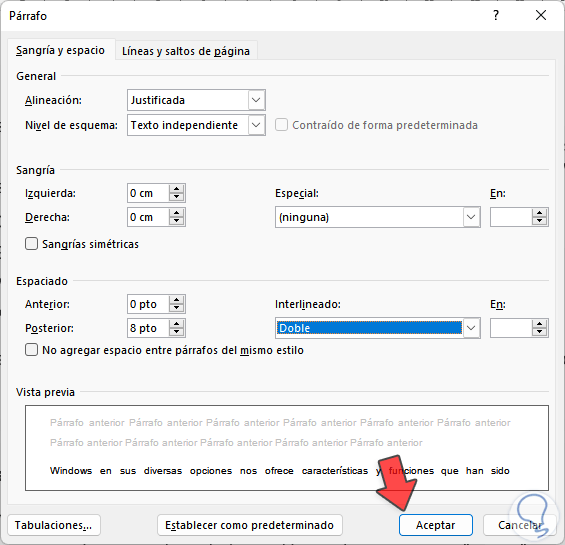
step 10
Apply the changes to see the result of the line spacing:
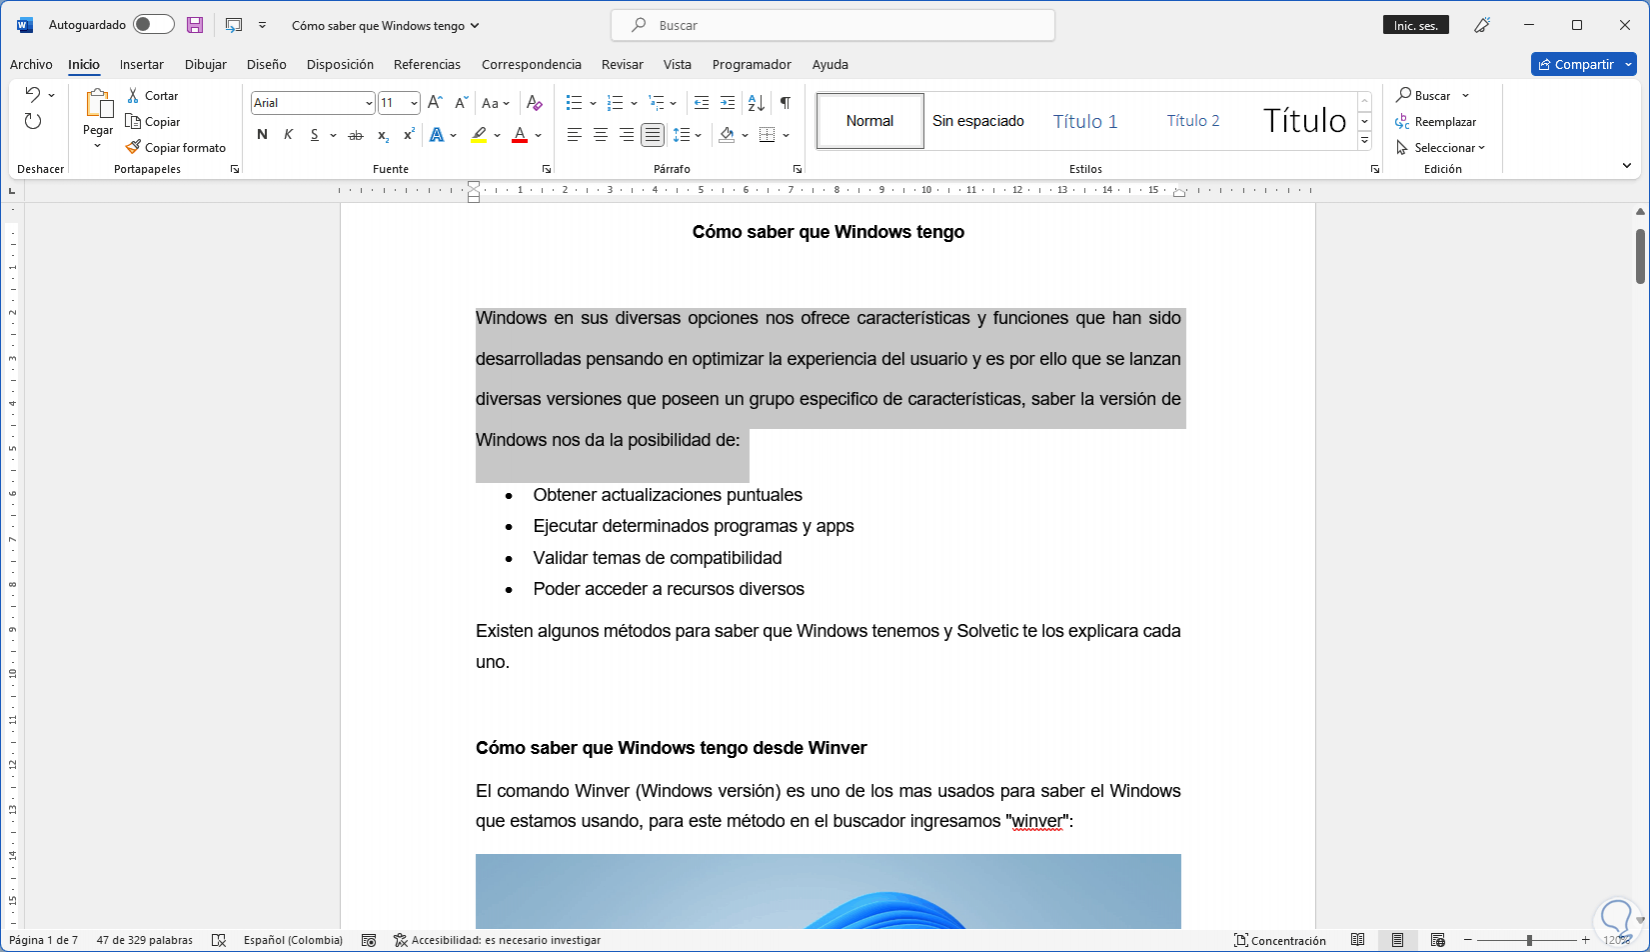
As we can see, line spacing is simple to use but it will completely improve the presentation of the text in Word..