If we talk about communication tools most used, surely one of the first that comes to mind is the mobile phone. And it is that these small devices have taken a fundamental role in terms of communication between people, although their utilities go much further, and especially since the Internet reached them..
We have gone from using our mobile phone to make or receive calls to go much further. Now, and thanks to instant messaging applications such as WhatsApp, Telegram or Messenger among others, the concept of communication has changed completely. Having written conversations live with a person wherever we are is something that we do every day, in addition to exchanging files such as photos , videos or voice notes using this route.
The use of these applications is so important that the keyboard becomes a fundamental part and within this the autocorrector; which can be tremendously useful for correcting words according to situations, but it can also correct words that we did not want to give rise to misunderstandings in the conversation we are having. For this reason today in TechnoWikis we will explain how to put or remove the autocorrector in one of the Apple terminals of the moment: The iPhone XR..
For this you have to:
To keep up, remember to subscribe to our YouTube channel! SUBSCRIBE
Step 1
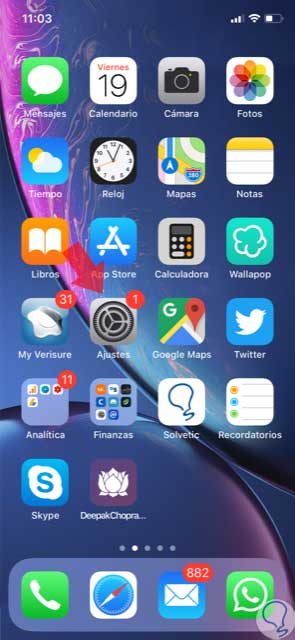
Access the "Settings" by clicking on the icon represented by a cogwheel on your iPhone XR.
Step 2
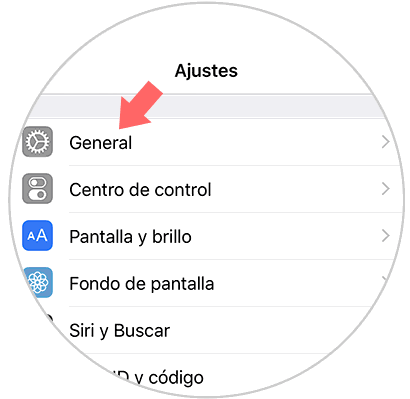
In the list with the different configuration options under “Settingsâ€, click on “Generalâ€.
Step 3
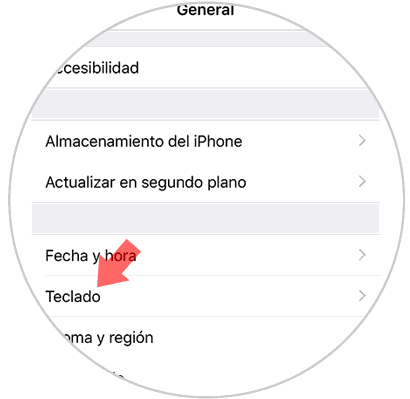
Now, in the new screen you must click on the “Keyboard†option to continue â€.
Step 4
Within it, you will see the option "AutoCorrect", which you can activate by sliding the tab located to the right side and deactivate by sliding the tab to the left side of the screen.
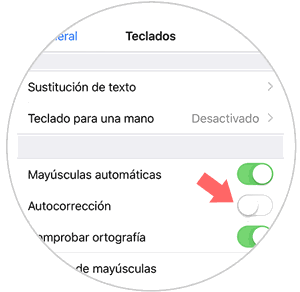
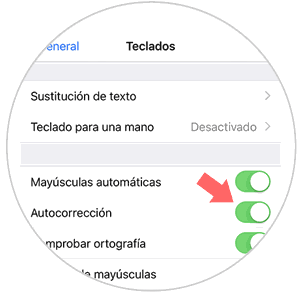
It will be that simple to put on or remove the autocorrector on the iPhone XR.