The use of vintage or retro effects in the World of digital photography and Social Networks have become more and more popular. Many content creators, both in professional media and on Social Networks, have seen the use of this type of effect as a vehicle to generate sensations of nostalgia by applying that retro style to the photographs. With these vintage effects we can make a style analogy in the decades from the 50s to the 80s, managing to customize each of these effects and adapting them to the needs of each user individually..
Surely by now you know that editing photography in The Digital World on Social Networks has become a fundamental part of the creative process. Nowadays, images are a very powerful means of communication that manage to connect with the public in multiple ways and that allow us to represent any type of reality depending on how we transmit them and how they receive them. That is why editing plays a fundamental role, since if what we want is remarkable content, with digital editing we can substantially improve the quality and the final impact of these photographs on the user.
It may be that you have a photograph with a very attractive composition and that in principle is going to create a sensation in the end user. But imagine that we also added an editing state to that photograph with that visual power in which we changed its appearance and managed to evoke feelings and emotions that were not present until then. Hence, working with light or color corrections and even applying effects or filters that we customize ourselves will make us control the final personality of our photographs. In this sense, if we want to generate a nostalgic and somewhat analog atmosphere, we can resort to the so-called retro or vintage effects that take us to past decades and that give our images unique messages and emotions..

Features of use of the Glow Effect
We can highlight the following elements as characteristics of a glow effect:
- Greater softness and blending. With this effect, an appearance of softness is sought in our image with some blurring that gives rise to a sensation of subtle and diffused brightness. It doesn't matter if we lose some sharpness if we get that smooth effect.
- Justified overexposure. Sometimes a higher level of exposure is used to achieve brighter images than in their natural state.
- Uses of light layers. Applications are often needed to help us add layers of light or more filters that generate a greater amount of brightness and increase the diffuse effect.
- Smoothed textures. This effect seeks more relaxed and soft textures.
- Retro or vintage atmosphere. The glow effect is widely used to evoke retro aesthetic environments from the 90s or early 2000s, creating a nostalgic feeling.
- soft contrasts. The glow effect will look for soft contrasts to create that diffused and softened effect.
- Predominance of pastel tone. In this effect, pastel tones predominate in relation to that retro environment with which it is related.
- Higher brightness. This effect seeks higher levels of shine than in a natural setting.
- Selective focus. Focusing on an element and blurring the background or selected areas is a common resource in this effect.
As we see both the vintage effects in general and the glow effect that we will see today in particular, they can be used to generate that feeling of nostalgia and identity that will add a plus to our personal brand and will generate an artistic aesthetic in our photographs that will make them stand out from the crowd. others.
To stay up to date, remember to subscribe to our YouTube channel!
SUBSCRIBE ON YOUTUBE
How to Make 90s Glow Effect Lightroom Mobile
Although retro or vintage effects work very well when it comes to generating that nostalgia in our photographs, the truth is that we must know how to choose very well in what type of images we are going to use it, since we could go from creating a sensation of authenticity to a Somewhat sparse own image where we show that we are not very well oriented when using according to what type of effects. There are scenarios or moments in which a retro effect such as the glow effect can remind us of that decade of the 90s where those softened effects and shines stand out. The ideal is to know different types of effects like the ones we show you in the Lightroom Mobile course in order to have your own gallery of effects that you can vary in each of your photographs depending on the type it is.
If, in addition to Social Networks, you use your photography in a more professional way, such as events such as weddings or trips, the use of retro styles and effects can help us generate a distinctive artistic effect that evokes the user to whom the photo is delivered. material sensations of nostalgia that excite in a different way than it would in other types of editions. That is why with this glow effect we seek to create a unique environment with a certain tone in the photographs that can be used for different themes such as Social Networks, travel, art or fashion..
If you would like your photographs to tell a story or convey a message related to nostalgic and past environments, the use of effects like the one we will see today can greatly enhance the interaction with the end user, making that image move to a much more sentimental level. powerful. As we always tell you, the configuration that we are going to give you today generates a general result but you can customize it the way you want at any time. In fact, we encourage you to do different tests and keep the configuration that best suits you. your picture.

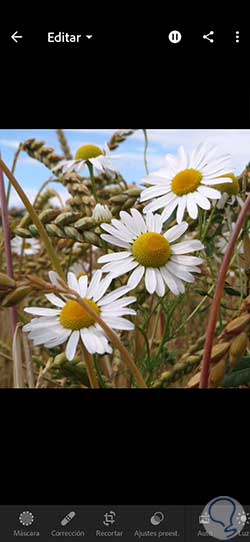
Step 1
We are going to start by opening the image that we want to edit within our Lightroom Mobile, if you do not have it in the gallery, proceed to import it.
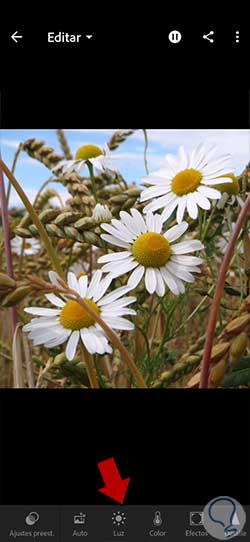
Step 2
We will start by configuring the lighting section of our photography and for this we will use the "Light" option that we have in the options bar.
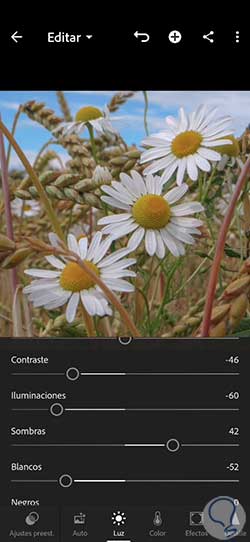
Step 3
The settings that we are going to see will be approximate and it is possible that depending on the starting values of your photo you will have to readjust a bit. In any case, the general settings that we propose are the following. Although we won't touch on the exposure, you can turn it up a bit if you want as a glow effect can overexpose your composition.
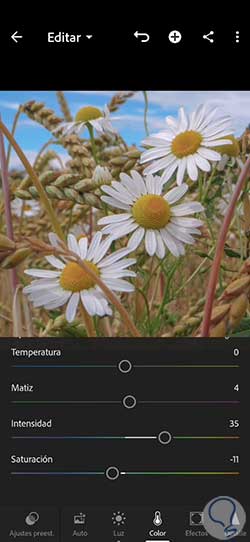
Step 4
Once we have our lighting configured, we are going to continue with the Color edition of our image and for this we will click on the lower “Color” section.

step 5
To change the color configuration of our photograph we will use a configuration that will be similar to the following:
step 6
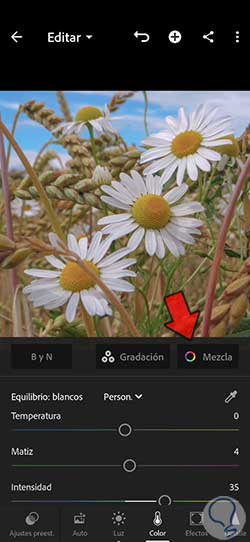
We are also going to do a somewhat more complete color edition making an adjustment by segmented colors within our photograph. To do this, click on "Mix":
step 7
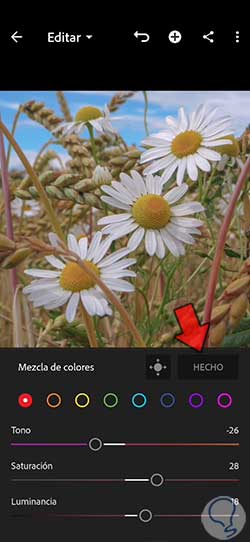
We are going to click on each color to give a configuration similar to the one we offer you according to the Hue, Saturation and Luminance parameters:
step 8
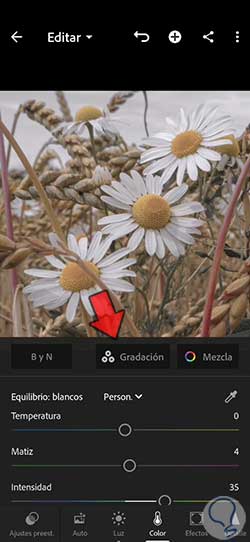
We already have our colors configured individually. The next thing will be to edit the color but only in the shadows since it is what interests us for this effect. To do this, click on the "Gradation" option.
step 9
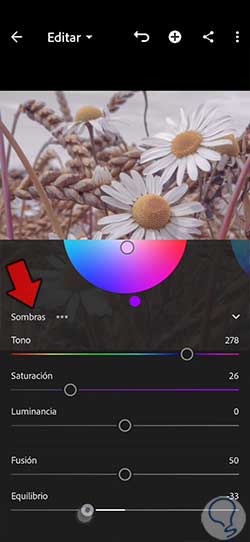
Here we are going to look for the "Shadows" section and click on it. Then we display its options and we are going to establish a configuration similar to this. Click on “Done” when you are finished.
step 10
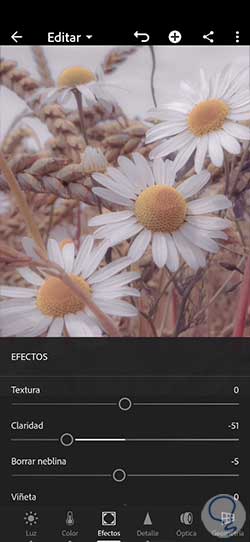
We are now done with the color settings. We continue applying some visual effect in our glow effect with the section that we will find under "Effects".
In this section we are going to give personality to the image using the "Clarity" and optionally we can add some "Grain" if we want that more analog effect.
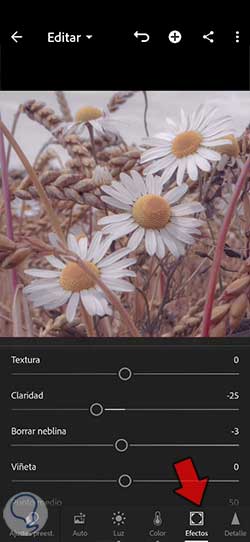
If you want to give the final effect much more power you can turn up the settings and choose higher adjustment levels:
step 11
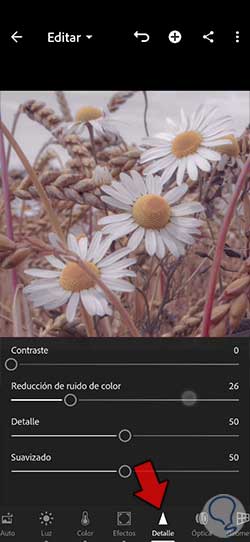
The next section that we are going to edit is that of "Detail" where we are going to enhance the focus of our photography a little more and we will try to reduce possible noise generated using the Noise Reduction options that we have.
- Color Noise Reduction: 26
step 12
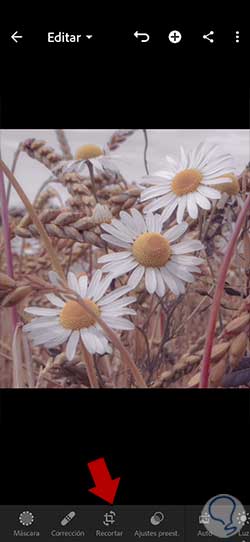
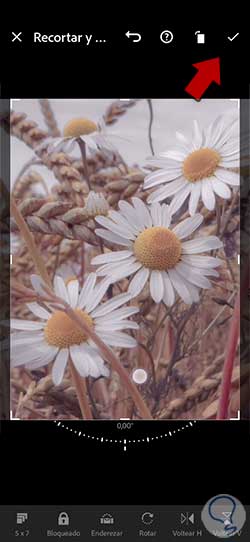
We would already have our photograph finished so the next step we can do to edit our photo will be to reframe it if you see that it is necessary. We cannot always use the same measurements depending on the platform used, so it will be interesting to change the proportions before publishing it. To do this, we are going to click on the “Crop” option:
step 16
Here you will be able to do a manual reframing or lean on the measurements that come predefined to be able to establish the new ones that your photograph will have. When you finish you can click on the upper check box to apply the changes.
step 17
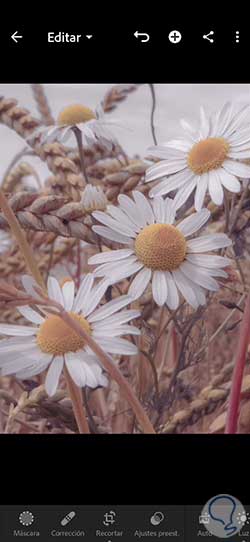
We would already have our glow effect applied. If you want more glitter effects on your image you can use other additional applications to add it. In this case we can already compare the before and after of our edition.
step 18
After this complete edition we do not want to lose all the configuration and also surely you would like to apply it to other photographs quickly whenever you want, that is why we recommend you create your own preset or preset. To do this we can click on the three upper points in the image:

step 19
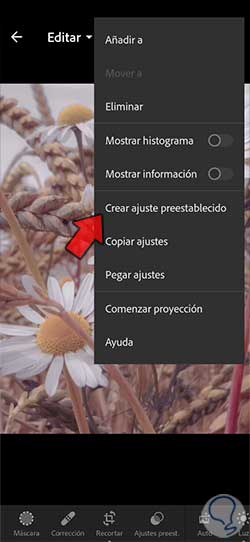
In the drop-down menu we are going to click on the option that appears under the name “Create preset” to generate a new one.
step 19
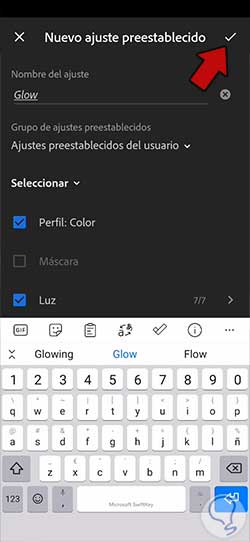
Here we can select those settings that we want to include in our custom preset, in this case we leave everything checked except clipping. We establish a name to identify it and save it by clicking on the upper check.
step 20
When we already have our preset ready, we can find it at any time in our preset gallery and apply it to any photo quickly to see how it would look:
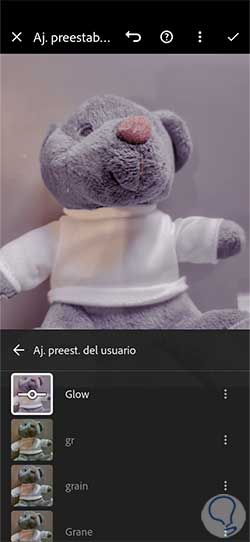
In this way we will have created the glow effect of the 90s in a personalized way using the Lightroom Mobile editing tool from any mobile device we have.