In Windows 10 and Windows 11 we find a series of files and folders when we access drive C, u and in other system paths, in which key system information is housed but many of these are hidden by default to prevent them from somehow accidentally delete or change any of them which may have an impact on the stability and operation of Windows. For administrative reasons and temporarily it will be possible to see these files and TechnoWikis will explain how to achieve it in Windows..
Viewing hidden files in Windows may be necessary when we have to enter a specific folder that is normally associated with sensitive content on our system. That is why we will be able to find hidden elements by default on our computer and we will have to find a way to see hidden Windows files to access these areas. We recommend that you be careful when modifying the content found in them as it can have significant repercussions on your system.
To stay up to date, remember to subscribe to our YouTube channel!
SUBSCRIBE ON YOUTUBE
How to see hidden files Windows
Step 1
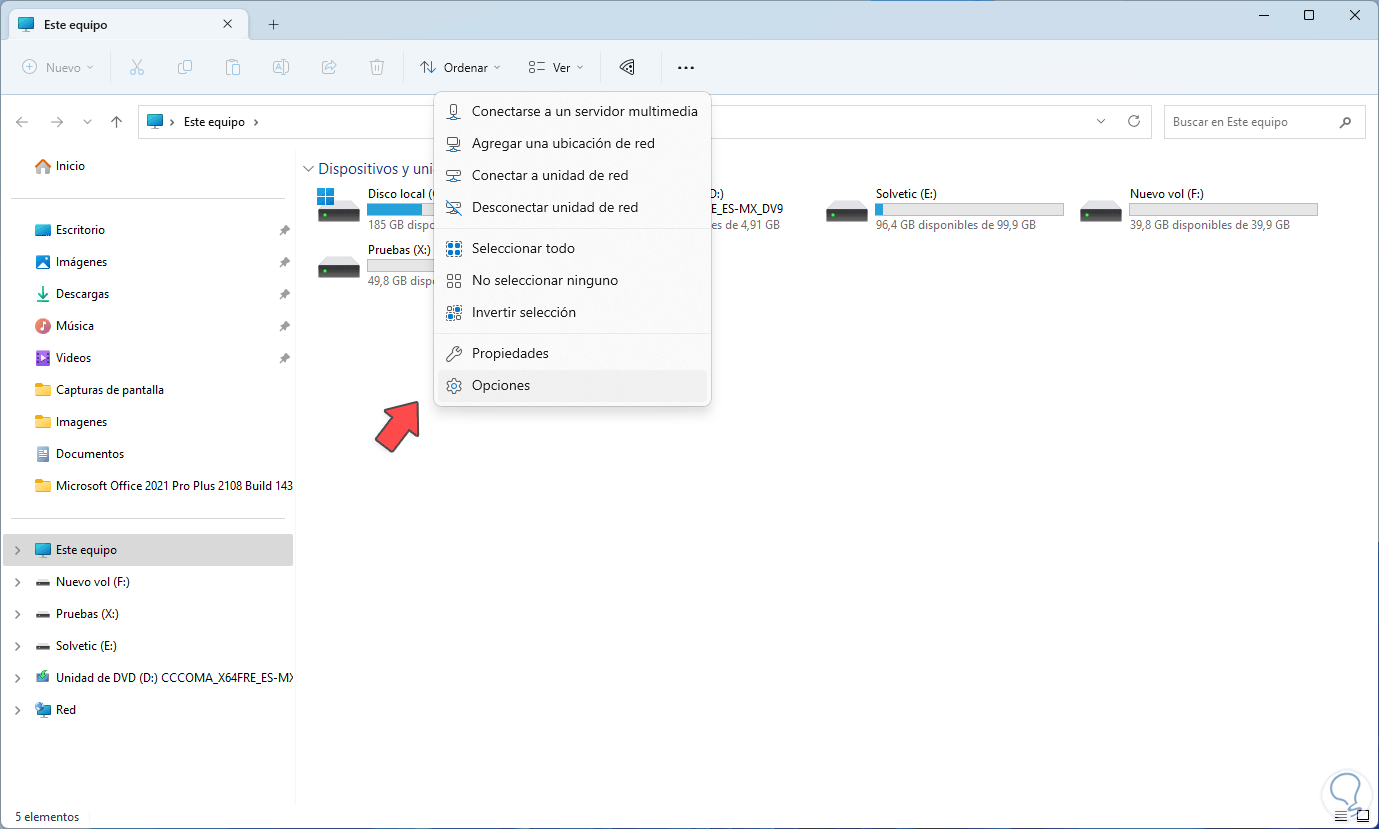
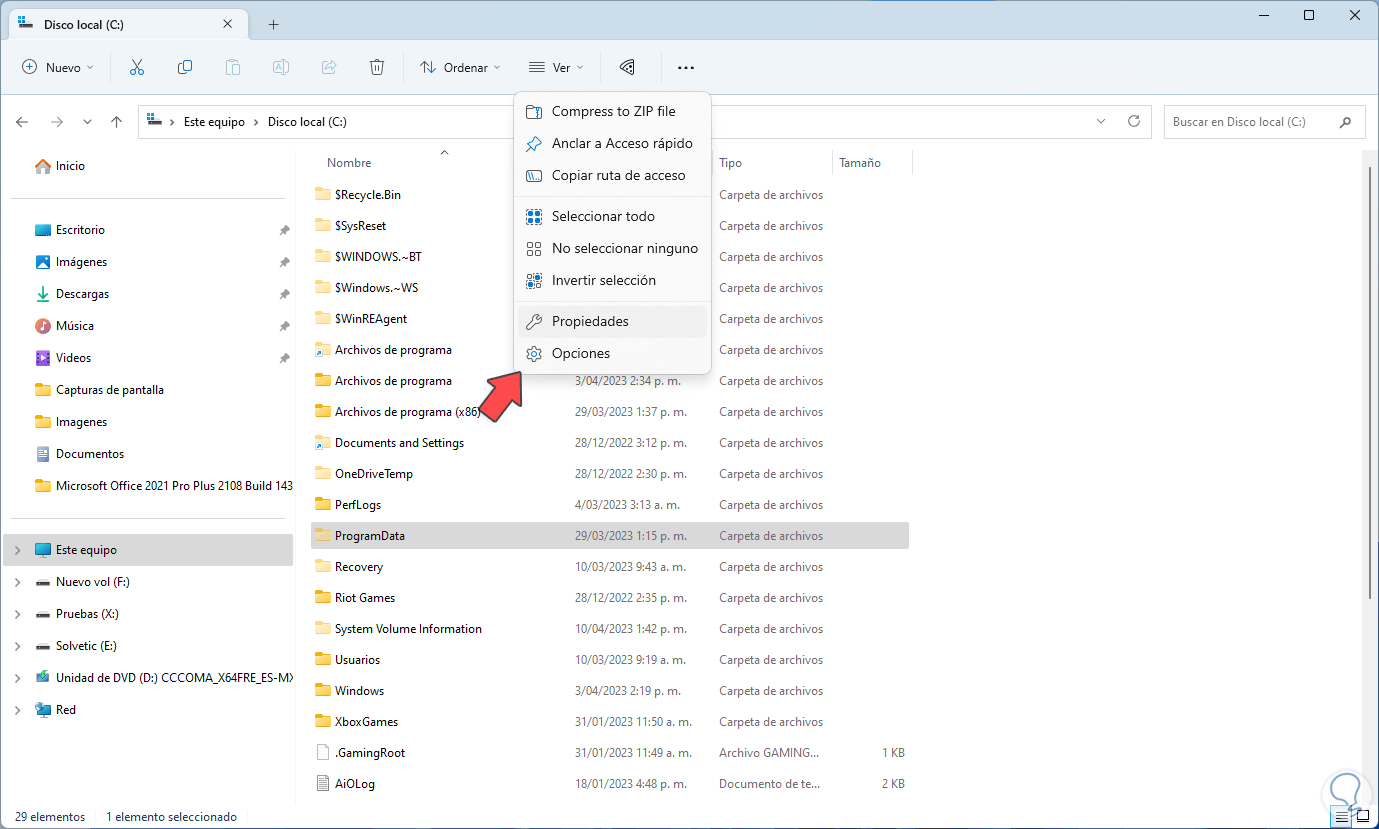
We open the File Explorer, click on the context menu and select "Options":
Step 2
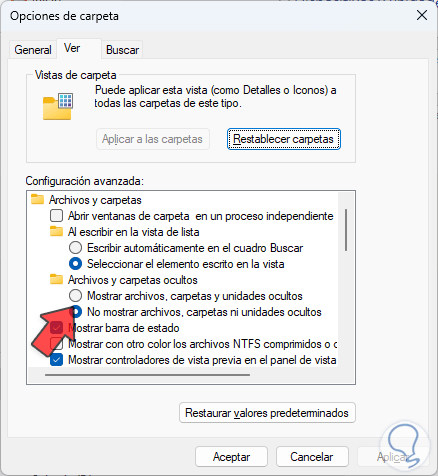
In the "View" tab we will have the following options:
Step 3
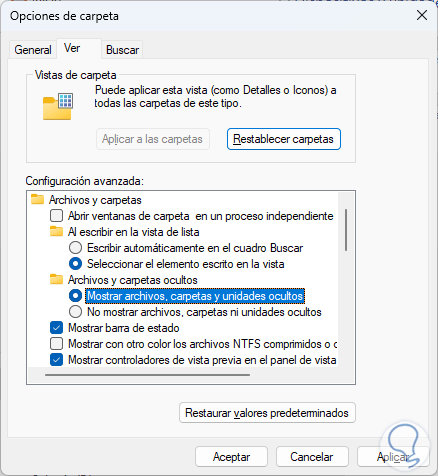
Check the "Show hidden files, folders, and drives" box:
Step 4
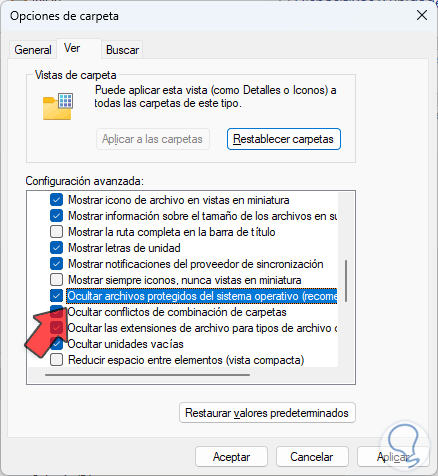
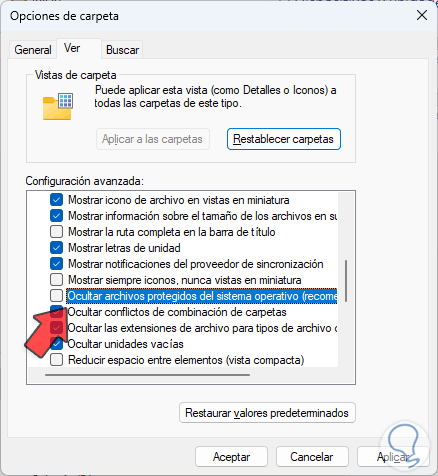
We go a little further down to locate the line "Hide protected operating system files":
step 5
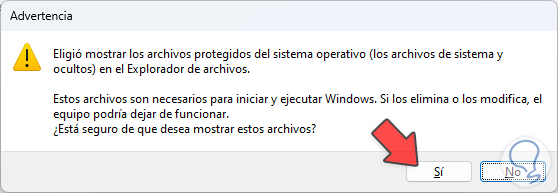
We deactivate the "Hide protected operating system files" box and the following message will appear:
step 6
Confirm the process to see the disabled box:
step 7
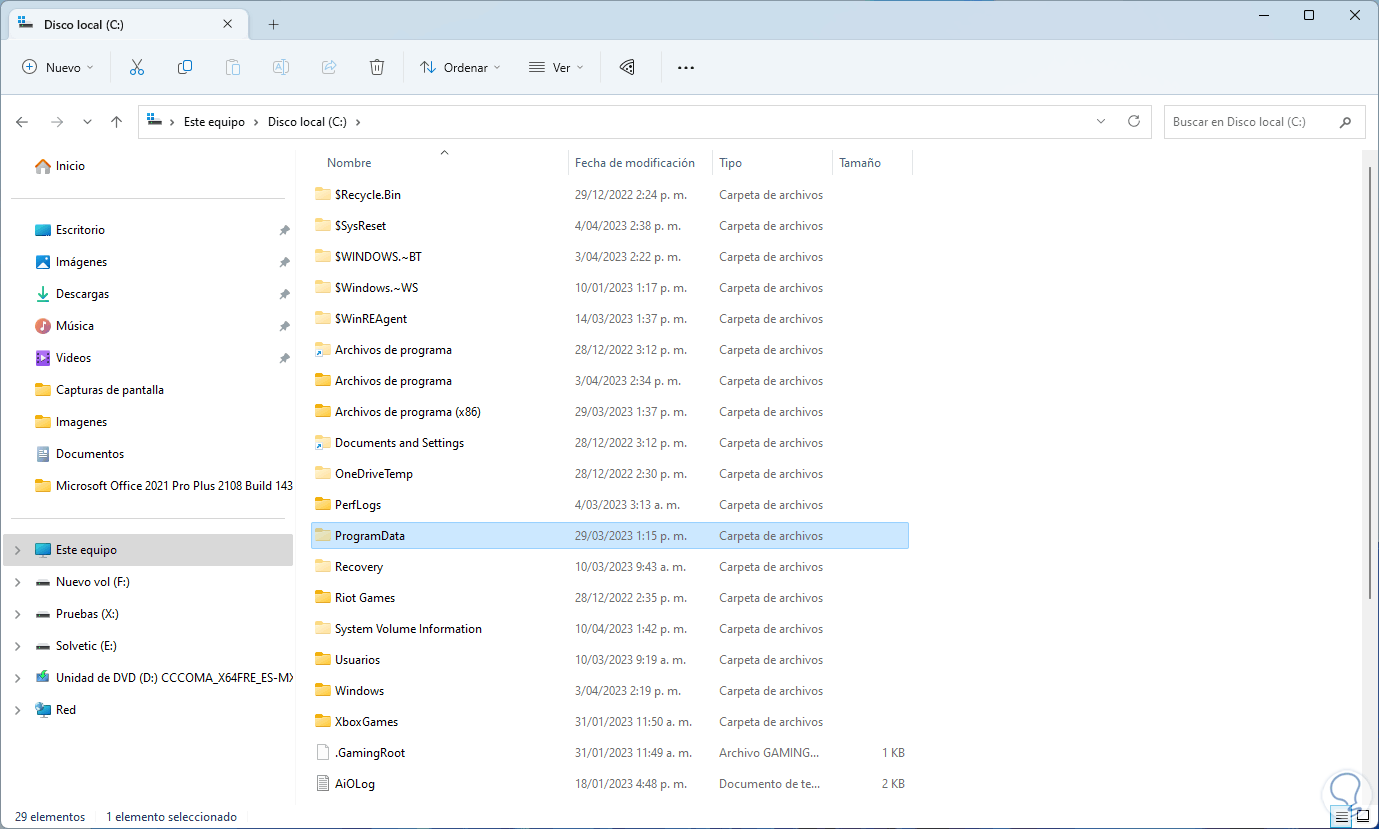
We apply the changes and we will see all the hidden system files:
step 8
To hide them again, we go to Options:
step 9
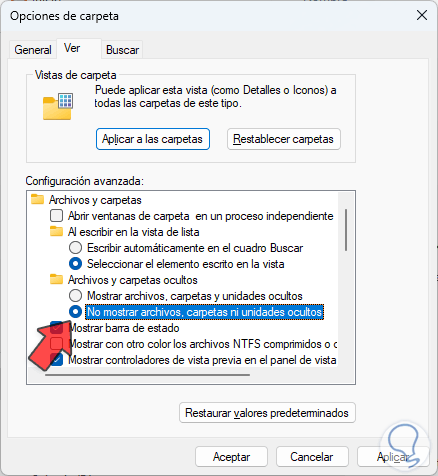
In "View", we activate the "Do not show hidden files, folders or drives" box:
step 10
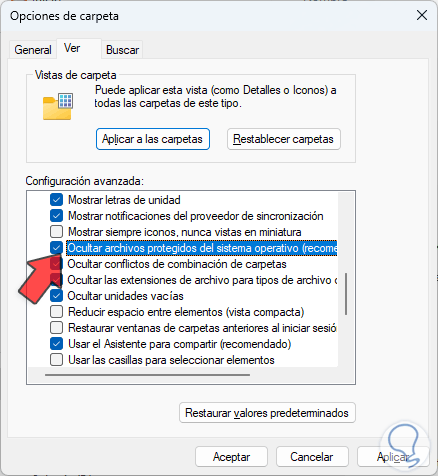
Check the "Hide protected operating system files" box:
step 11
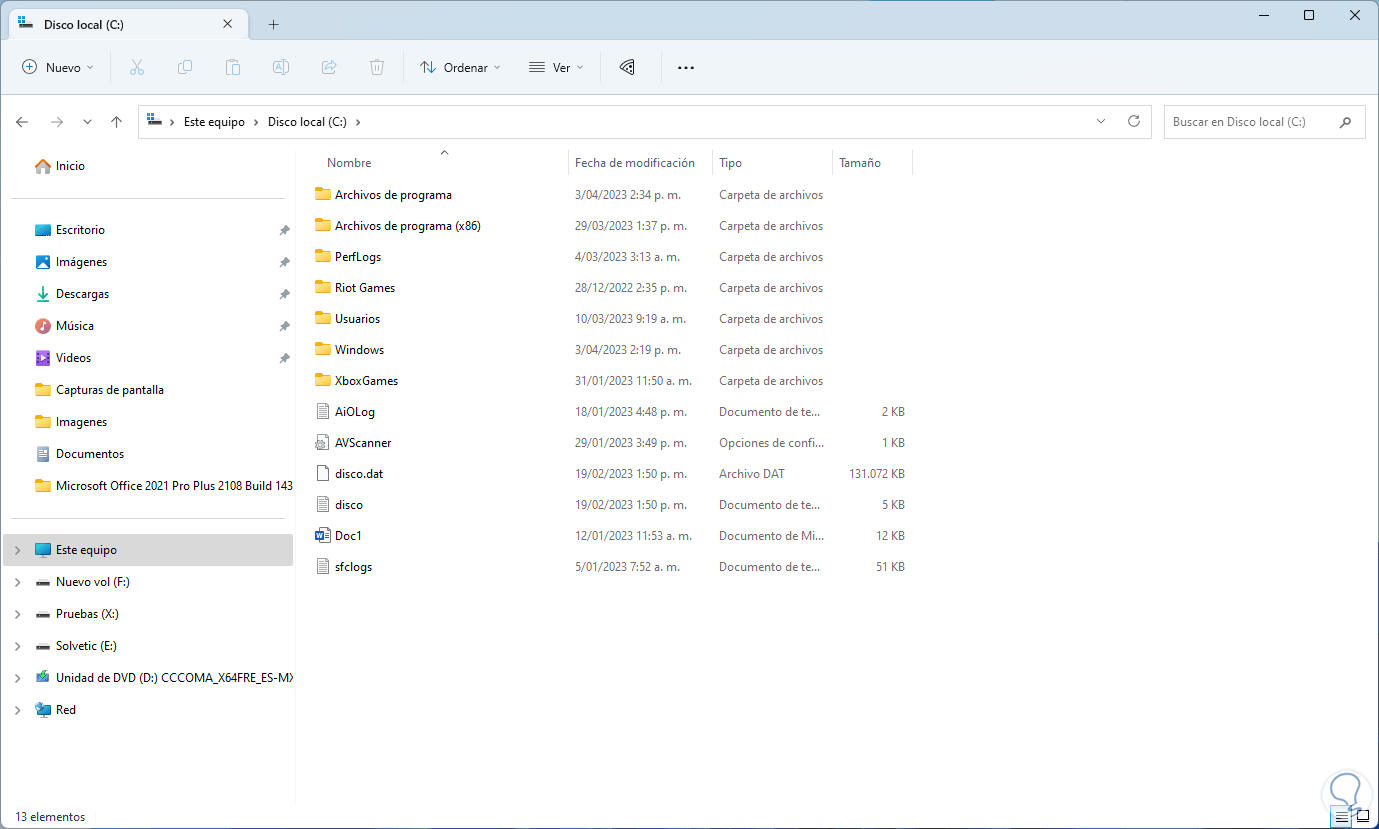
Apply the changes and they will now be hidden again:
It is that simple to perform this process in Windows 10/11..