As you already know, associated with your ChatGPT account there is a series of data that is stored as you use it. By default, the conversation history is activated and that is why you can see all the conversations that you have started automatically, being able to consult it at any time. But we don't always want a record of it and that's why sometimes we prefer to delete the data permanently. In these cases, a recommended option is to make a backup copy in case at any time this information is missing, something that you can achieve by exporting history and data in ChatGPT..
That's why in this case we want to help you learn how you can export the ChatGPT history and you will get a backup copy that will help you have a backup of your conversations with the AI. To export the history of your data, you will be able to collect information from the chats that you have already had and thus even be able to manage it to be able to unify it and create much more complete information. We are going to see how to do this process on both PC and mobile.
To stay up to date, remember to subscribe to our YouTube channel!
SUBSCRIBE ON YOUTUBE
1 Export History and Data ChatGPT PC
Step 1
The first thing we will do is go to our browser and go to the official ChatGPT website and log in with our account from the following link:
ChatGPT
Step 2
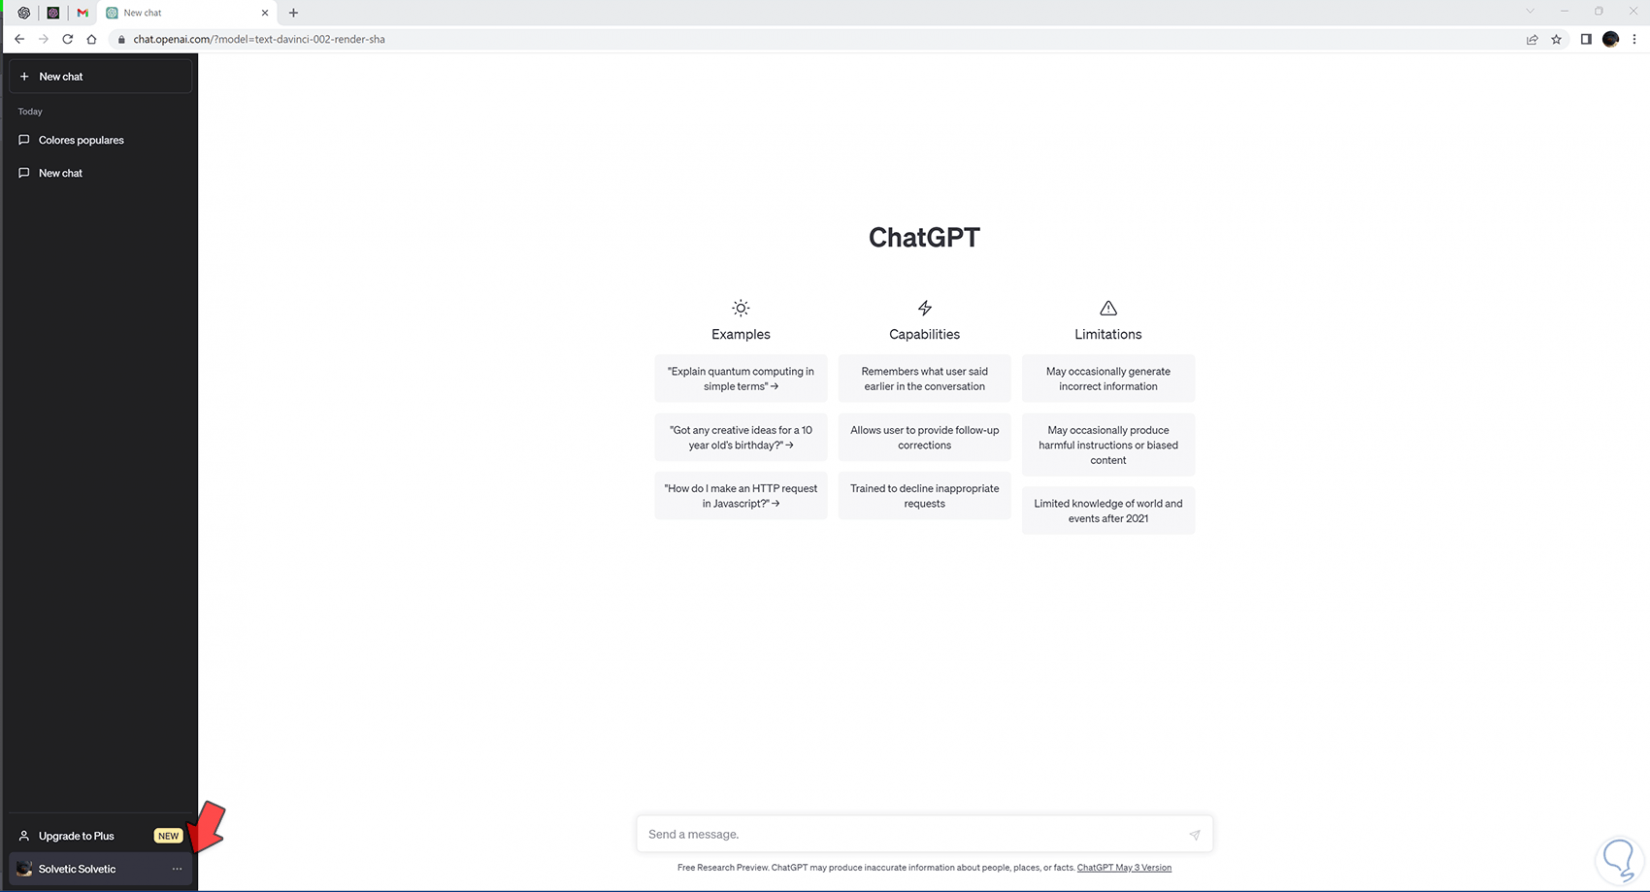
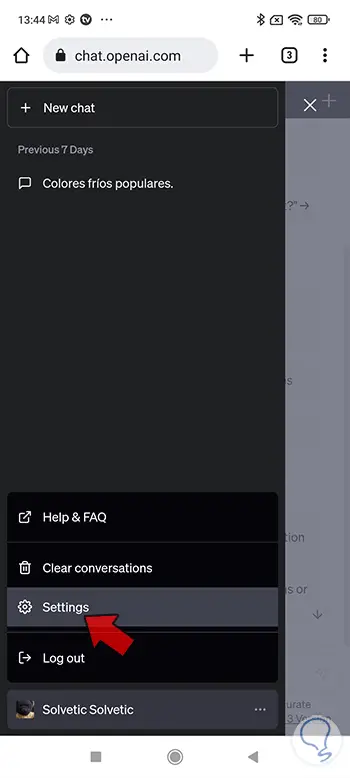
On the main page we are going to go to the bottom where the name of our user is and click on the three points:
Step 3
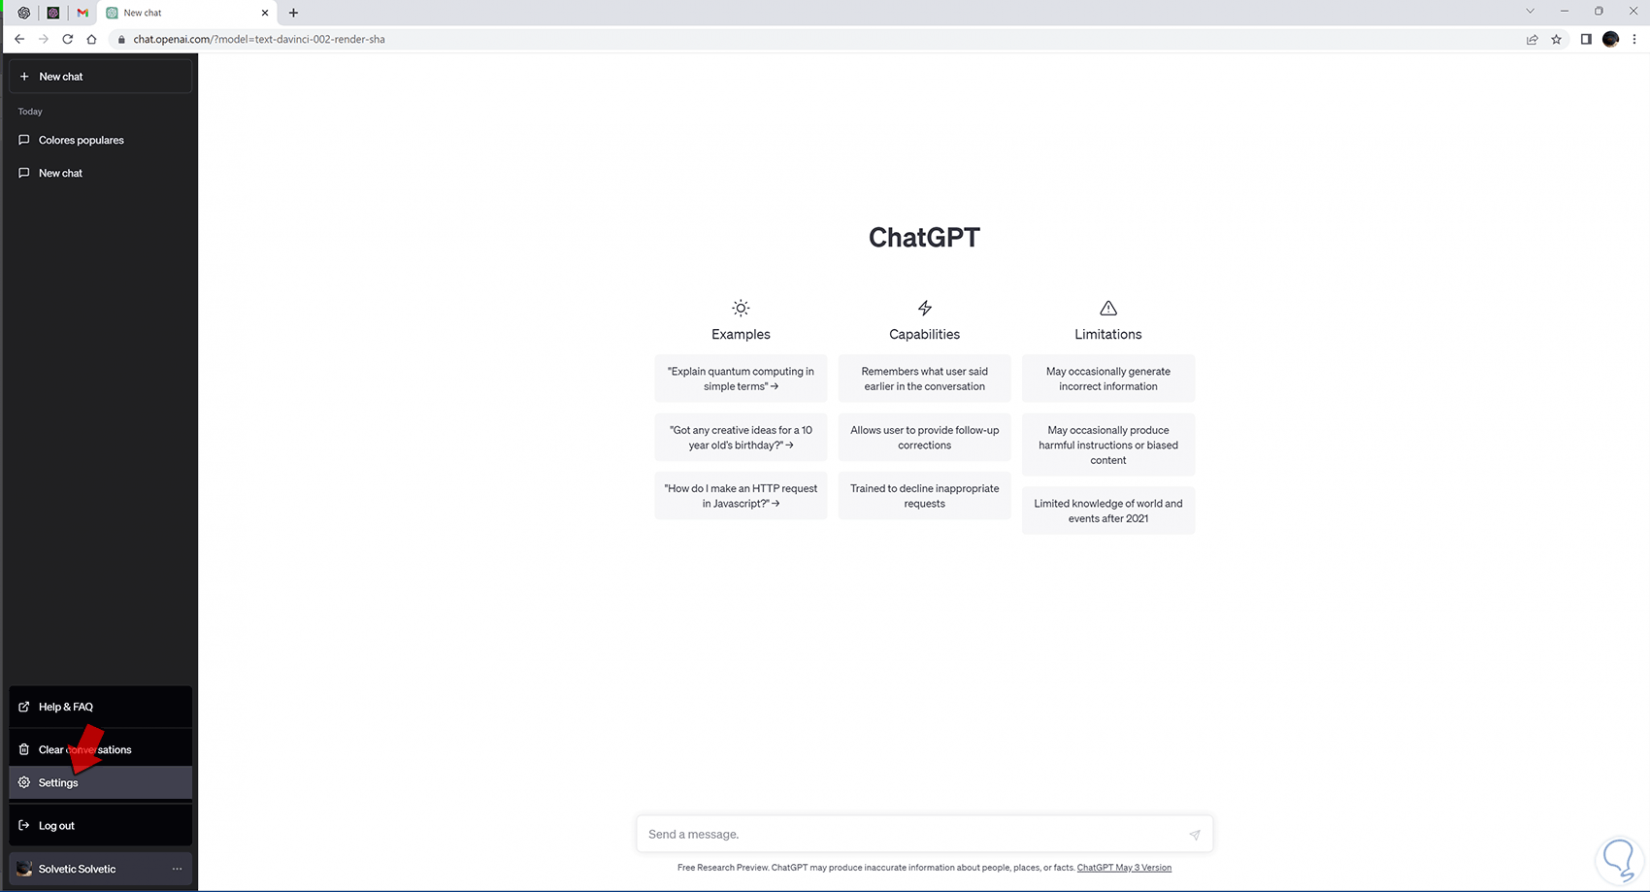
The next thing we will do is click on the “Settings” option that appears:
Step 4
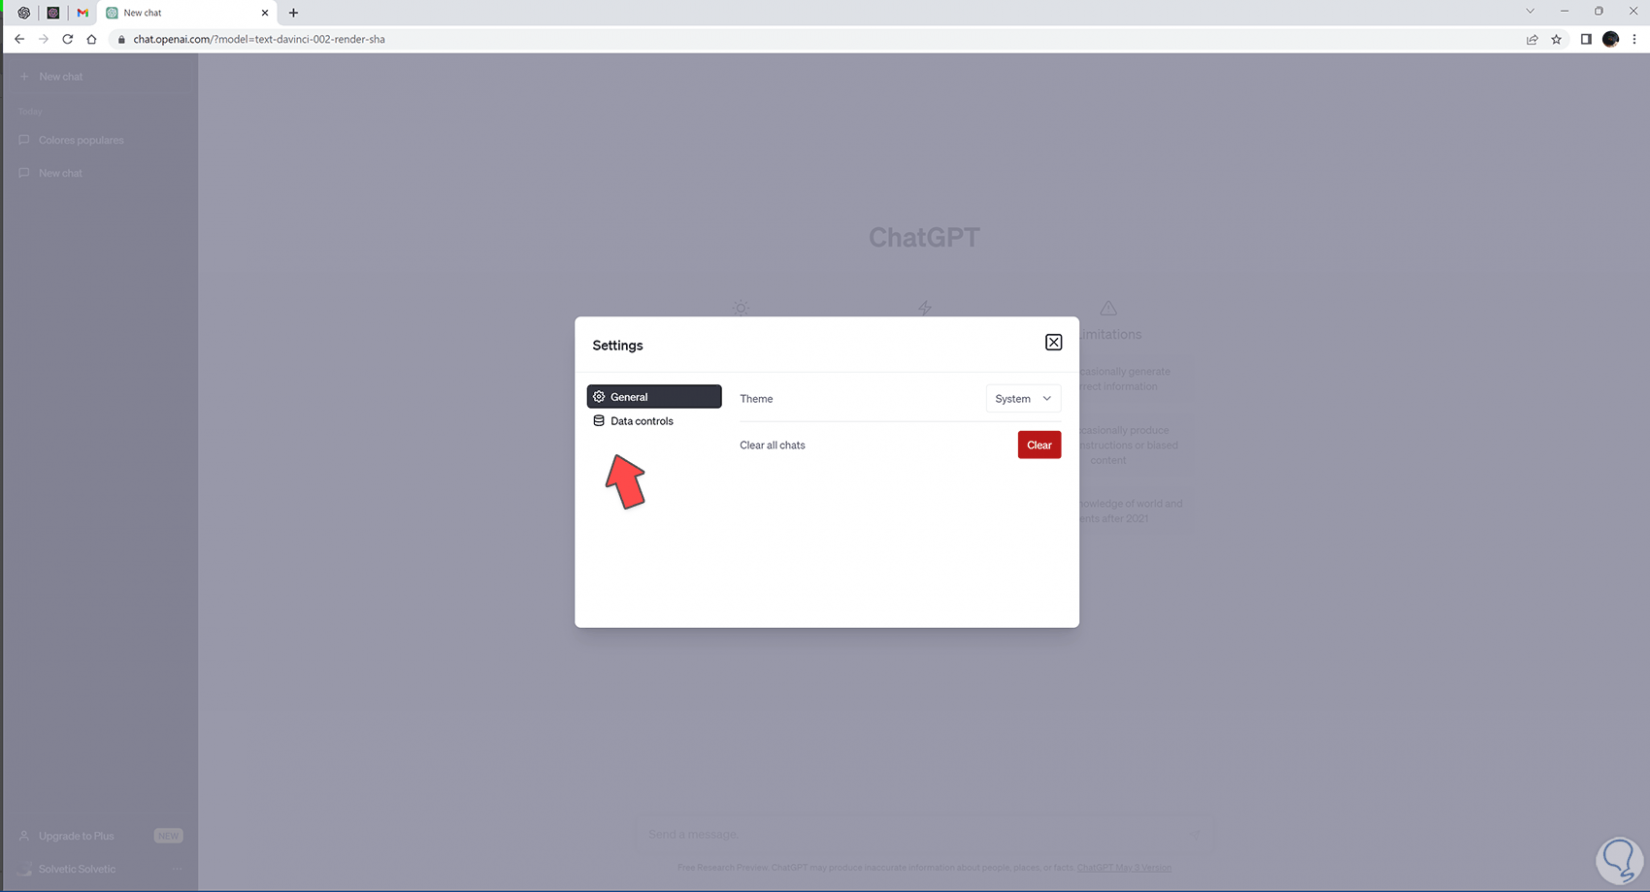
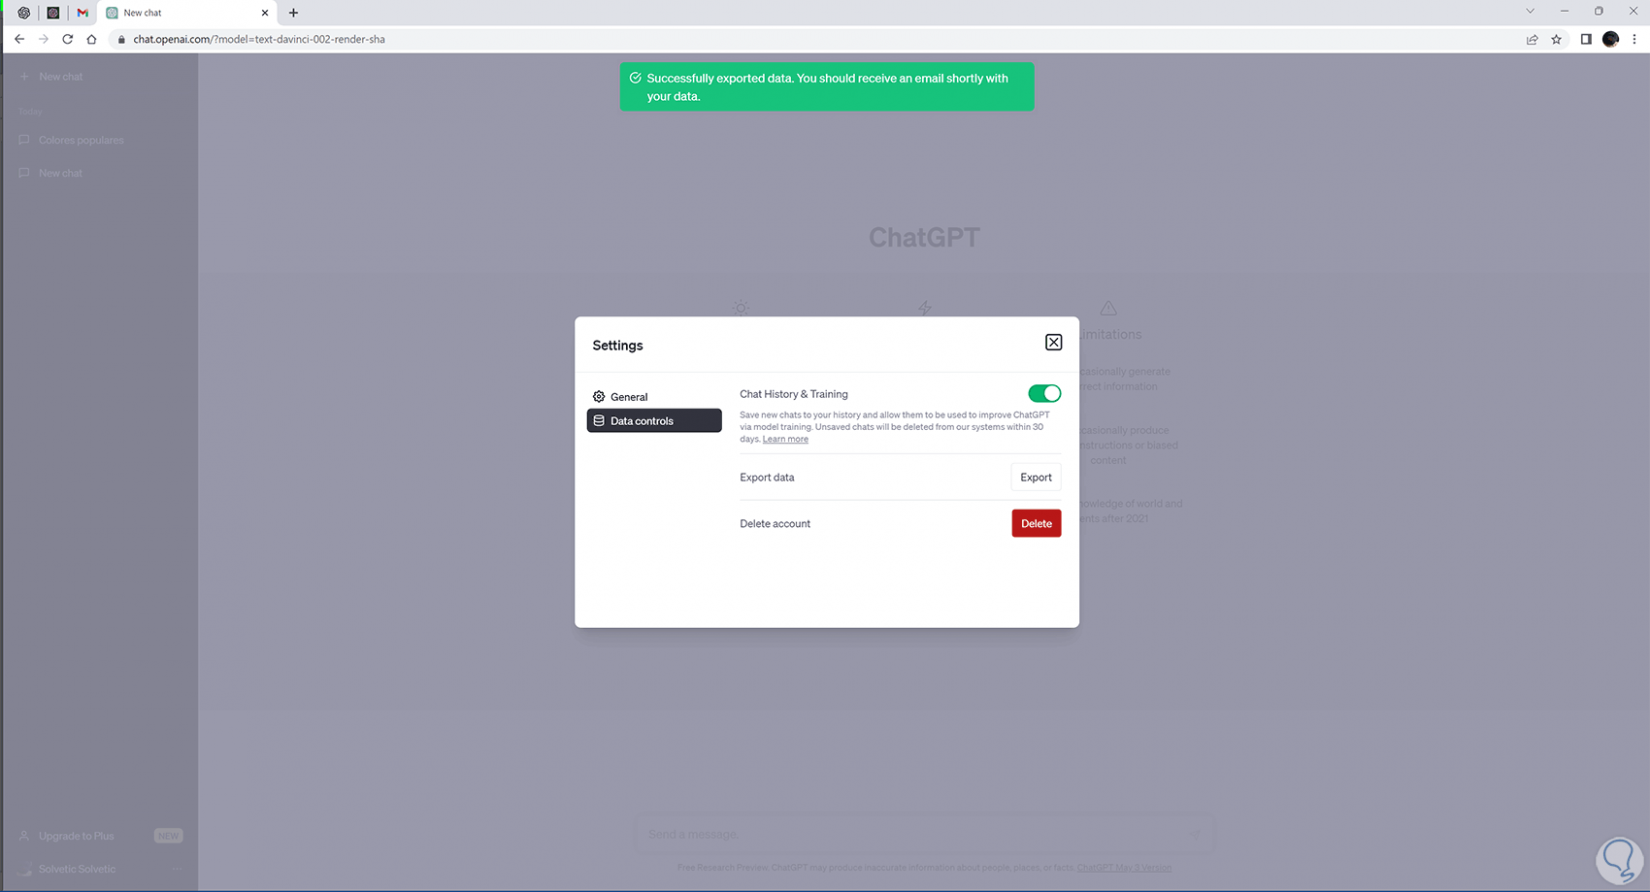
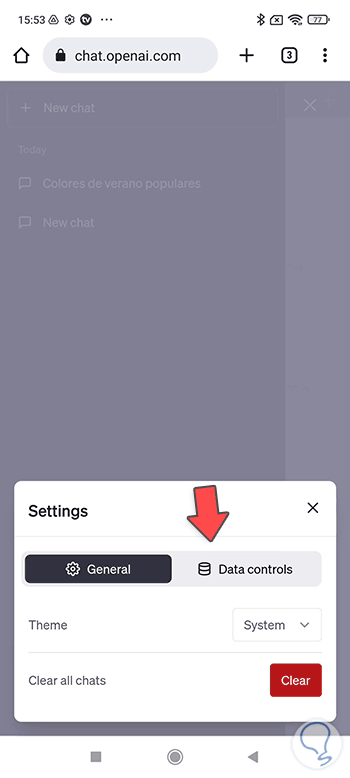
In the displayed window, click on the “Data controls” category.
step 5
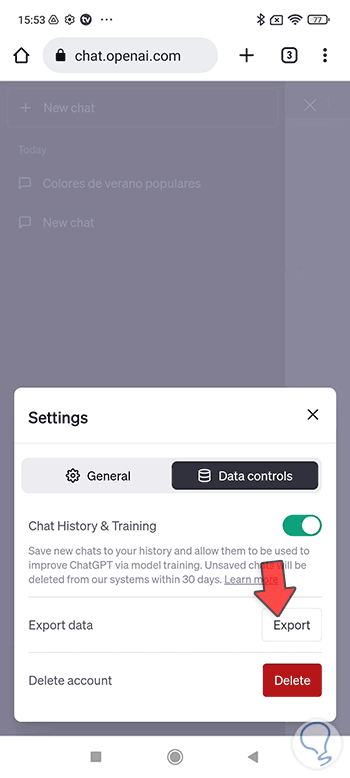
Here we will be able to find the “Export data” option. To export our data we will click on the “Export” option.
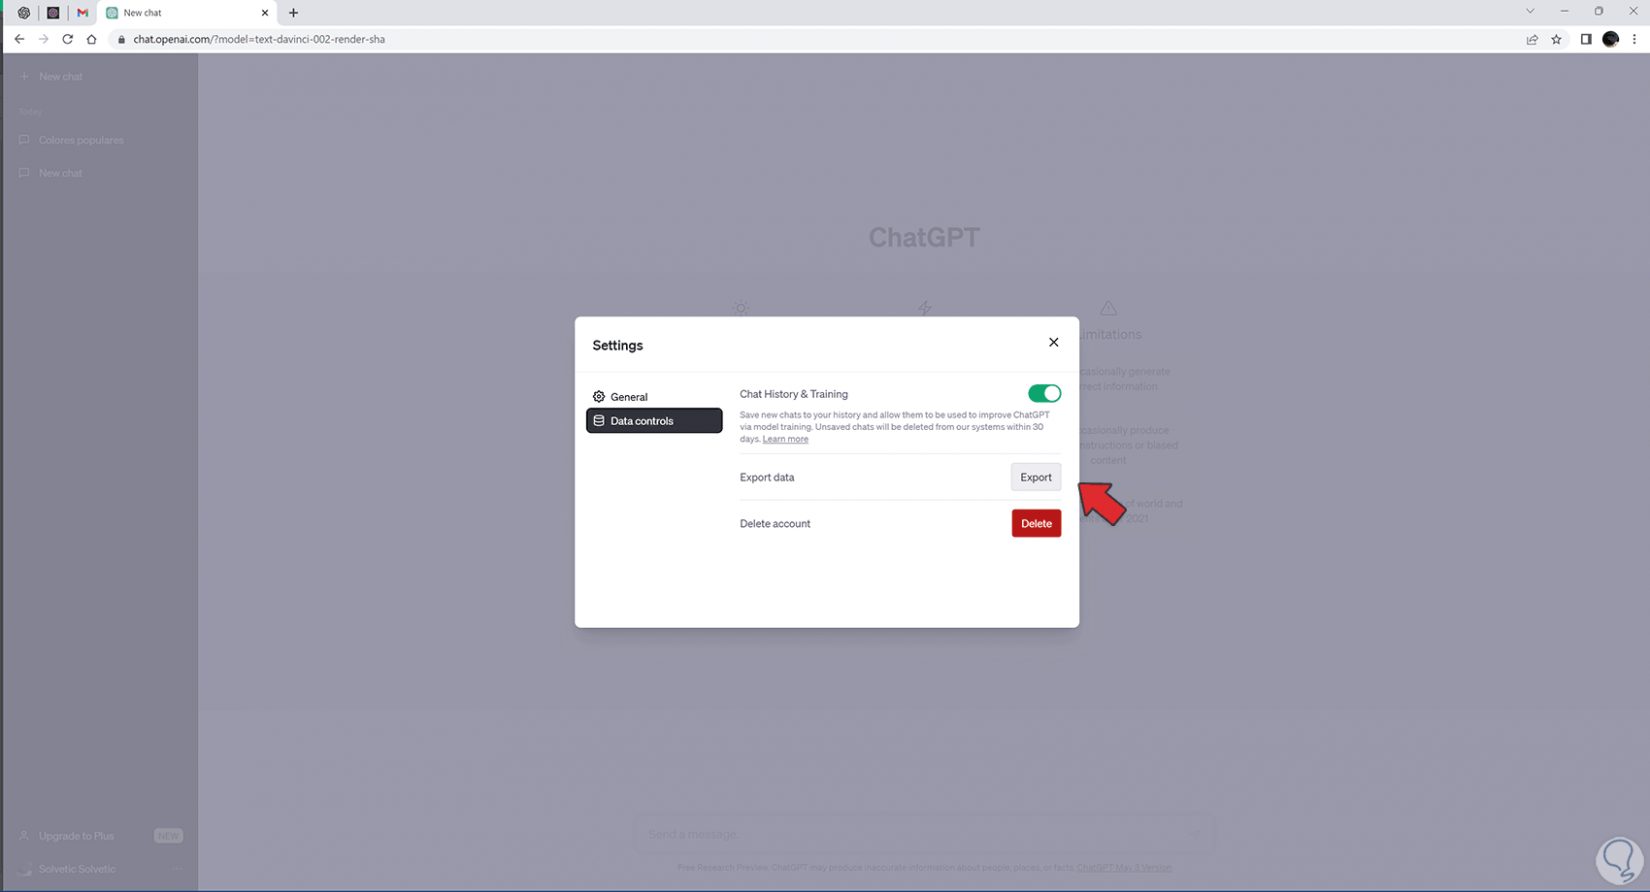
step 6
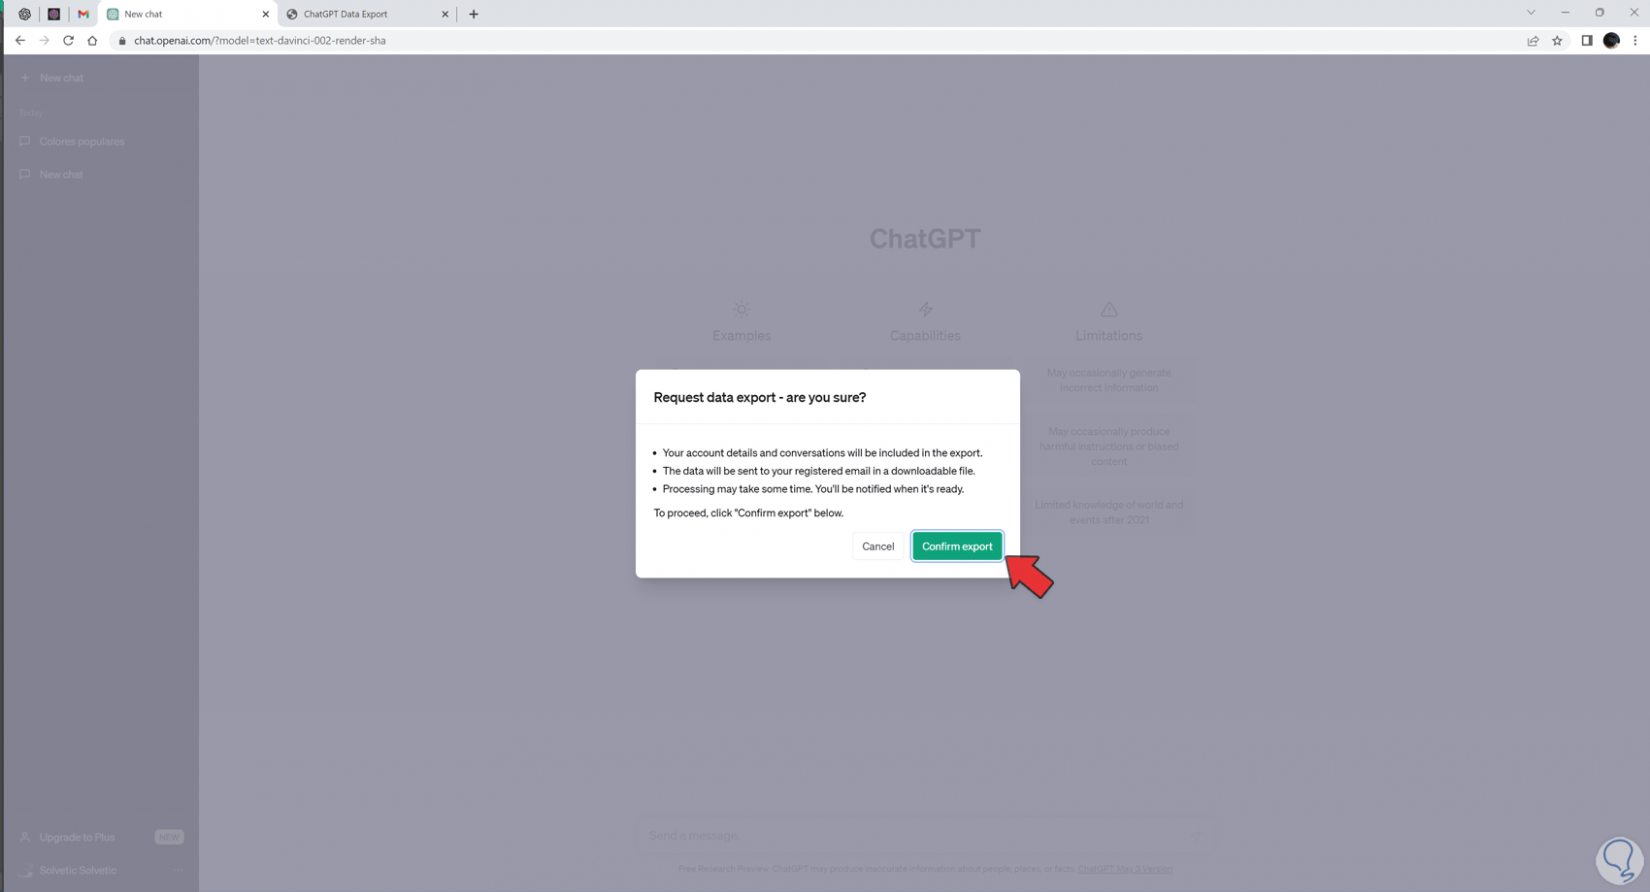
In the next step we will have to confirm the export process with the “Confirm export” option. Before doing so, keep the following in mind:
- Both your account details and conversations will be included in the export.
- Your associated data will be sent to your email linked to the account in downloadable file format.
- Keep in mind that the process may take a while, you will receive a notification when it is available.
step 7
A notice will appear that the export process has been completed.
step 8
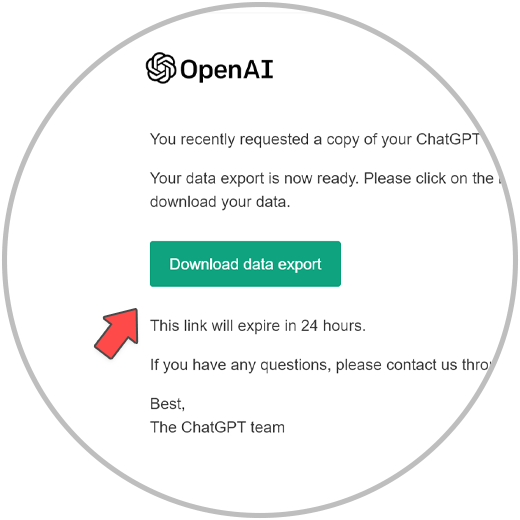
When the downloadable file is ready, we will receive it in our email and we will be able to download it with the “Download data export” button.
step 9
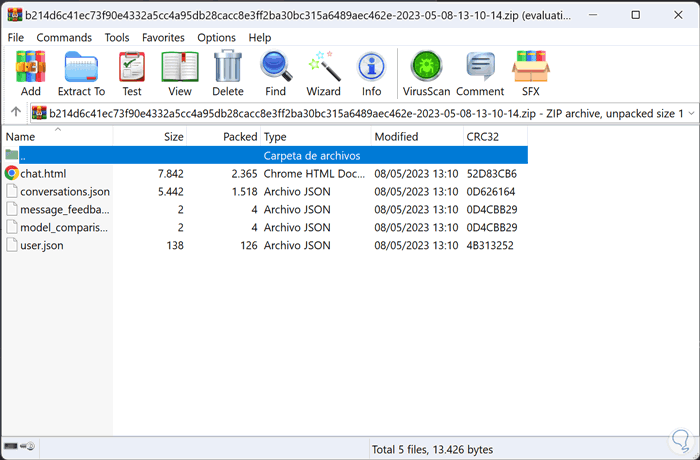
A compressed .zip file will be downloaded with all the information of our data in ChatGPT:
2 Export History and Data Mobile ChatGPT
Step 1
We will start by going from our browser to the official ChatGPT website with the following link:
ChatGPT
Step 2
Click on the drop-down menu to the left of the three lines that we see:

Step 2
Now we are going to go to the bottom where our name appears and click on the 3 points:
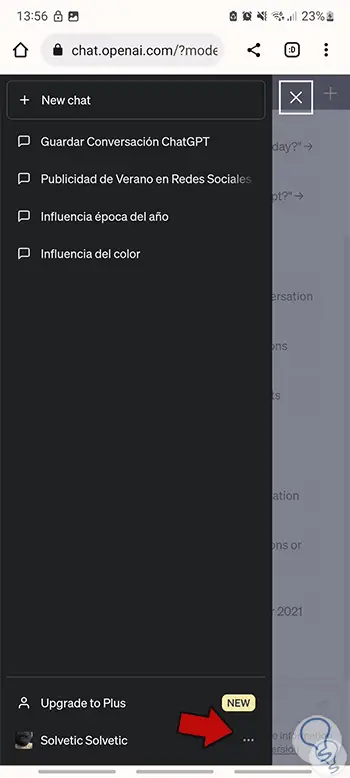
Step 3
Then you have to click on the “Settings” option that appears:
Step 4
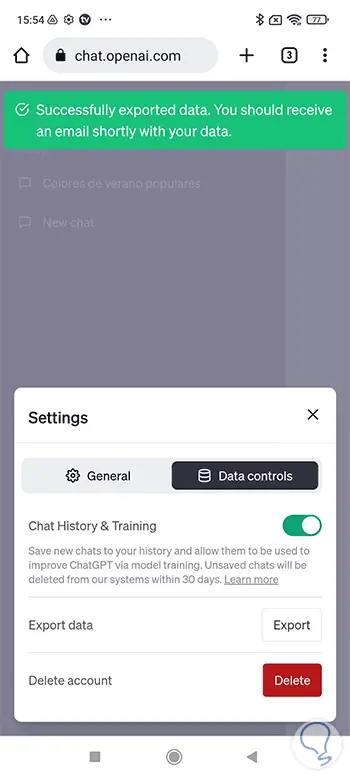
Now enter the category under the name of “Data controls”.
step 5
Within here we have to click on the "Export data" option and start the process by clicking on "Export".
step 6
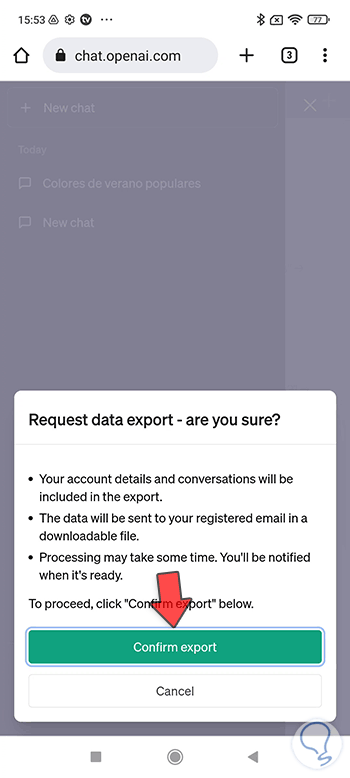
The next thing we do is confirm the export step with “Confirm export”. Before continuing, keep the following in mind:
- Both your account details and conversations will be included in the export.
- Your associated data will be sent to your email linked to the account in downloadable file format.
- Keep in mind that the process may take a while, you will receive a notification when it is available.
step 7
You will see a green notice indicating that the export has been completed and that a confirmation email will be sent to you.
step 8
Once the email arrives, we can download our editable file by clicking on “Download data export”.

step 9
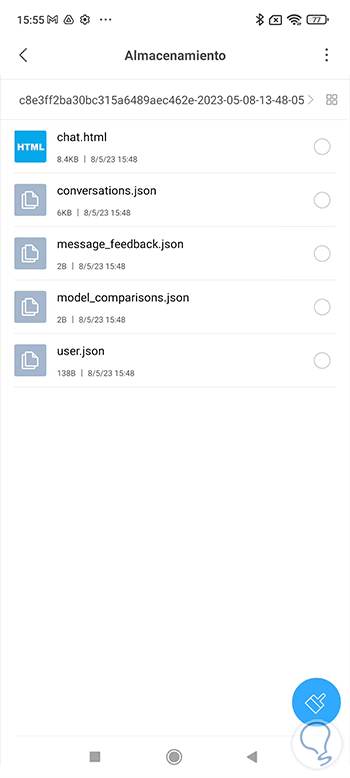
We choose a save path and a compressed .zip file will be downloaded with all the information of our associated data in ChatGPT:
In this way we can export the ChatGPT history or export ChatGPT data and thus save a backup copy of our data in ChatGPT both on PC and mobile..