One of the integrated functions that still exist in Windows 10 but that already has very little use is the traditional and well-known screen saver. We remember that time where we put our name or bubbles as a protector on Windows systems , but because today they do not have the same use. The reason is simple, the screen protector was developed with the mission of helping to preserve the image quality of old monitors, CRT monitors, well known for having a large rear part and its great weight, so that The screen protector helps a general problem of CRT monitors (cathode ray tube) and it is that in them the images were permanently recorded on the screen if they were static for a long time..
This made the image that was static remain visible without the option of removing which logically was a problem not only in appearance but also in the life of the monitor itself, so the screen protector activated a series of movements on the screen to prevent this happen.
Currently LCD monitors, LED and up to 4K, do not have cathode ray tubes so that this problem is not present worse yet many users have these protectors active in Windows 10. TechnoWikis will explain how we can disable this screen saver easily in Windows 10
1. How to disable screen saver in Windows 10 using Settings
Step 1
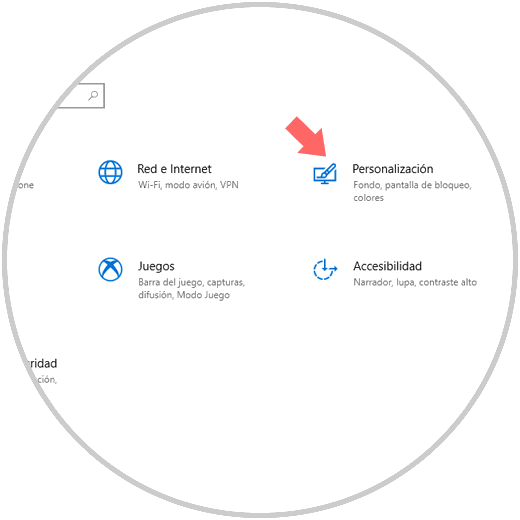
For this we will go to the Start menu and there we select the Configuration utility, the following will be displayed. Let's go to the Personalization section.
Step 2
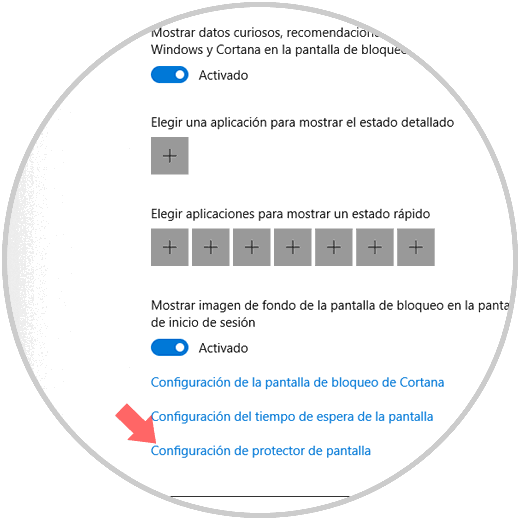
In the displayed window we will go to the Lock screen section and at the bottom we find the Screen saver configuration line:
Step 3
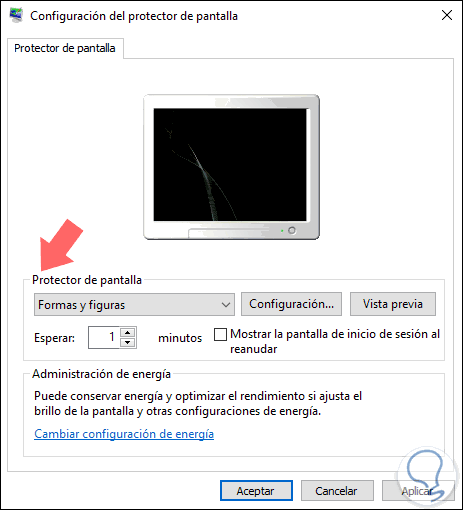
By clicking there we will access the current configuration of our protector with values ​​such as:
- Time in which the protector is activated
- Possibility to activate it with password and more
Step 4
Now, to deactivate, click on the Screen Saver field and select (none) in the displayed options:
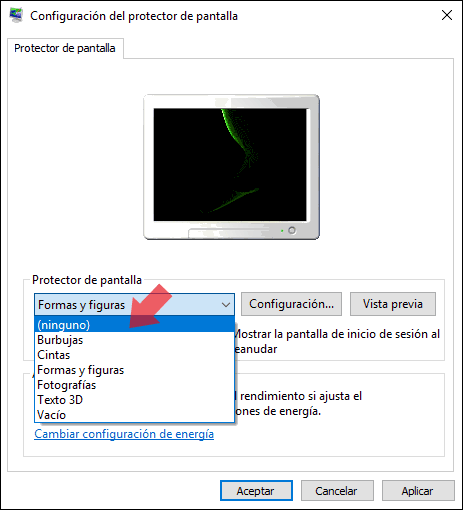
Click on the Apply and Accept button to save the changes..
2. How to disable Windows 10 screensaver using group policies
This option involves making some changes to the system policies, only available for the Pro, Enterprise and Studio versions of Windows 10.
Step 1
To start this process we will use the Windows + R keys and execute the mmc command:
+ R
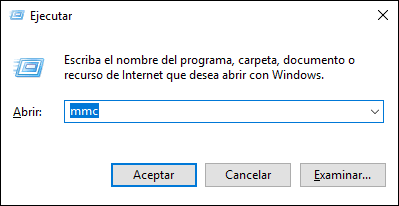
mmc (Microsoft Management Console) is a central console from where we will have the opportunity to manage multiple software and hardware policies in Windows 10.
Step 2
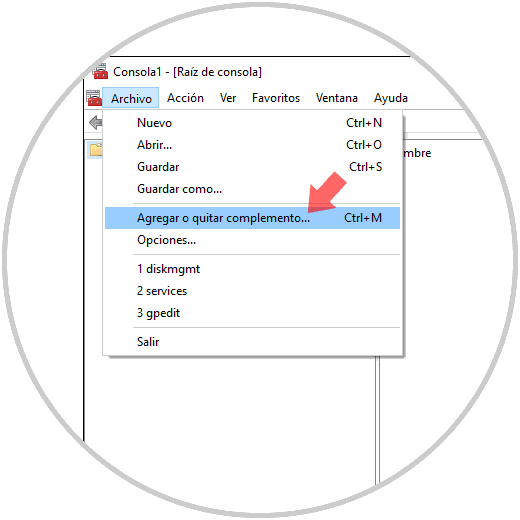
Press Enter to access it and in the pop-up window we must go to the File menu and there select the option Add or remove add-ons or we can use the key combination Ctrl + M:
Step 3
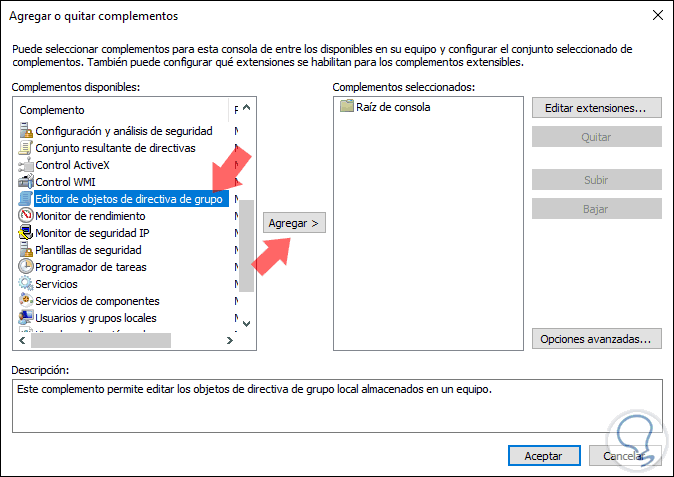
In the displayed window, select the Group Policy Object Editor line and click on the Add button. Click on OK to apply the changes.
Step 4
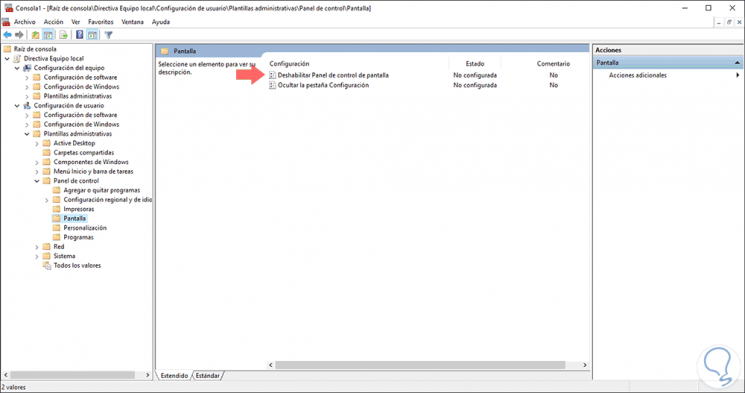
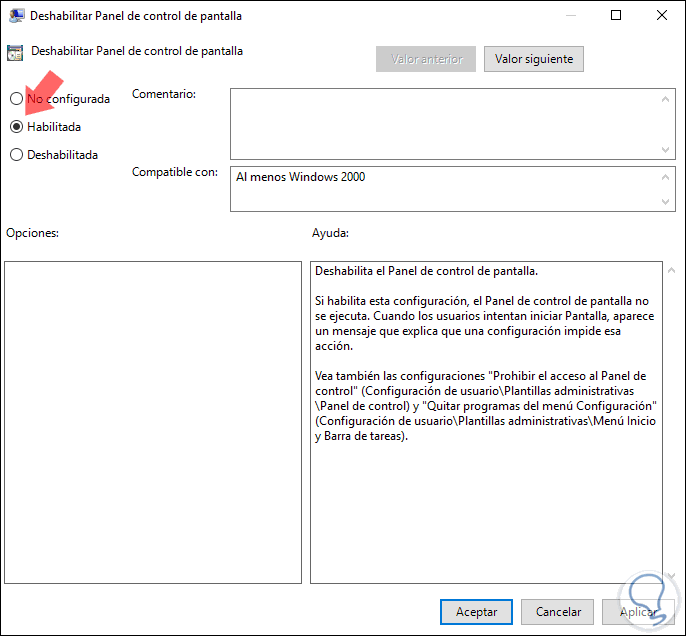
Now, in the central console, we will go to the section User Configuration / Administrative Templates / Control Panel / Screen, there we must locate the policy called Disable Screen Control Panel:
Step 5
We double click on this policy and enable it to prevent the screen saver from being active, this policy hides those system options. Click on Apply and Accept to save the changes.
With any of these methods it will be possible to deactivate and prevent the screen saver from being activated in Windows 10..