Windows 10 operating systems automatically integrate, although disabled, screen savers whose mission is to protect and improve the life of the monitor, no matter what type of element we use as a protector (images, photos, text, etc.), your Its function is to prevent some of its manufacturing elements, such as phosphorus, from being spent without just cause and this leads to a much shorter life than expected. Being able to configure our screen saver properties allows us to define what we want to appear on our monitor. If our computer is shared or we have it at work, it may not be convenient to display an image gallery just as it would be necessary to activate the login to protect our equipment when we are absent..
It is true that, with the most current screens, LED, 4K, LCD, etc., this is not a problem, we can use these protectors in order to add security or improve the appearance of our desktop environment , and Windows 10 offers us Modern and dynamic alternatives to set the screen saver like bubbles, photos, tapes and 3D text screen protectors.
TechnoWikis will explain how we can enable and set a screen saver in Windows 10..
To keep up, remember to subscribe to our YouTube channel! SUBSCRIBE
1. Change screen saver settings from Start menu in Windows 10
Step 1
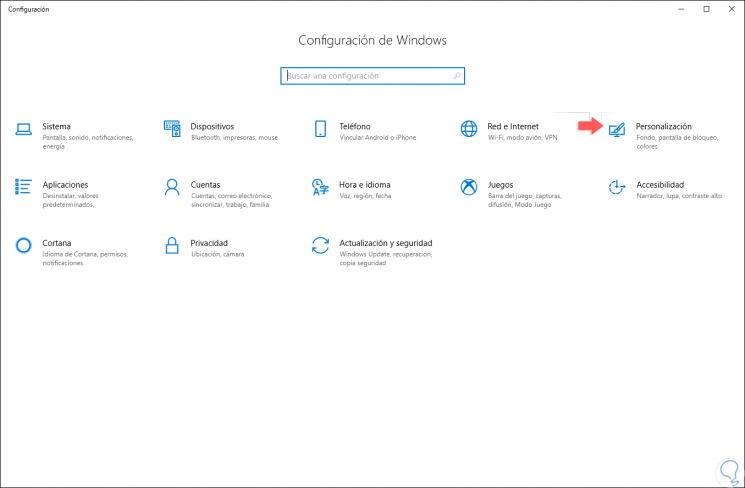
To set this screensaver in Windows 10, we will go to the Start menu and there we will select the “Configuration†utility where we will see the following:
Step 2
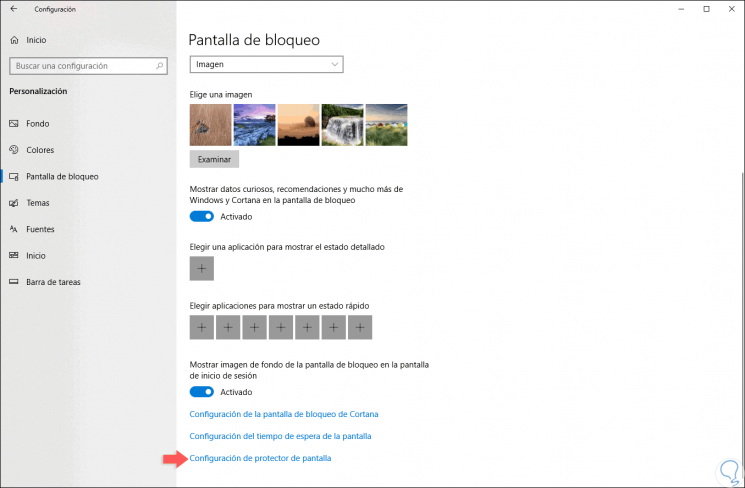
There we go to the “Personalization†category and in the new window we will go to the “Lock screen†section and at the bottom we will see the “Screen saver settings†line:
Step 3
By clicking on this line we can see that the protector is disabled by default in Windows 10:
Step 4
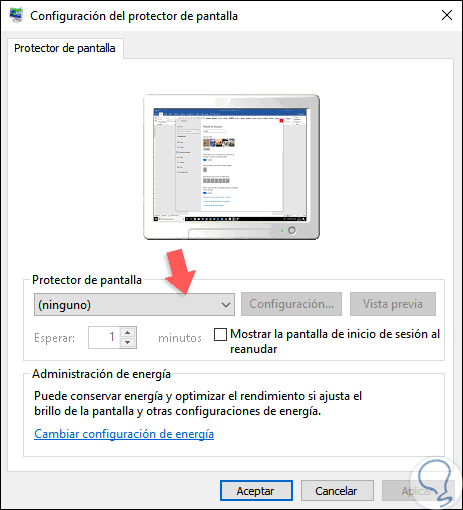
To activate it, simply select one of the available options that are:

Step 5
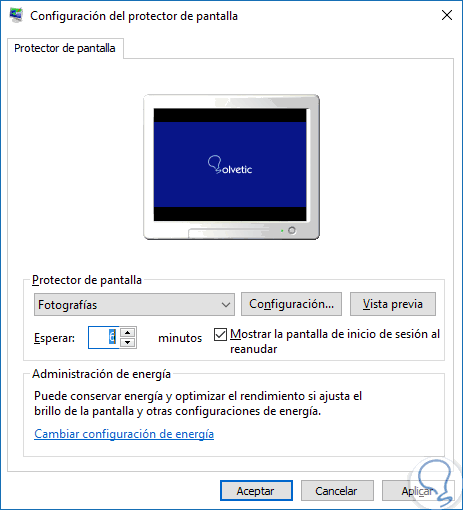
Once this option is selected, we can define values ​​as. Once the desired option is defined, click on the Apply and Accept button to save the changes.
- Time in which the protector will be activated
- Show the login screen in which you need to enter the Windows password
- Configure the text, images or photos to display
- Get a preview of the protector
2. Change screen saver settings from search engine in Windows 10
Now we will see another simple option to change the options of our screen saver.
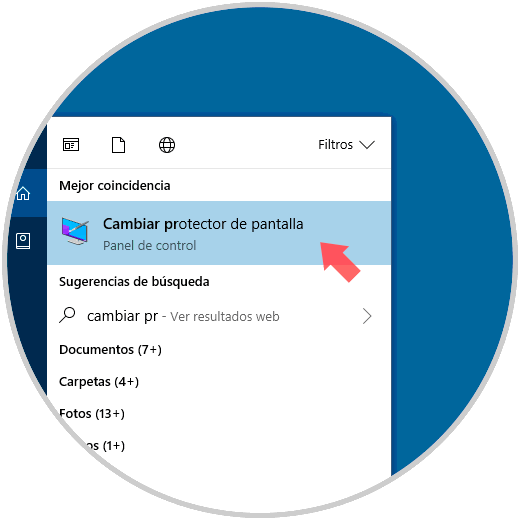
Step 1
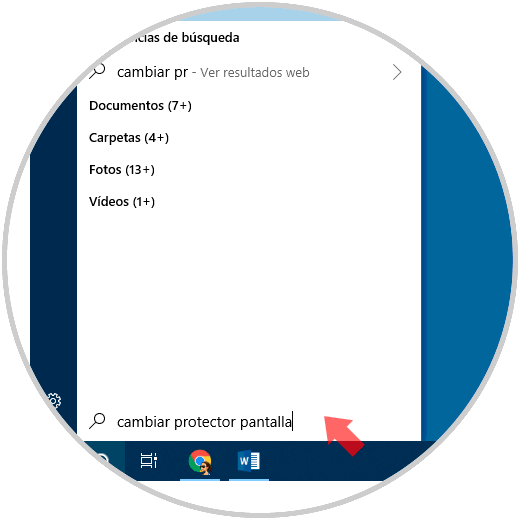
The first thing will be to go to the search engine in the lower left of our toolbar and write “change screen saverâ€.
Step 2
We will see that the option we are looking for is displayed so we click on it.
Step 3
The window will open to configure our screen saver, whether the waiting time, the home screen or the waiting time:
Step 4
After making the changes we can see how our new screensaver would look although we can also use the "Preview" option.
It's that simple to configure the screen saver in Windows 10.