Windows 10 is a versatile system, perhaps one of Microsoft's most versatile and beloved systems for its various functions, features, and security options, but like any system, it is subject to failures. These failures range from incorrect startup, crashes, sudden reboots, and finally, various symptoms that can originate both in the system's file system and in processes, services, or other parameters that directly affect the operating system..
Repair reasons
Some symptoms that indicate that the system needs repair are:
- Connectivity issues for some devices
- System slowness due to various causes of both software and hardware
- Blue Screen of Death (BSOD)
There are various methods to repair Windows 10 and TechnoWikis brings you these solutions so that you can select the one that best suits your needs and have a system in optimal conditions.
To stay up to date, remember to subscribe to our YouTube channel!
SUBSCRIBE ON YOUTUBE
1 How to repair Windows 10 using Safe Mode
One of the options that we can use to repair our system is accessing Safe Mode, when using this mode Windows 10 will start with a special boot in which minimal use of drivers, services and settings is made to carry out administrative tasks. in a centralized way, you should know that a high percentage of third-party programs and services will not start, to use or access this safe mode, first of all we are going to make use of the automatic repair function which is active in Windows 10 and that by itself searches for and corrects errors present at the start of the system.
Step 1
For this it is possible to restart the PC three times or press the F8 key during the restart, we will see how the automatic repair starts:

Step 2
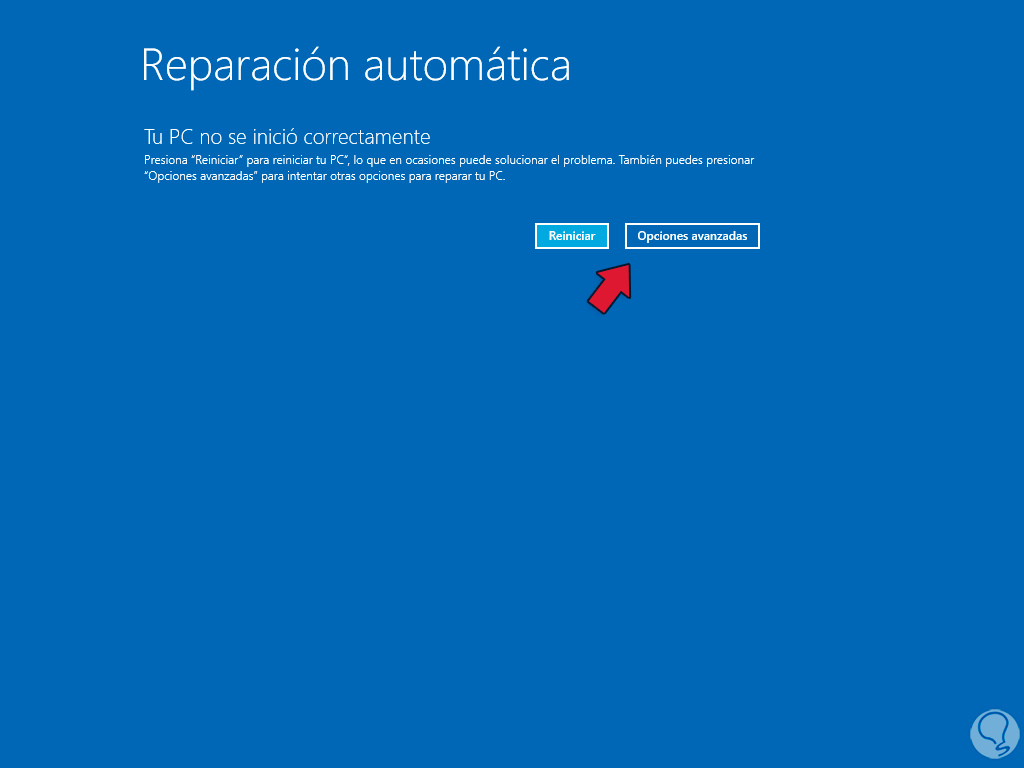
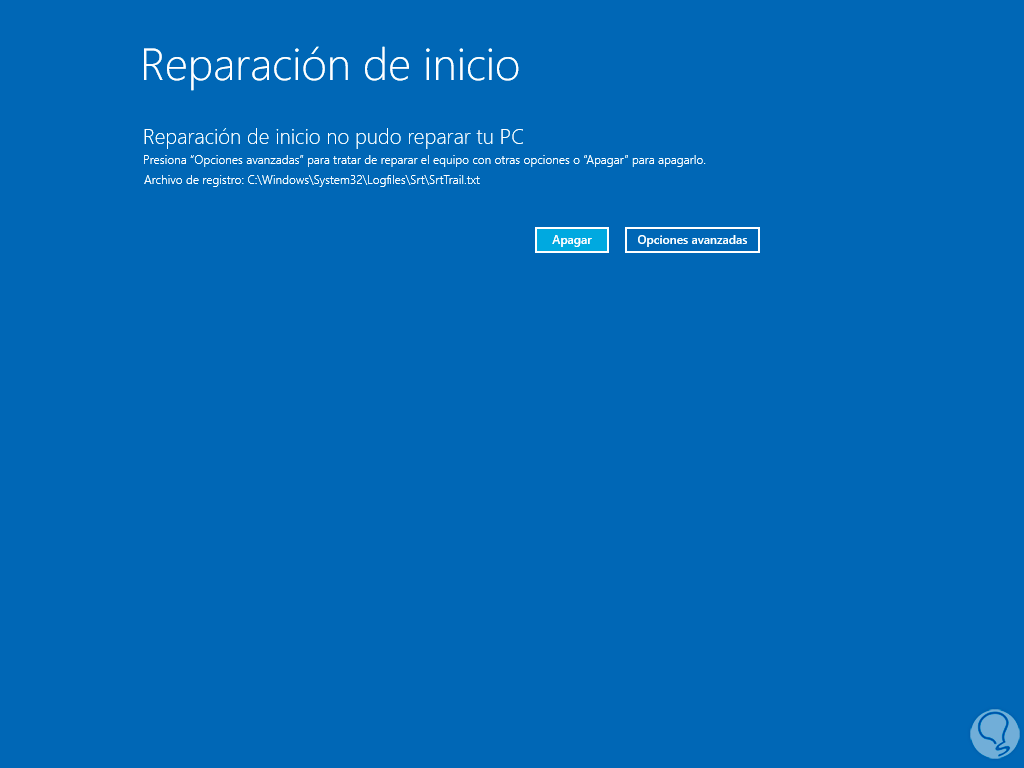
After a moment the equipment diagnostic will be done. As a general rule in Windows 10 when this option is used we will always see this error:

Step 3
This is an internal Windows 10 error that occurs when the cause of the error is not detected or its correction is not possible due to permission issues, there we go to "Advanced options"
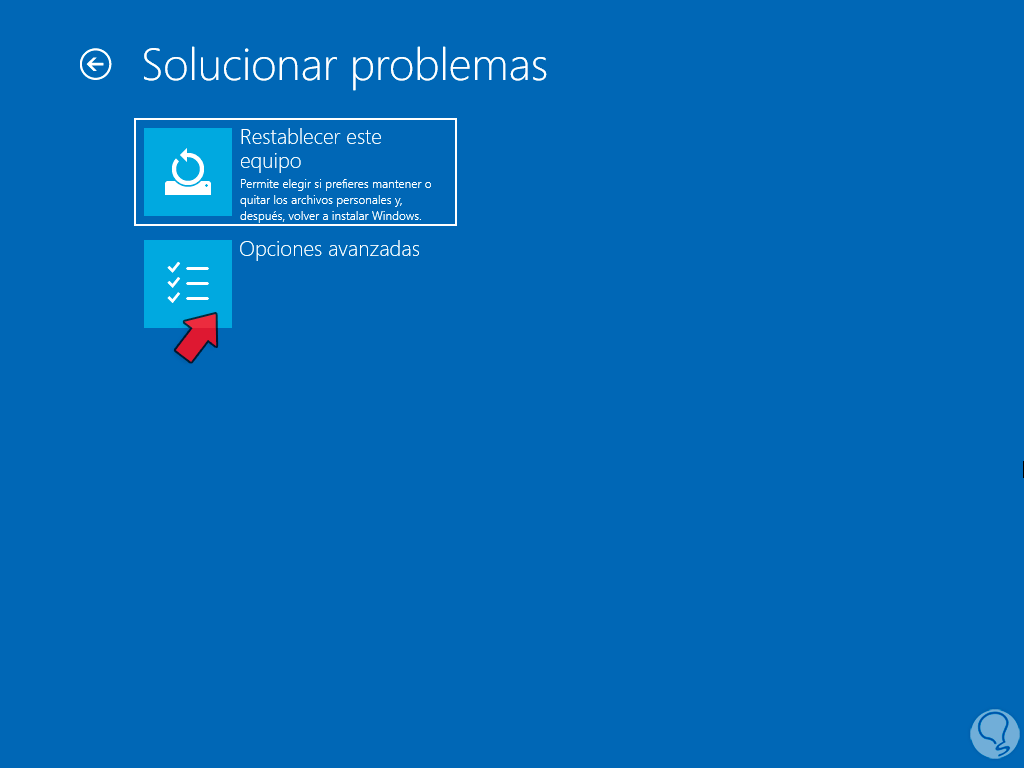
Step 4
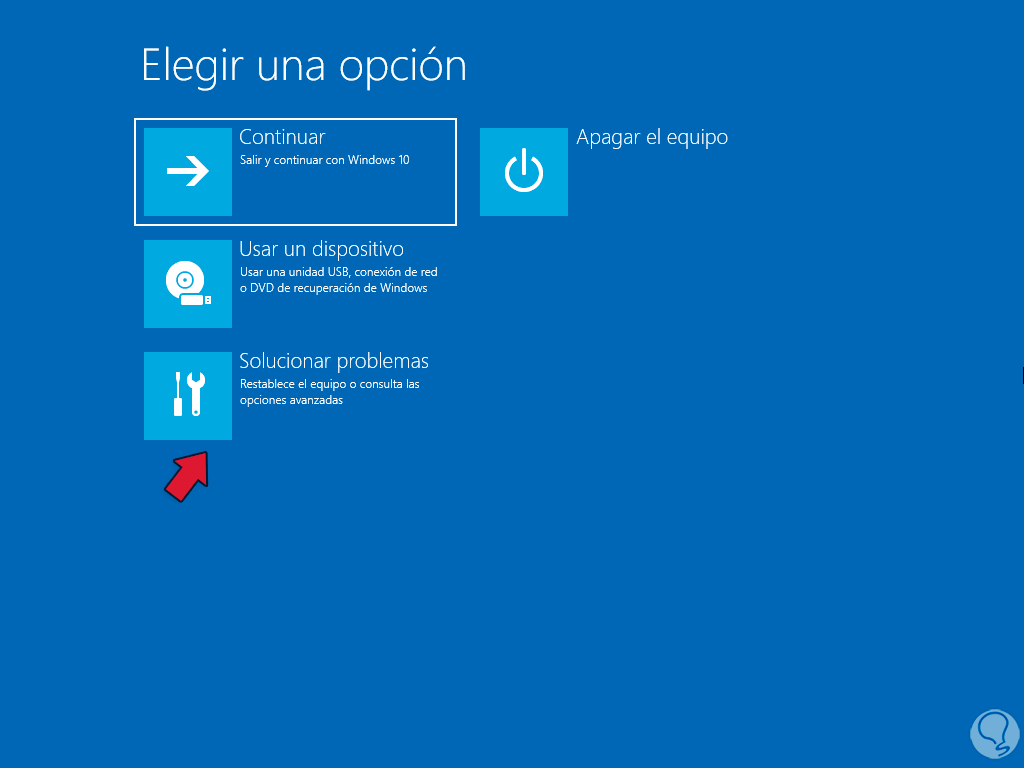
With this we will go to the available menu of these options. To be able to access safe mode, we will first click on “Troubleshoot”
step 5
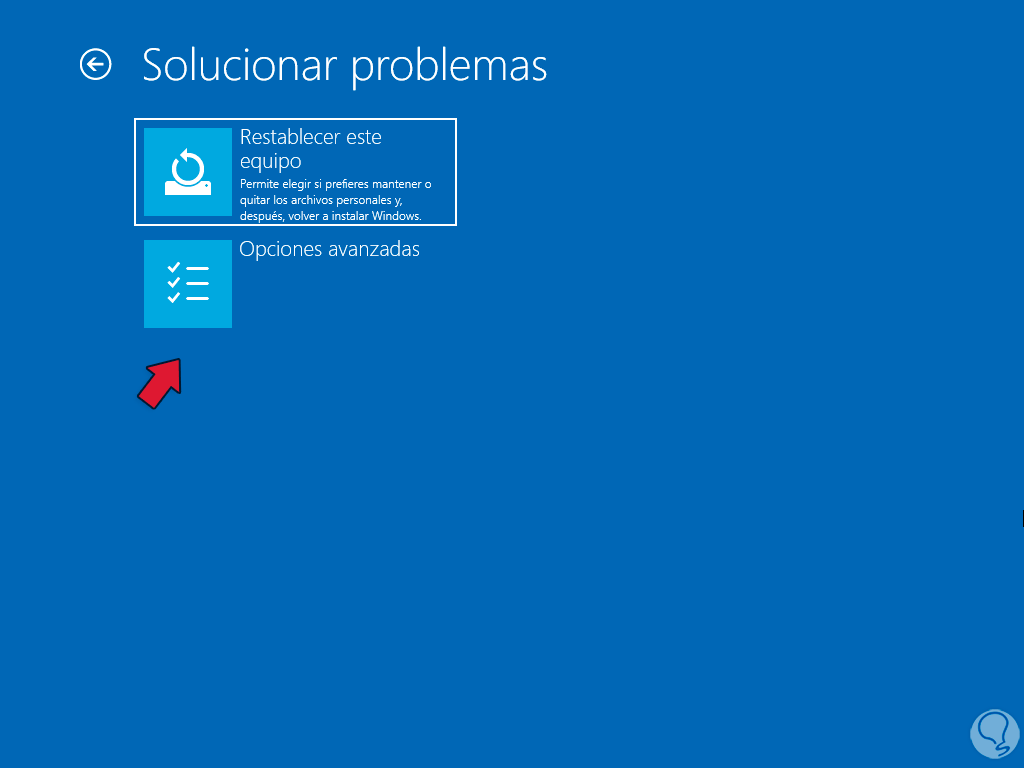
then we click on "Advanced options":
step 6
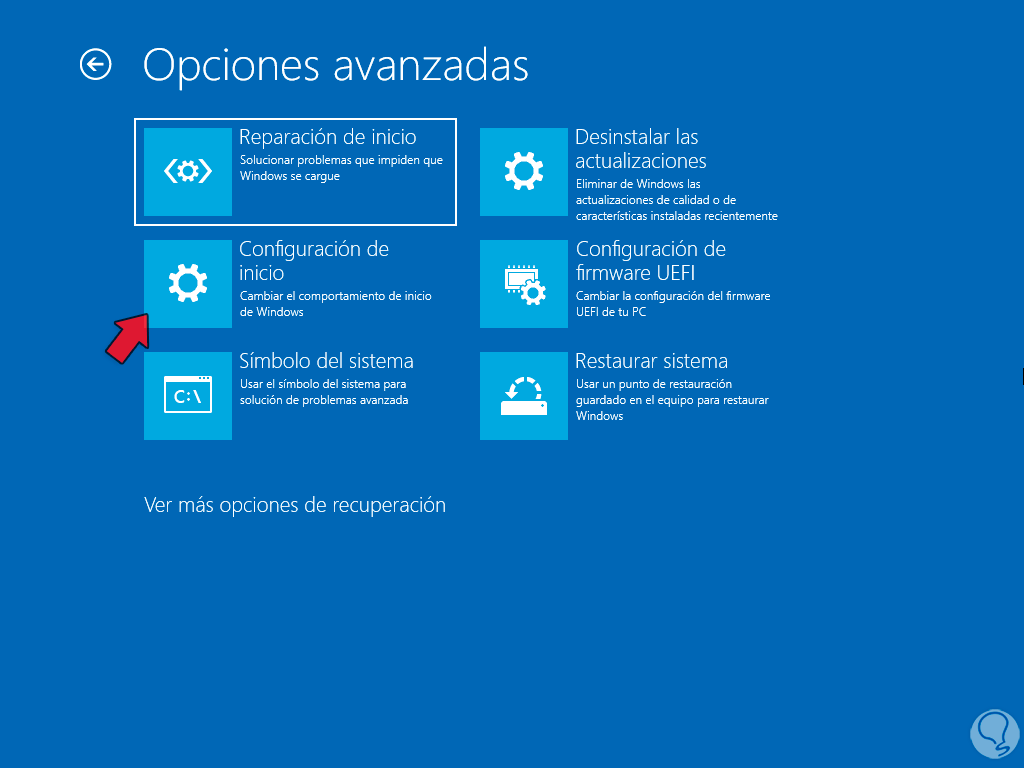
We will access all the advanced options. In the main menu you must click on the "Startup Settings" option to access the following:
step 7
We click on the "Restart" button to access the various options available:
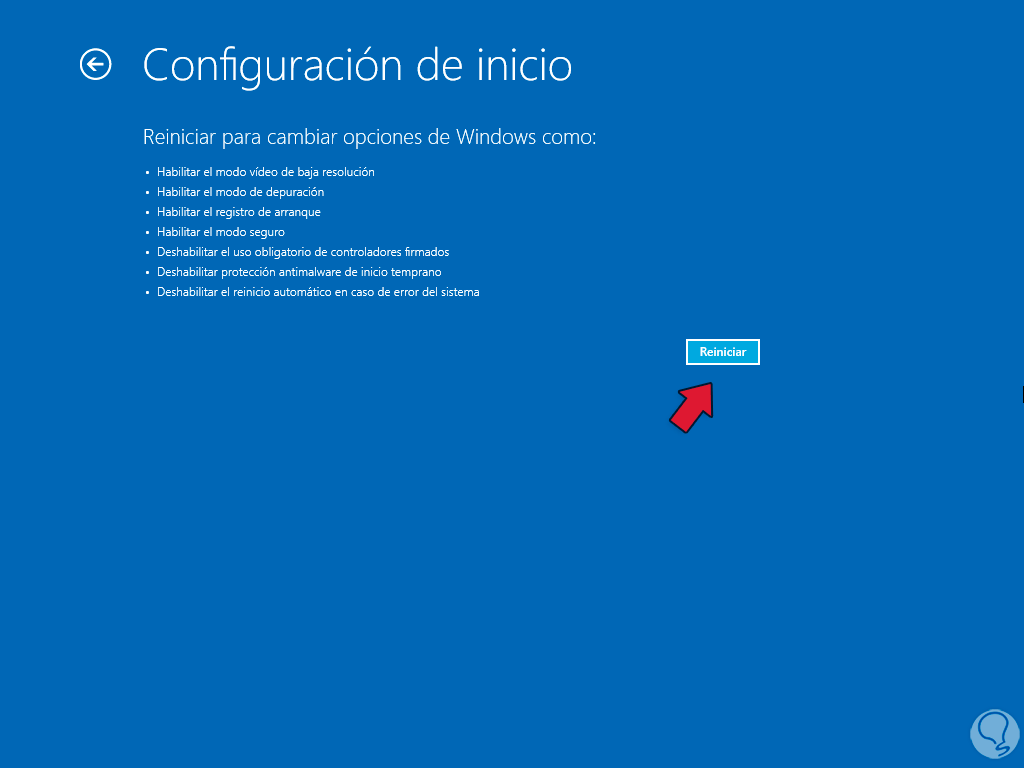
step 8
In our case we are going to press the F4 key to use Safe Mode,
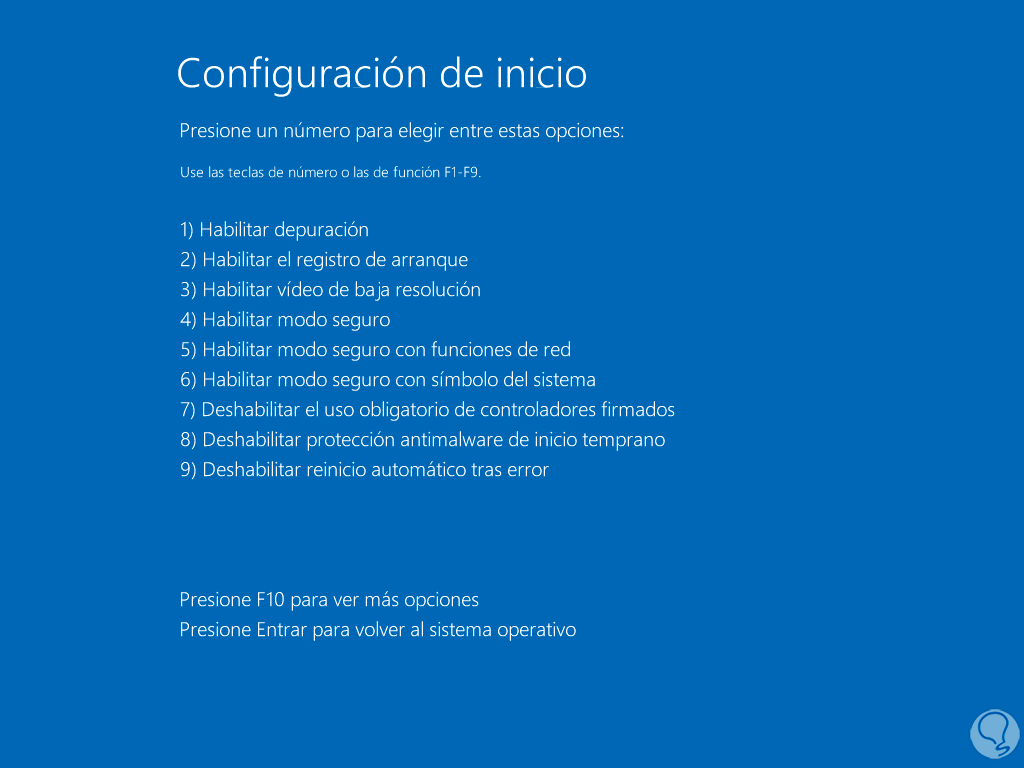
step 9
the system will be rebooted again:

step 10
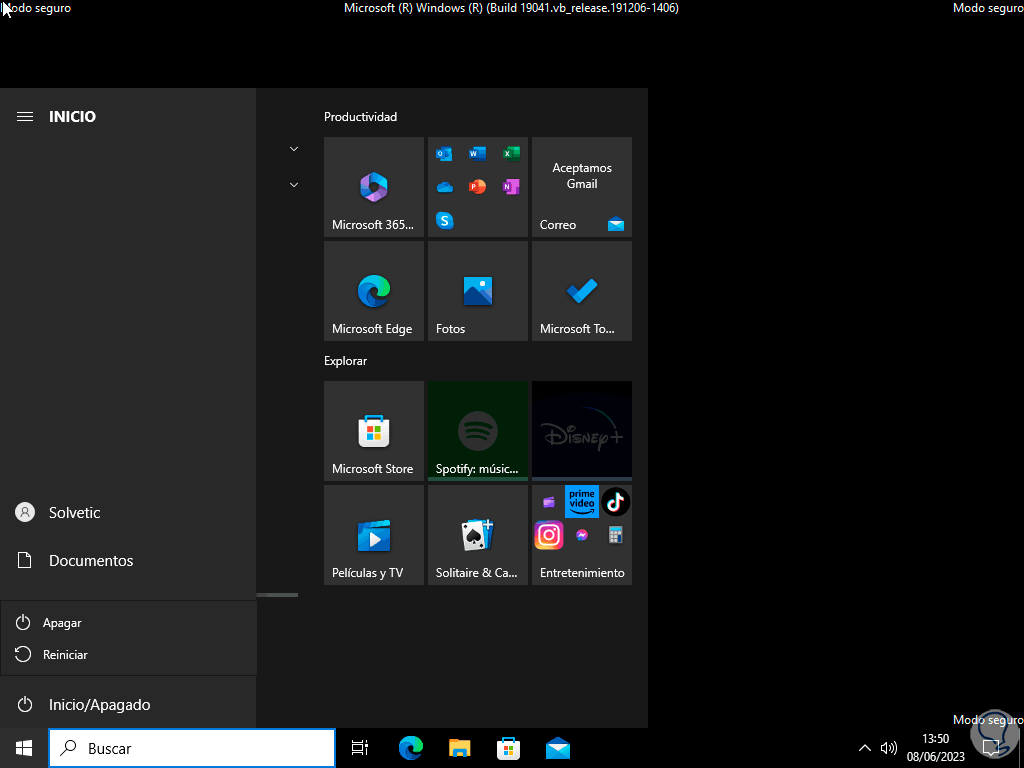
After this we are going to log in to Windows 10 but using Safe Mode:

step 11
If the session starts, it means that the computer can boot normally and possibly some process was affected:

step 12
Now we restart Windows to access the already known environment as normal:
step 13
We wait for the system to reboot:

step 14
We see that the system loads normally:

2 How to repair Windows 10 by repairing the System Startup
This is a function integrated into the disk in Windows 10 and with which it seeks to perform a complete analysis of each component that comes into play in the boot process and if any failure is detected it will be corrected, all this is linked to the boot manager .
Step 1
To use this option it will be necessary to access the advanced startup and for this we click on the shutdown button, then press the Shift key and then click on "Restart":

Step 2
We will have access to the advanced options. We click on "Troubleshoot" to see this:

Step 3
After this we are going to click on “Advanced options”.

Step 4
and in the main menu we will click on "Startup Repair":

step 5
By clicking there we will see that the system does a small restart:

step 6
Now we will see the following:
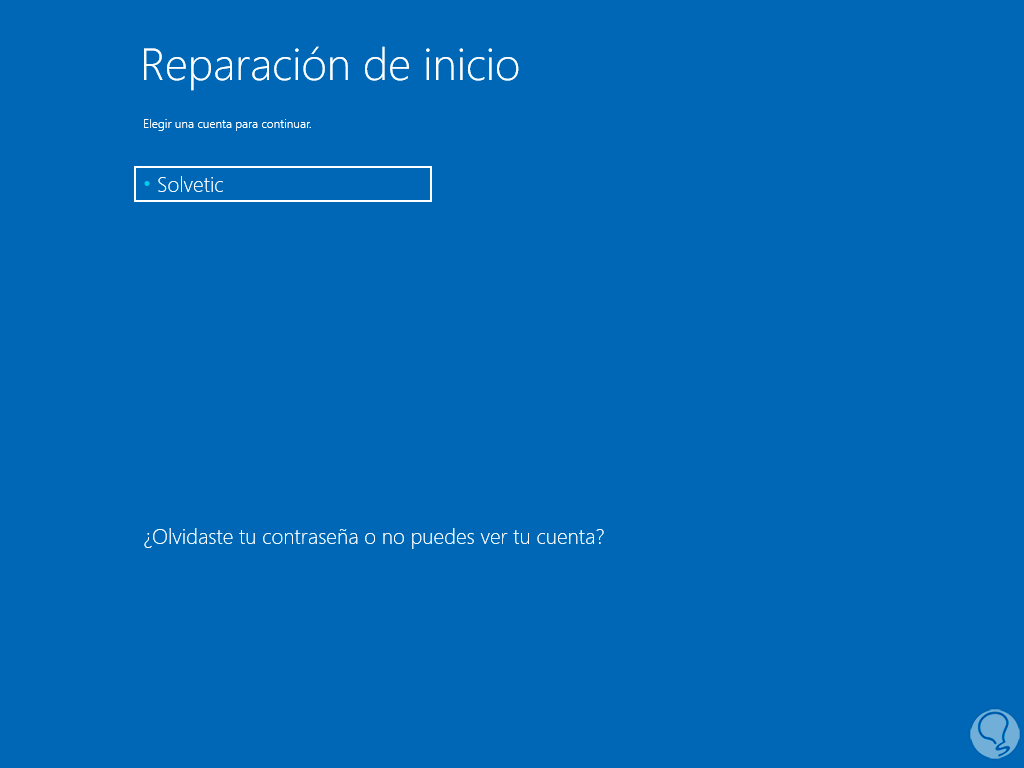
step 7
We select the user to use and then we must enter its password:
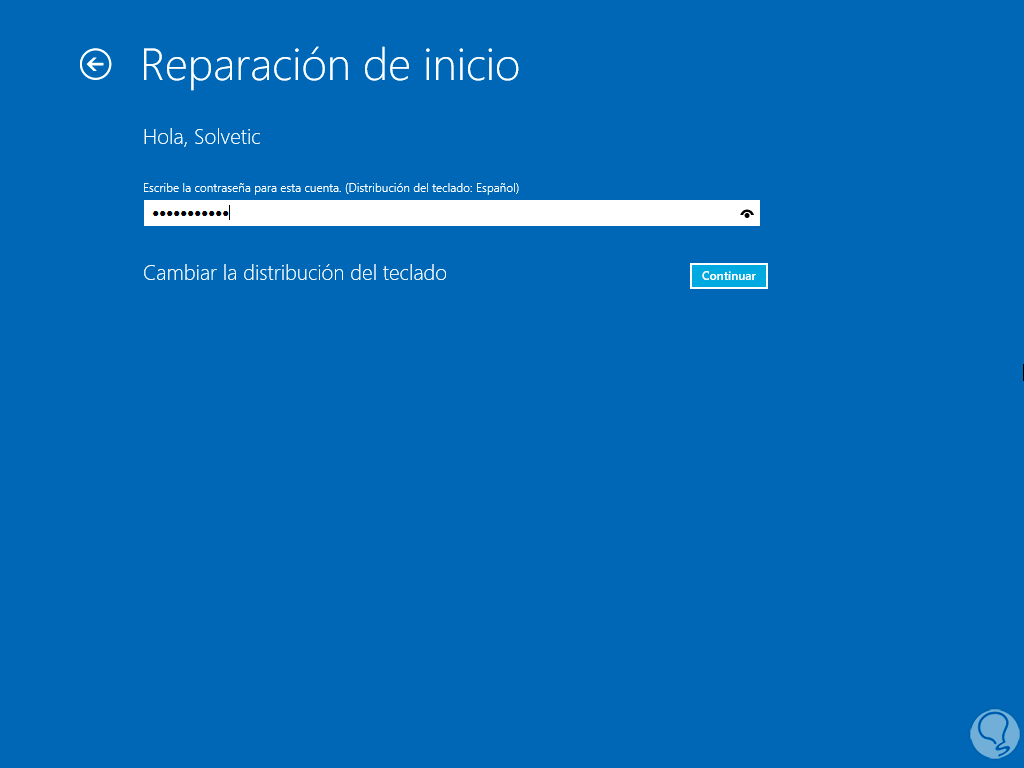
step 8
The automatic repair and diagnosis of the equipment will start to find faults that affect its use in Windows 10:
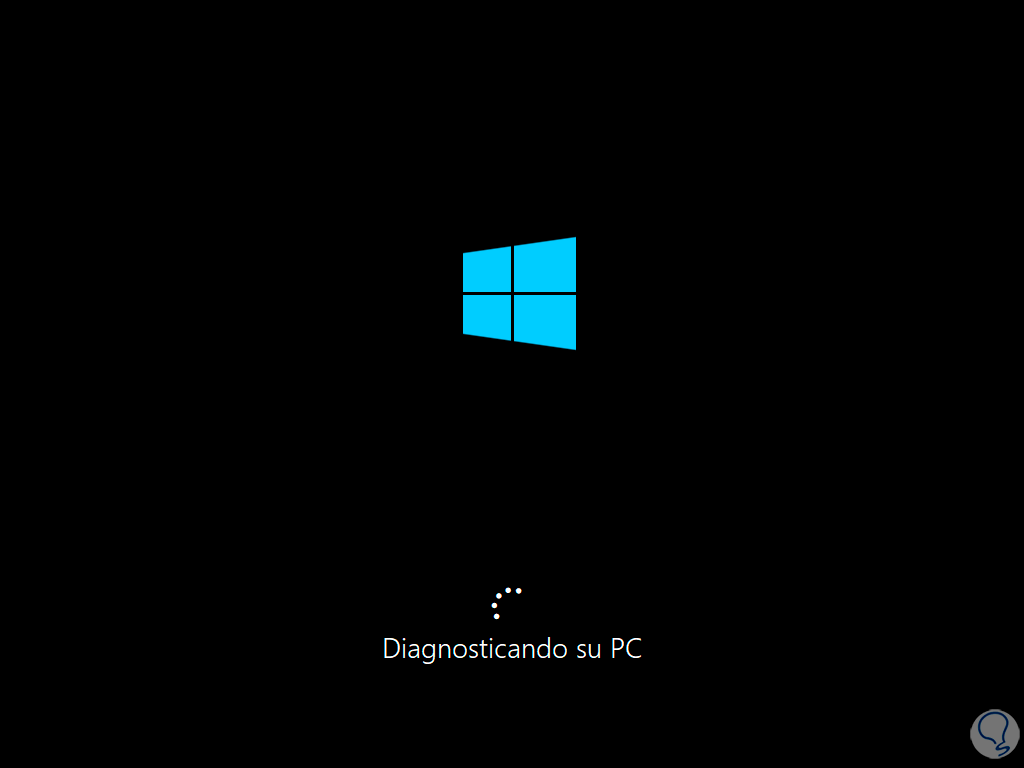
step 9
It is likely that we will again see that the check for failures could not be performed:
3 How to repair Windows 10 by restoring the system
The System Restore function gives us the opportunity to allow the equipment to return to a previous date where everything worked correctly, this is achieved using restore points and we must know that as we make changes to the equipment or updates are installed some may affect system stability..
Step 1
To use this method while in the advanced options, after using the automatic repair, we click on "Troubleshoot" and then go to "Advanced options":
Step 2
In the main menu we will see the following:
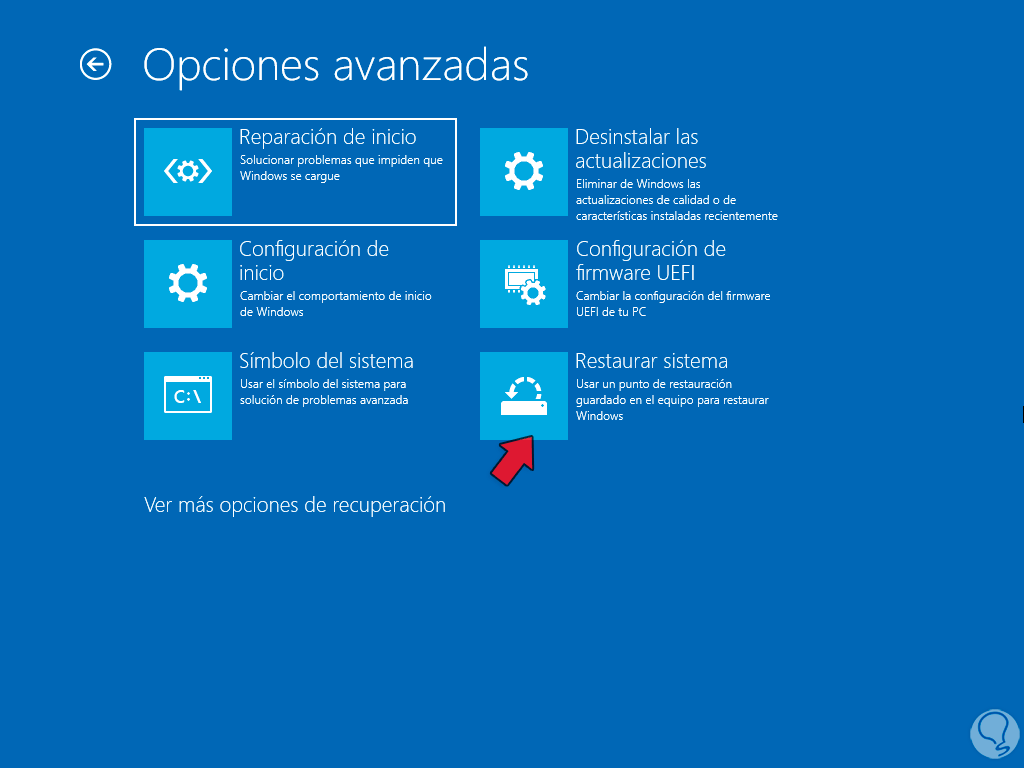
Step 3
We will click on "System Restore" and the wizard will open:
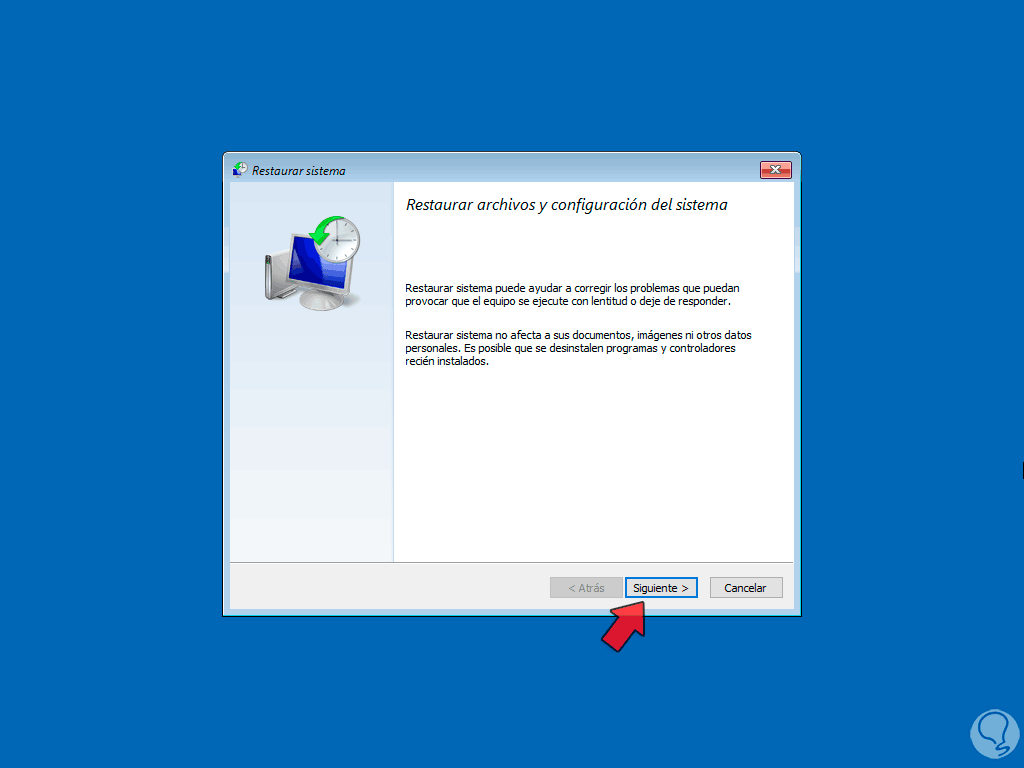
Step 4
We click "Next" to select the desired restore point:
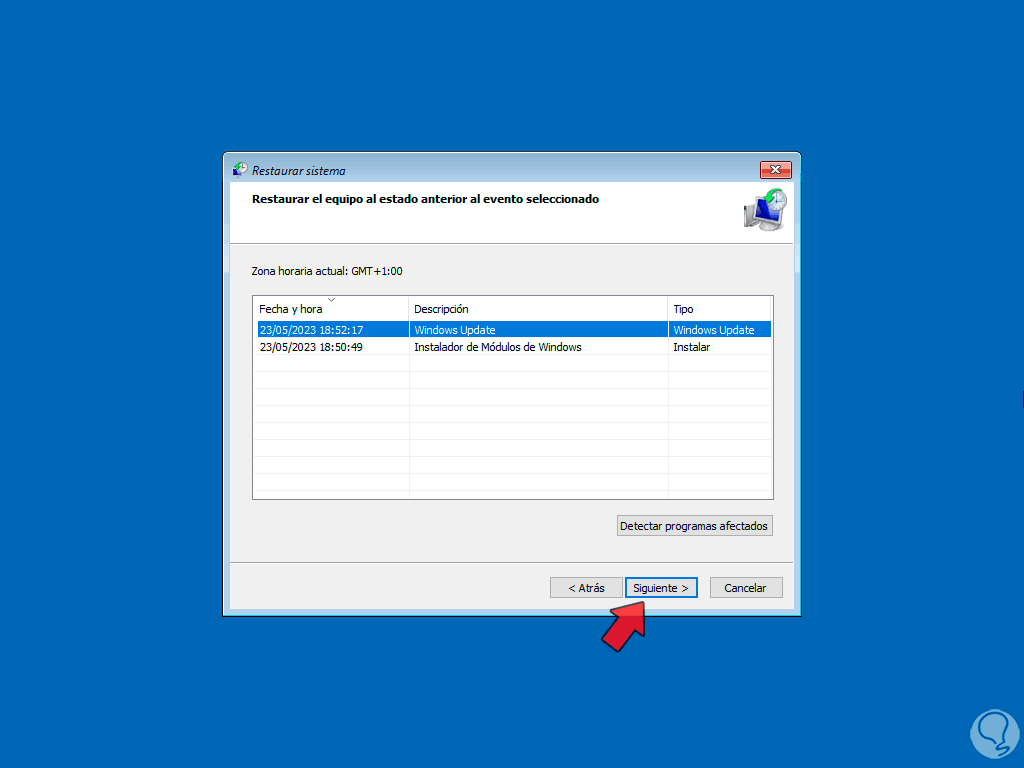
step 5
By clicking on "Next" we will see a summary of the process to be carried out:
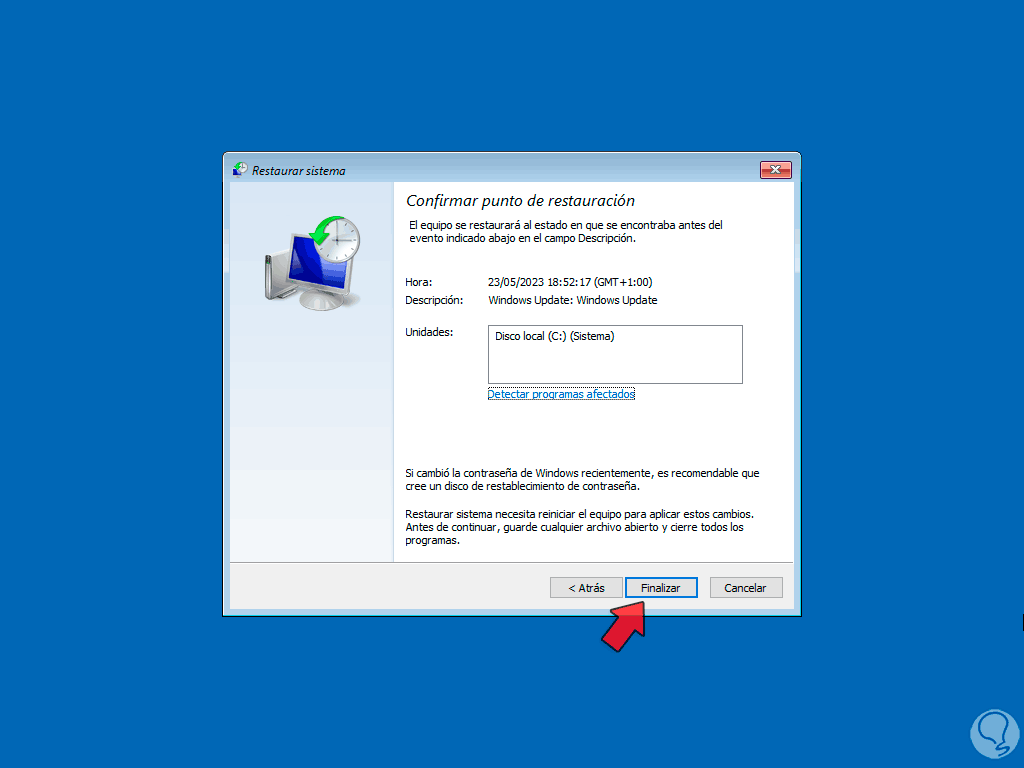
step 6
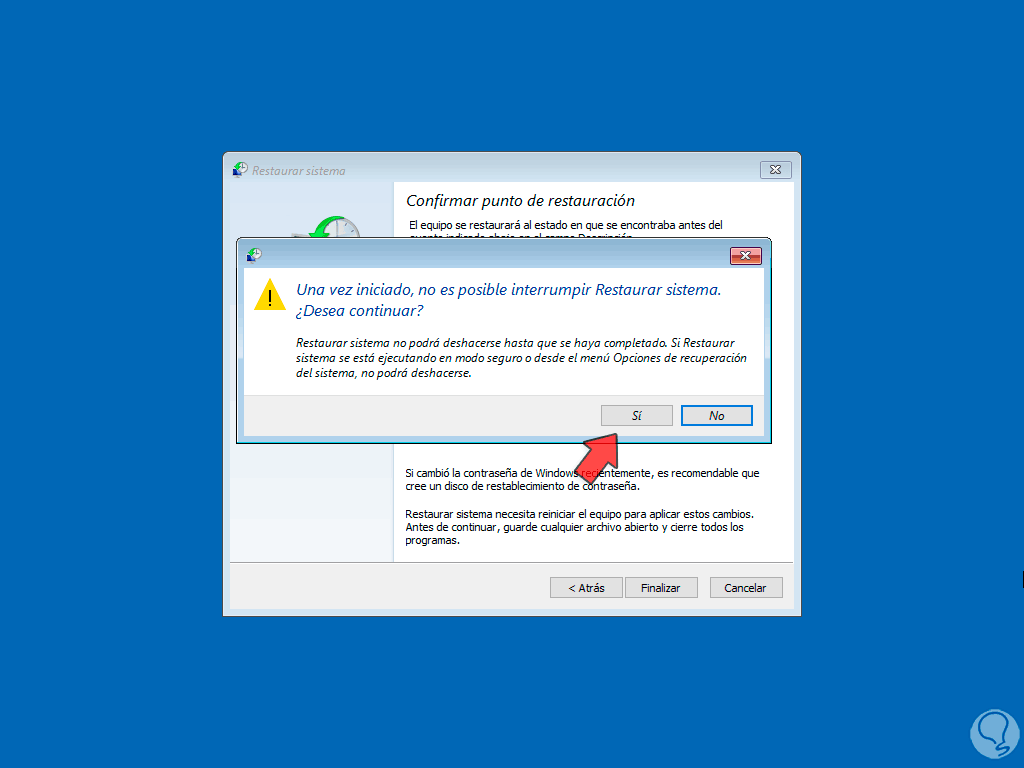
We will be notified that this process cannot be reversed and the system will go to the selected date after confirming this action:
step 7
This will allow us to access Windows 10 normally:

4 How to repair Windows 10 from terminal
The console integrated in Windows 10 gives us the opportunity to execute a series of commands to work directly on possible failures in the system that affect its normal operation.
Step 1
To achieve this we must access the advanced startup by clicking on the shutdown button, then press the Shift key and hit "Restart":
Step 2
In the displayed menu we are going to click on "Solve problems":

Step 3
Then we are going to click on "Advanced options" to access the various possibilities of use:

Step 4
We are going to click on "Command Prompt" in the options window:

step 5
First of all, what we are going to do is an analysis of the Windows file system, in the console we enter the command.
sfc /scannow

step 6
The SFC command (System File Checker) is a system diagnostic and repair tool which does a full scan on the NTFS file system in order to verify the integrity of the system files.
As a result it will be possible to see one of the following messages:
- No integrity violations found" - Indicates that no problems with system files were found.
- "Integrity violations found and repaired" - This indicates that SFC found problems and managed to fix them automatically.
- "Some operations could not be performed" - tells us that SFC found problems but could not fix them.
step 7
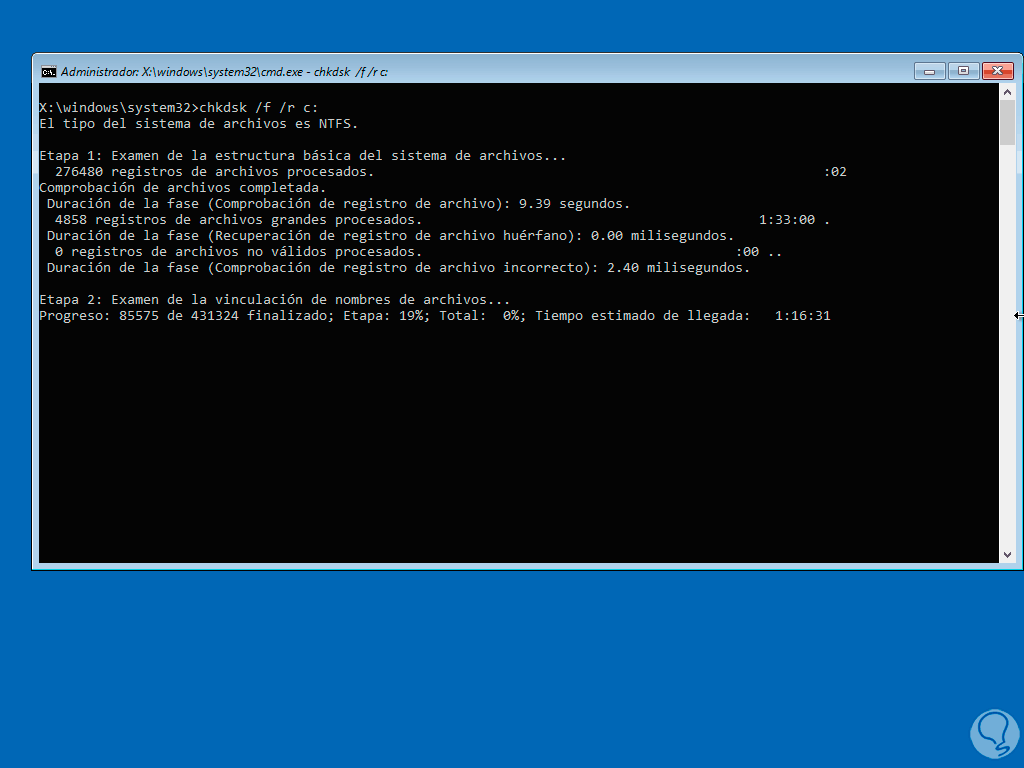
After this we are going to carry out a comprehensive analysis of the hard drive to find and repair failures, for this we are going to execute the following. CHKDSK (Check Disk) is a Windows utility that allows us to verify and repair errors in the file system and on the hard drive which affect the behavior of Windows 10, the /f parameter is responsible for correcting errors on the disk and for Therefore the hard disk must be locked, on the other hand the /r parameter locates bad sectors and recovers the readable information that is available.
chkdsk /f /rc:
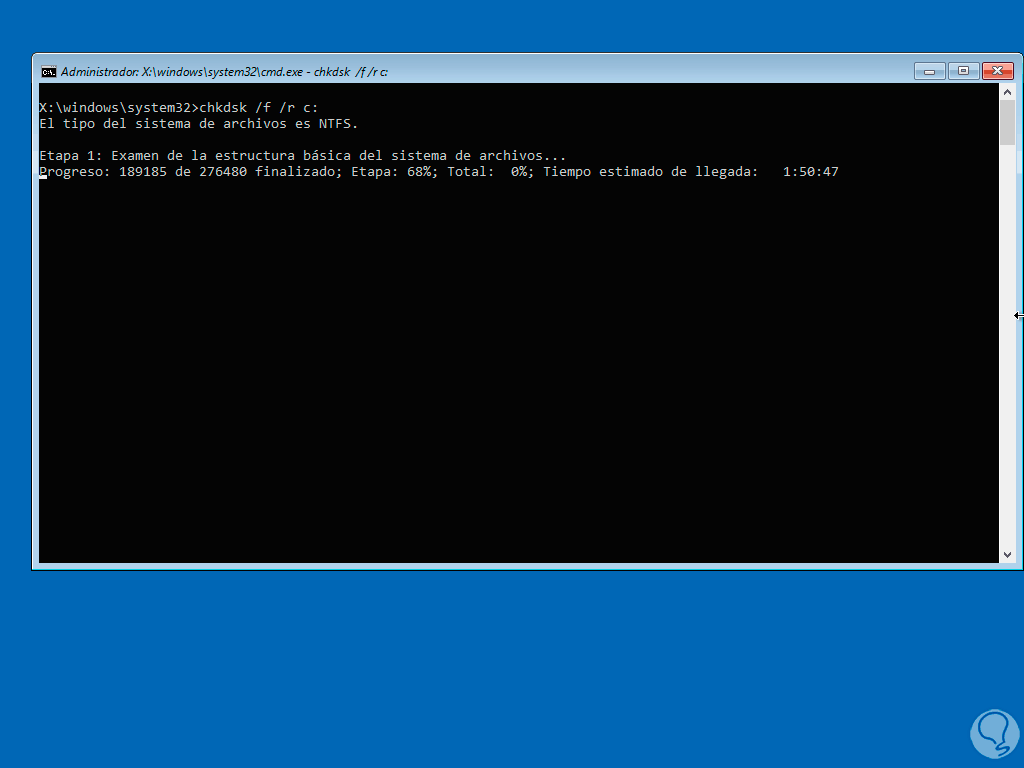
step 8
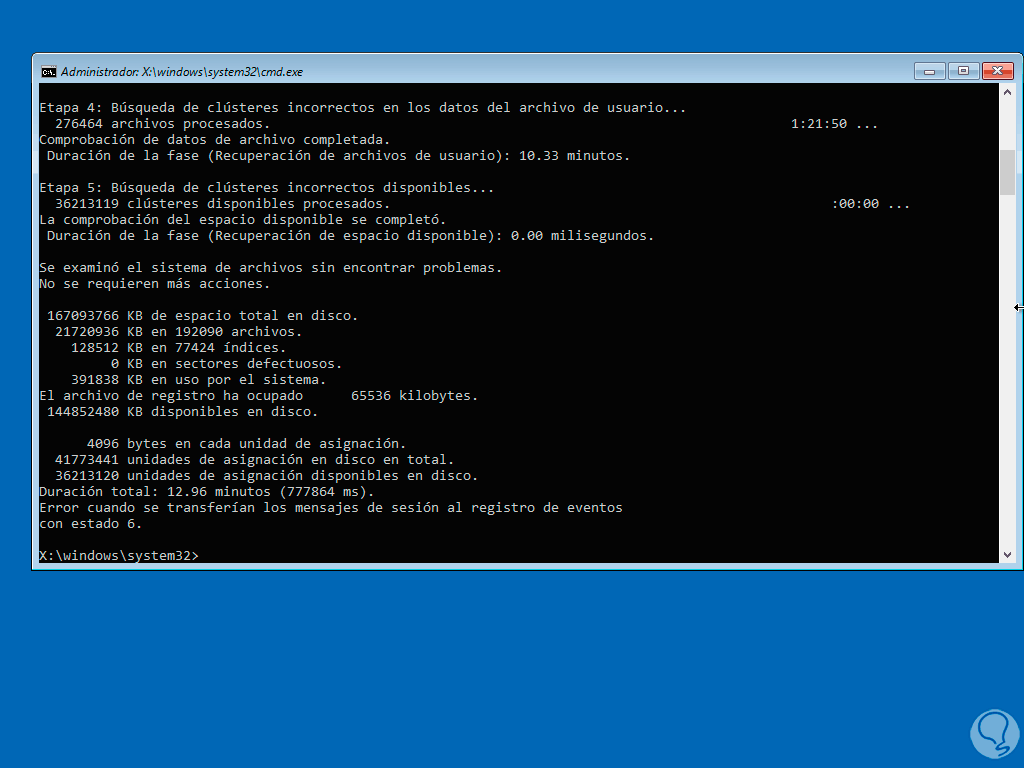
There we must wait for each phase of the analysis to complete:
step 9
At the end we will see the following:
step 10
We exit the console with the "exit" command and then we will click "Continue" so that you can see that Windows 10 loads correctly:
step 11
Windows 10 restarts:

step 12
We will see Windows 10 work without problems:
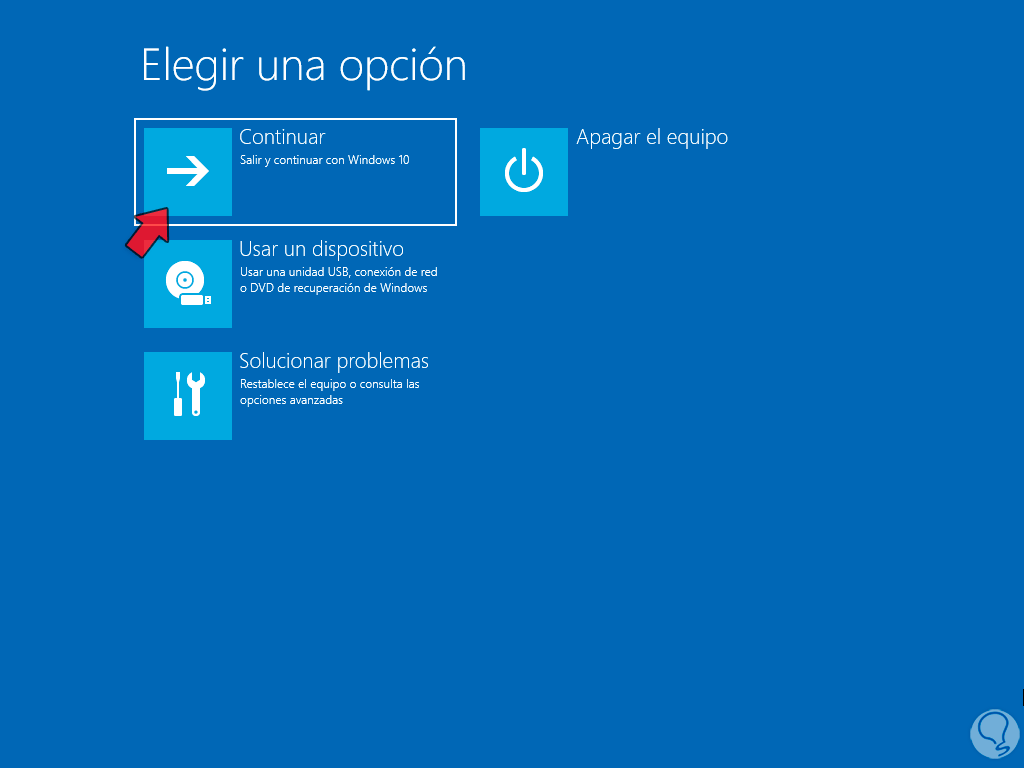
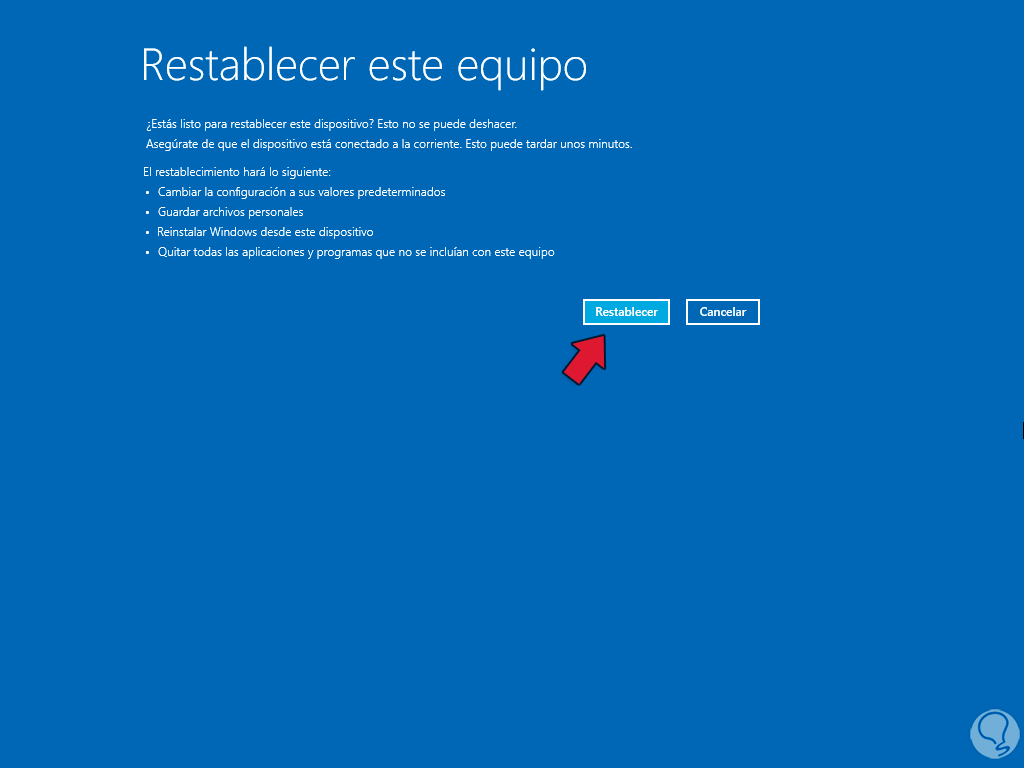
5 How to repair Windows 10 by resetting the PC
It is the last option to use but if none of the above helps you, it will be necessary to do so, we click on the off button.
Step 1
Press the Shift key and click on "Restart":
Step 2
We click on "Solve problems":

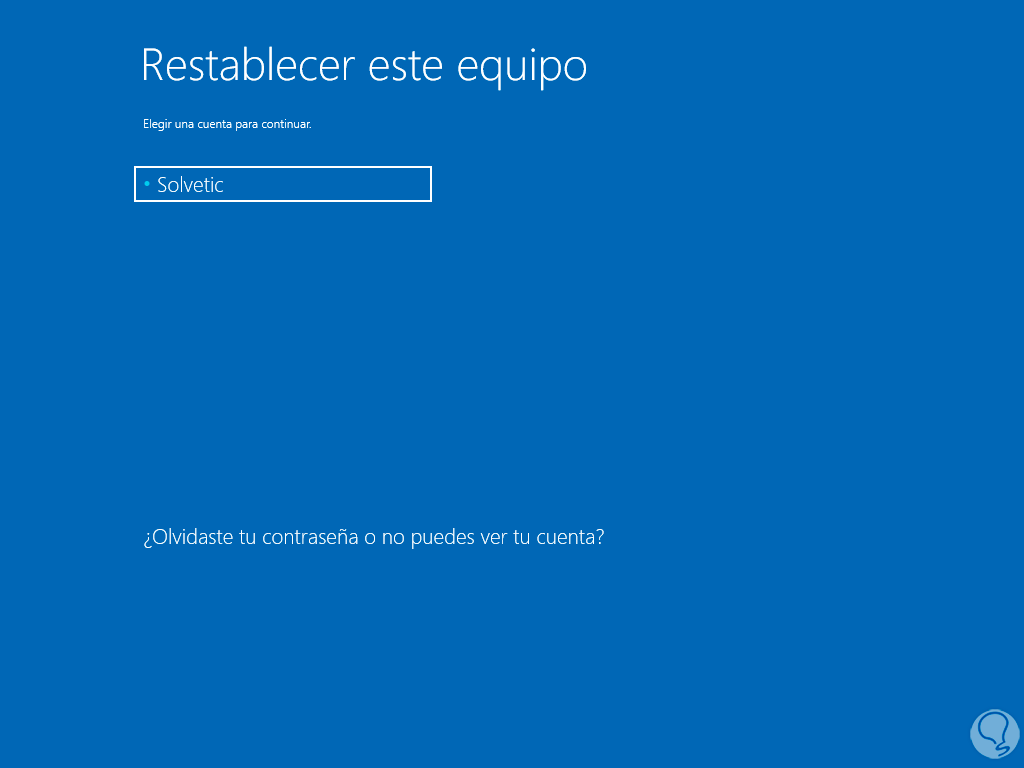
Step 3
Then we are going to click on "Reset this computer":

Step 4
We are going to indicate if we want the files to be deleted or not:

step 5
We must select the user again:
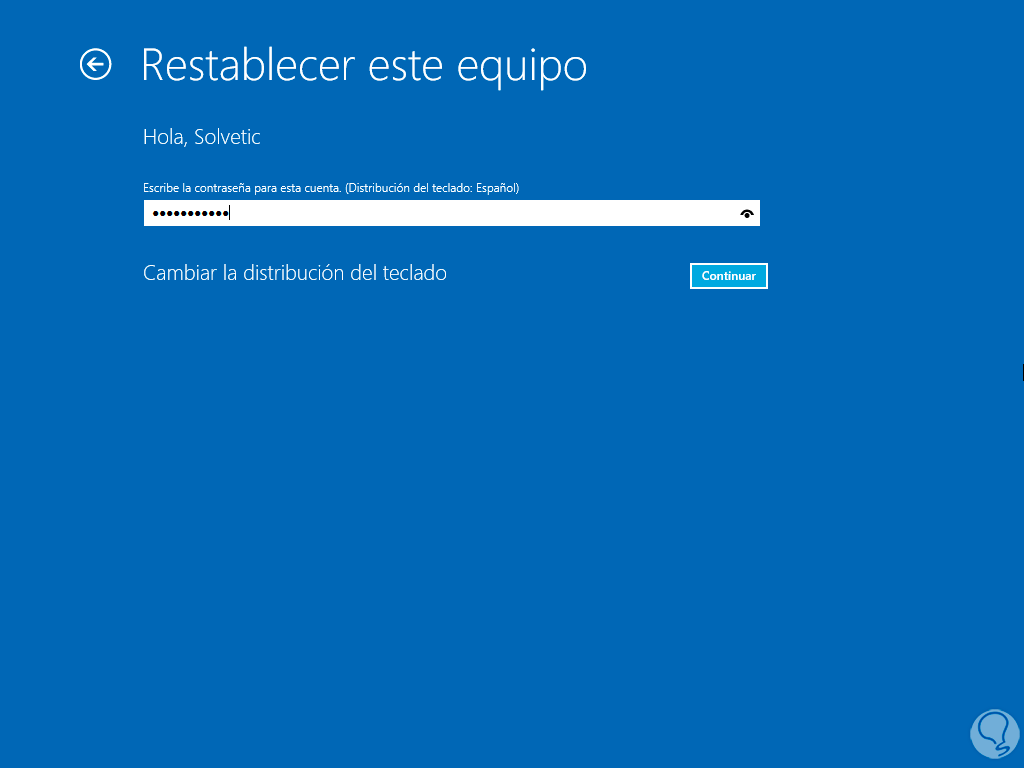
step 6
We enter the password of this:
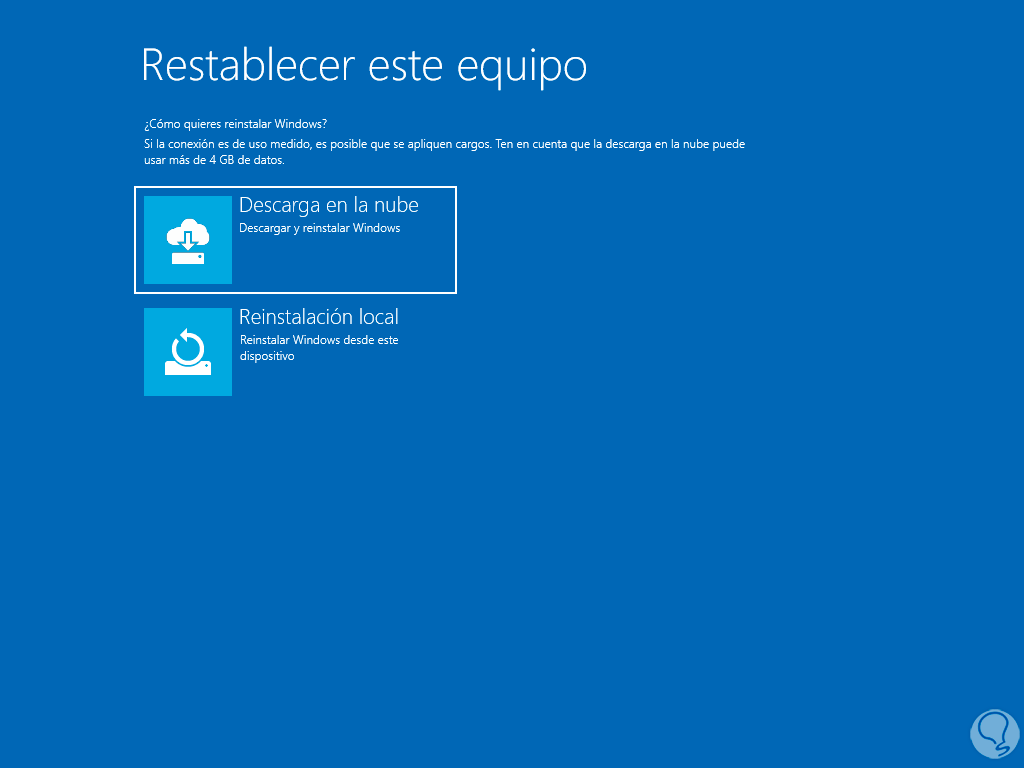
step 7
Now we are going to select the type of installation to use, cloud download or local reinstallation:
step 8
Wait for the initial reset process to finish:

step 9
After this we will click on "Reset": We wait for the process to come to an end.
Each step of these is functional to recover the operation of Windows 10 and have access to all its functions.