The transfer of files will always be one of the main tasks to be carried out by administrators, support staff and traditional users of the system since in many cases it is required to pass information between computers either locally or remotely . Although there are several ways to achieve this, one of the simplest , safest and most practical is joining two computers in the local network through Ethernet , which allows us to have a stable and reliable connection . Although it is a practical method we must know for sure some basic aspects so that communication between the two is ideal..
TechnoWikis will explain how to connect 2 computers with Windows 10 using an Ethernet network cable.
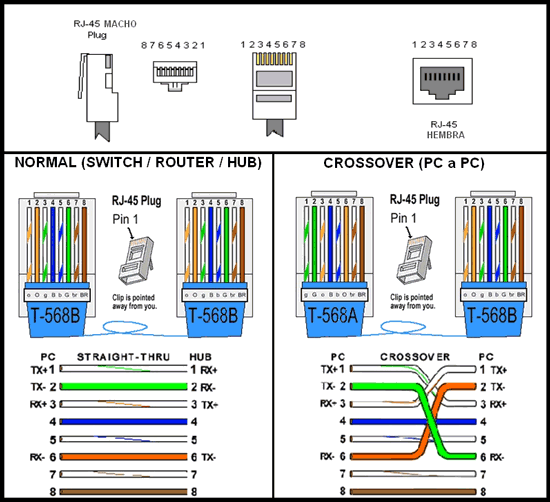
Type of cable
Before identifying the type of cable to be used, it will be necessary to determine which devices are to be connected. We can connect two different computers or devices such as a PC to a network switch or an Ethernet adapter and in this case change the type of cable to use to optimize communication. When we use a connection between computers to devices such as switch, hub or routers we will use direct cable where the same type of standard will be used at both ends.
In case of using two similar systems for tasks such as file sharing, where one is responsible for generating the data and the other receives it, the ideal type of cable is cross-wiring which connects the transmission signals at one end with the signals of Welcome to the other end. The crossover cable is used to connect devices directly, this is the case of computers, hub or siwtch, In this case the configured character is different at the ends, that is, different standard. Since we are going to connect two computers with Windows 10, we will use this type of cable for the connection ..
1. Connect PCs with network cable in Windows 10
Step 1
To start this process we will go to the next route.
- Center network and sharing
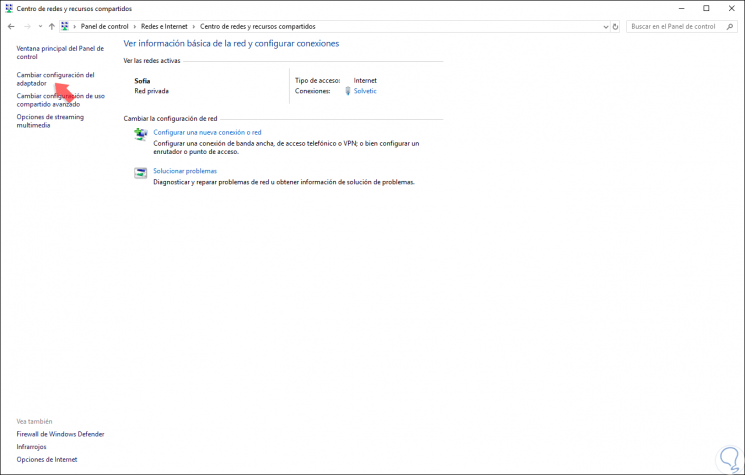
Step 2
There we click on the "Change adapter settings" option and in the window we will right click on the Ethernet network adapter and select the "Properties" option:
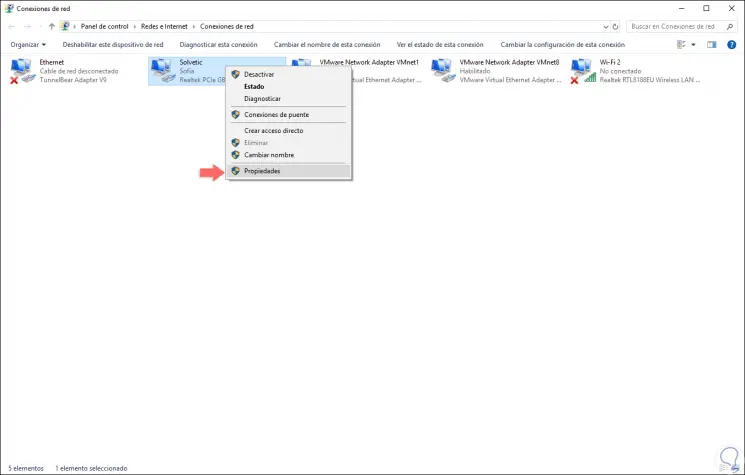
Step 3
In the pop-up window we go to the "Network functions" tab and select the line "Internet Protocol version 4 (TCP / IPv4)":
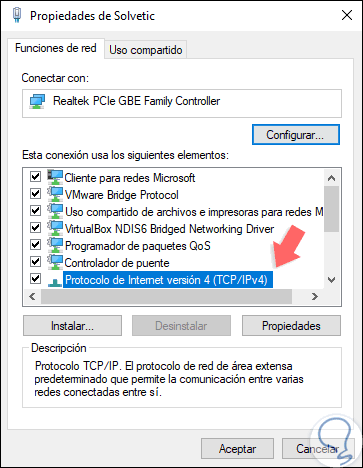
Step 4
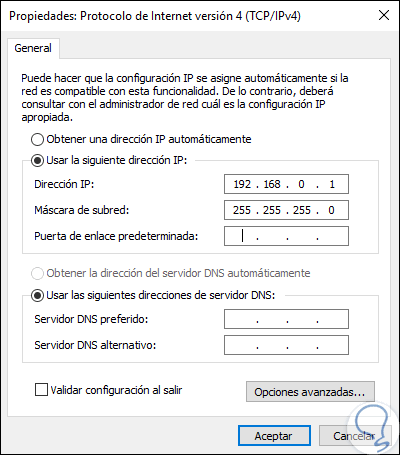
We click on the "Properties" button and in the following window we define the following:
- Subnet mask. 255.255.255.0
Step 5
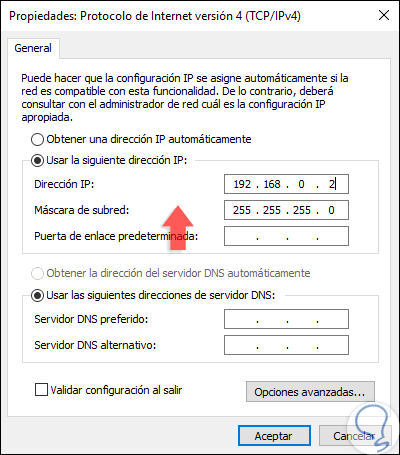
In the second device we access the same adapter option and there we define the following:
- Subnet mask. 255.255.255.0
Step 6
Click on OK to save the changes. We must keep in mind that the IP addresses of both computers must be different, otherwise a conflict will be created. Once this is done, we will connect the crossover cable to the network ports of the two computers, both ends of the network cable have the same appearance on a physical level like this:

Step 7
This port is on the back of the desktops and on the side of some portable computers. Now, we go to the main team and go to the next route.
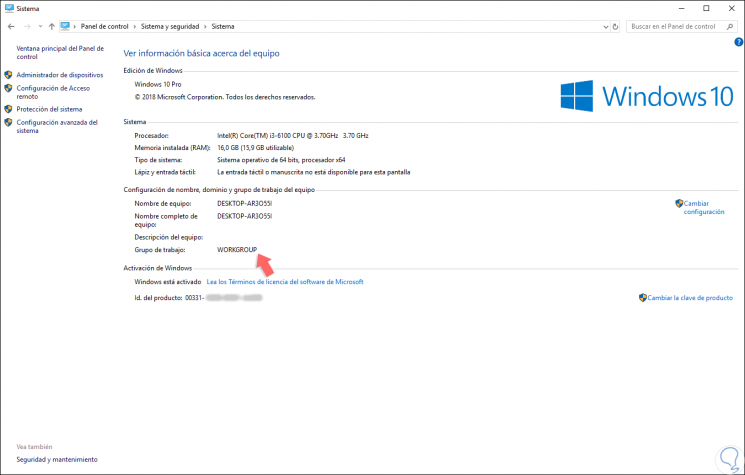
Step 8
There we must look at the work group in which the team is located, as a rule it is the WORKGROUP group:
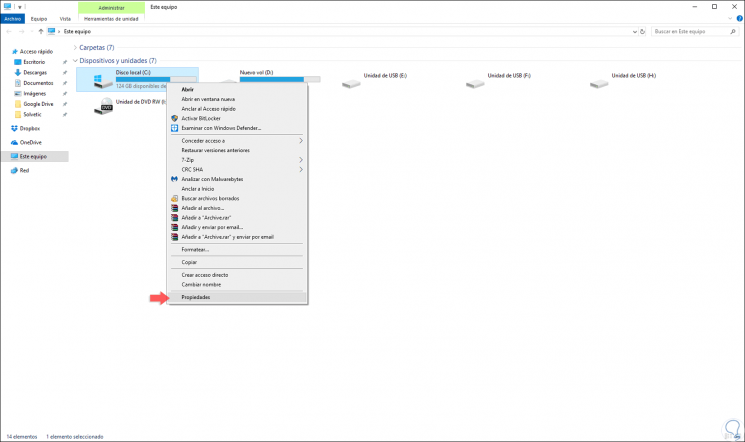
Step 9
The next step is to go to the unit that we have to share, right click on it and select "Properties":
Step 10
In the displayed window we will go to the “Share†tab and there we click on the “advanced sharing†button:
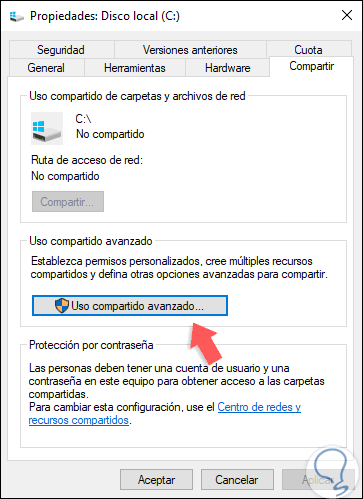
Step 11
In the new window we activate the “Share this folder†box and if we wish we can define the maximum number of connections simultaneously. Click on the Apply and Accept button to save the changes.

2. Transfer files between PCs with network cable in Windows 10
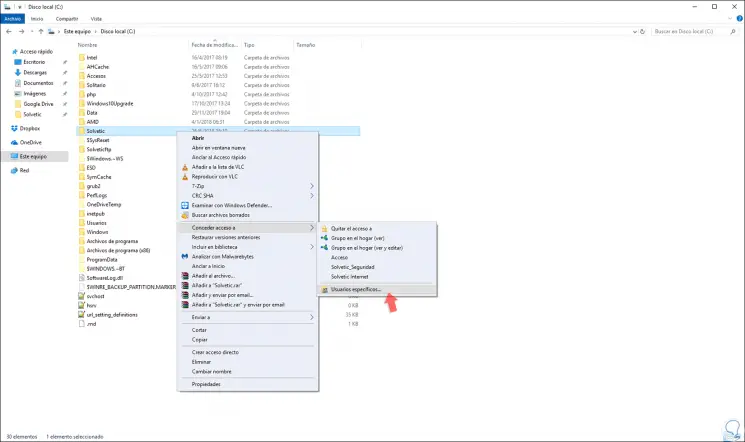
Step 1
Now we will go to the team where the unit has been shared, we will right click on the desired item and select the option “Grant access to / Specific usersâ€:
Step 2
In the displayed window, click on the user field, select "All":
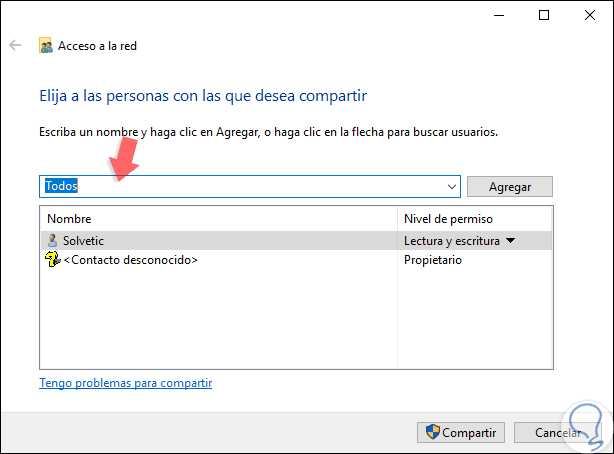
Step 3
Click on the "Add" button and then we can define the type of permissions to grant:
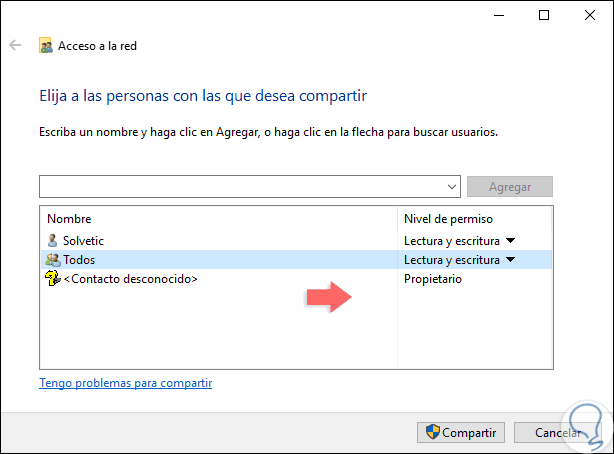
Step 4
Click on the "Share" button to complete the process.
Step 5
Now, from the other computer, it will be possible to access the unit we have shared and perform all the necessary transfer tasks.

With this simple method, we manage to share in a secure and agile way, all kinds of elements between two Windows 10 computers.