To stay up to date, remember to subscribe to our YouTube channel!
SUBSCRIBE ON YOUTUBE
Google Chrome is one of the most popular browsers which is versatile, dynamic and compatible with most current operating systems but like any application it is prone to failures and one of the most delicate is that the pages do not load, this is something serious since that if we access Chrome it is precisely to view the content of a website, this error can be caused by factors such as:
Error factors
- Error in the local network service (which we must review and if this is the case, call the provider).
- DNS failed to resolve domain name.
- Browser or destination maintenance.
Whatever the cause TechnoWikis has a series of options to provide a comprehensive solution to this error and with this to be able to open and navigate in Chrome without problems..
1 Restart connection from Terminal
Step 1
Our first method will be to run some commands in the console, we can use the Terminal or the CMD Command Prompt, in this example we are going to open the terminal as administrators:
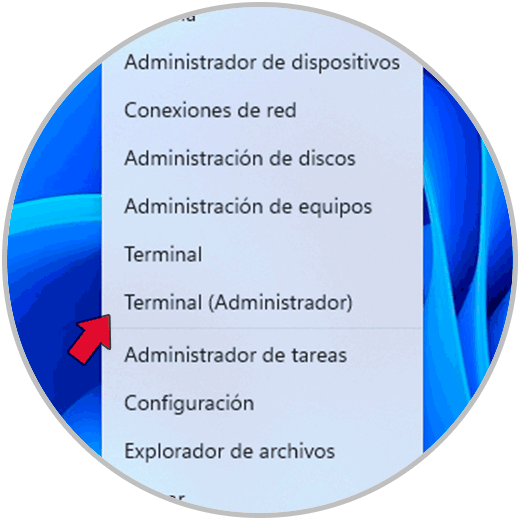
Step 2
We accept system permissions:
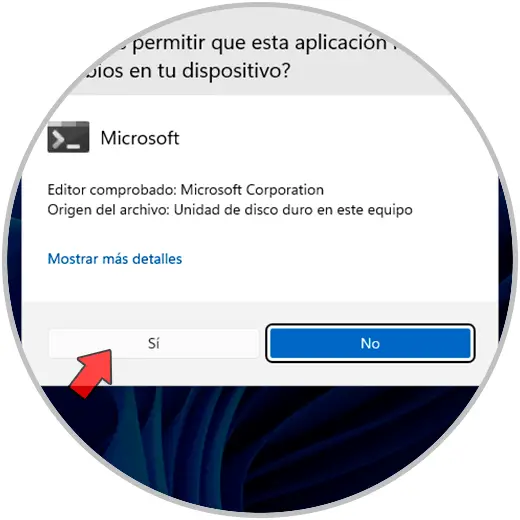
Step 3
We execute the following command to free the IP address which may be saturated:
ipconfig /release
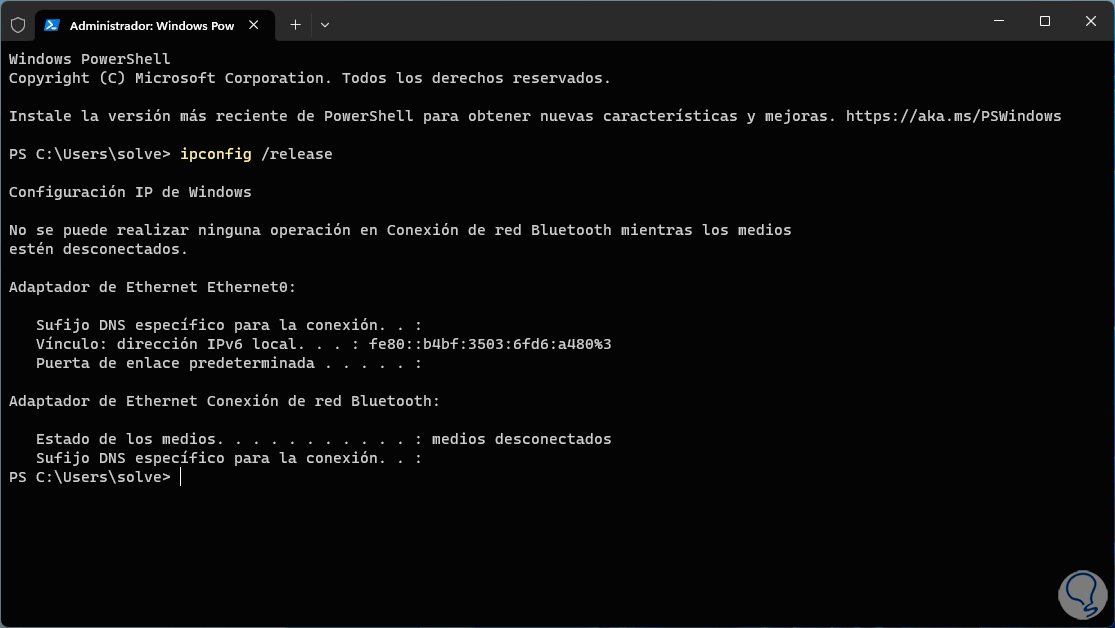
Step 4
Now we are going to release the cache memory which is created as we visit the websites and an accumulation of this will cause us to have problems in Chrome, for this we execute the following:
ipconfig/flushdns
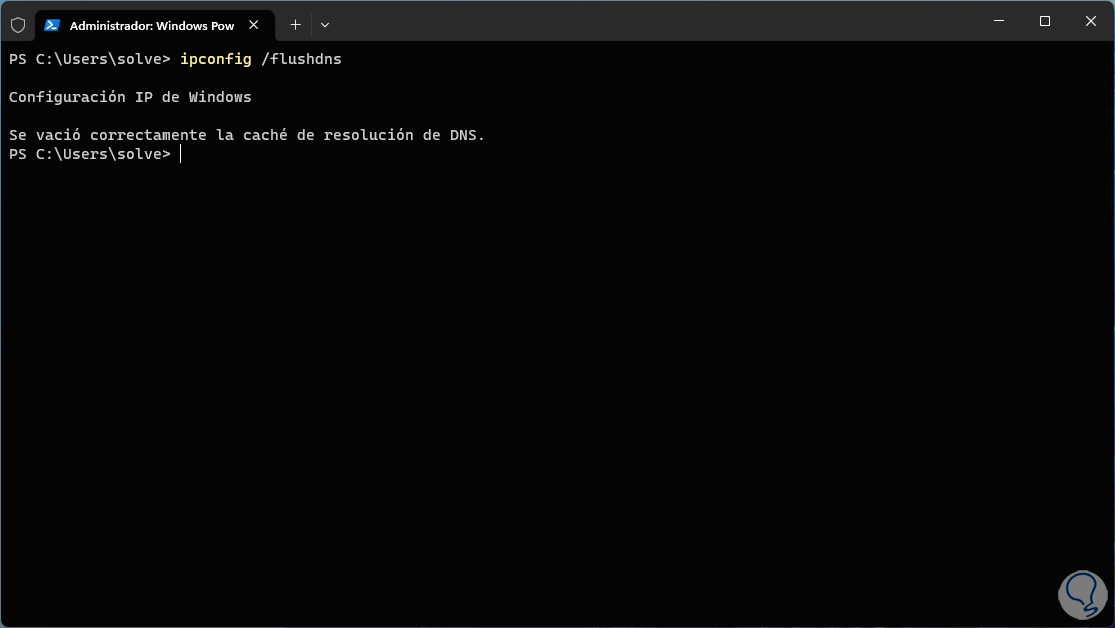
step 5
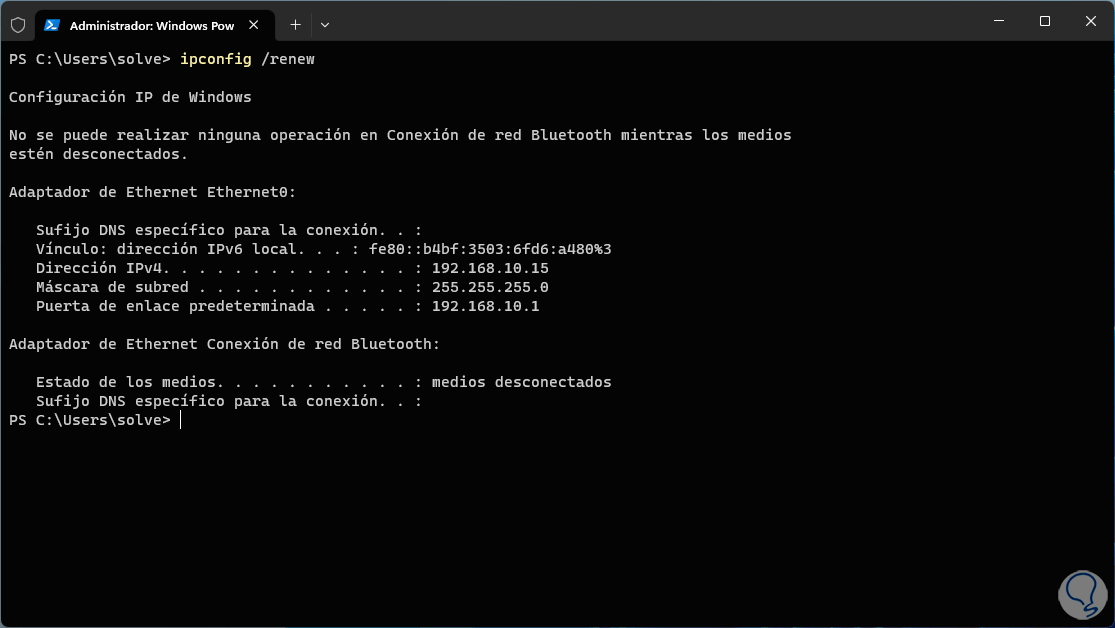
Now we are going to renew the IP address with the command:
ipconfig /renew
step 6
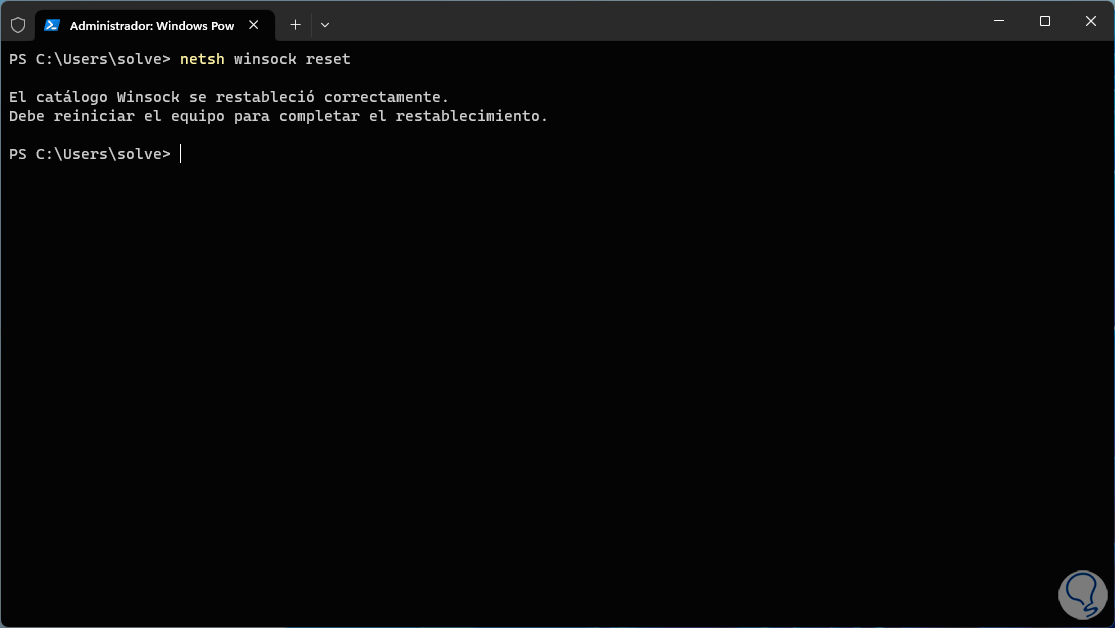
Finally we are going to restore winsock which is the programming interface that allows communication between Windows and the TCP / IP protocol, we execute the following command:
netsh winsock reset
step 7
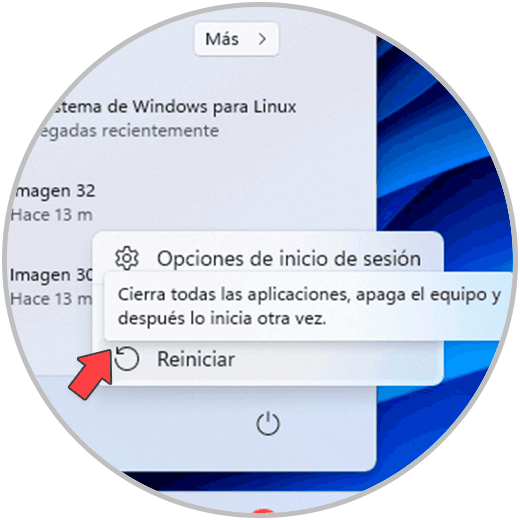
As we see that a system restart is required, we proceed to restart Windows to apply these changes:
step 8
We wait for the system to be rebooted:

step 9
When the session starts we open Chrome to see that the sites work:
2 Rename Chrome Shortcut
Step 1
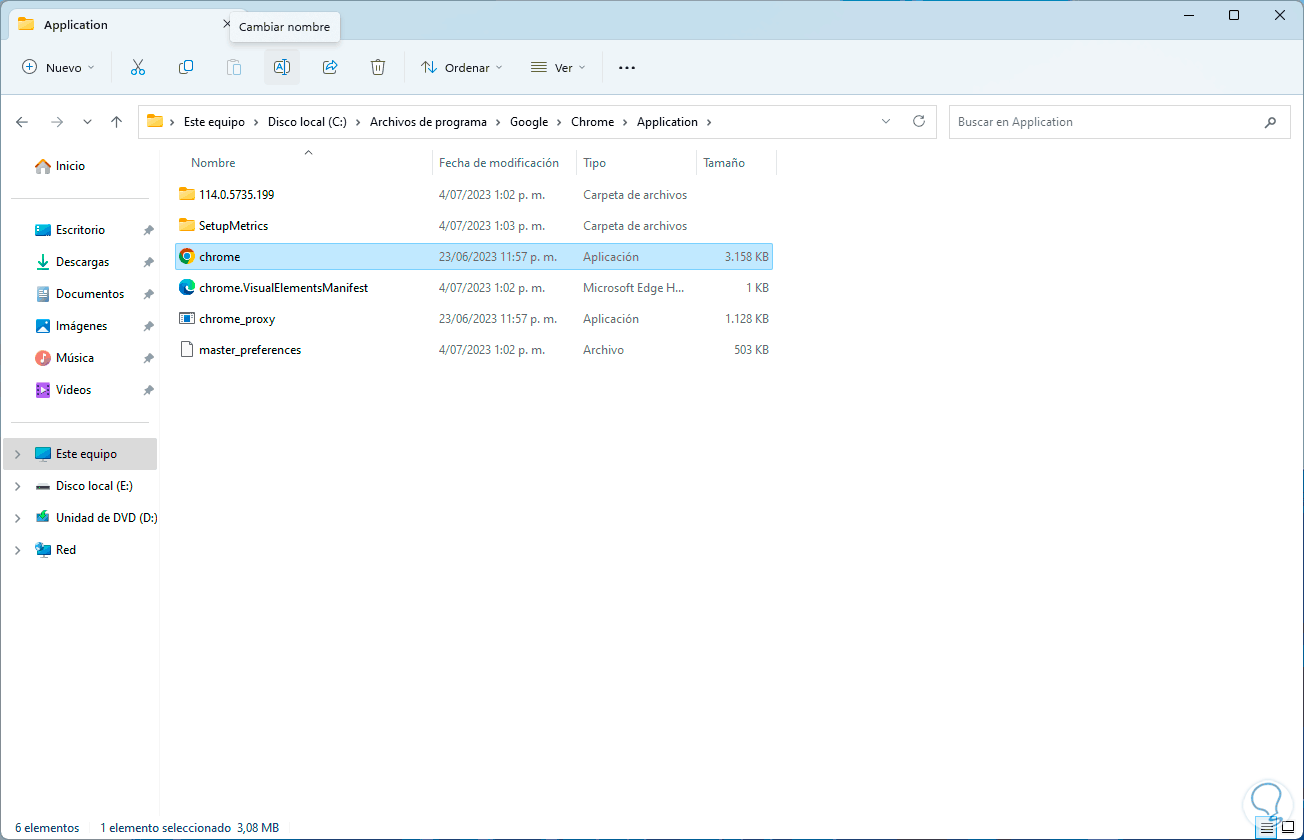
This method allows you to rename the Chrome executable since, rarely but it happens, the default name can affect, we are going to open the File Explorer and we will go to the path where Chrome is installed which by default is the following:
C:\Program Files\Google\Chrome\Application
Step 2
There we will select the shortcut or executable and click on "Change name", enter the desired name and we will see the following:
Step 3
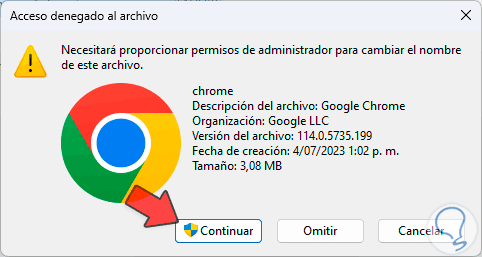
We confirm the process by clicking "Continue":
Step 4
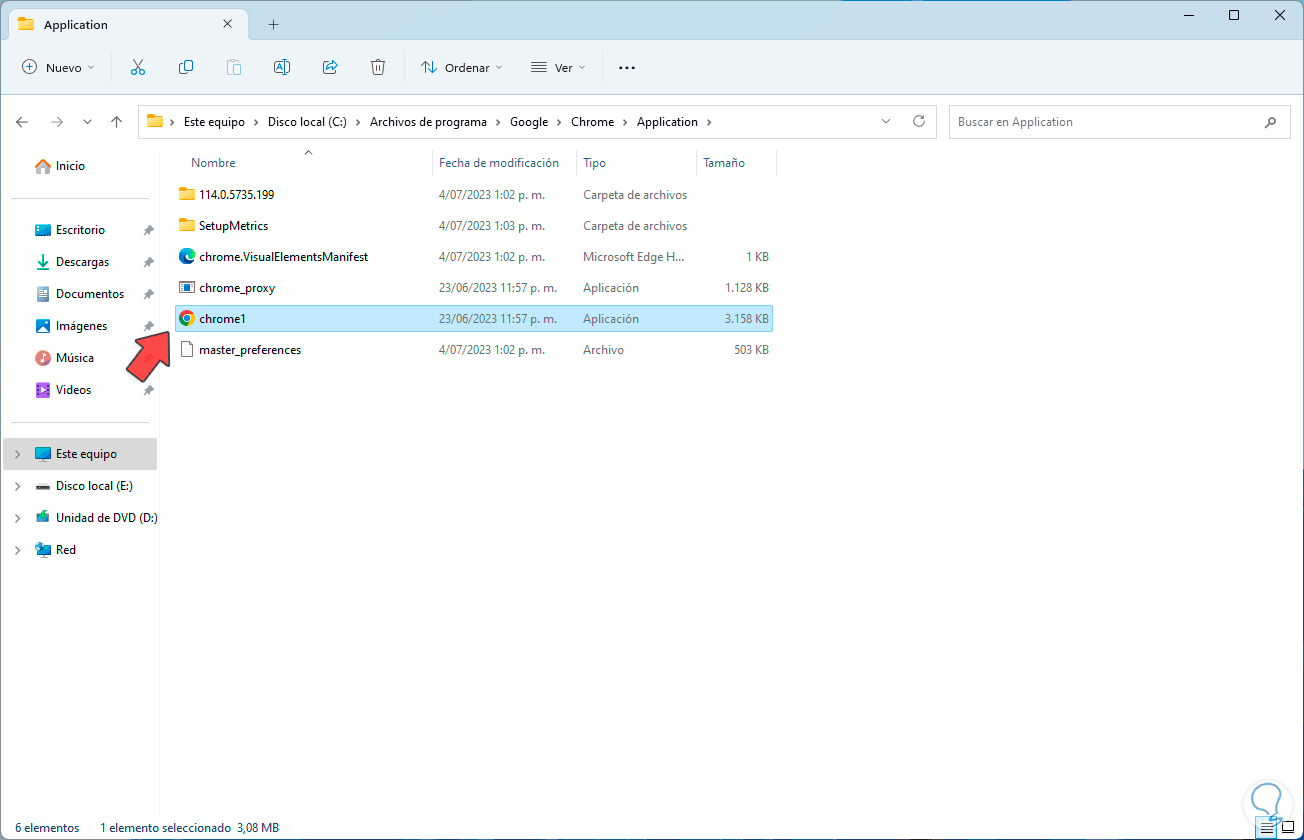
We double click on this access to open Chrome and see that the page loads correctly:

3 Delete Registry Key
Step 1
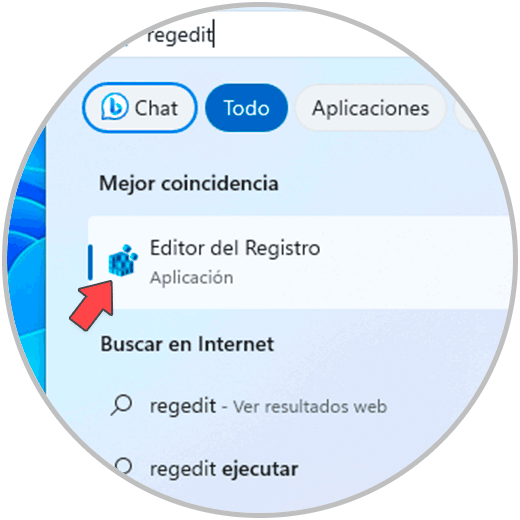
Through the registry editor we are going to manage some registries that can affect the behavior of Google Chrome, in the search engine we enter "regedit" and click on the Registry Editor:
Step 2
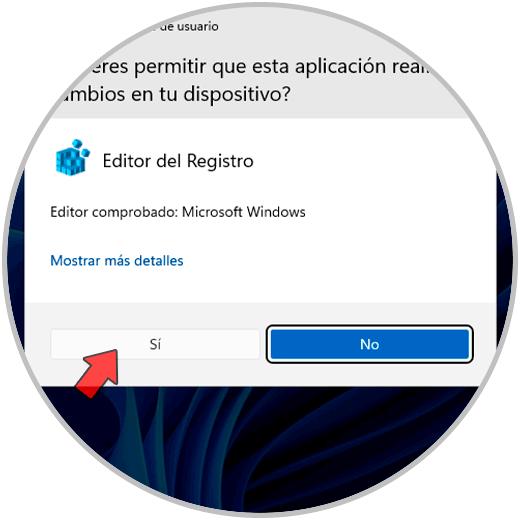
We accept system permissions:
Step 3
We go to the following route:
HKEY_CURRENT_USER - Software - Microsoft – SystemCertificates
Step 4
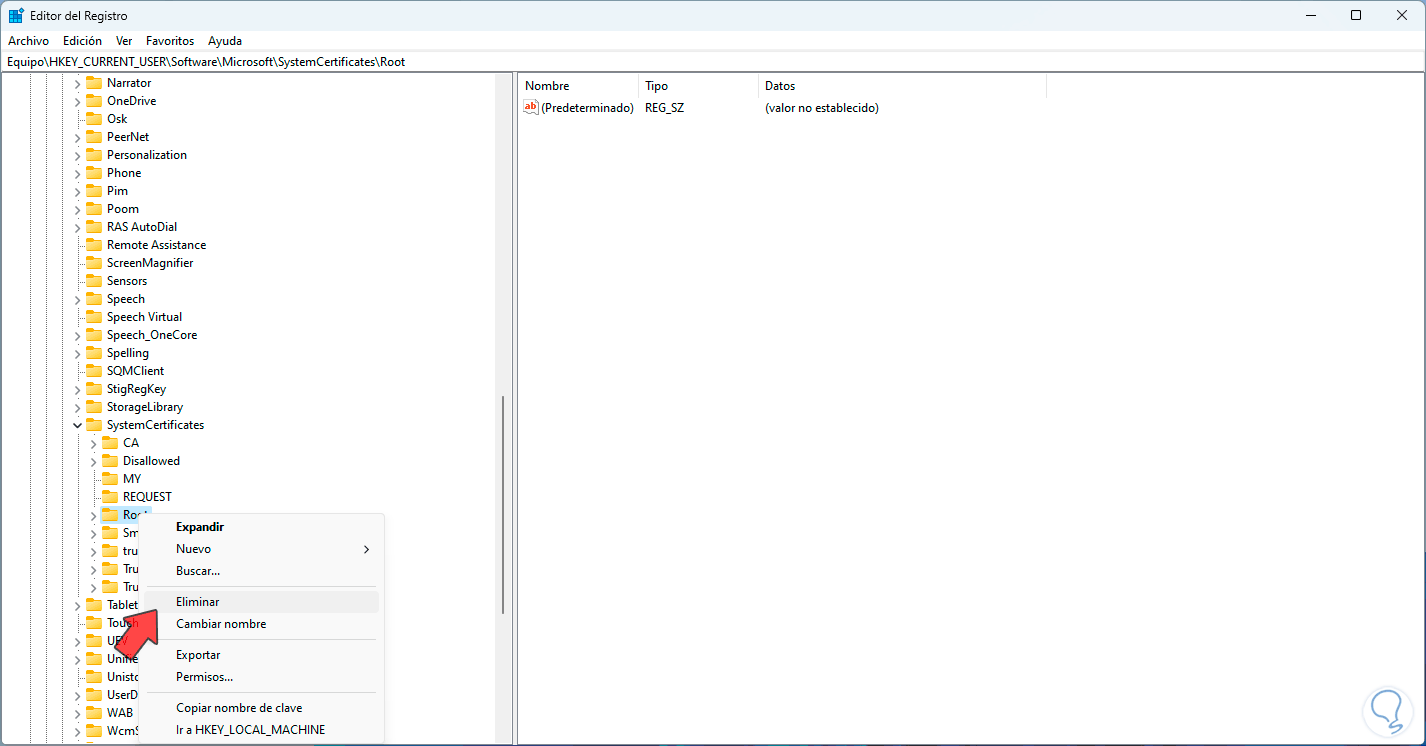
There we right click on the "Root" key and select the "Delete" option:
step 5
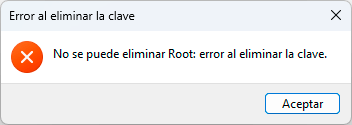
We will see the following message:

step 6
We confirm the process and check if its removal is possible (many times it is not):
step 7
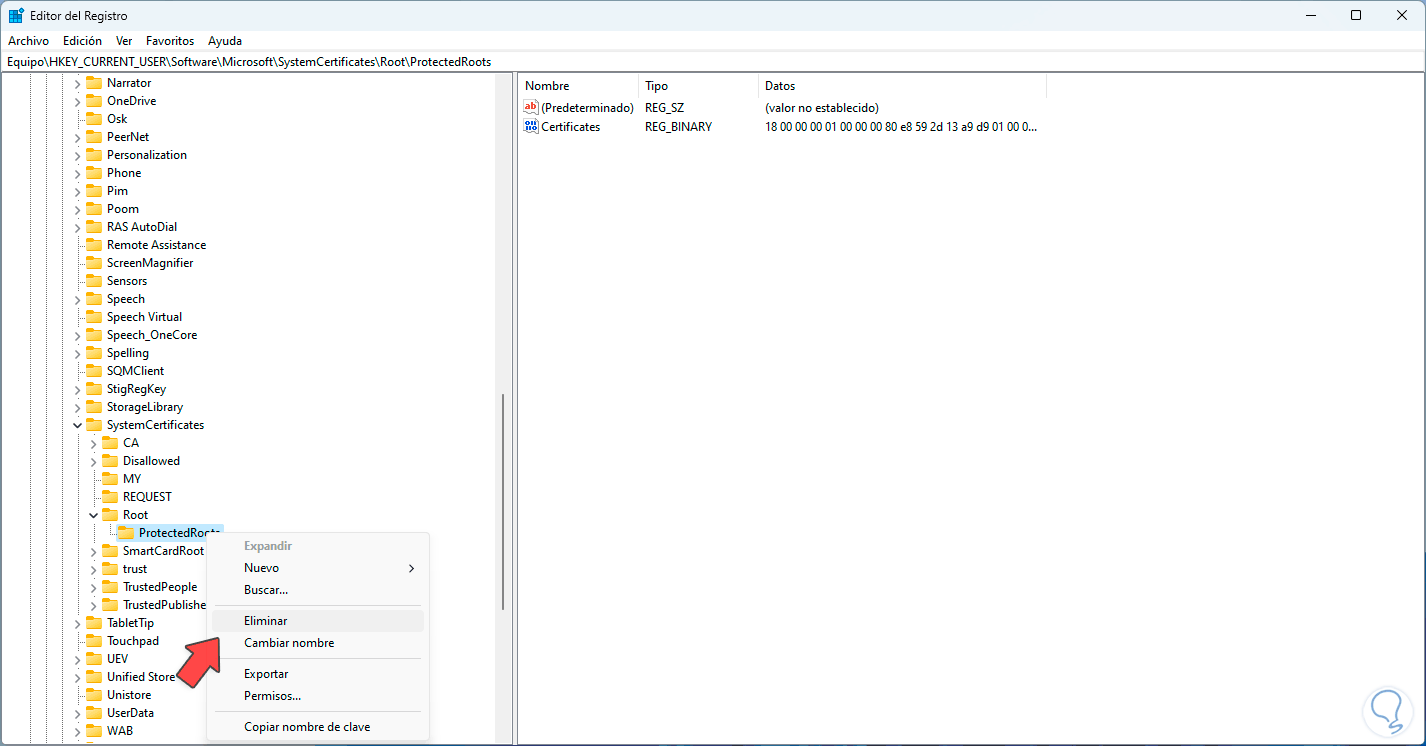
Now we click on "Root", then we right click on the "ProtectedRoots" key and select "Delete":
step 8
We see this message: Confirm the process and check if its removal is possible.

step 9
Let's confirm if the pages load in Chrome after this:

4 Change DNS settings
The DNS (Domain Name System - Domain Name System) is responsible for converting IP addresses into domain names and vice versa, this makes it easier for users to easily access a website but the DNS we work with, which is our ISP may be affected, there we can change it to a public one.
Step 1
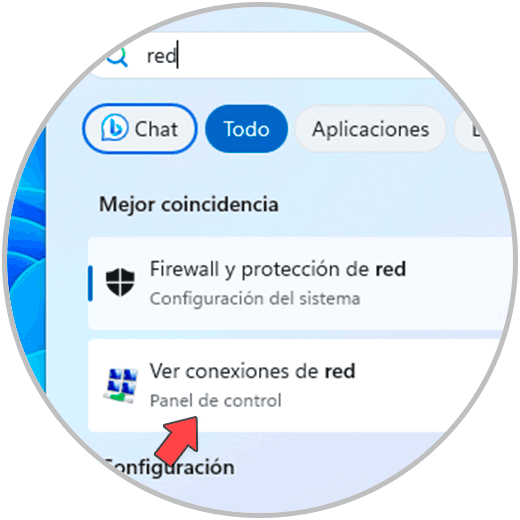
To do it in the search engine we enter the word "network" and click on "View network connections":
Step 2
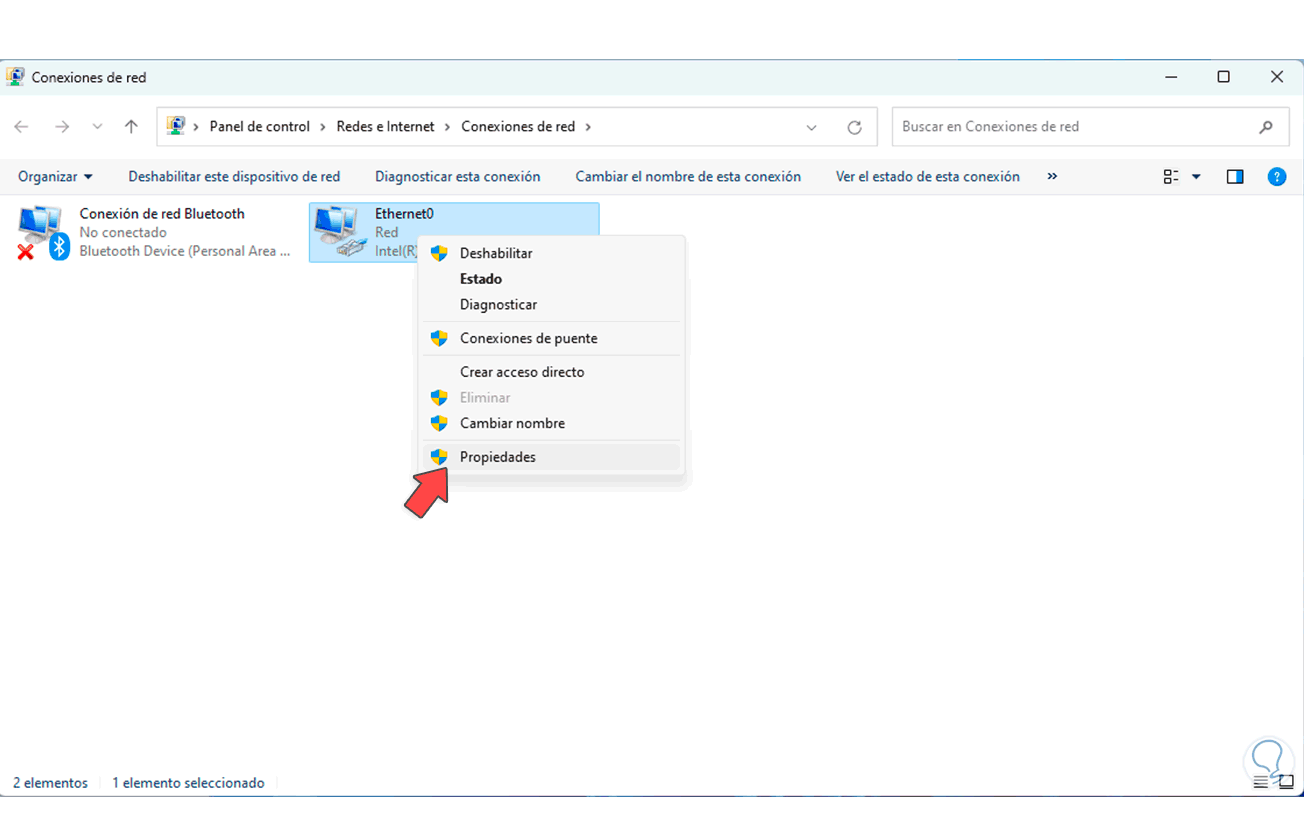
We are going to right click on the network adapter and select the "Properties" option:
Step 3
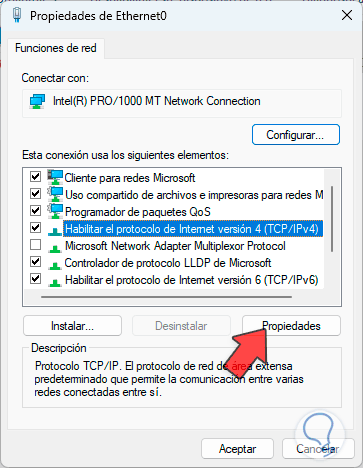
In the pop-up window we select the IPv4 protocol:
Step 4
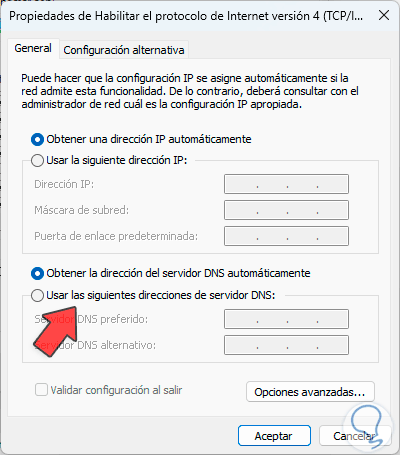
We click on "Properties" to see the following.
step 5
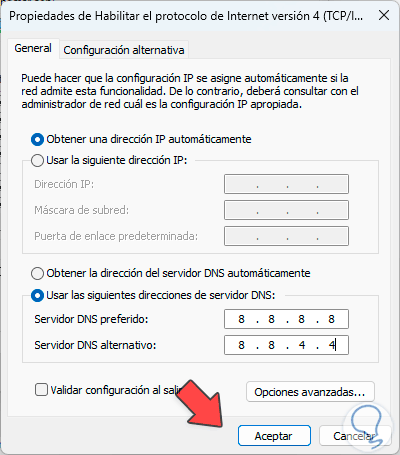
We are going to activate the "Use the following DNS server addresses" box and enter the desired addresses:
step 6
Some of the options to use are: We apply the changes.
- Google: 8.8.8.8 and 8.8.4.4
- Cloudflare: 1.1.1.1 and 1.0.0.1
- OpenDNS: 208.67.222.222 and 208.67.220.220
- FreeDNS: 45.33.97.5 and 37.235.1.177
- CyberGhost: 38.132.106.139 and 194.187.251.67
step 7
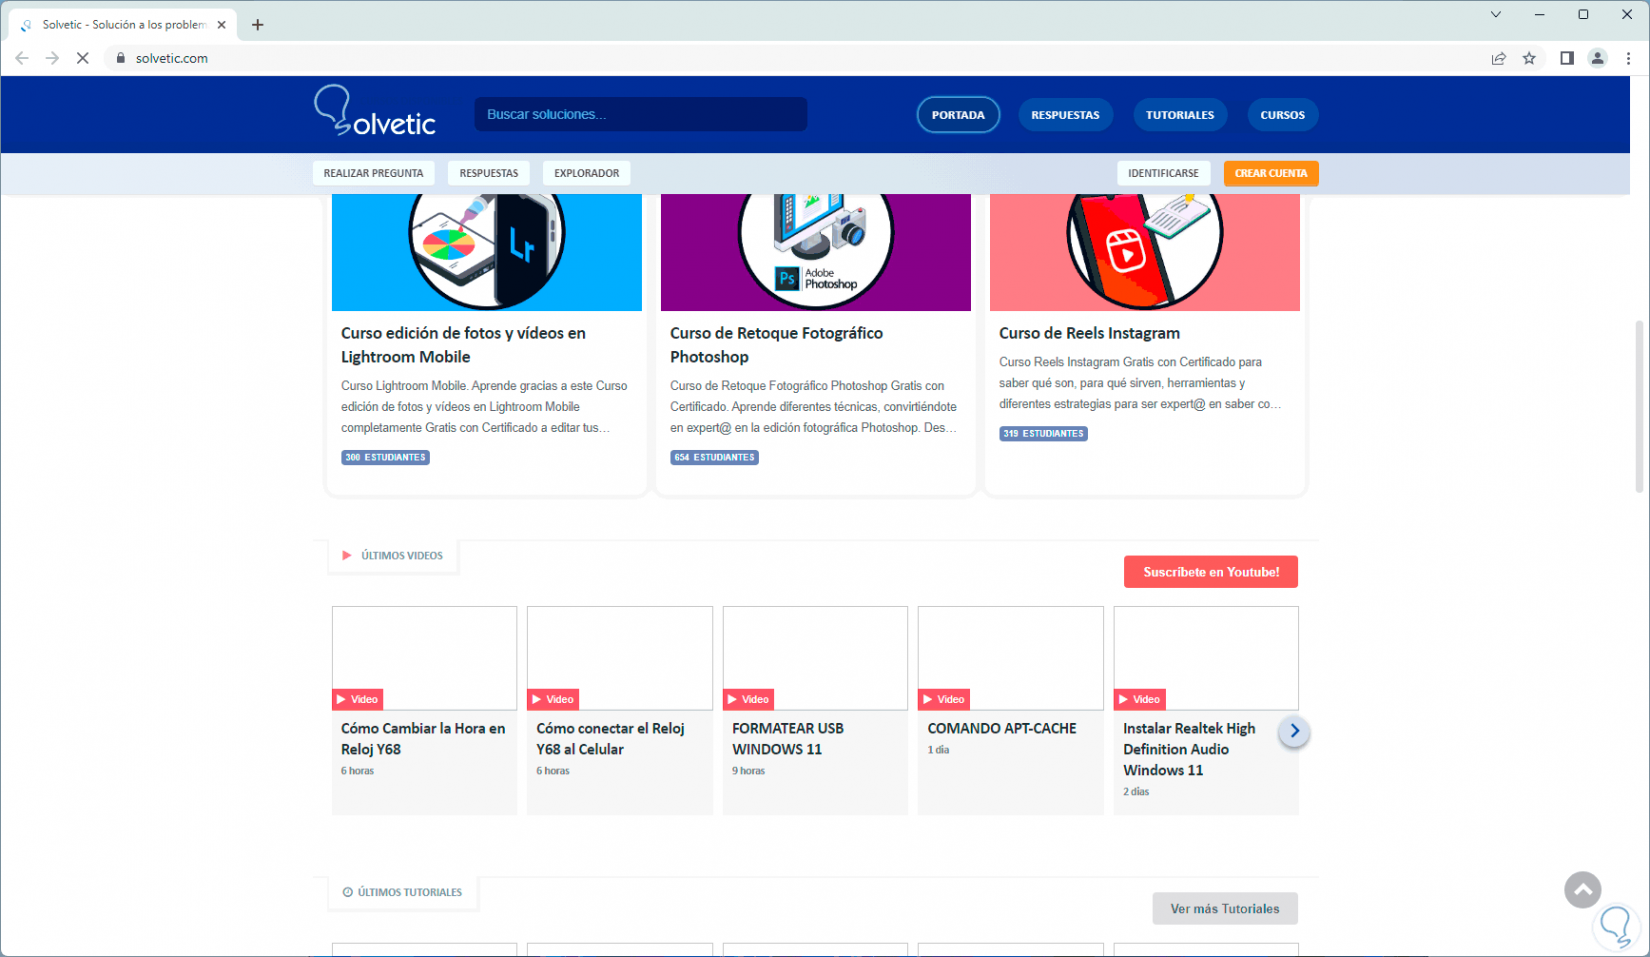
We open Chrome to confirm that the site loads:
5 Reset Network Adapter
The network adapter is the means through which all access requests pass and over time it is possible that the adapter parameters are affected, in this case restoring it is a practical and simple option.
Step 1
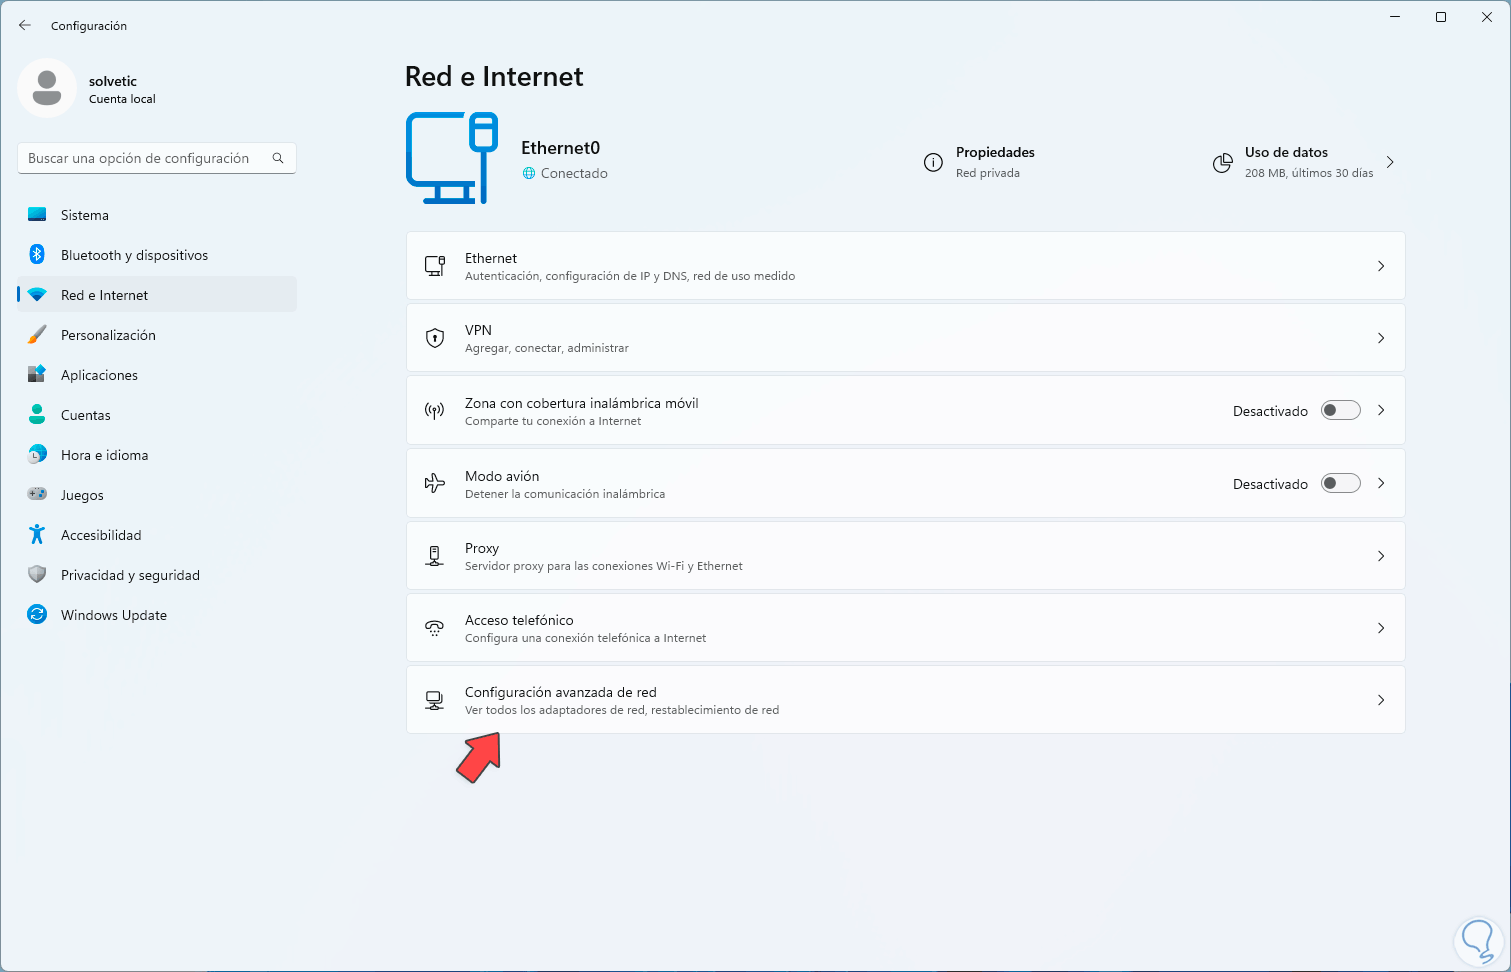
Let's go to the route:
- Advanced network settings
Step 2
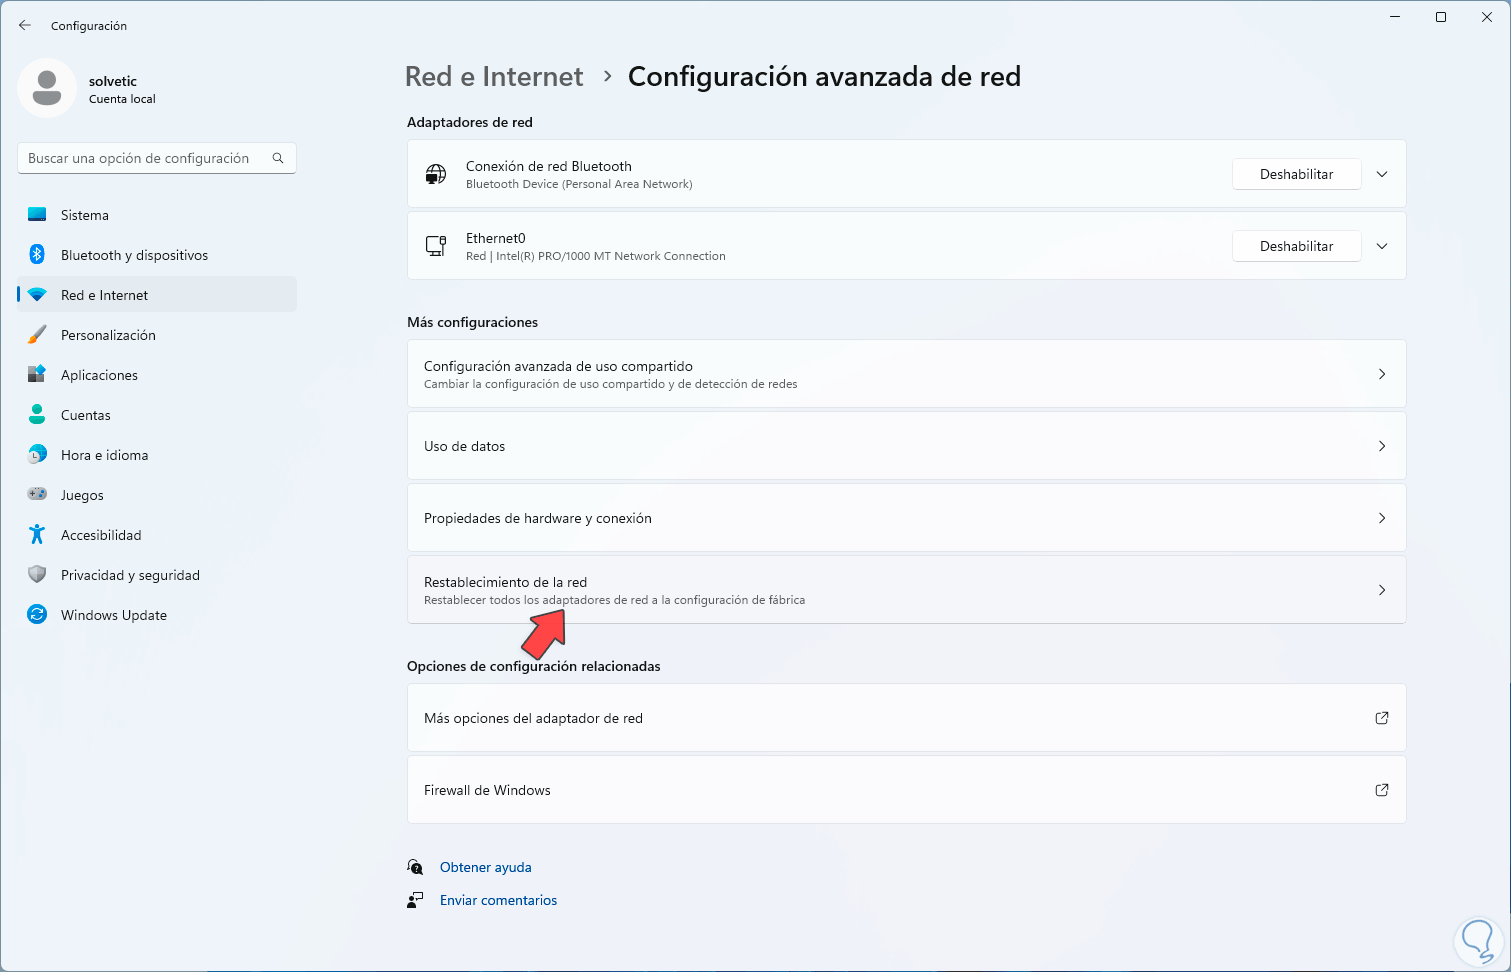
By clicking there we will see the following:
Step 3
There we will click on "Network reset" to see the following:
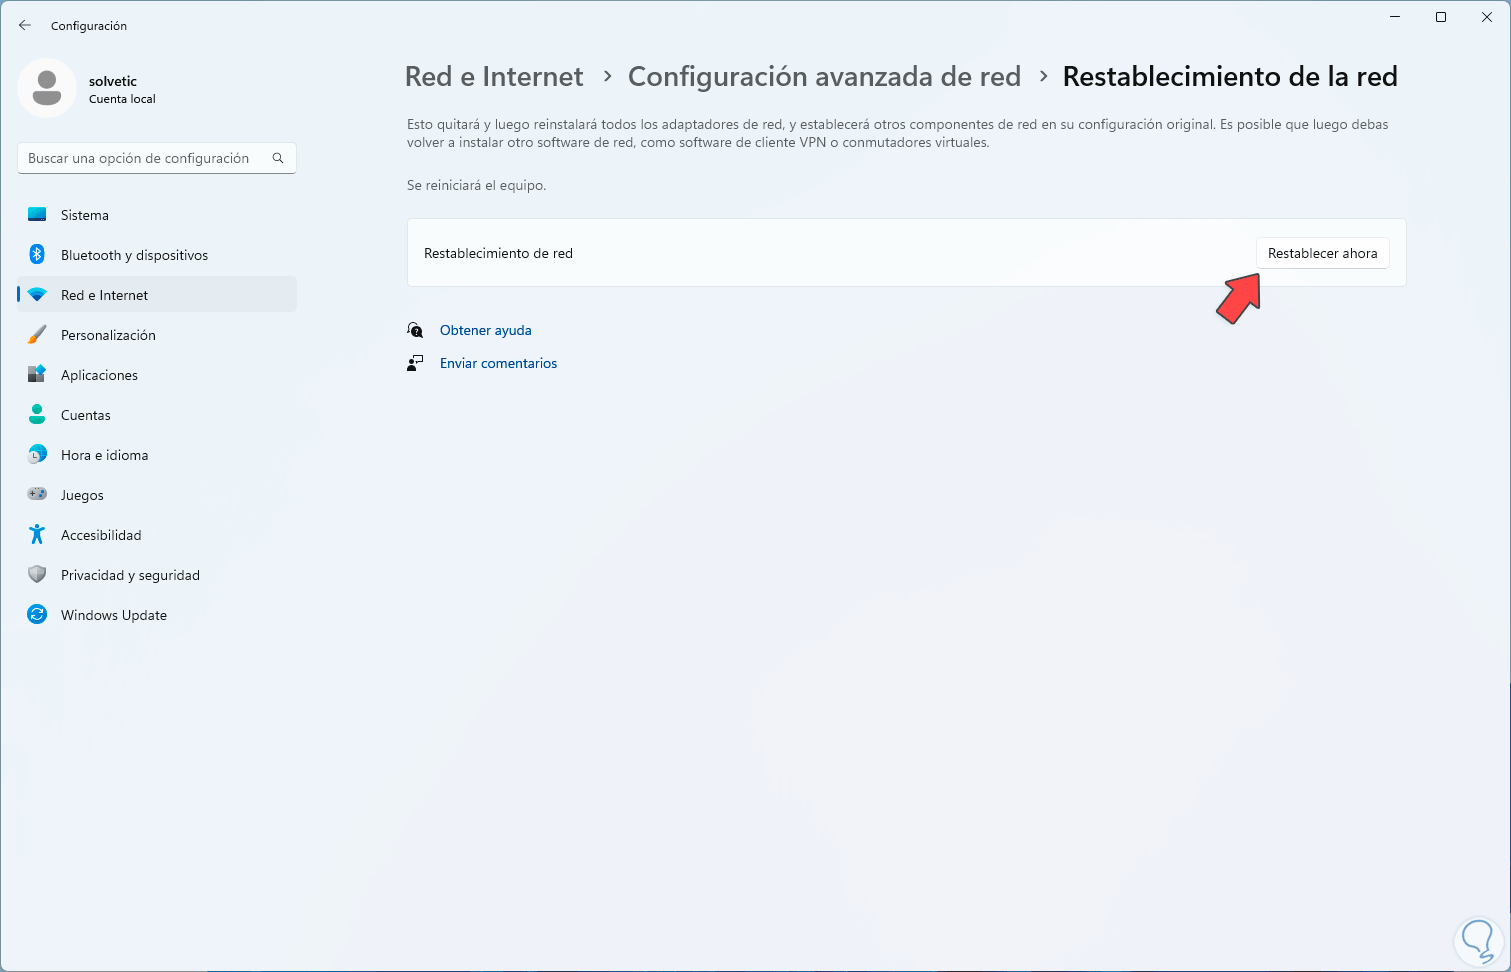
Step 4
We click on "Reset now" and the following message will open:
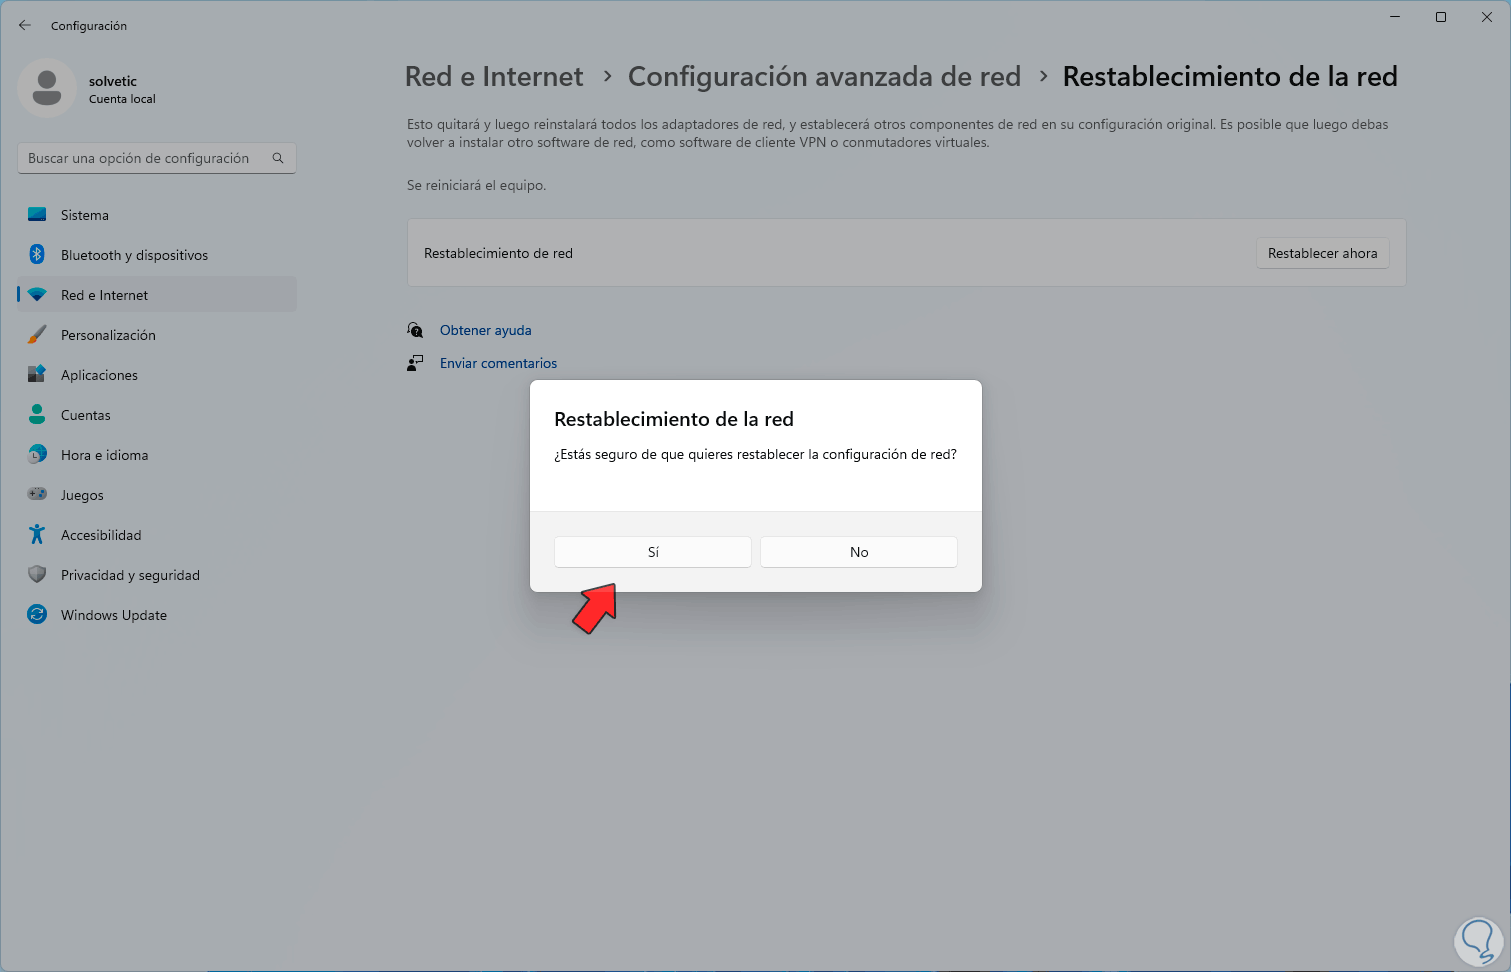
step 5
We confirm this operation and then we will see the time in which the system will restart:
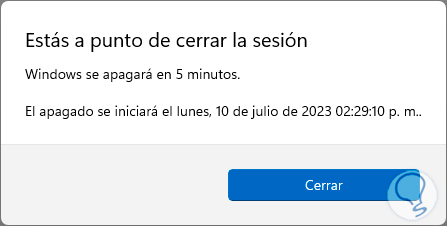
step 6
We can apply these changes by restarting Windows manually:
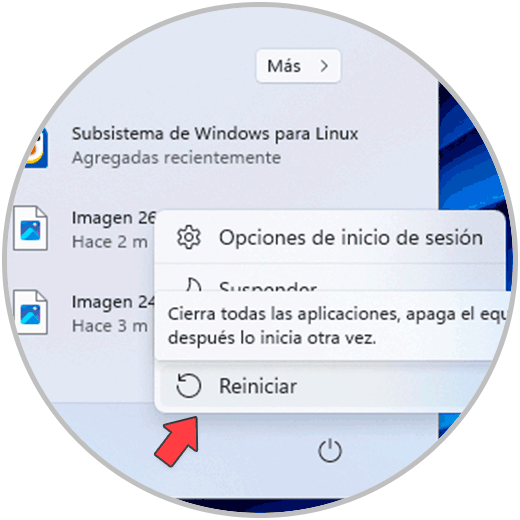
step 7
We wait for the reset to complete:

step 8
Confirm that the sites load in Chrome:

6 Disable Chrome Extensions
The extensions or complements allow the browser to expand its options and operation, but excessive use of these can cause effects contrary to what is desired, since some of these extensions may contain malicious code, we can deactivate them to check, in this case we open Google Chrome.
Step 1
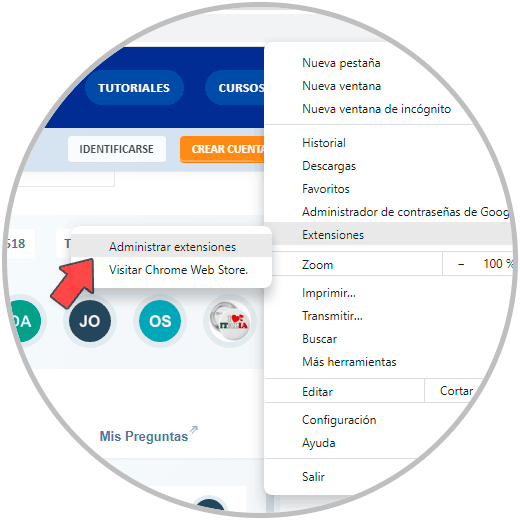
We go to the configuration menu and there we click on "Extensions - Manage extensions":
Step 2
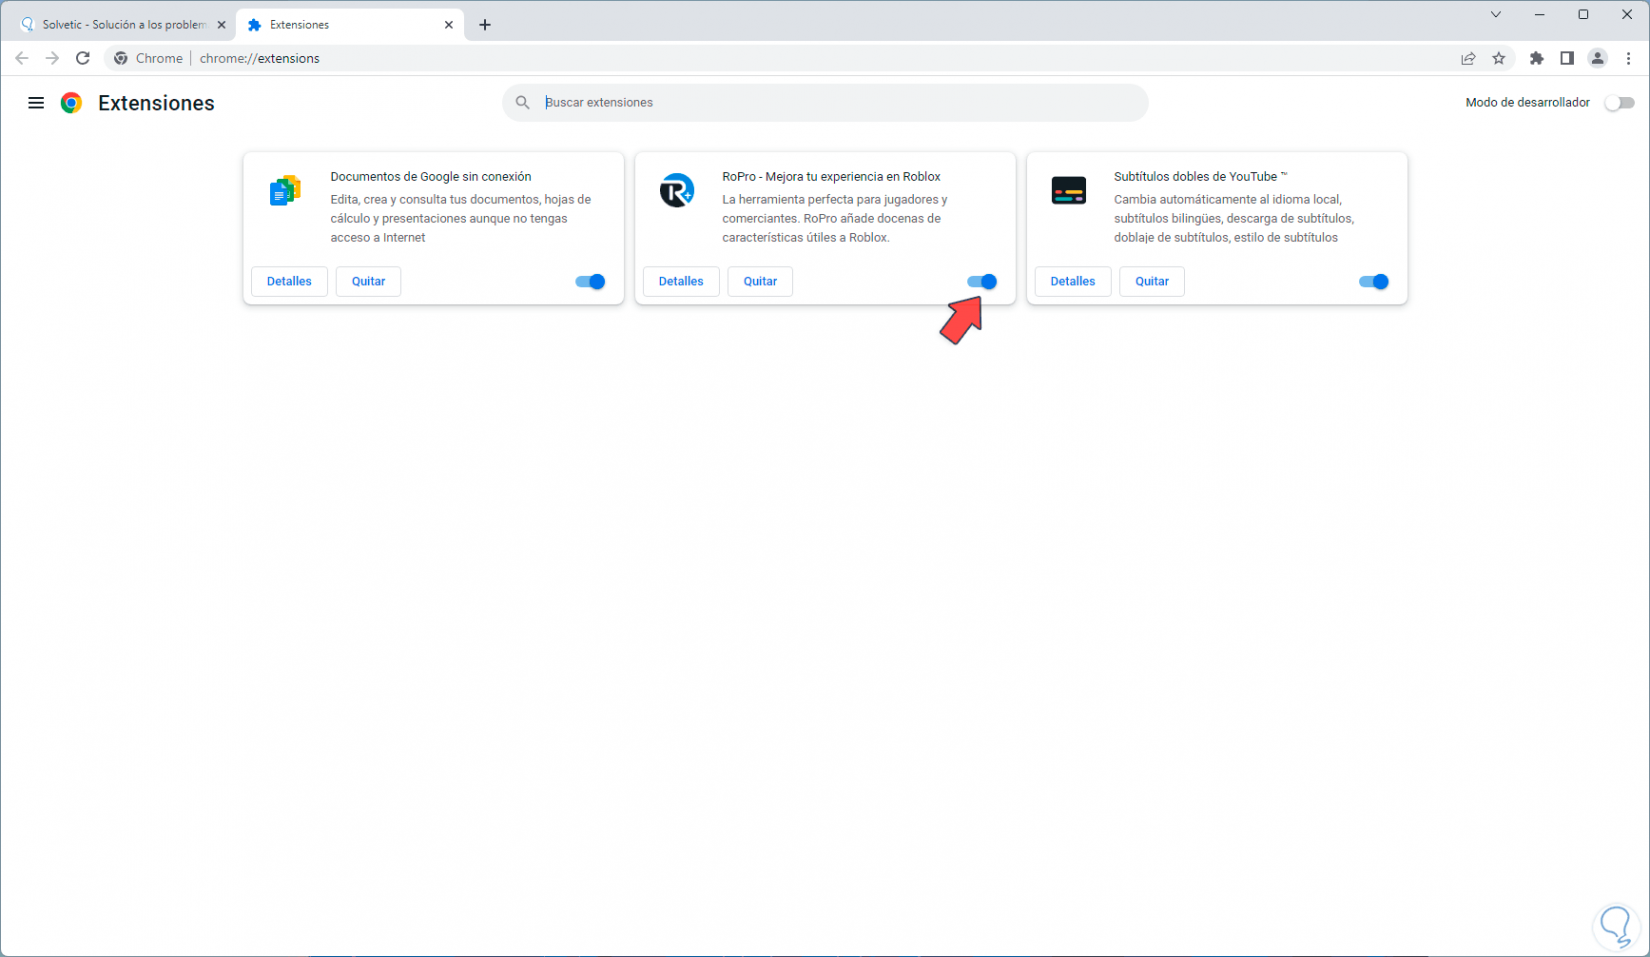
The extensions window will open:
Step 3
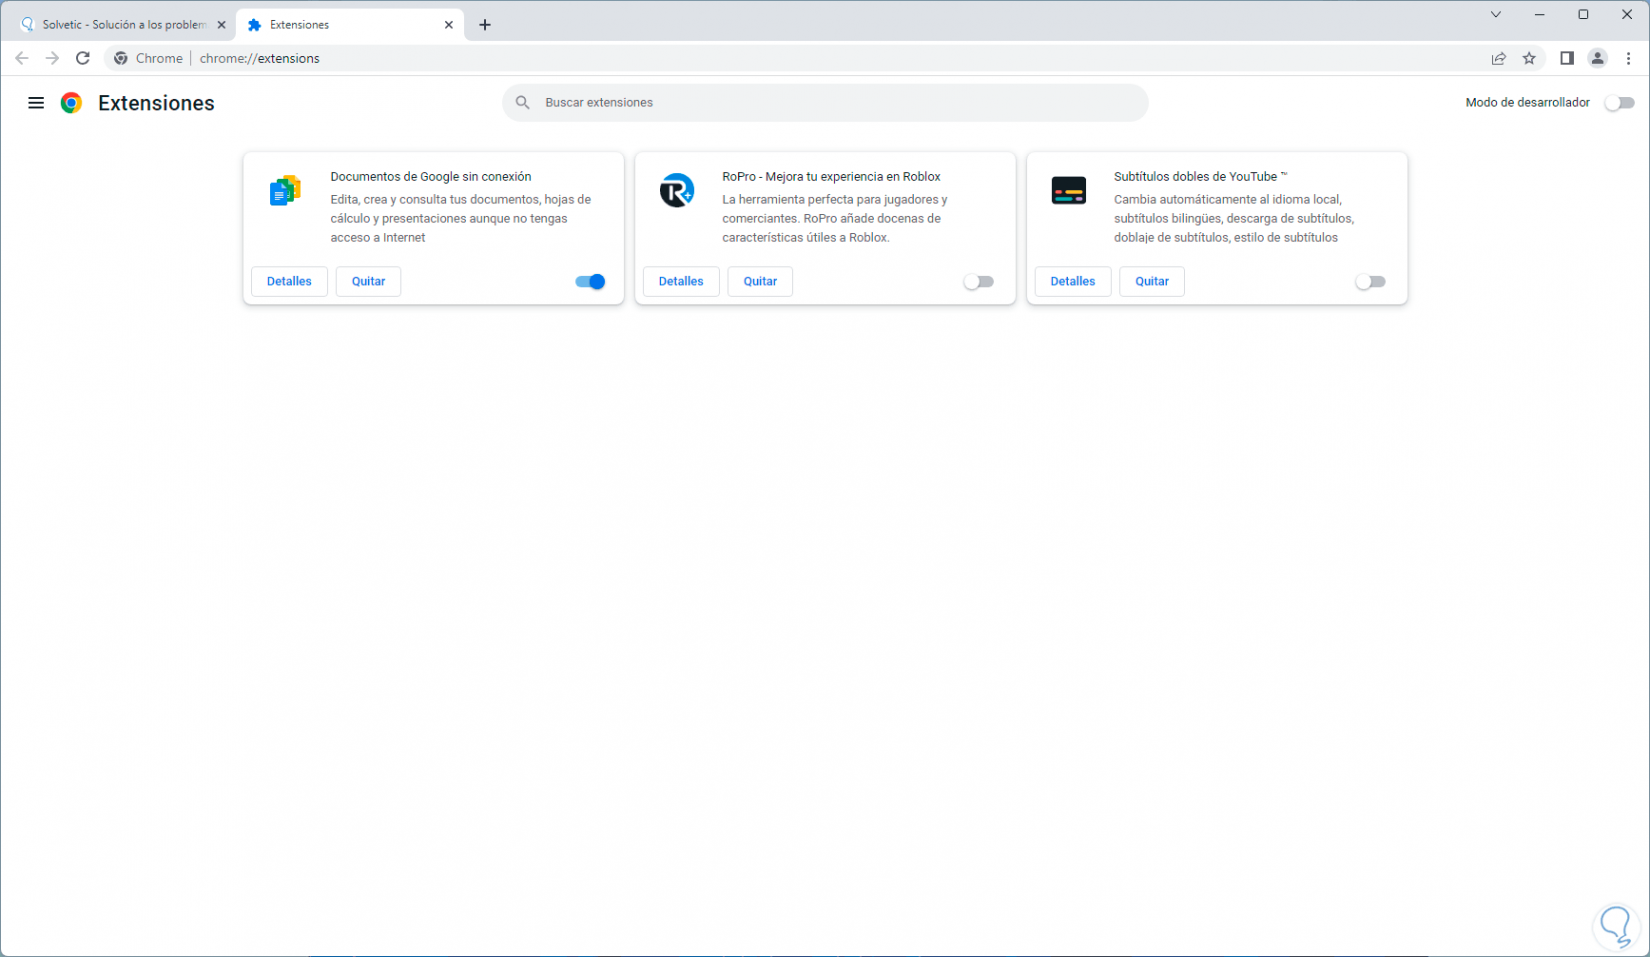
There we are going to disable the extensions to validate if they affect Chrome directly:
Note
if any extension is not useful we can uninstall it.
Step 4
We refresh the page to see that it loads normally:

7 Disable VPN
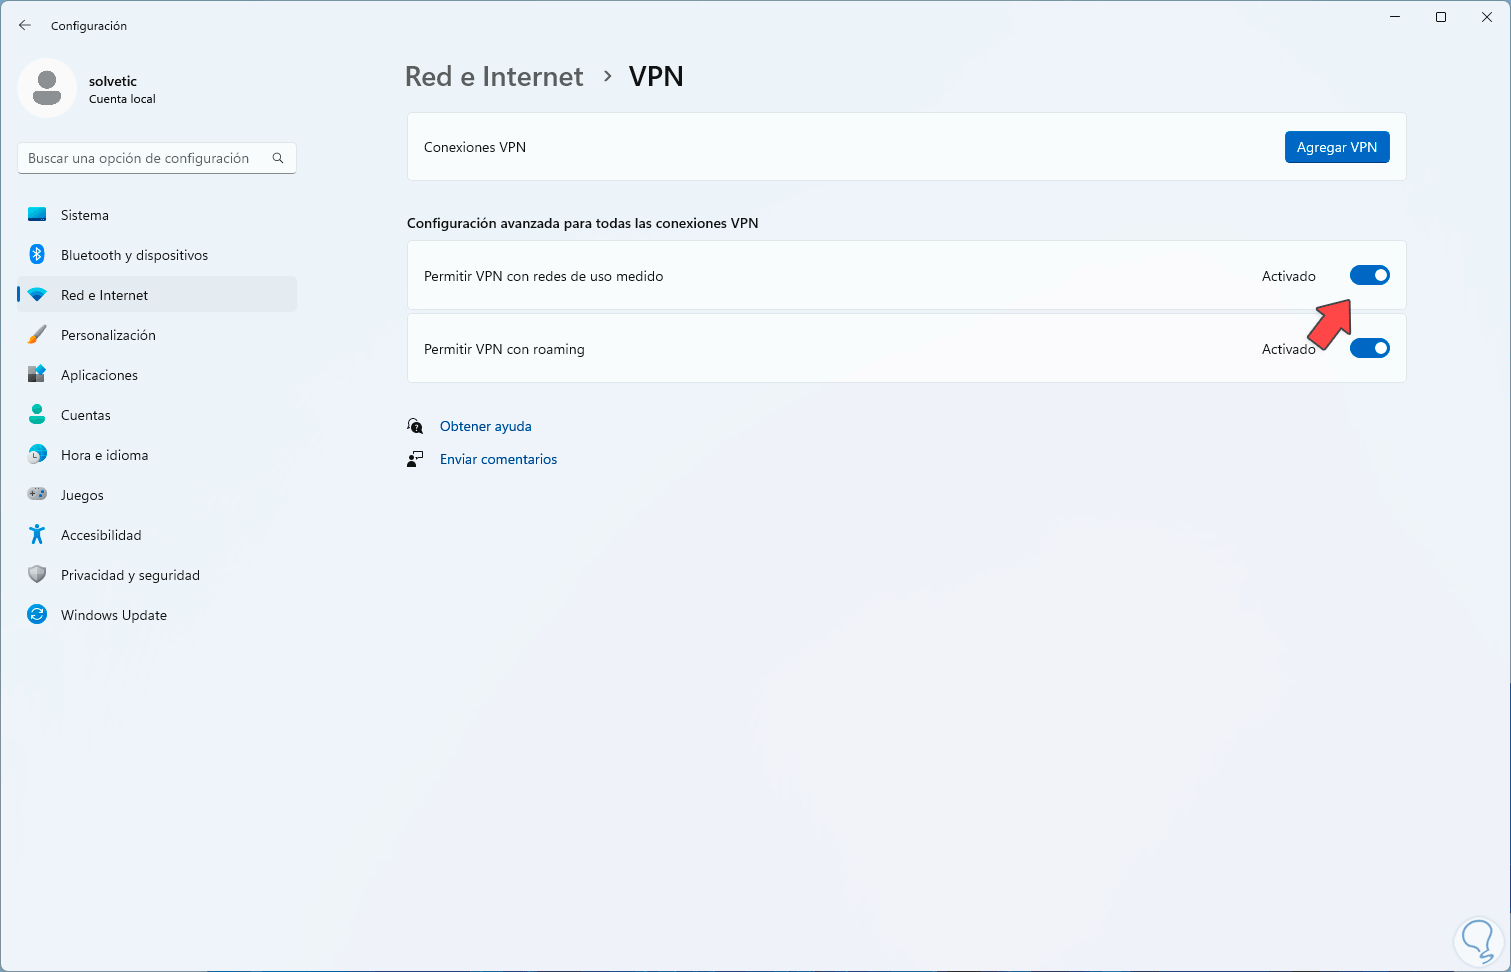
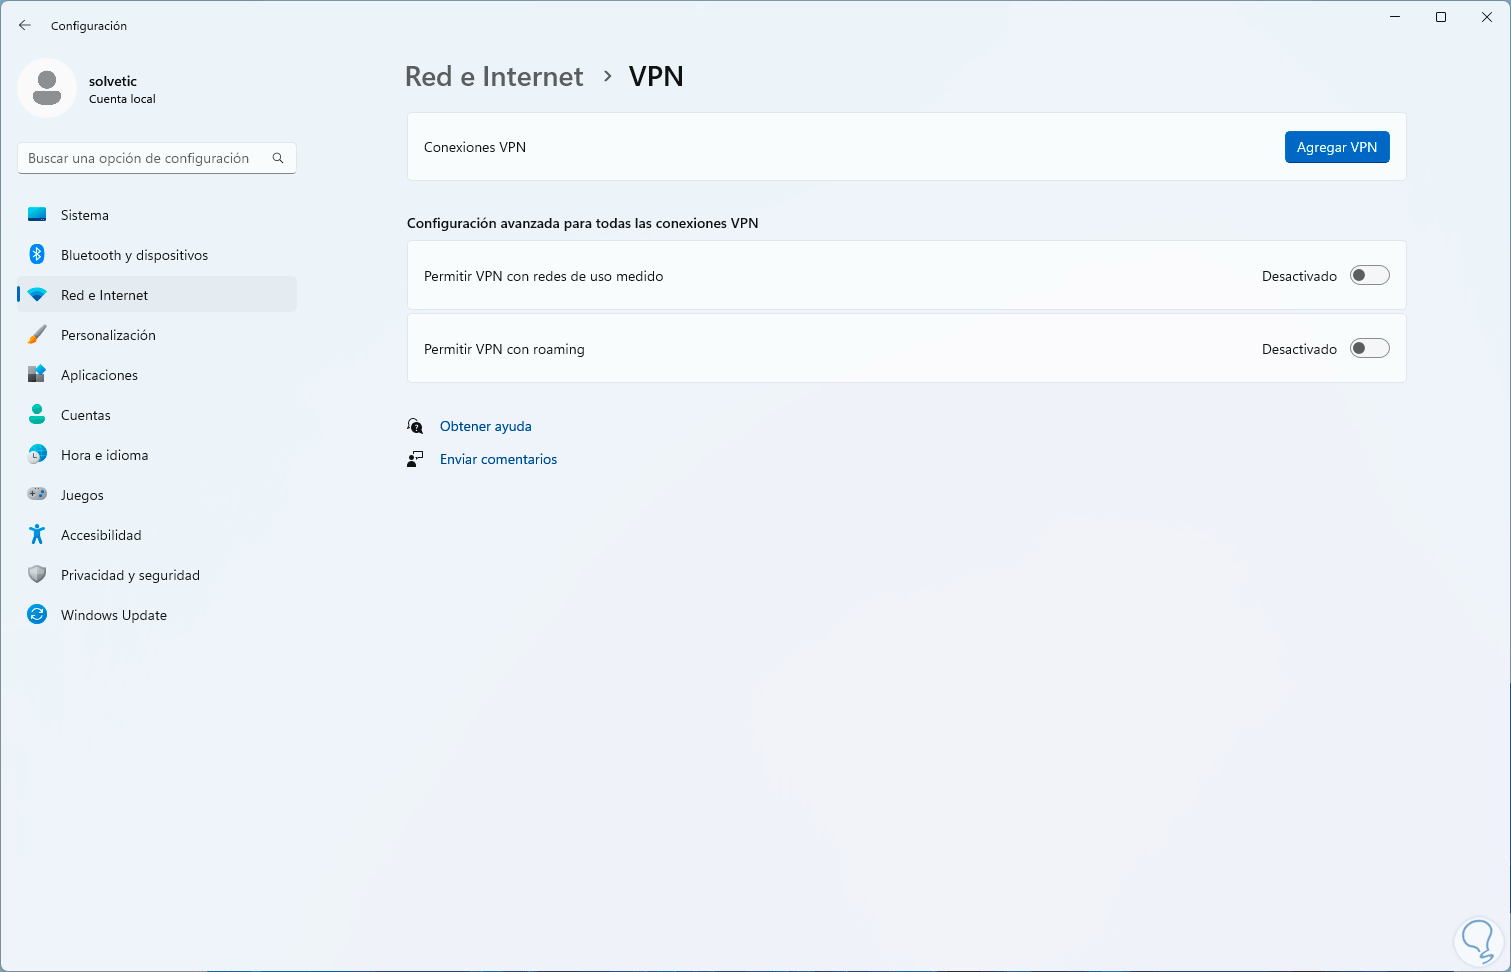
The use of VPN virtual private networks is a mechanism to protect user data, but this encryption system can affect the loading of a site or page in Google Chrome, we can disable the VPN (if we have it) as well as its options.
Step 1
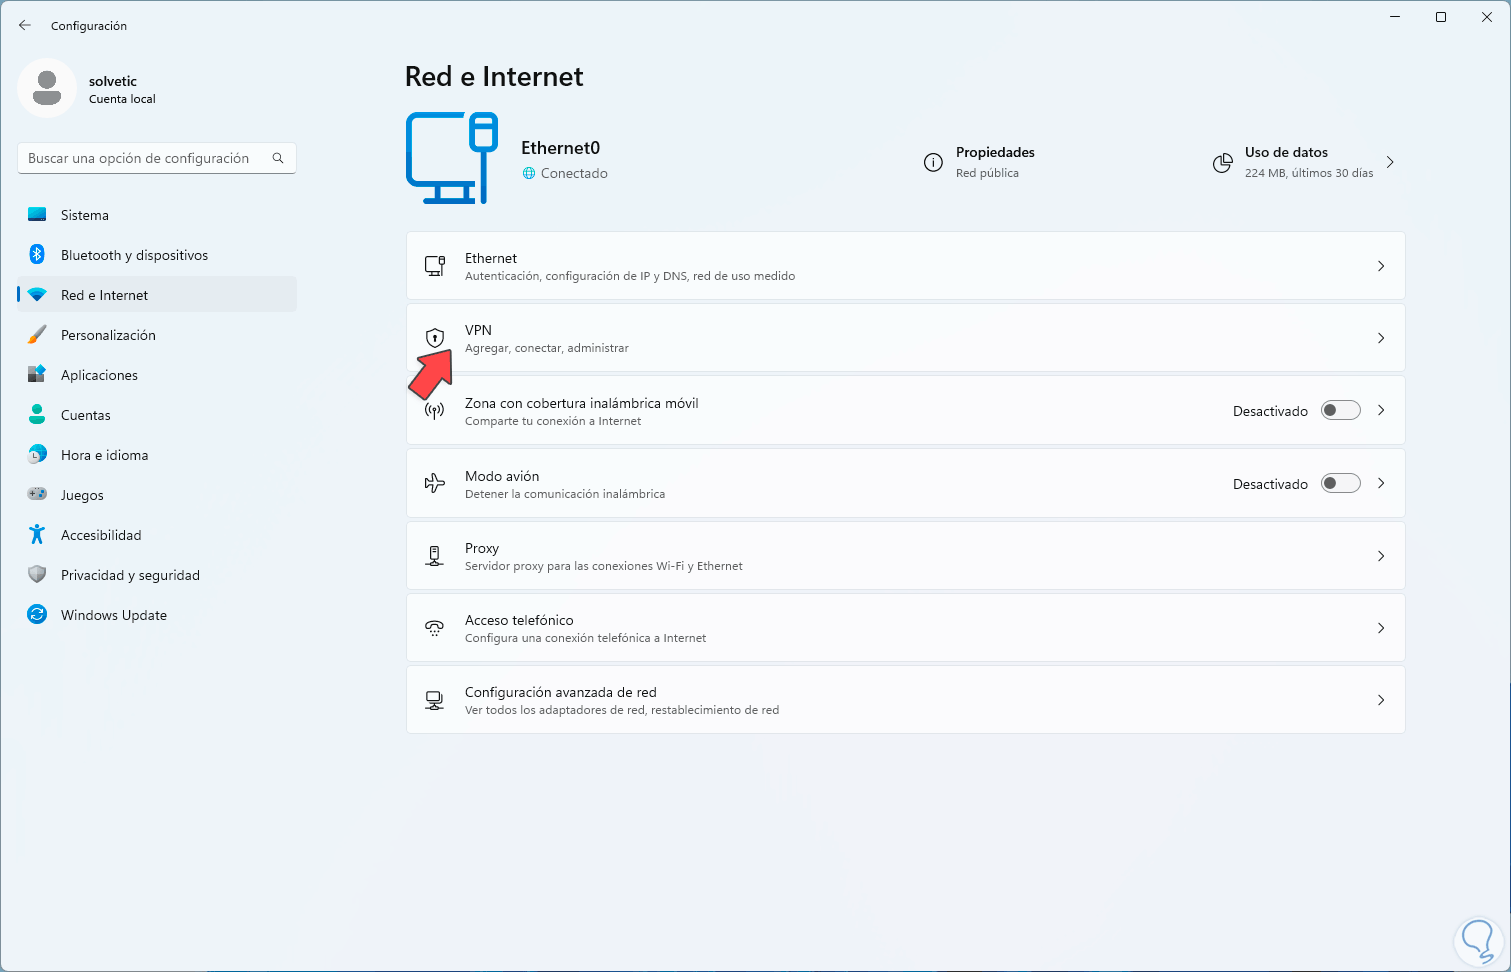
To achieve this we are going to:
Step 2
When accessing there we will see the following:
Step 3
We are going to deactivate the available options of the VPN:
Step 4
We open Chrome and confirm that the site is accessed:

8 Clear Chrome Data
This is one of the common Chrome errors and it is that as it is used frequently, cookies, history, data and much more information are stored that in the end can cause the pages to not open correctly due to data accumulation or in some cases. cases because the configuration of the site we visit change.
Step 1
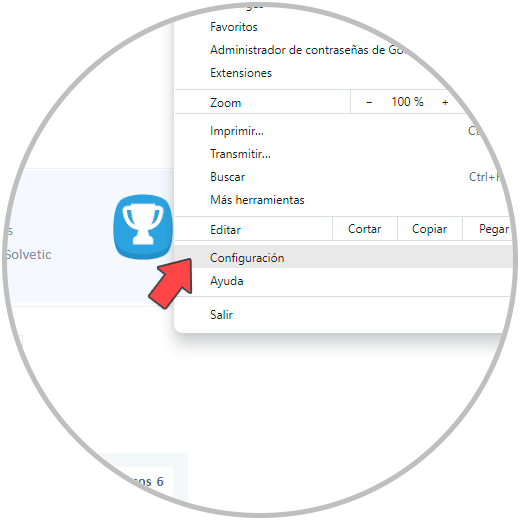
Deleting this data is simple, we open Google Chrome and from the menu we give "Settings":
Step 2
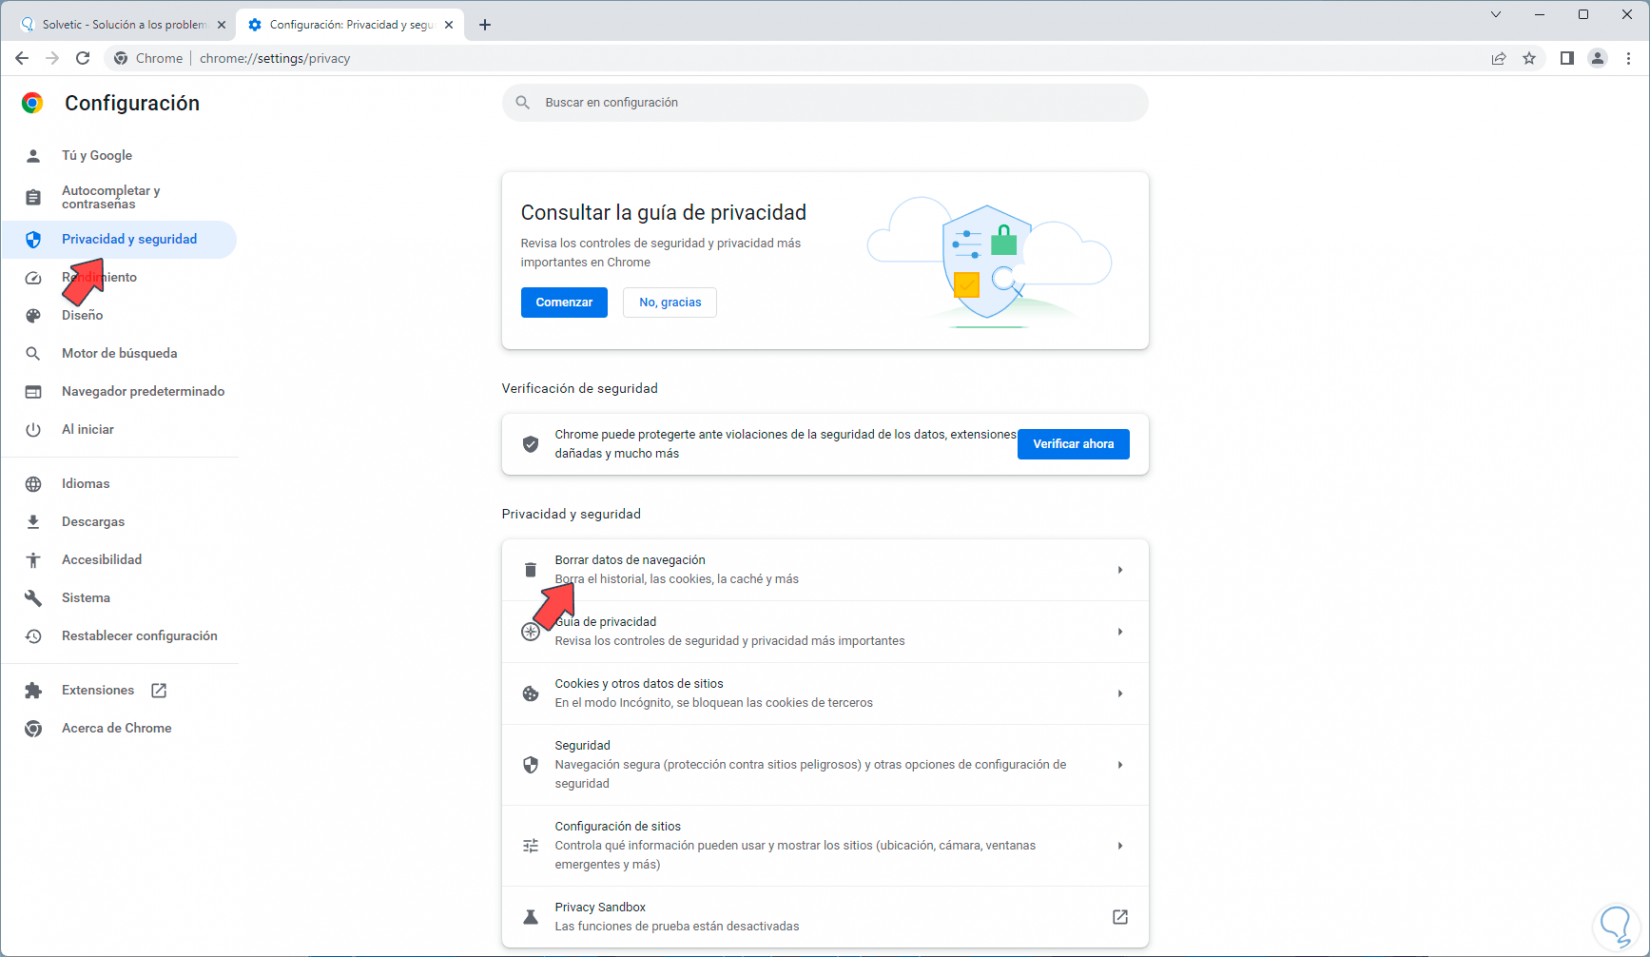
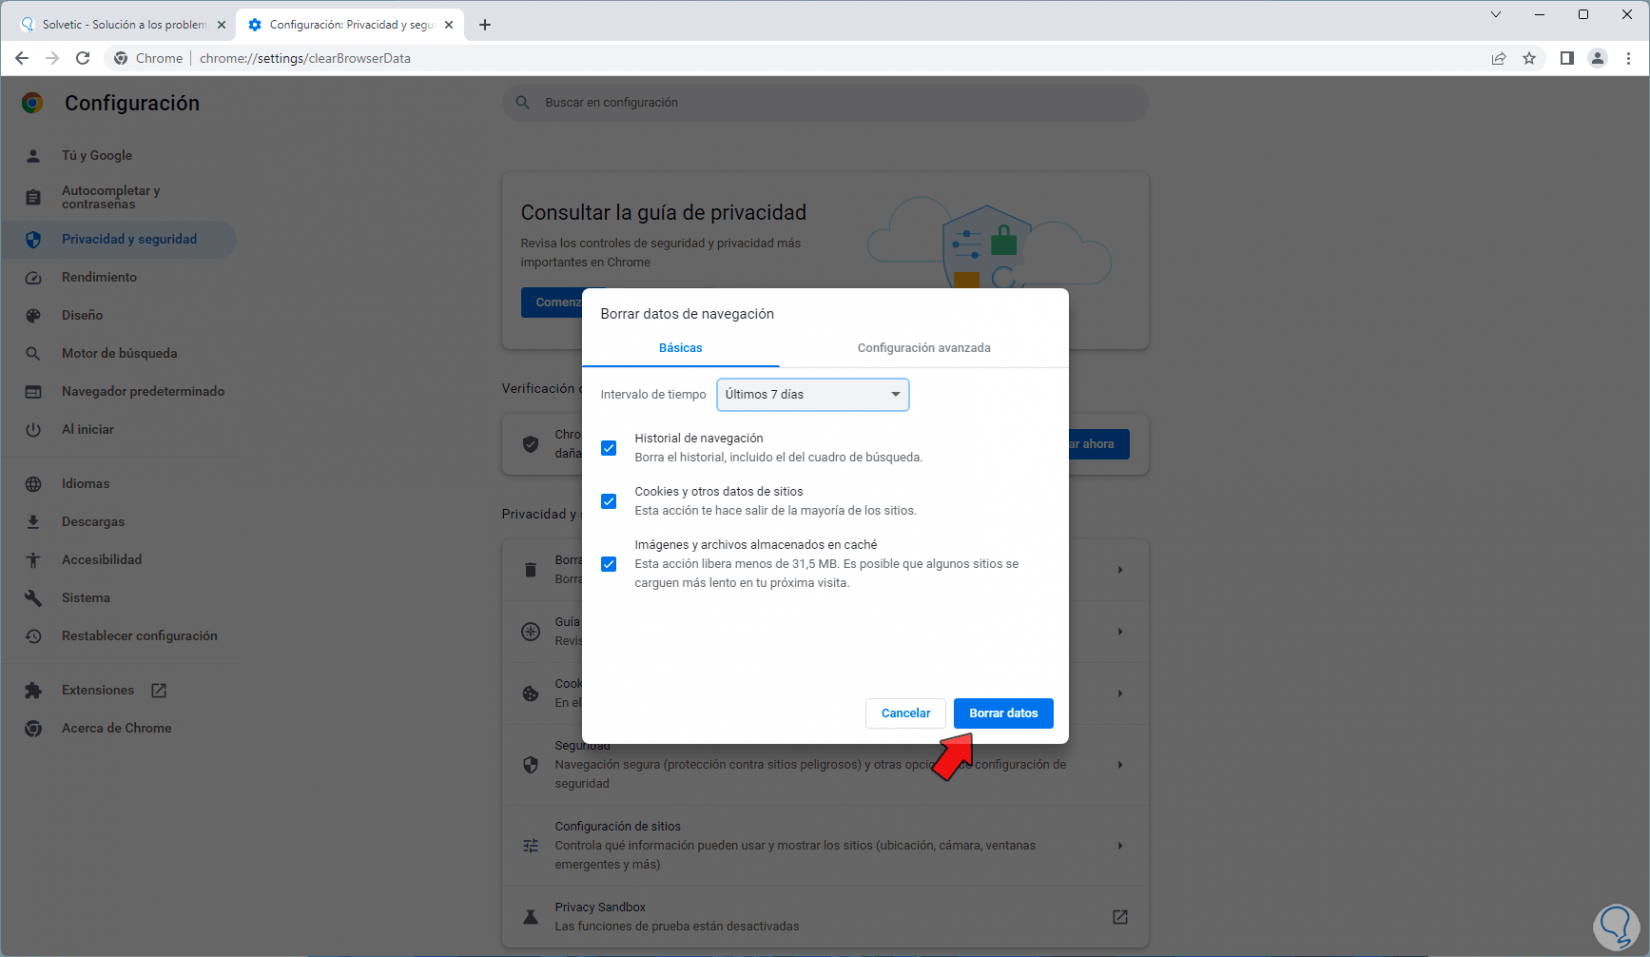
We are going to go to the "Privacy and security" section and then click on "Clear browsing data":
Step 3
Clicking there will open the following. We are going to select the time range, activate the desired boxes and click on “Clear data”,
Step 4
then we validate that the site opens:

9 Update Windows
Windows 10/11 handles different types of updates and some may be directly related to Google Chrome fixing some bugs and thus allowing all sites to open correctly.
Step 1
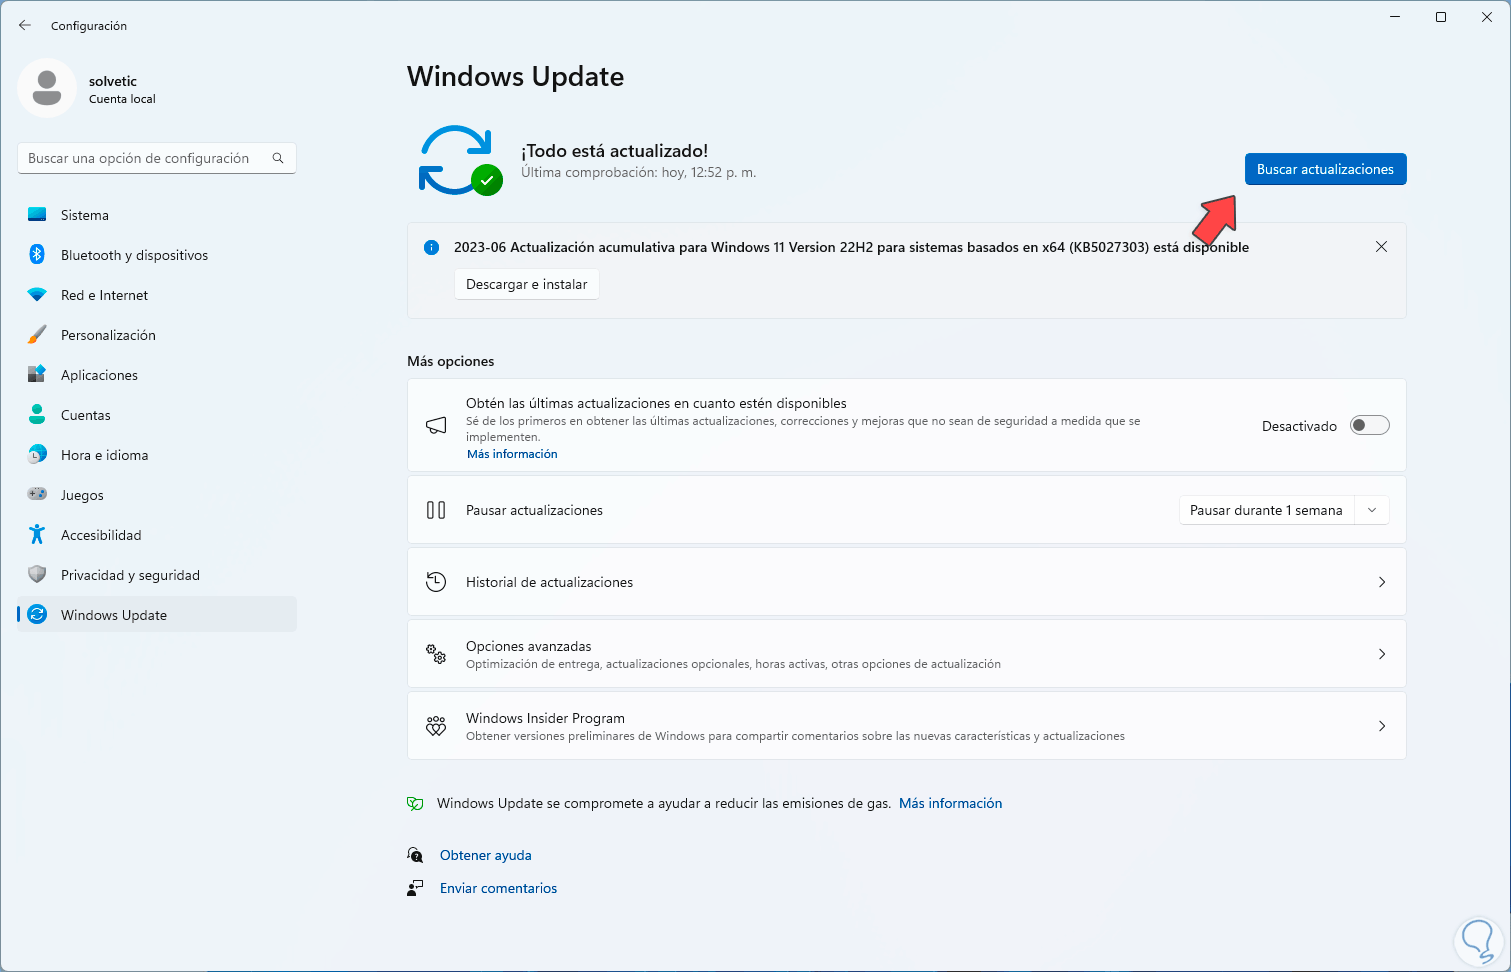
We are going to:
Step 2
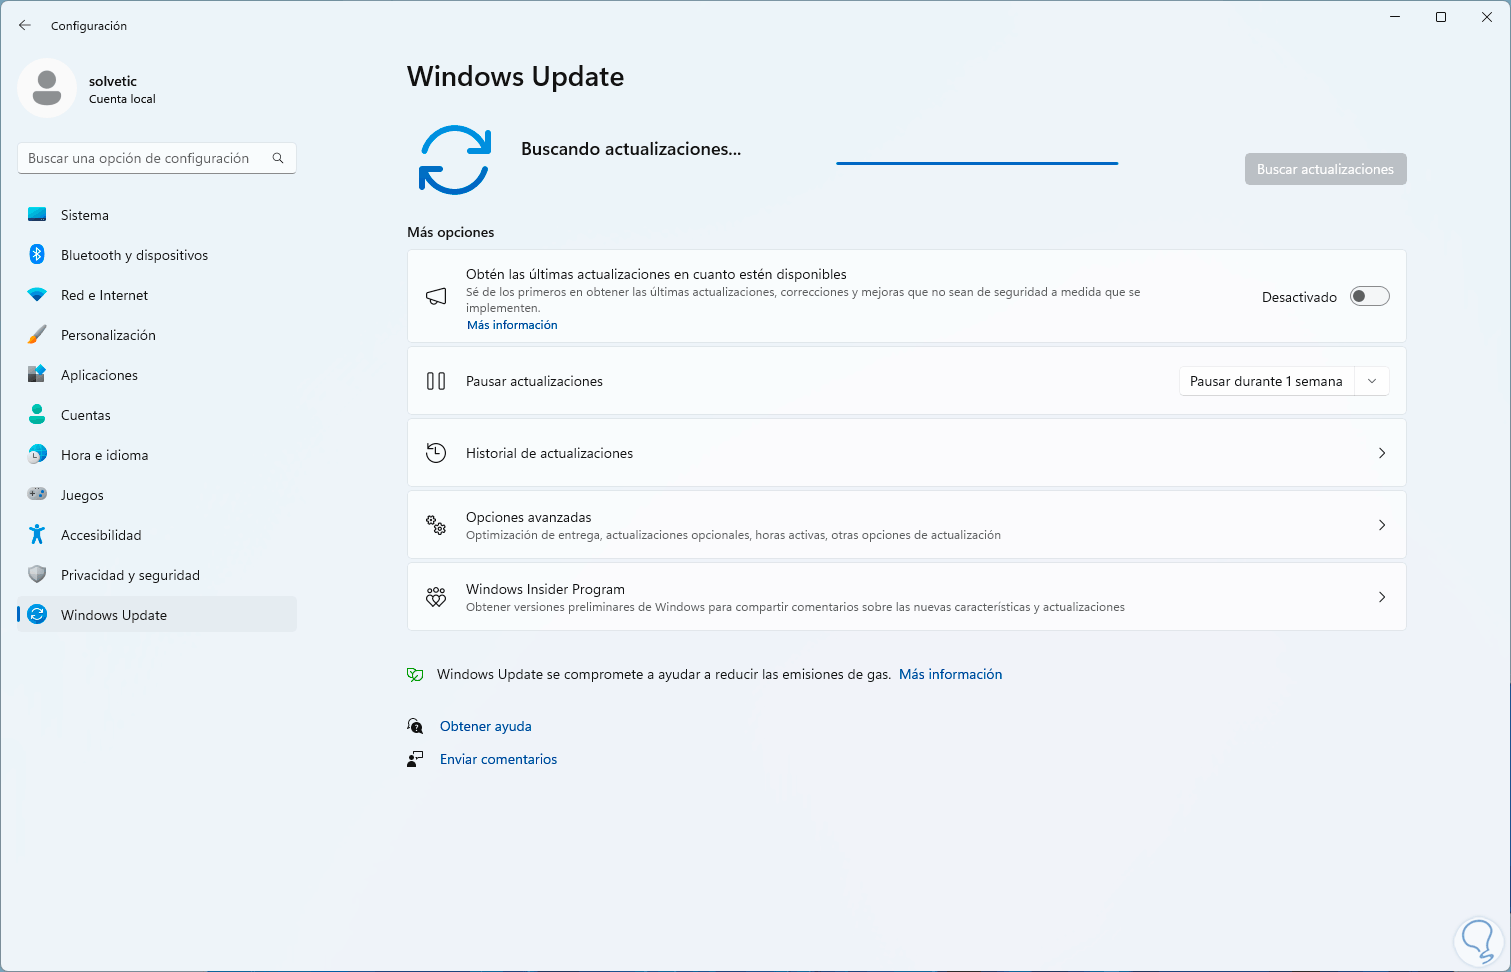
There we click on "Check for updates" and wait for the process to take place:
Step 3
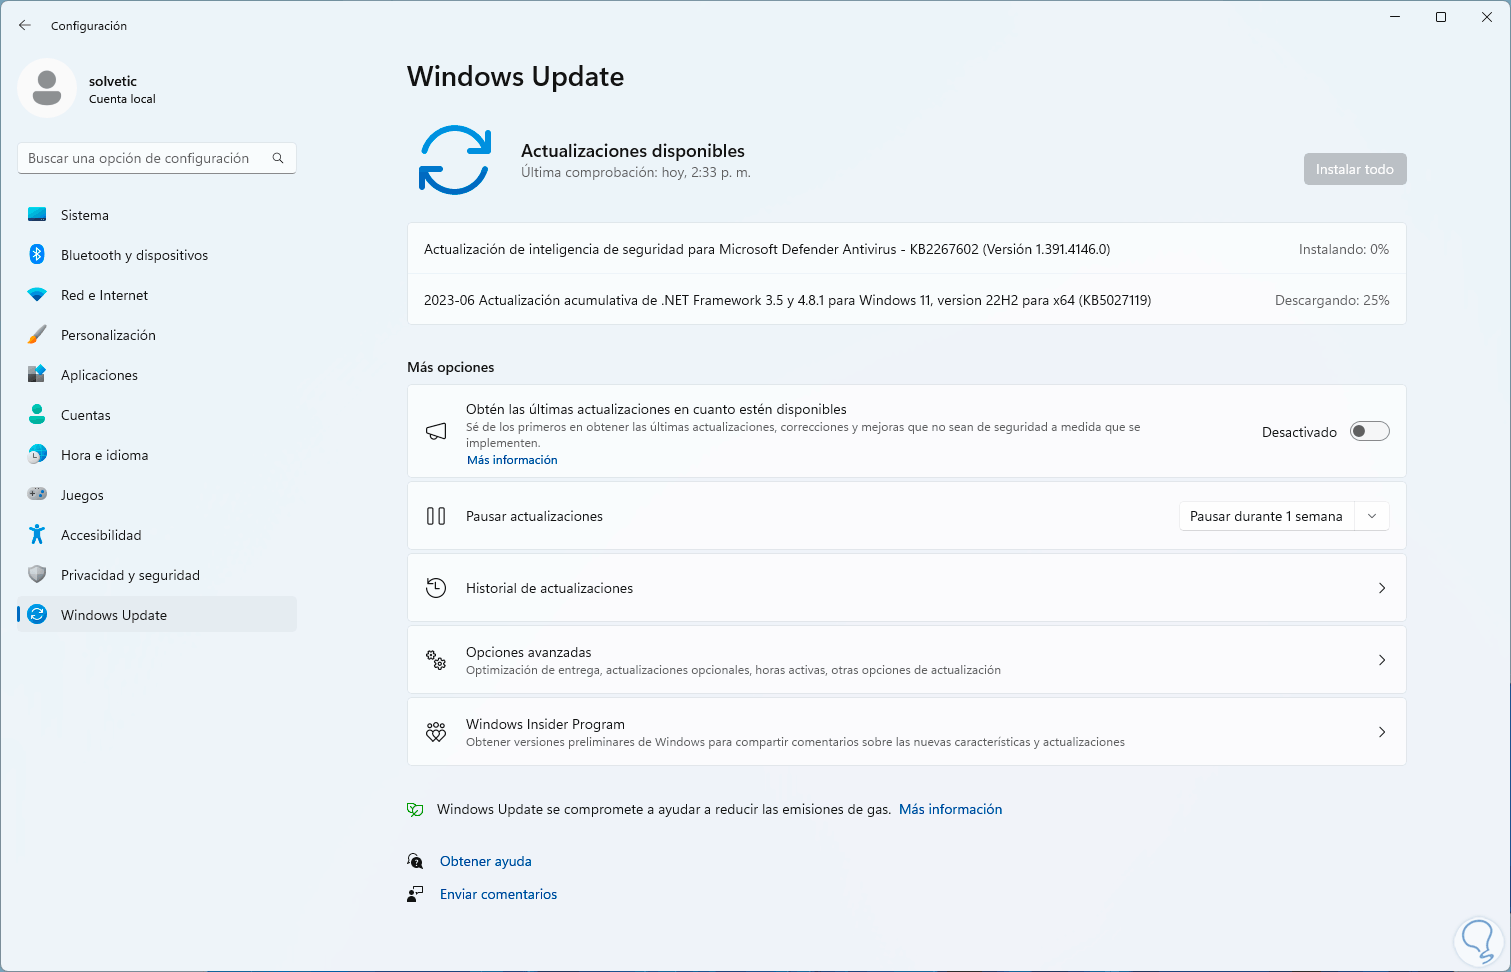
We validate if any of these updates apply to Google Chrome:
Step 4
We open Chrome and see if the site loads:

10 Reinstall Chrome
Finally, if none of the mentioned options help to correct this error and the site is still bad, we can reinstall Chrome.
Step 1
First we are going to uninstall it from the path:
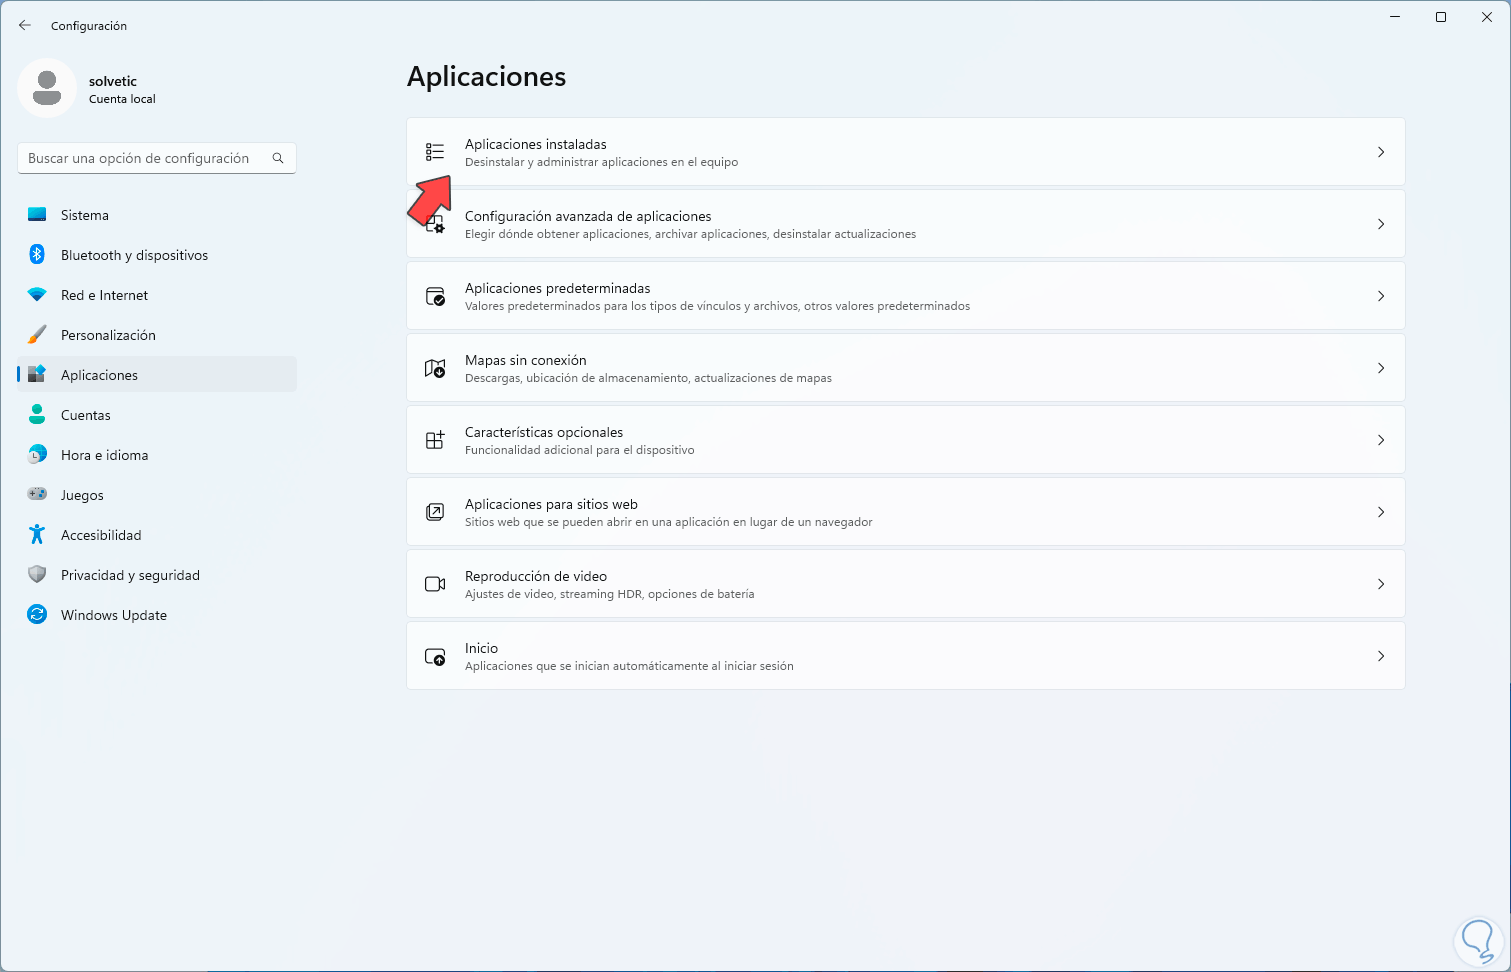
Step 2
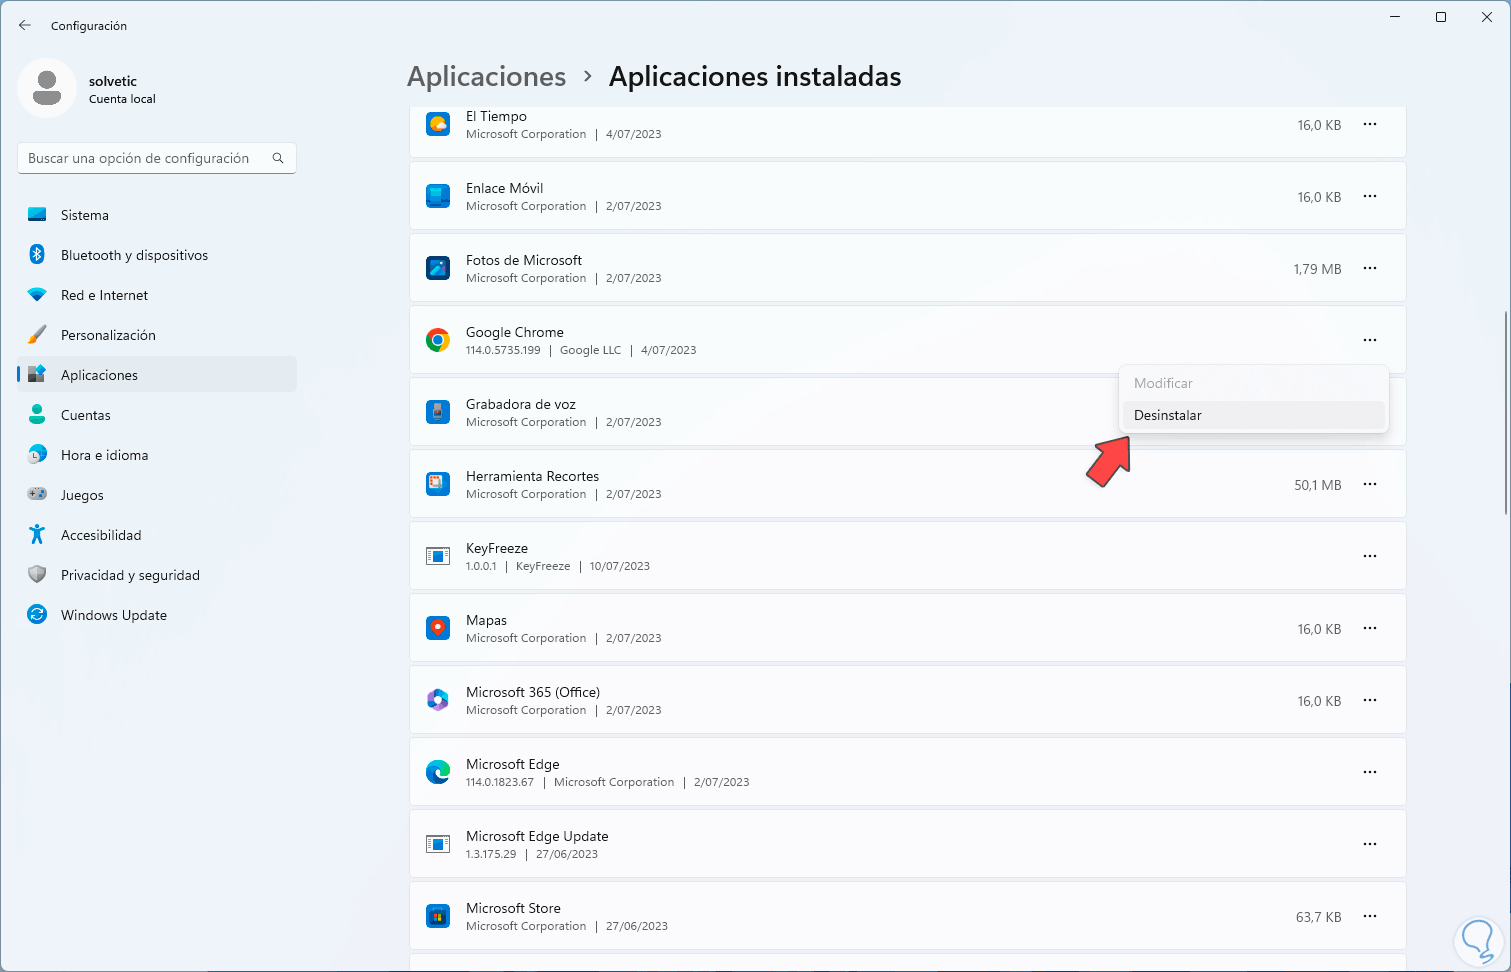
Then we are going to locate Google Chrome and click on its menu to select the "Uninstall" option:
Step 3
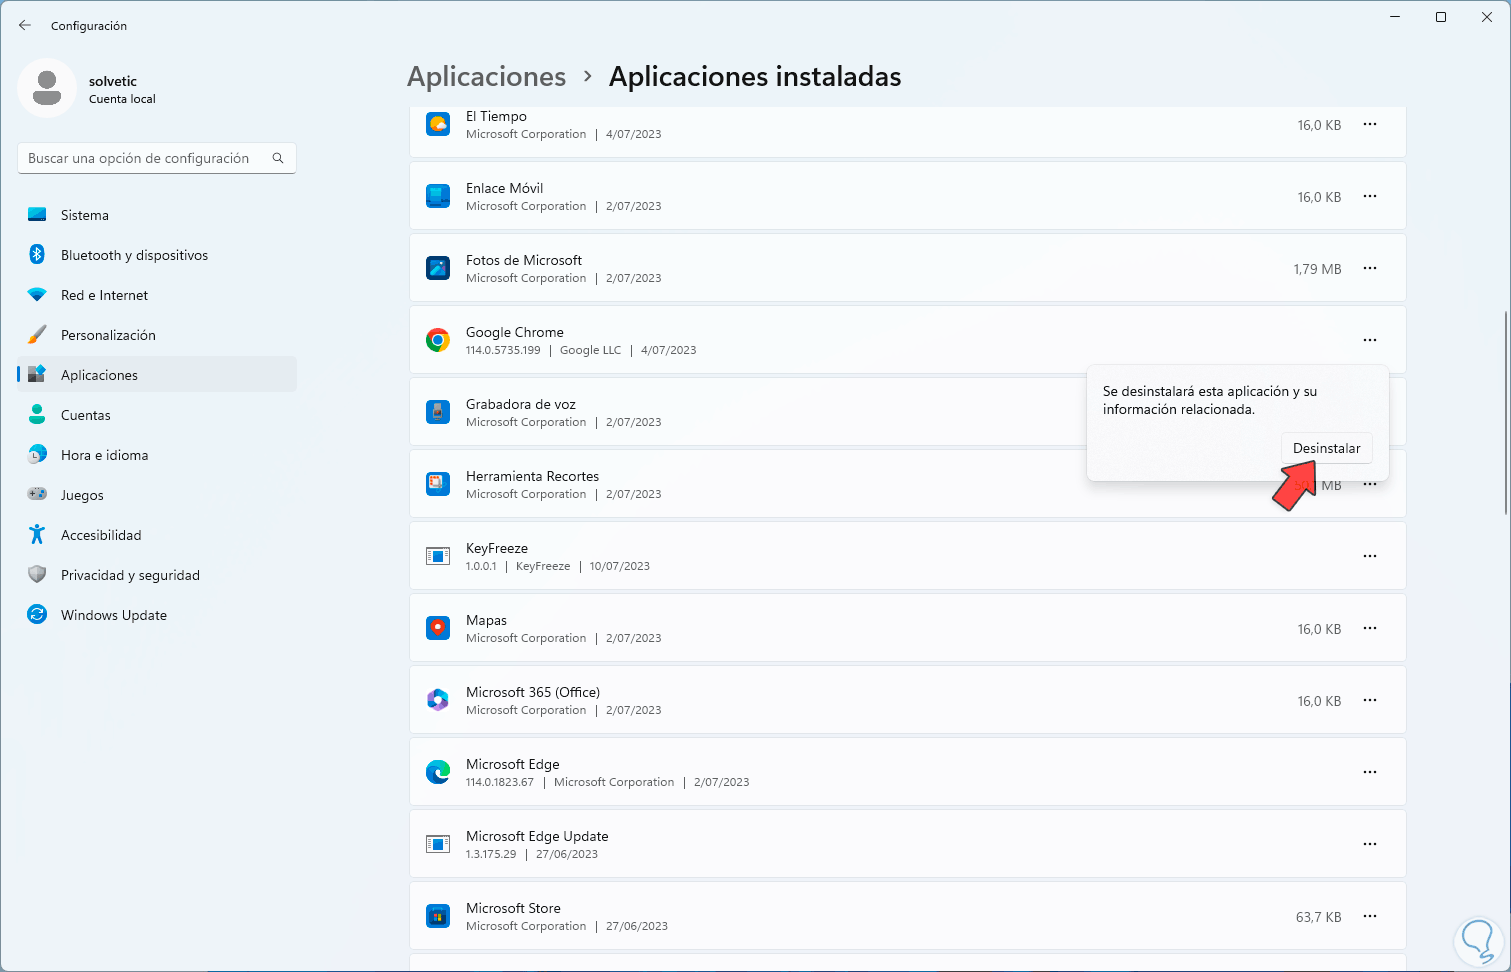
By clicking there we must confirm:
Step 4
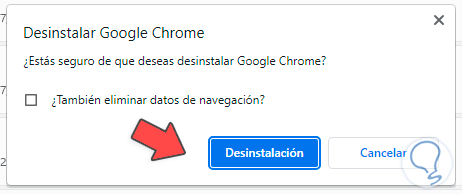
We will see the following message:
step 5
We click on "Uninstall" and wait for it to be uninstalled:
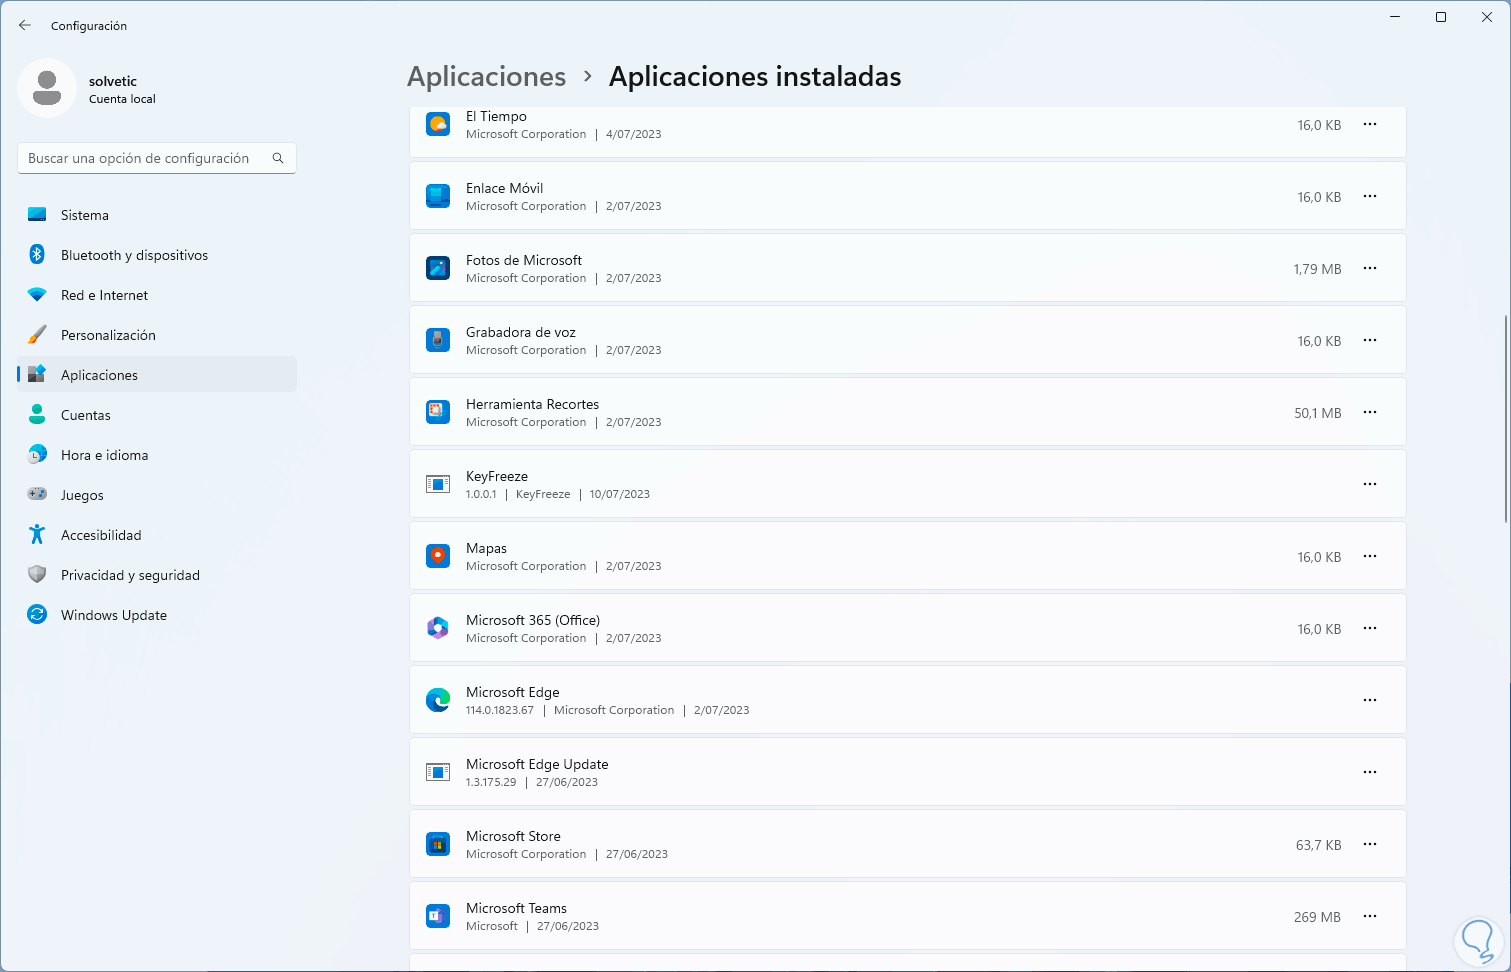
step 6
Now we go to the Google Chrome URL:
Chrome
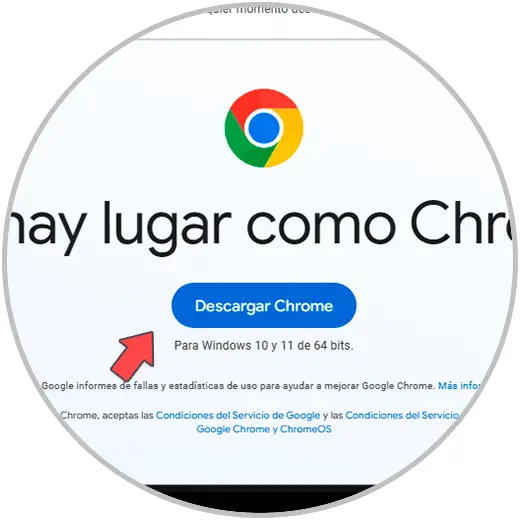
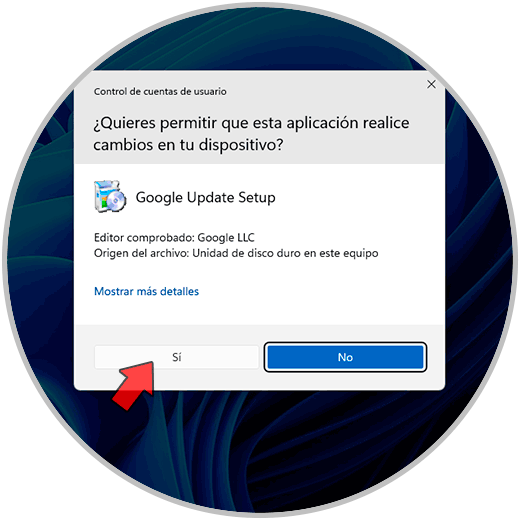
step 7
Once downloaded, we execute the file and accept the system permissions:
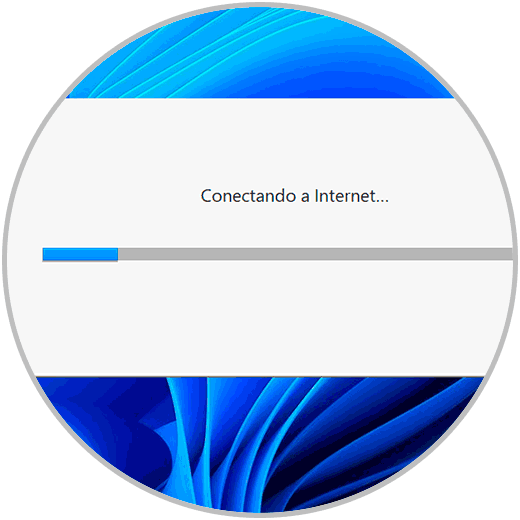
step 8
The Chrome download will start:
step 9
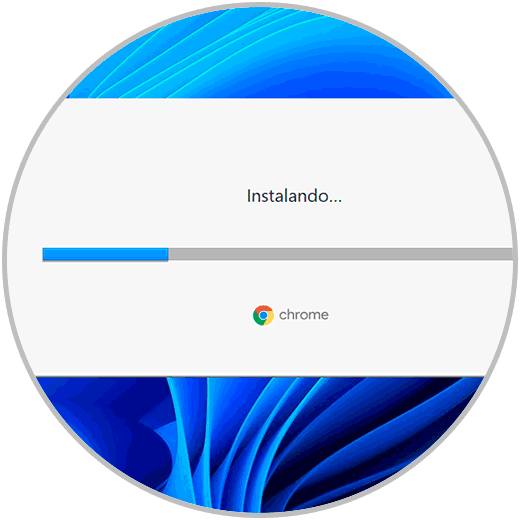
Then it will install:
step 10
When Google Chrome opens we will see if the site loads or not:

These are the ways to fix this error and thus use Chrome to the maximum of its capacity..