To stay up to date, remember to subscribe to our YouTube channel!
SUBSCRIBE ON YOUTUBE
As Windows users we always hope that the startup and loading of the system and its applications is as fast and optimized as possible, but on many occasions we see how the system presents some failures when loading its components and services and the reason for this could be in various places, from system failures to profile errors. If we have any type of these errors, we can experience that Windows does not Load Correctly and that is why we cannot enter our system normally..
But this is not an impediment for TechnoWikis to attract you some comprehensive solutions that will help you recover the proper functioning of the system and make it possible for us to repair Windows start, the steps that you will see apply to both Windows 10 and Windows 11.
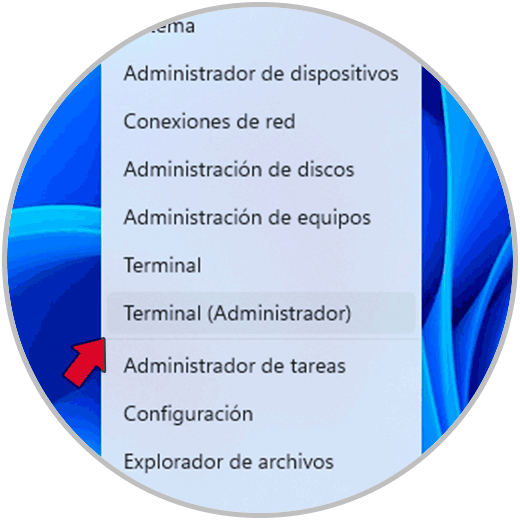
1 Fix Windows not loading from Terminal
Step 1
Through the terminal (Command Prompt or PowerShell), we have the opportunity to execute some commands that will help us check the system thoroughly and correct or rule out that the system does not load due to internal errors, to start we will open the terminal as administrator from the Start menu:
Step 2
In the console we will use the DISM utility, DISM (Deployment Image Servicing and Management) has been developed in order to manage and maintain system images and this includes the installation images of Windows 10/11, if the local image presents a fault we can be faced with a number of faults. In the console we will execute the following:
dism /online /cleanup-image /restorehealth
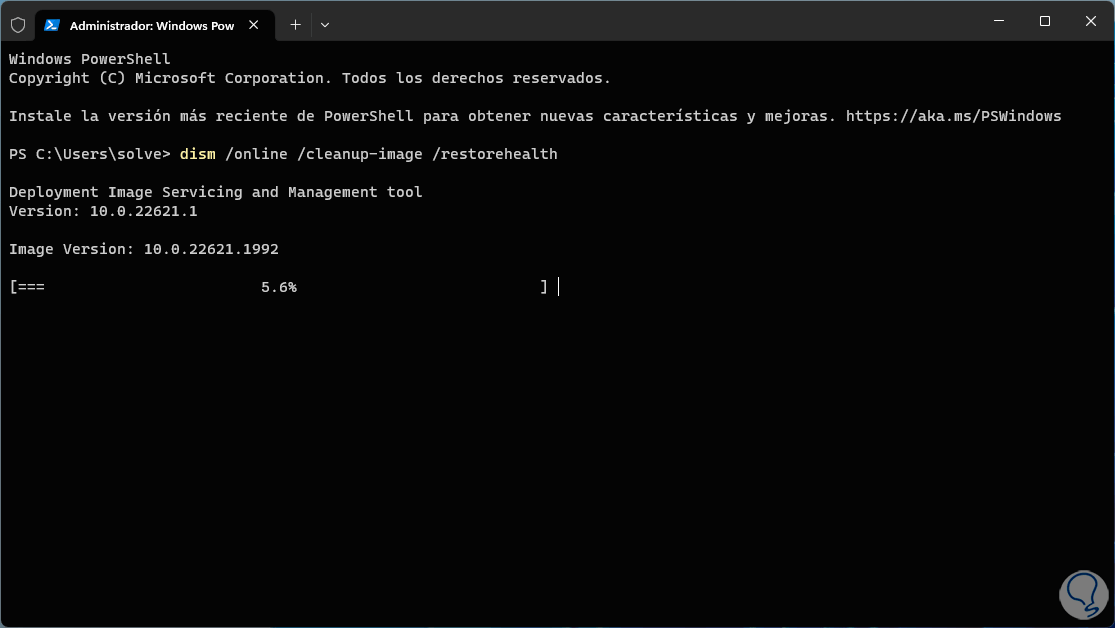
Step 3
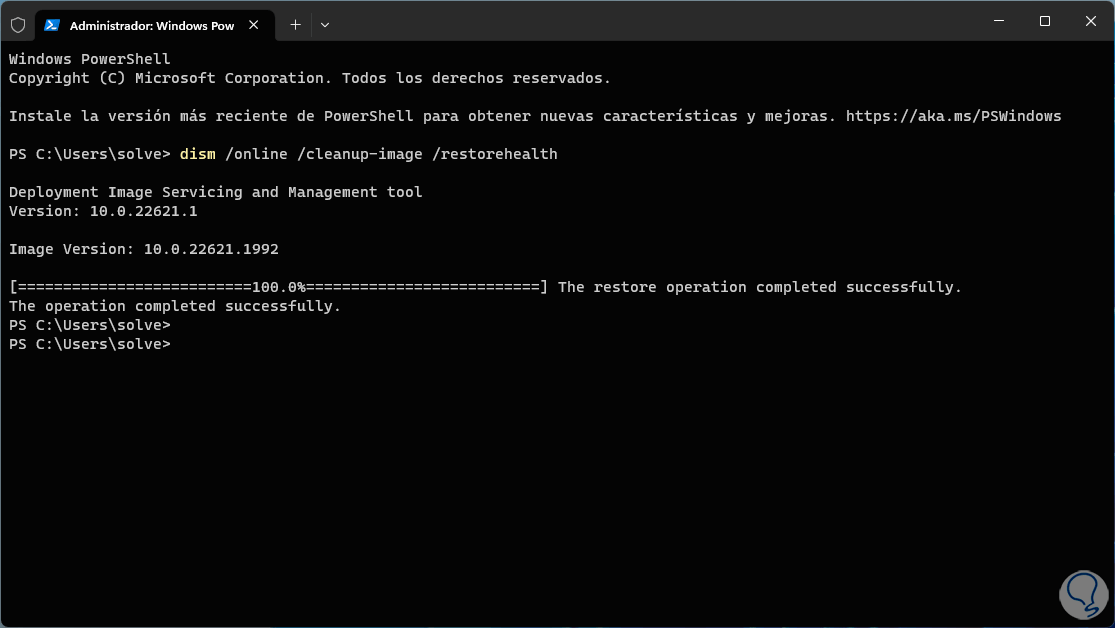
We wait for this process to finish:
Step 4
Now we are going to review the Windows NTFS file system with the SFC (System File Checker) command, which will be in charge of analyzing and correcting any errors in the file system, it does this by replacing the damaged versions or those that have been modified by original versions and in good condition hosted in the system file cache, in the terminal we execute the following:
sfc /scannow
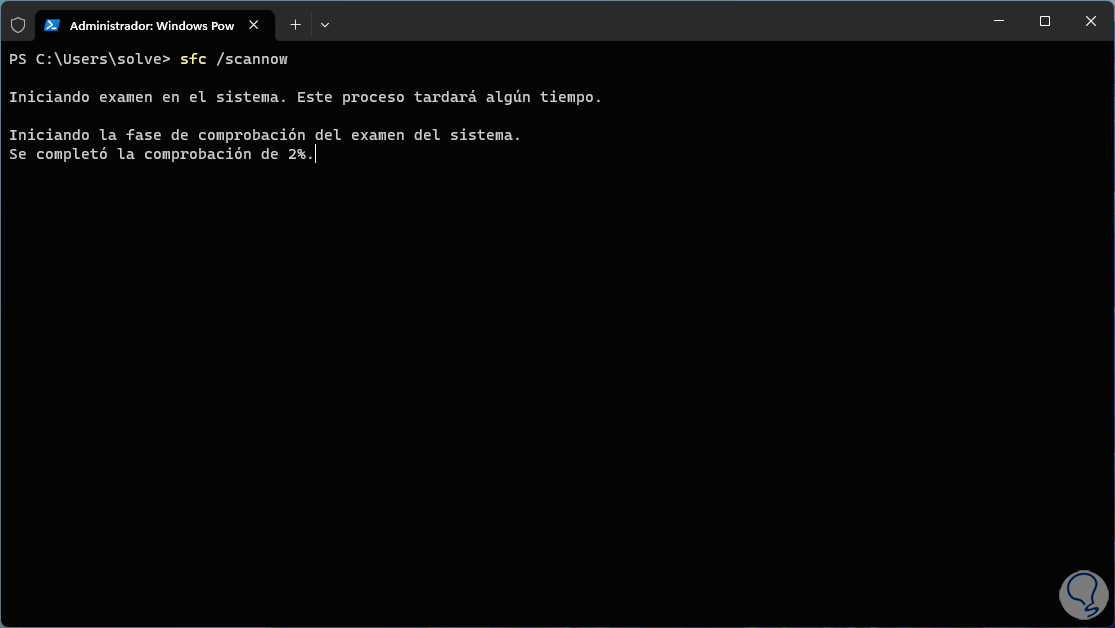
step 5
We wait for this process to finish:

step 6
The possible results that we can see are:
- "No integrity problems found" - Indicates that no damaged or corrupted system files were found on NTFS.
- "Problems were found and resolved" - SFC found corrupted files and successfully repaired them.
- "Problems were found, but could not be resolved": Indicates that the SFC command detected corrupted files but was unable to repair them automatically.
step 7
After this we will restart the system to apply the changes:
step 8
The system will be rebooted:

step 9
You can see that the system loads correctly:
2 Fix Windows not loading by restoring system
This method allows us to return the system to a state in date and time where everything worked ideally, if the function is activated, Windows is responsible for creating restore points frequently to preserve system availability.
Step 1
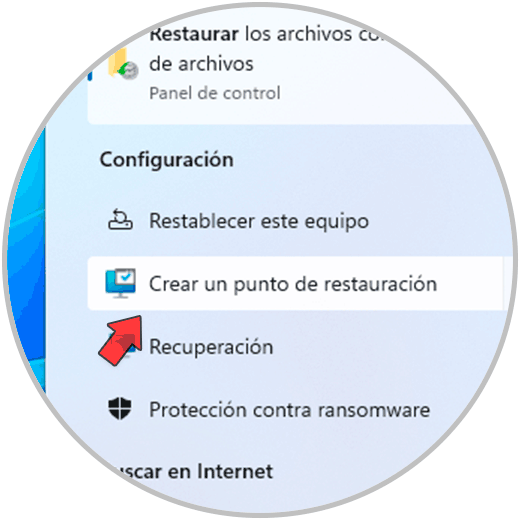
To use this method in the Start search engine we enter the word "restore" and click on the option "Create a restore point":
Step 2
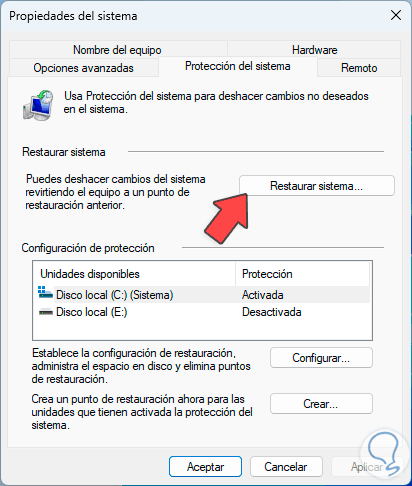
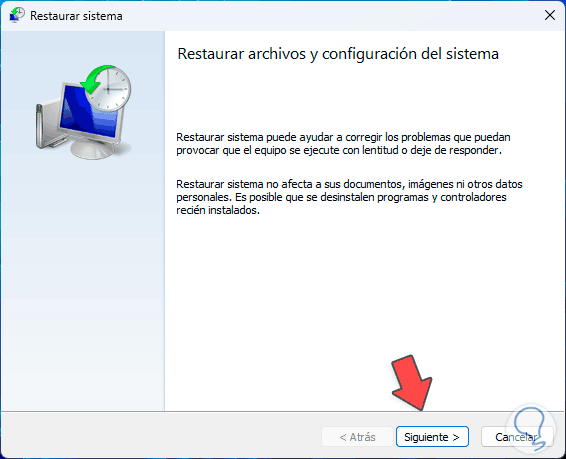
The following will open. In the pop-up window we will click on the "System Restore" option and the wizard will open:
Step 3
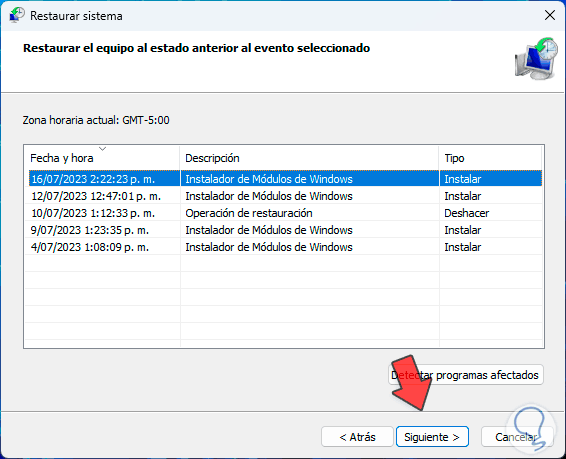
We click "Next" to select the desired restore point:
Step 4
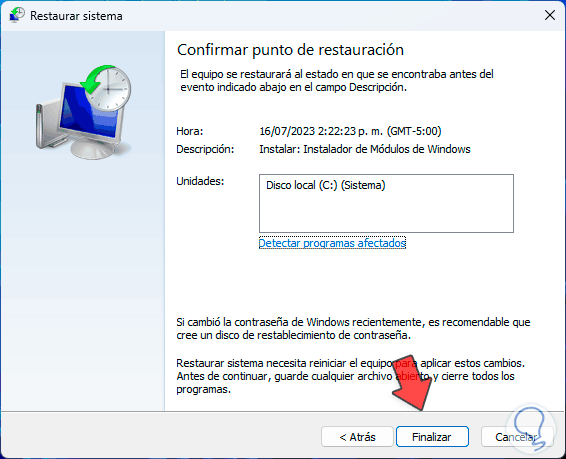
We click on "Next" to see a summary of the task:
step 5
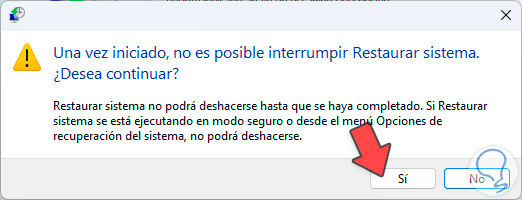
When we click "Finish" the following message will open:
step 6
There we click "Yes" and wait for the entire process to be completed.
3 Fix Windows not loading with Advanced Startup
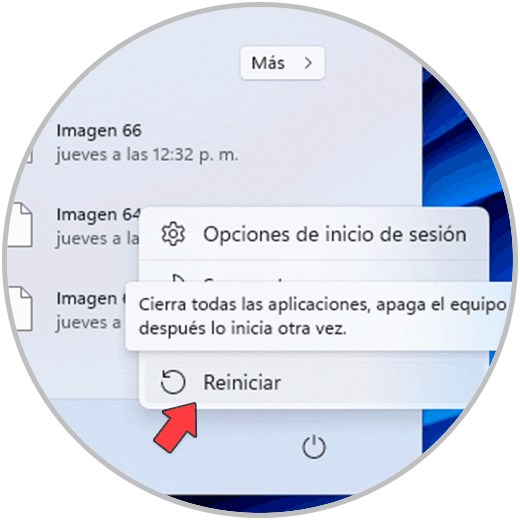
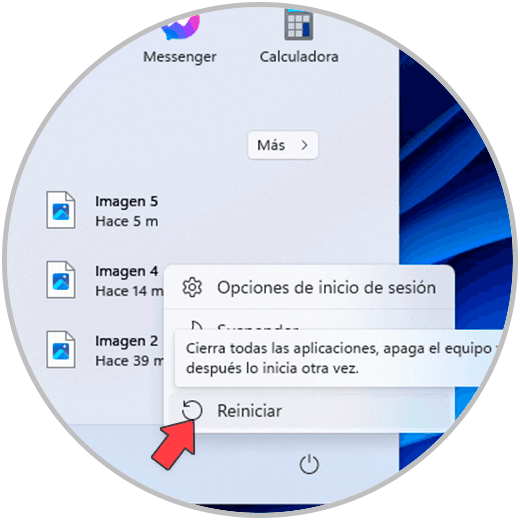
This option allows us to perform some actions on the system in this mode that helps us to have more complete control over each area of Windows, to access this mode we are going to go to the Windows shutdown button.
Step 1
There we press the Ctrl key on our keyboard and click on "Restart":
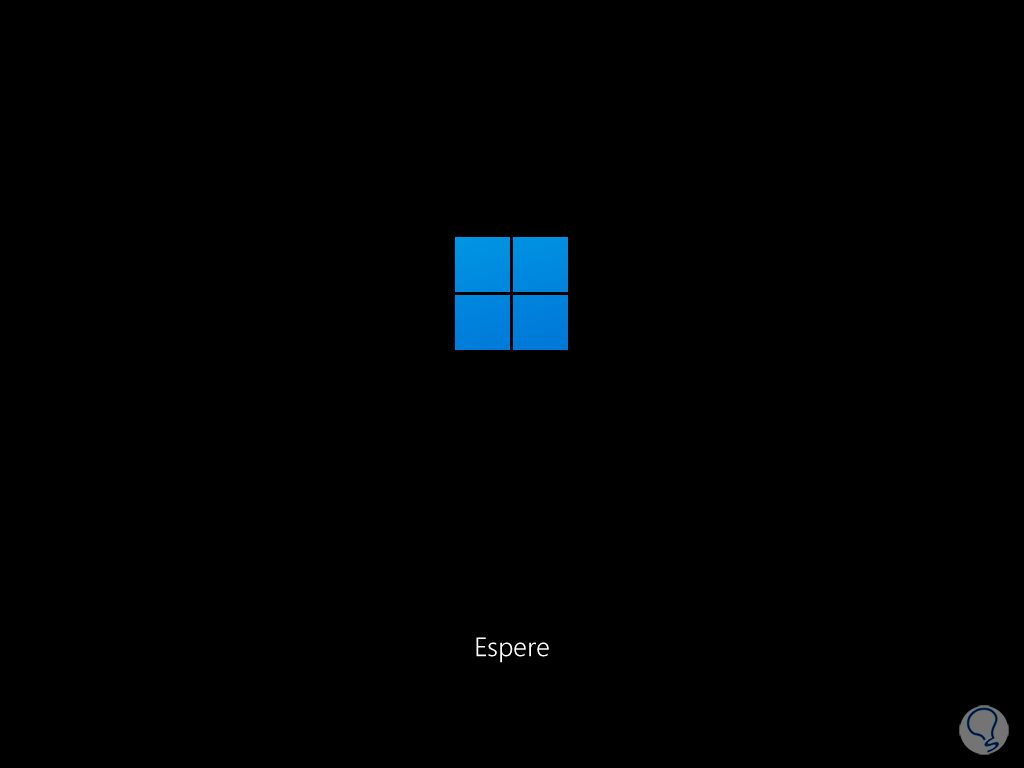
Step 2
This will start Windows in advanced mode:
Step 3
After a moment we will see the following:
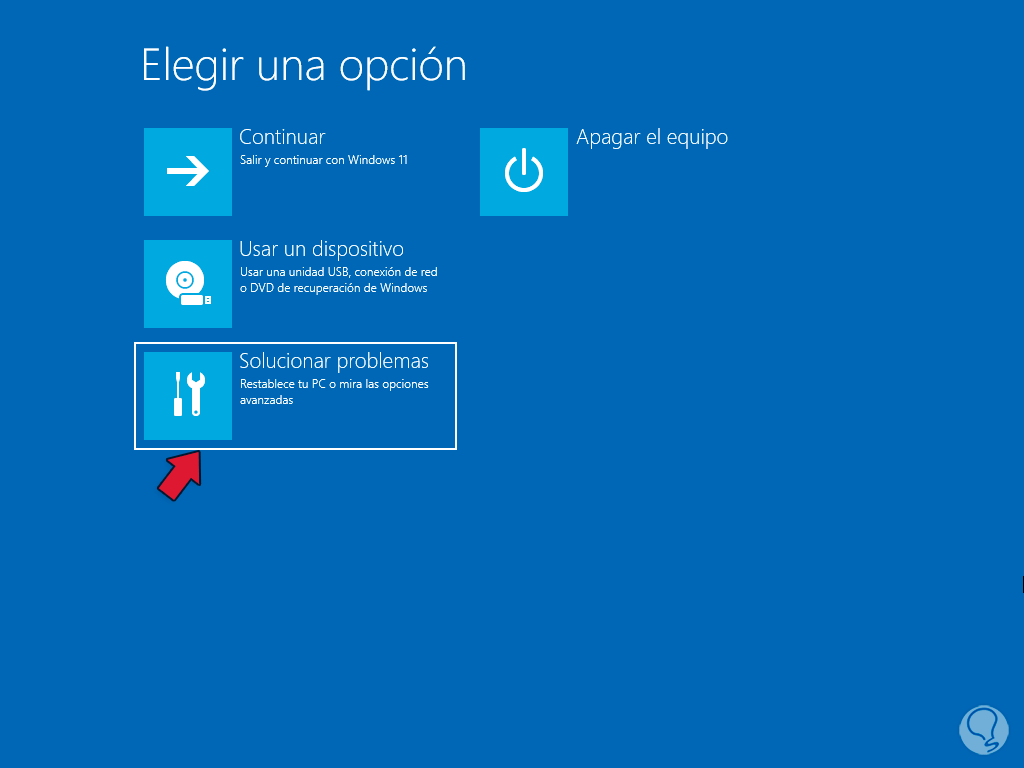
Step 4
and now we will see the following:
step 5
There we will click on "Advanced options" to access the functions menu:
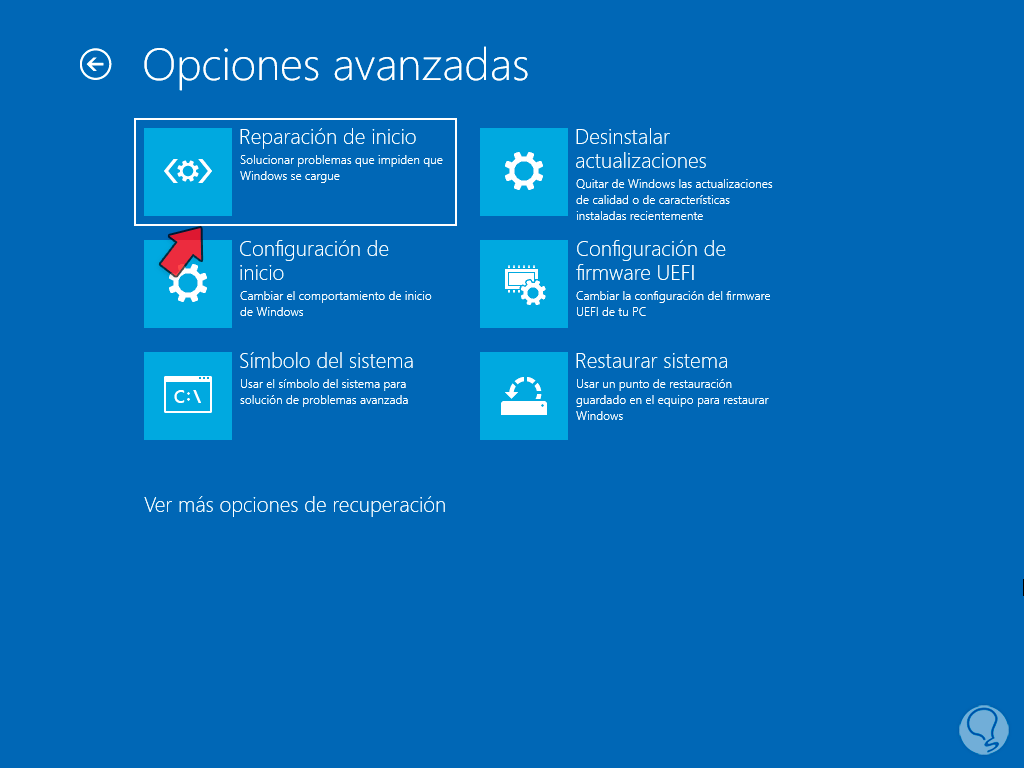
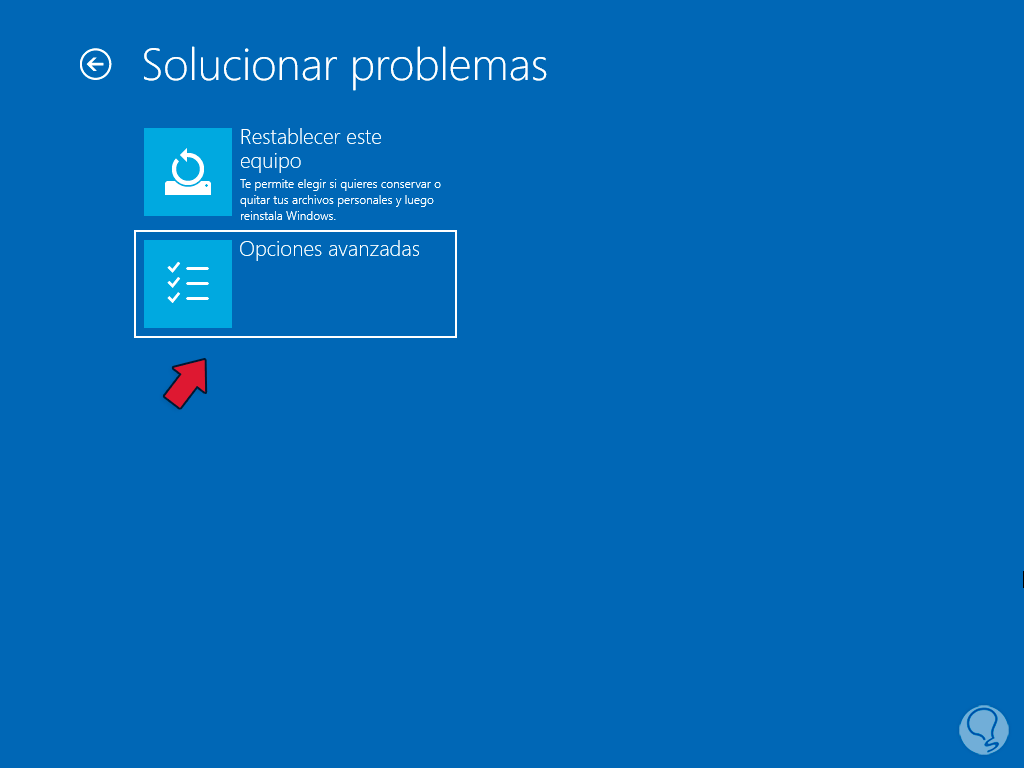
step 6
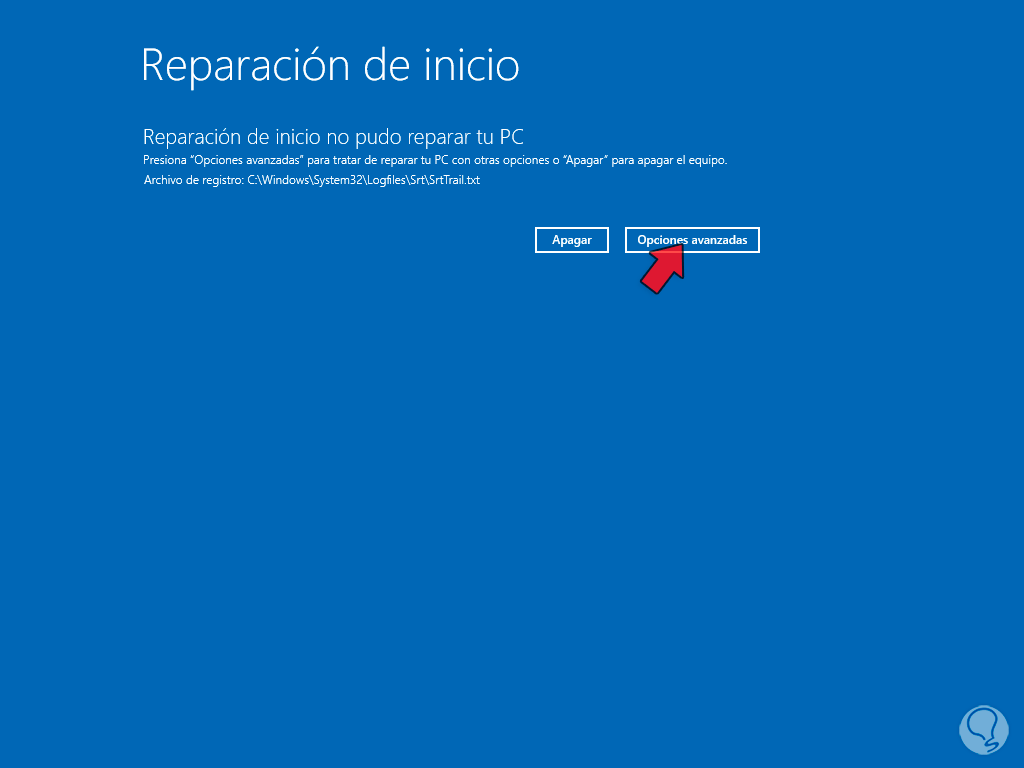
First of all in the main menu we will click on "Startup Repair" and wait for the system to be diagnosed:
step 7
We wait to see the result:
step 8
In the results we click on "Advanced options" to access the initial menu again:
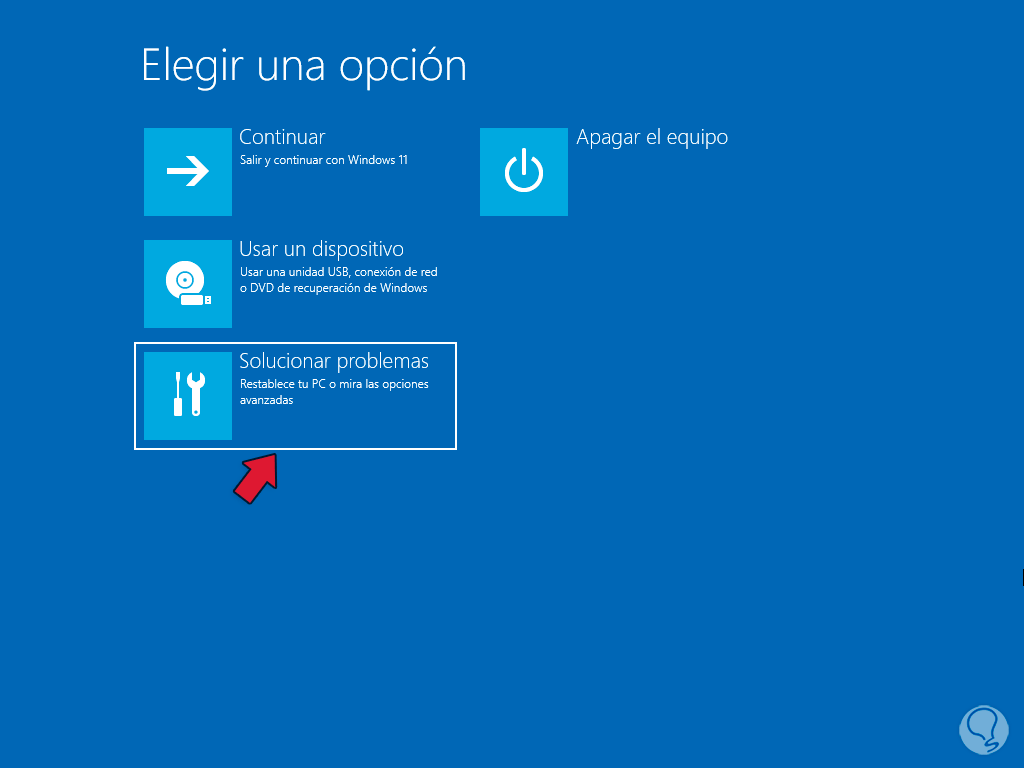
step 9
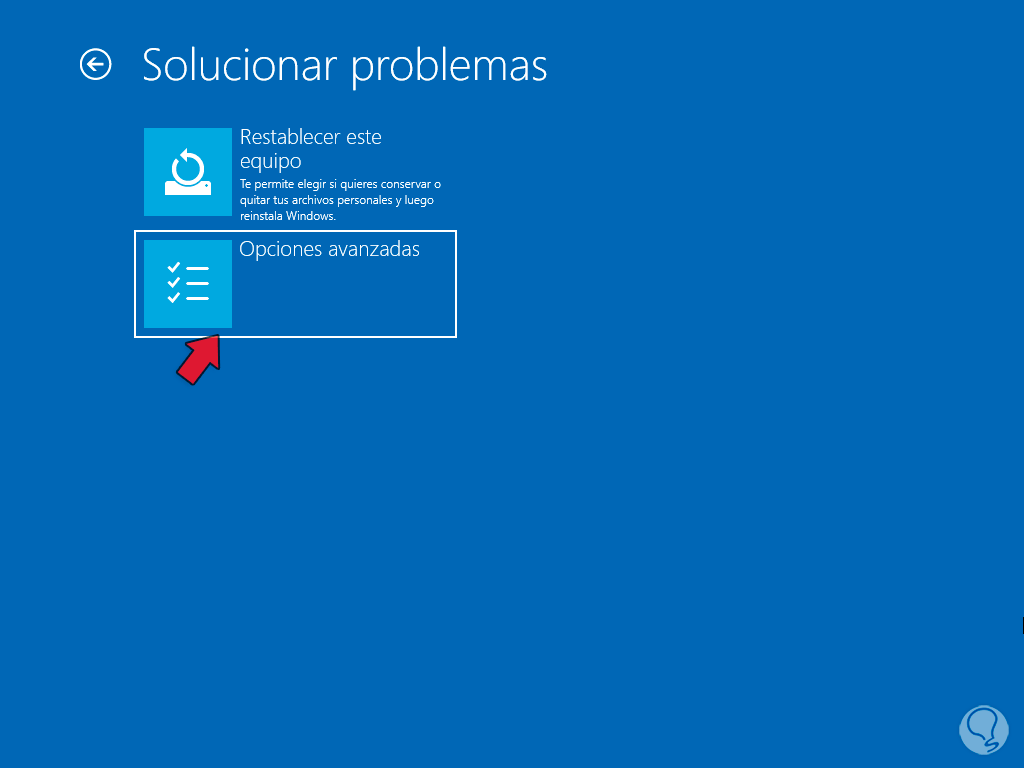
We click on "Troubleshoot" and then we will click on "Advanced options":
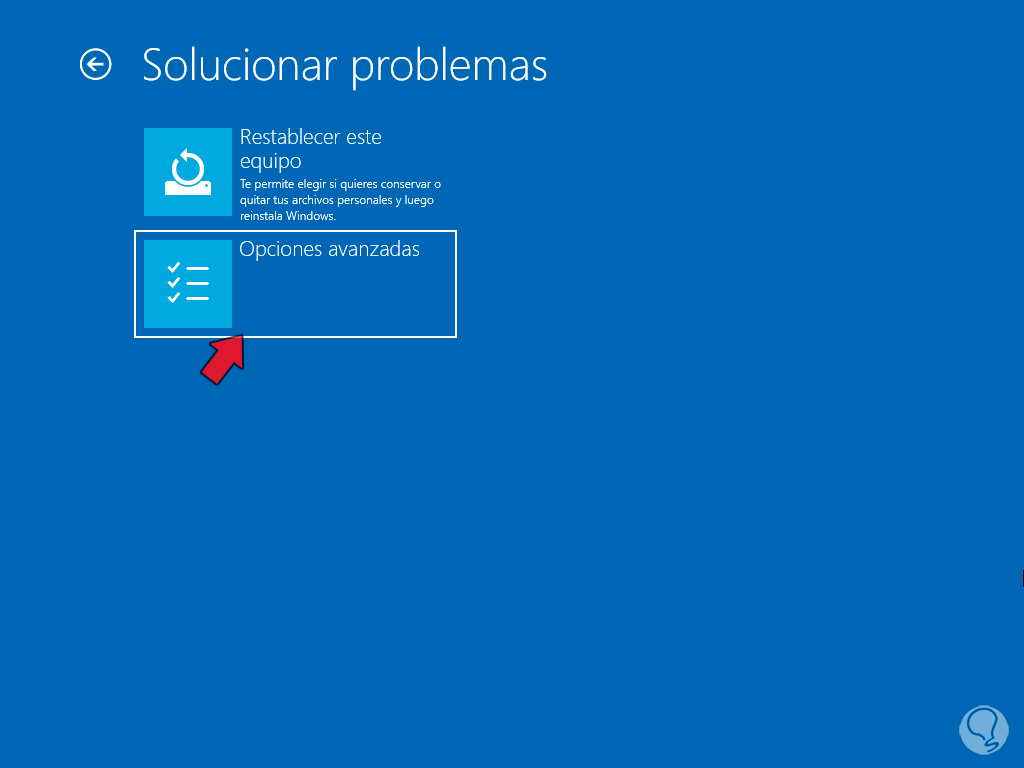
step 10
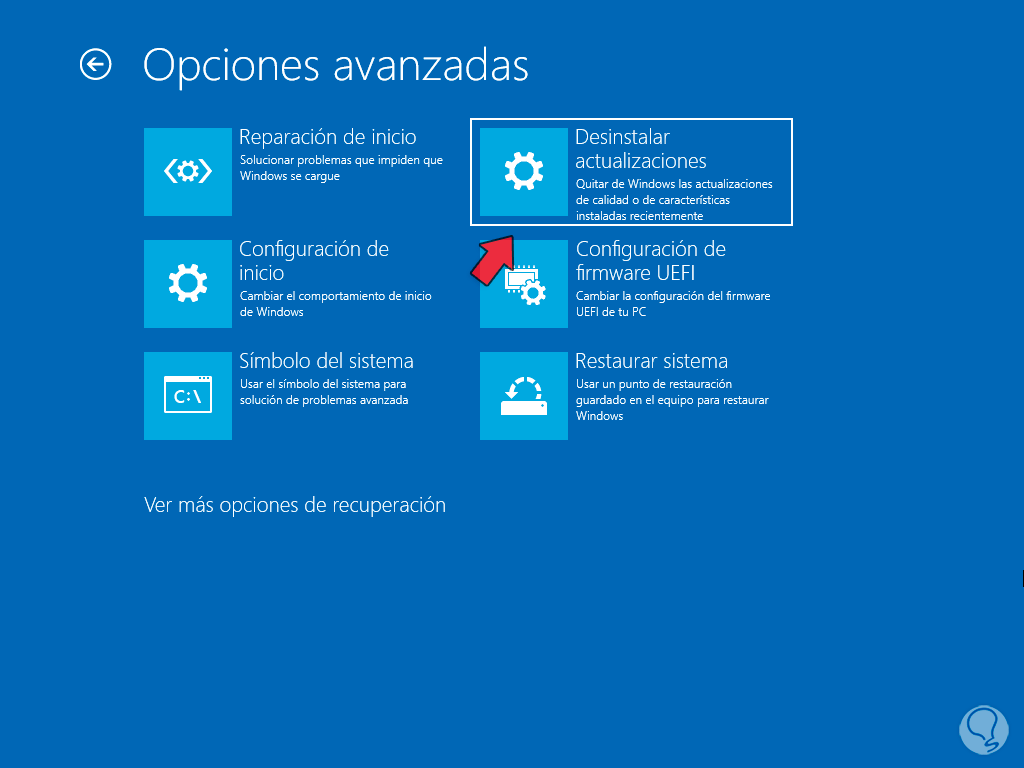
In the main menu we click on "Uninstall updates":
step 11
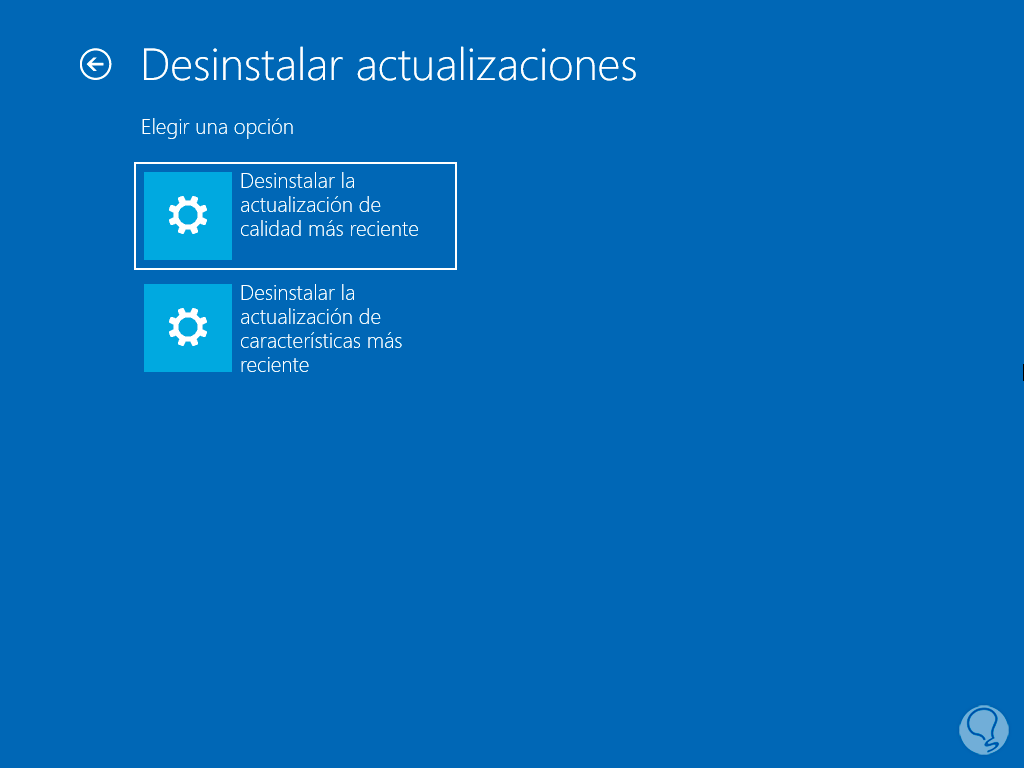
Now we select the type of update to uninstall:
step 12
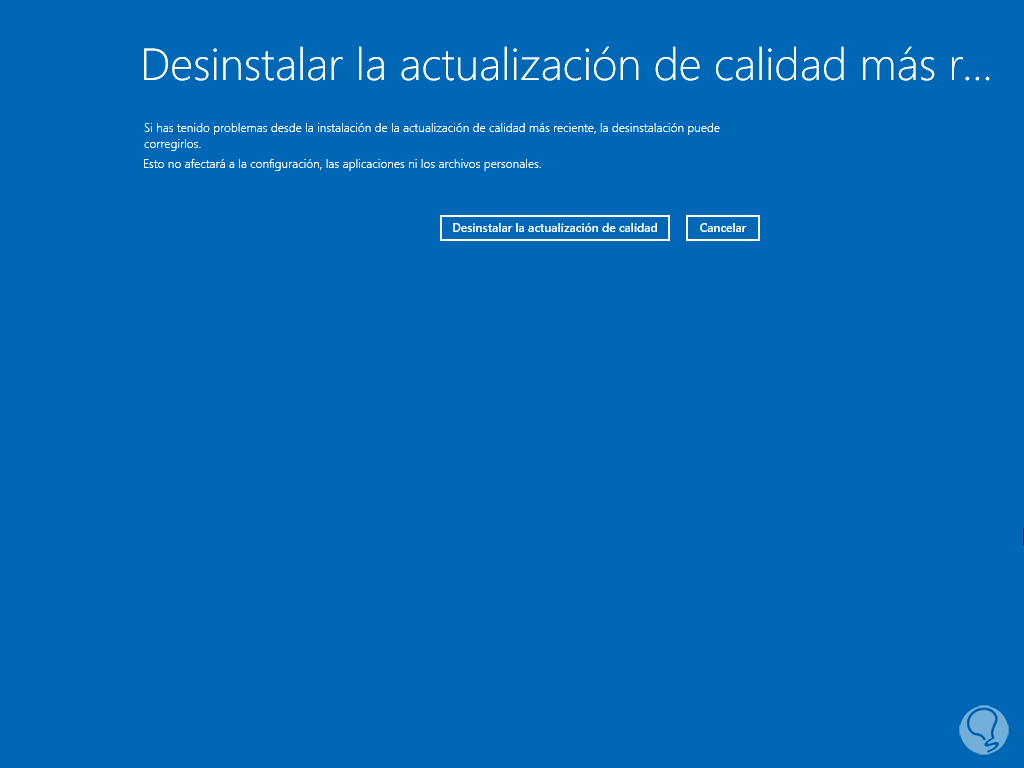
Then the following window will be displayed. We complete the process if necessary.
step 13
We go back to the initial menu and click on "Troubleshoot":

step 14
We click on "Advanced options":
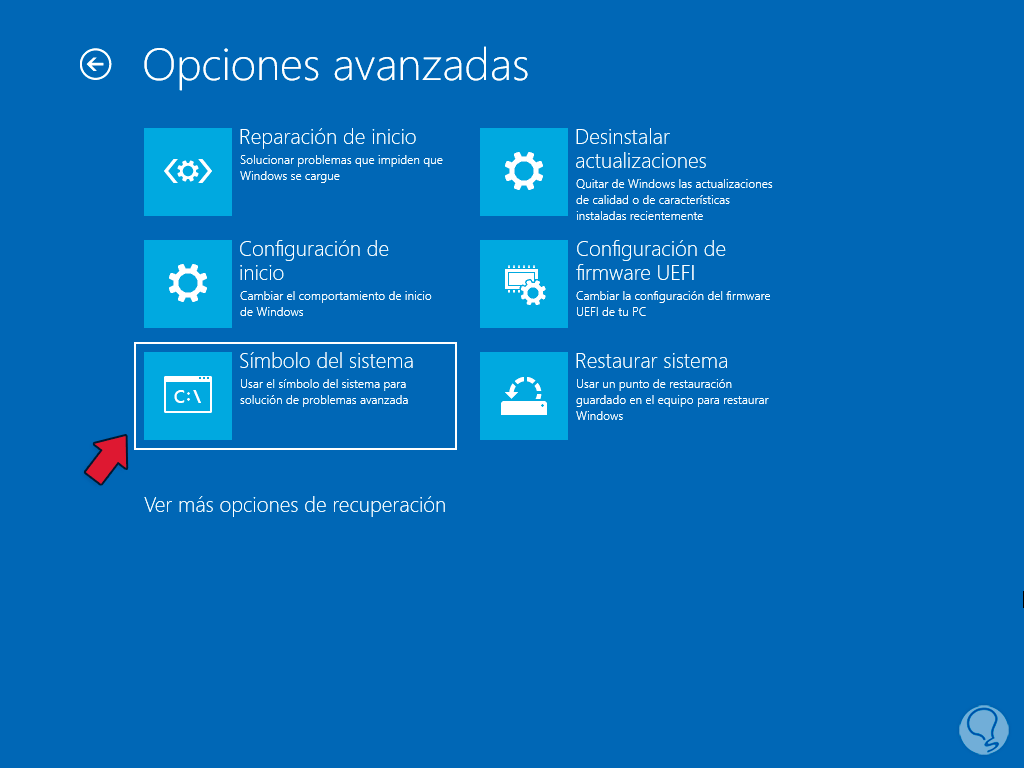
step 15
In the main menu of the advanced startup we are going to click on "Command Prompt":
step 16
In the console we are going to correct BCD and MBR errors:
bootrec /fixmbr
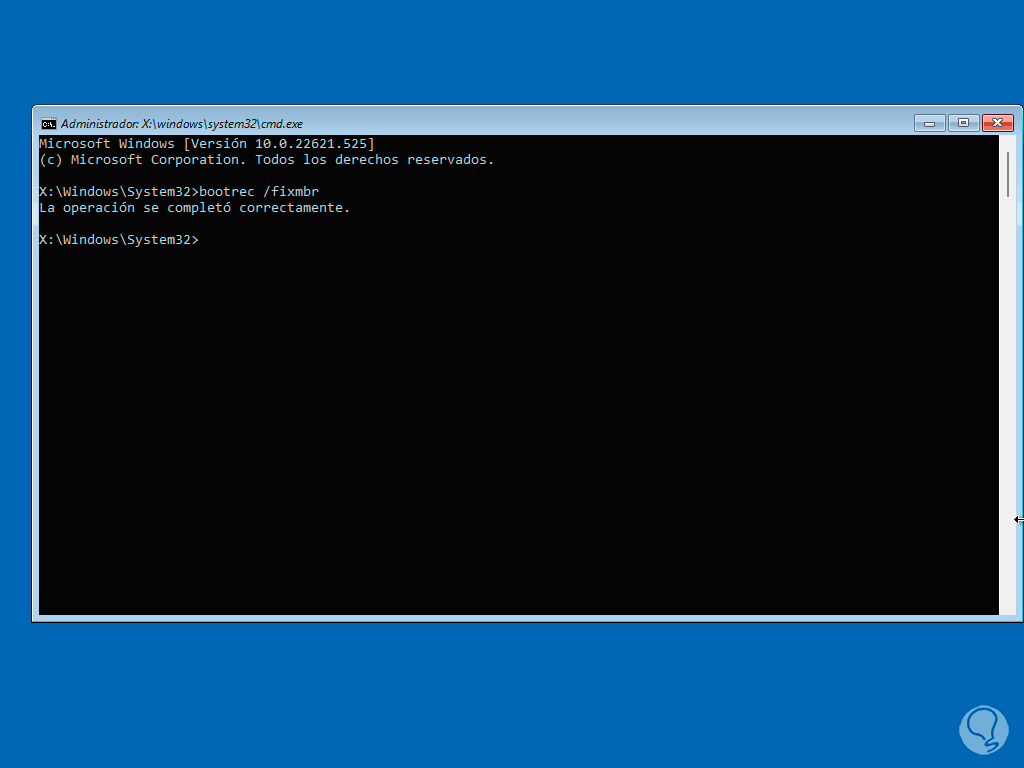
The MBR (Master Boot Record) is a data set available for systems based on BIOS (Basic Input/Output System) that allow starting the boot process and loading the operating system, this MBR is located in the first sector or boot sector of the hard drive where the operating system is installed, some of its functions are:
- It has a partition table where there is information about the available hard disk partitions
- It has a 2-byte signature located at the end of the sector, this is used to validate the integrity of the MBR and to inform the BIOS that it is a valid and reliable MBR.
step 17
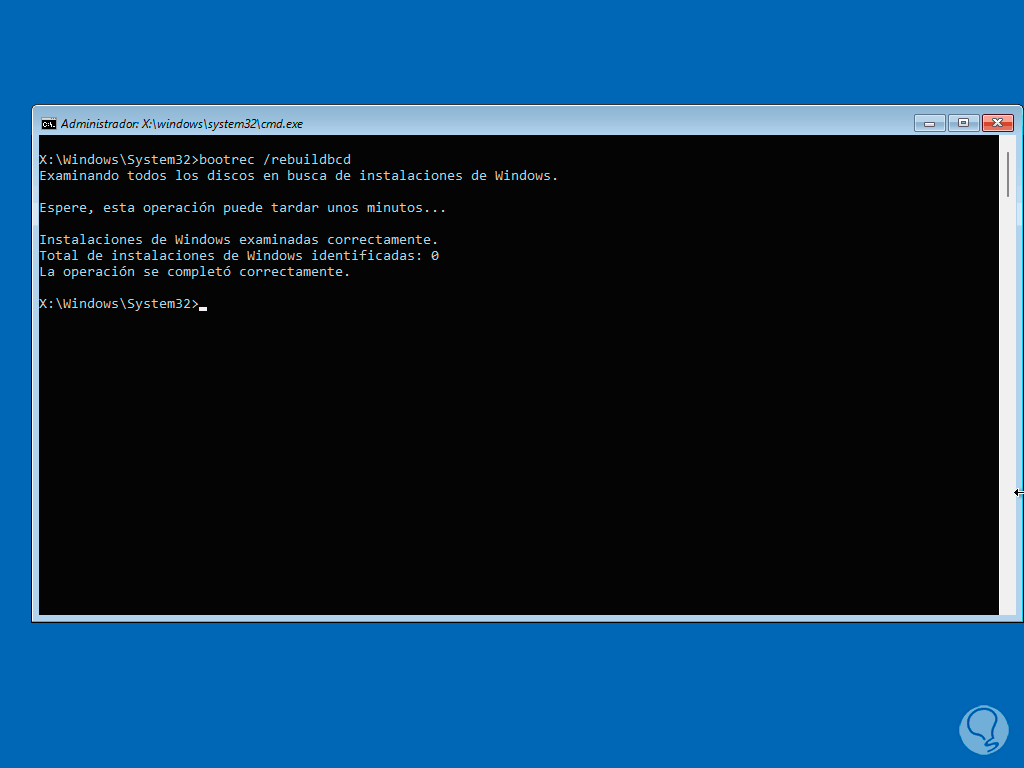
After this we are going to execute the following:
bootrec /rebuildbcd
step 18
This will rebuild BCD (Boot Configuration Data) which is the database where the configuration information of the boot process and loading of the operating system for systems with UEFI firmware is located.
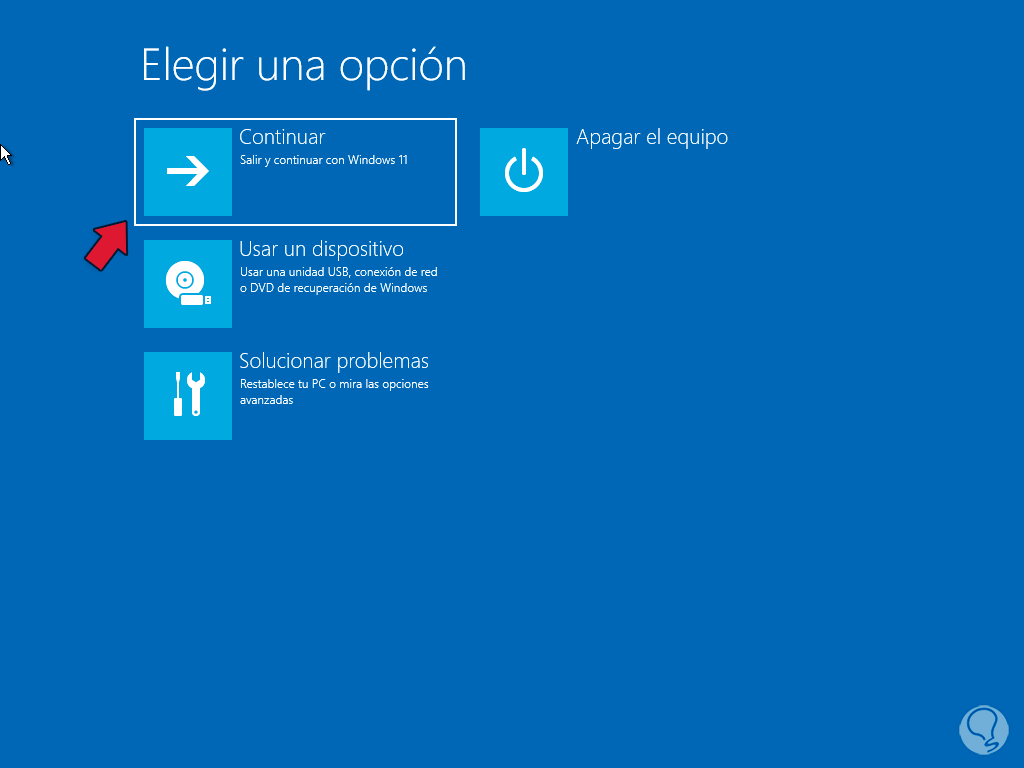
We exit the console with the "exit" command and then we will click "Continue" to log into Windows without errors:
step 19
We see that the system loads:
We have seen how each of these options will help us to have a reliable and integrated system..