Among the operating systems available, without a doubt, Windows 10 occupies a privileged place among the most used by users, due to its simplicity of use, the intuitiveness that results and the large number of functionalities it provides among many other factors..
Windows 10 has several applications and integrated functions which by default are assigned with a certain icon, popular with millions of users; which just by seeing it already know what utility they refer to. For example, just by seeing an icon of a bin we know that this refers to the recycle bin .
Windows 10 gives us the ability to edit the default icon of each of these accesses to establish their own and thus acquire a much more personalized system and it is for this reason that in this tutorial TechnoWikis will explain the process to perform it step by step..
1. How to edit icon Shortcut in Windows 10
First, we will see
how to edit the icon of one of the shortcuts on our Windows 10 desktop .
Step 1
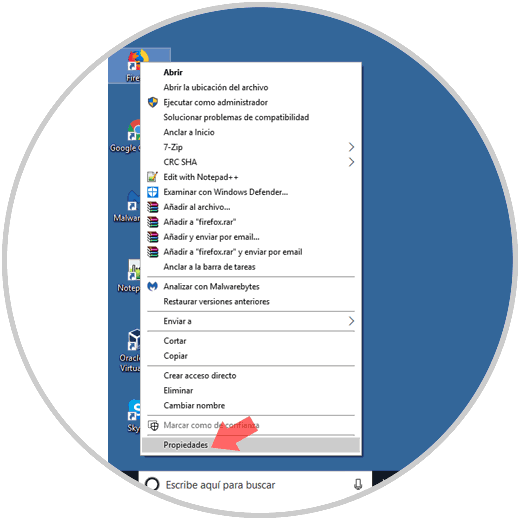
To do this, we right click on the desired icon and in the drop-down list select "Properties":
Step 2
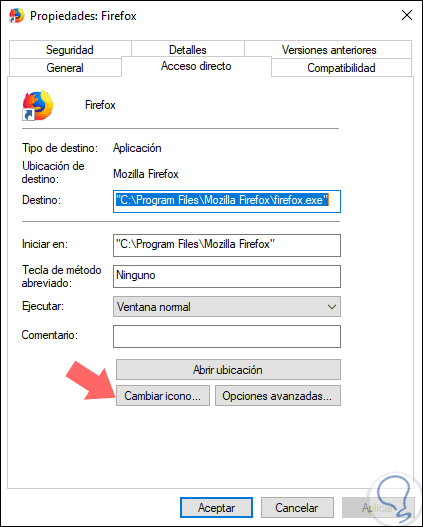
In the window displayed, we will go to the "Shortcut" tab where we will see the following. There we click on the "Change icon" button
Step 3
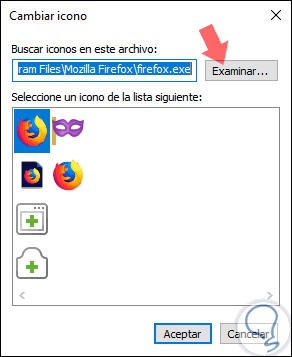
By default the system will use the icons in the route associated with the application, in this case of Firefox this will be the route.
C: \ Program Files \ Mozilla Firefox \ firefox.exe
Step 4
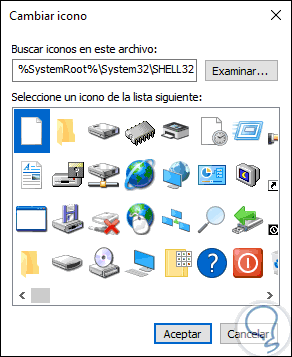
There we find very few options, we can enter the following line in the Search icons field in this file:
C: \ WINDOWS \ system32 \ imageres.dll:
Now we have many more usage options to edit the default icon. There we select the desired one and we can see that the change is applied automatically
2 . How to change Windows 10 Control Panel icon
The Control Panel is one of the most practical utilities to carry out administration and support tasks in Windows 10, since from there we have direct access to multiple system parameters and although the Configuration utility, which is a universal application included with Windows 10 that was designed as the replacement of the Control Panel; We still access it to carry out various tasks in a practical way.
Windows 10 gives us the option to carry out editing actions on the desktop elements through the "Themes in Configuration" section:
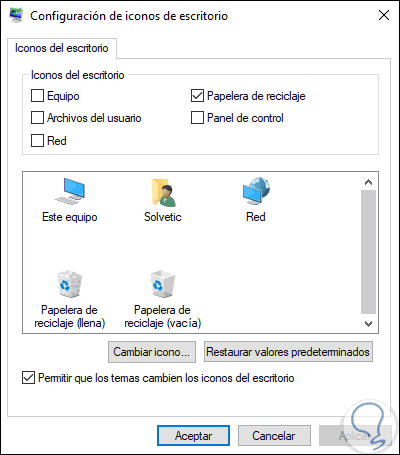
There we find the "Change icon" section, but the "Control Panel" is not available, and for this reason TechnoWikis will explain how to edit that icon.
Step 1
For this, we must access the registry editor , but first we will make a backup or a restore point in case of editing any parameter in the wrong way.
Then, we access the editor using the following key combination:
+ R
We execute the following command:
regedit
Press "Enter" and in the window we will go to the following route:
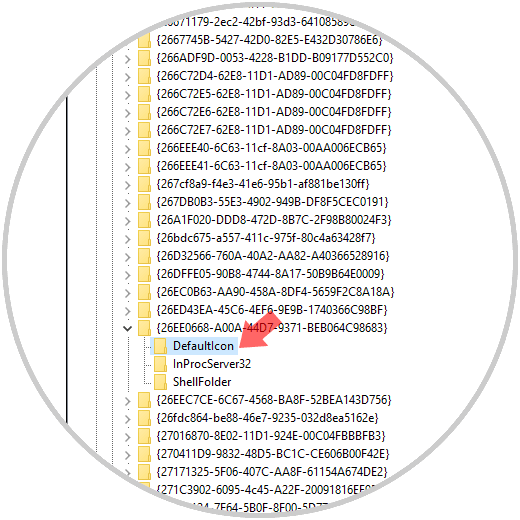
HKEY_CURRENT_USER \ Software \ Microsoft \ Windows \ CurrentVersion \ Explorer \ CLSID \ {26EE0668-A00A-44D7-9371-BEB064C98683} \ DefaultIcon Note
If you do not have the password:
{26EE0668-A00A-44D7-9371-BEB064C98683} We must create it by right clicking on the CLSID key and selecting the "New"> "Password" option:
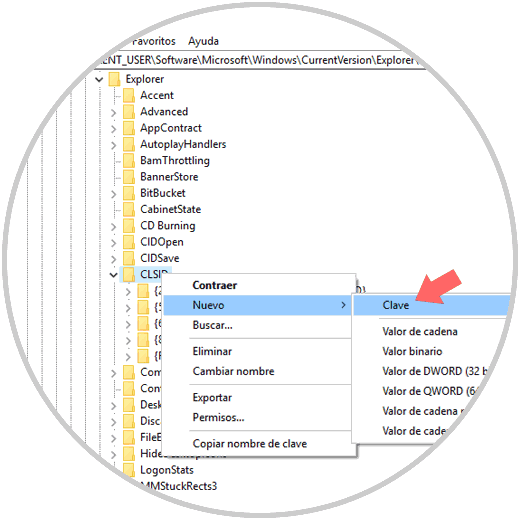
Step 2
There we enter the following password:
{26EE0668-A00A-44D7-9371-BEB064C98683} Now we will right click on it and again select the "New"> "Password" option:

Step 3
This new key will be called "DefaultIcon":
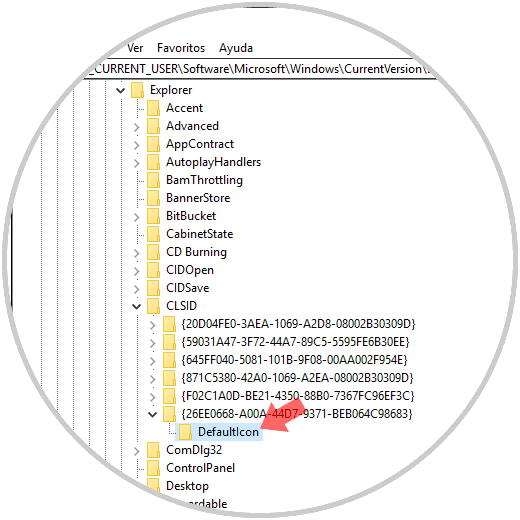
Step 4
Now, we will right click> "Modify" or double click on the string value (Default) and in the "Value information" field we will enter the path where the .ico file has been downloaded for that purpose. Click on "Accept"
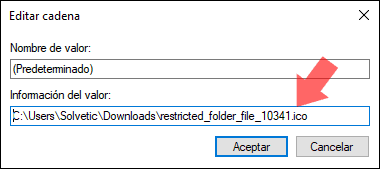
Step 5
We will see that this route has been added correctly:
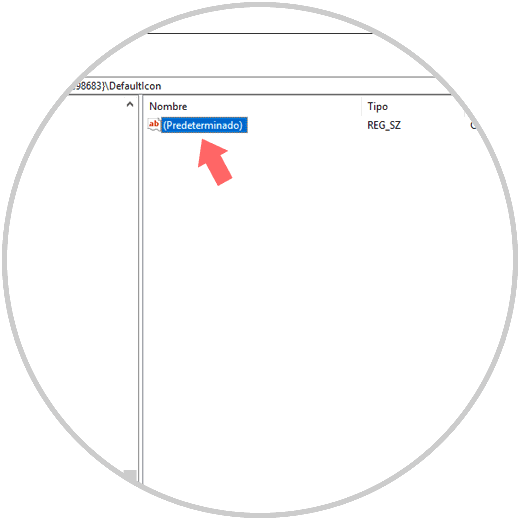
We proceed to restart the browser and for this we can go to the Task Manager and there select the line " Windows Explorer " and right click> "Restart". Now we can see that the Control Panel icon has been edited according to our preference:
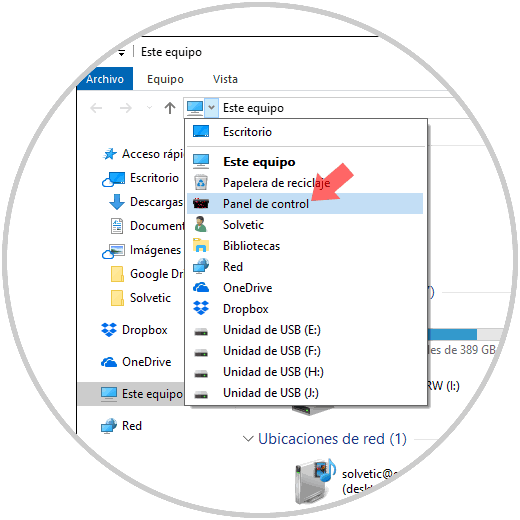
Step 6
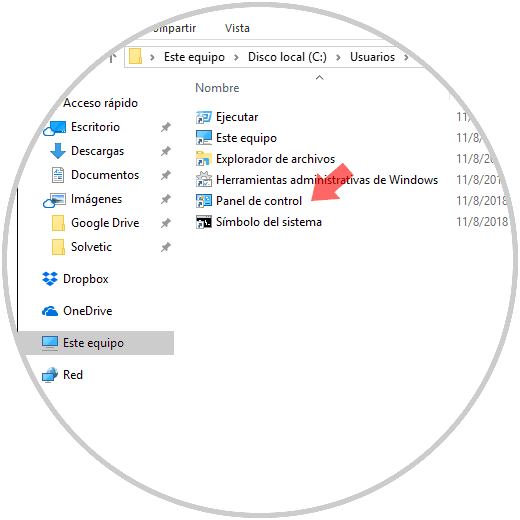
To change the icon in the Start Menu and in the Taskbar , it will be necessary to change the icon for the shortcut Panel.lnk, for this we will copy the following line in the address bar of the Windows 10 File Explorer .
% appdata% \ Microsoft \ Windows \ Start Menu \ Programs \ System Tools
We will see the following. There we will right click on the "Control Panel" line and select "Properties"
Step 7
Then we click on the "Change icon" button and we will access the route where the desired icon is. This will affect the user icon in the current session.
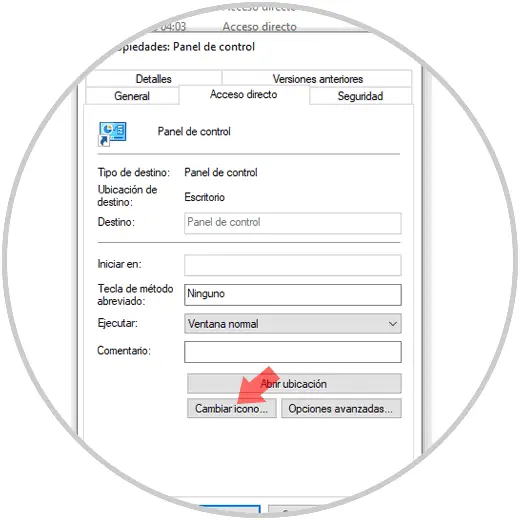
If we want this change to apply to all users, we must go to the following path in the registry editor:
HKEY_CLASSES_ROOT \ CLSID \ {26EE0668-A00A-44D7-9371-BEB064C98683} \ DefaultIcon There we double-click on the "Default" value and in the Value data field we enter, as we saw in the previous step, the path where the desired icon is.
Thus, in this way, it will be possible to edit the default icons in Windows 10..